
 Web Front-endJS TutorialDetailed explanation of the steps to implement the modal dialog component in Vue
Detailed explanation of the steps to implement the modal dialog component in Vue
This time I will bring you a detailed explanation of the steps to implement the modal dialog component in vue. What are the precautions for the implementation of the modal dialog component in vue. The following is a practical case, let's take a look.
Written in front
Dialog box is a very commonly used component and is used in many places. Generally, we can use the built-in alert to pop up the dialog box, but What should we do if it is a designed diagram, so we need to write a dialog box ourselves, and if it is used in many places, then it is necessary for us to write it in a common component form and reference it between places where it is needed.
Now let’s implement a dialog component. According to the previous habit, let’s take a look at the implementation renderings

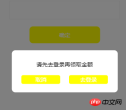
1. First, define a component through template
<template>
    <p>
      </p>
<p></p>
      <p>
        </p>
<p>
          </p>
<p>提示内容</p>
          <p>
            <a>确定</a>
            <a>取消</a>
            <a>去登录</a>
          </p>


  </template>
and add the corresponding dialog style
/*对话框style*/
    .dialog{
    }
    .dialog_mask{
      position: fixed;
  left: 0;
  top: 0;
  width: 100%;
  height: 100%;
  background: rgba(0,0,0,0.5);
    }
    .dialog_container{
        background: #fff;
  width: 300px;
  height: 120px;
  position: relative;
  border-radius: 10px;
  margin: 0 auto;
    }
    .dialog_content{
      text-align: center;
  padding-top: 30px;
    }
    .dialog_btn{
      margin-top: 20px;
    }
    .dialog_btn a{
      background: yellow;
        padding: 2px 30px;
  border-radius: 5px;
  color: #fff;
  text-decoration: none;
    width: 50px;
  display: inline-block;
    }
    .dialog_btn a:nth-child(2){
        margin-left: 20px;
    }
2. Use Vue.component to register a global Vue component , we call this component v-dialog, and then specify this component through template
Vue.component('v-dialog', {
      template: '#dialog',
      data:function(){
        return {
        }
      },
      methods:{
      },
      created:function(){
      }
    })
3. Finally, reference this component through the v-dialog tag where we need it
<v-dialog></v-dialog>
The steps to create a vue component are roughly like this, but how should the parent component and child components communicate? Woolen cloth?
Here we mainly use props to transfer data to sub-components
Modify the above code as follows and add the props attribute
Vue.component('v-dialog', {
      template: '#dialog',
          props:['dialogShow','msg'],
      data:function(){
        return {
        }
      },
      methods:{
      },
      created:function(){
      }
    })
You can see that we define prop through a string array In addition, we can also define props in the form of objects to specify validation rules for component props. If the type is wrong, there will be a warning in vue, where the value of type can be these :String Number Boolean Function Object Array Symbol
props: {
    name: String,
    showDialog: {
      type: Boolean,
      default: false
    }
   }
In the component template, use v-if="showDialog" to determine whether to display or hide the dialog box, and use v-text=" msg"Bind the dialog box prompt content,
v-if="type==1" is used to determine the dialog box type and display the corresponding button. The code is as follows:
<template>
    <p>
      </p>
<p></p>
      <p>
        </p>
<p>
          </p>
<p>提示内容</p>
          <p>
            <a>确定</a>
            <a>取消</a>
            <a>去登录</a>
          </p>


  </template>
Add:show-dialog="showDialog" :msg="msg" :type="type" where the component is referenced, and pass their values to the dialog component
<v-dialog></v-dialog>
It should be noted that showDialog needs to be written in the form of show-dialog in the component, otherwise the data will not be obtained.
We define these attributes in the data
data: {
        msg:'',
        showDialog:false,
        type:1,// 提示类型 1单按钮提示框 2双按钮提示框
      },
Then, we add the button When clicking submit, the pop-up dialog box event is triggered
submit:function(){
          //弹出对话框组件
          if(!this.isLogin){//未登录
            this.msg = "请先去登录再领取金额";
            this.showDialog = !this.showDialog;
            this.type = 2;
            return;
          }
          if(this.amount){
            if(this.amount1000){
              this.msg = "输入金额不能低于1元大于1000";
              this.showDialog = !this.showDialog;
              this.type = 1;
            }else{
              this.msg = "领取成功,请在账户中心查看";
              this.showDialog = !this.showDialog;
              this.type = 1;
            }
          }else{
            this.msg = "领取金额不能为空";
            this.showDialog = !this.showDialog;
              this.type = 1;
          }
        }
In this way, we can pop up the dialog box component and set different prompt messages through msg
So, how do we close this dialog box? , here it involves the child component needing to transmit information to the parent component
Mainly trigger parent class events through $emit, such as: this.$emit('close-dialog'); Then use v-on in the parent class to monitor the events triggered by the subclass, v-on:close-dialog="closeDialog", which can also be abbreviated as @close-dialog="closeDialog"
The code is as follows:
Add @close-dialog="closeDialog" in the v-dialog tag to listen for events triggered by sub-components
<v-dialog></v-dialog>
Then define the closeDialog function to modify showDialog status It also needs to be noted that the listening function closeDialog needs to be written in the form of close-dialog
ok, above we have implemented a dialog component
I believe After reading the case in this article, you have mastered the method. For more exciting information, please pay attention to other related articles on the PHP Chinese website!
Recommended reading:
Detailed explanation of the steps to implement full-screen scrolling plug-in in ES6Summary of how to use nodejs log module winstonThe above is the detailed content of Detailed explanation of the steps to implement the modal dialog component in Vue. For more information, please follow other related articles on the PHP Chinese website!

 Python vs. JavaScript: A Comparative Analysis for DevelopersMay 09, 2025 am 12:22 AM
The main difference between Python and JavaScript is the type system and application scenarios. 1. Python uses dynamic types, suitable for scientific computing and data analysis. 2. JavaScript adopts weak types and is widely used in front-end and full-stack development. The two have their own advantages in asynchronous programming and performance optimization, and should be decided according to project requirements when choosing.
 Python vs. JavaScript: Choosing the Right Tool for the JobMay 08, 2025 am 12:10 AM
Whether to choose Python or JavaScript depends on the project type: 1) Choose Python for data science and automation tasks; 2) Choose JavaScript for front-end and full-stack development. Python is favored for its powerful library in data processing and automation, while JavaScript is indispensable for its advantages in web interaction and full-stack development.
 Python and JavaScript: Understanding the Strengths of EachMay 06, 2025 am 12:15 AM
Python and JavaScript each have their own advantages, and the choice depends on project needs and personal preferences. 1. Python is easy to learn, with concise syntax, suitable for data science and back-end development, but has a slow execution speed. 2. JavaScript is everywhere in front-end development and has strong asynchronous programming capabilities. Node.js makes it suitable for full-stack development, but the syntax may be complex and error-prone.
 JavaScript's Core: Is It Built on C or C ?May 05, 2025 am 12:07 AM
JavaScriptisnotbuiltonCorC ;it'saninterpretedlanguagethatrunsonenginesoftenwritteninC .1)JavaScriptwasdesignedasalightweight,interpretedlanguageforwebbrowsers.2)EnginesevolvedfromsimpleinterpreterstoJITcompilers,typicallyinC ,improvingperformance.
 JavaScript Applications: From Front-End to Back-EndMay 04, 2025 am 12:12 AM
JavaScript can be used for front-end and back-end development. The front-end enhances the user experience through DOM operations, and the back-end handles server tasks through Node.js. 1. Front-end example: Change the content of the web page text. 2. Backend example: Create a Node.js server.
 Python vs. JavaScript: Which Language Should You Learn?May 03, 2025 am 12:10 AM
Choosing Python or JavaScript should be based on career development, learning curve and ecosystem: 1) Career development: Python is suitable for data science and back-end development, while JavaScript is suitable for front-end and full-stack development. 2) Learning curve: Python syntax is concise and suitable for beginners; JavaScript syntax is flexible. 3) Ecosystem: Python has rich scientific computing libraries, and JavaScript has a powerful front-end framework.
 JavaScript Frameworks: Powering Modern Web DevelopmentMay 02, 2025 am 12:04 AM
The power of the JavaScript framework lies in simplifying development, improving user experience and application performance. When choosing a framework, consider: 1. Project size and complexity, 2. Team experience, 3. Ecosystem and community support.
 The Relationship Between JavaScript, C , and BrowsersMay 01, 2025 am 12:06 AM
Introduction I know you may find it strange, what exactly does JavaScript, C and browser have to do? They seem to be unrelated, but in fact, they play a very important role in modern web development. Today we will discuss the close connection between these three. Through this article, you will learn how JavaScript runs in the browser, the role of C in the browser engine, and how they work together to drive rendering and interaction of web pages. We all know the relationship between JavaScript and browser. JavaScript is the core language of front-end development. It runs directly in the browser, making web pages vivid and interesting. Have you ever wondered why JavaScr


Hot AI Tools

Undresser.AI Undress
AI-powered app for creating realistic nude photos

AI Clothes Remover
Online AI tool for removing clothes from photos.

Undress AI Tool
Undress images for free

Clothoff.io
AI clothes remover

Video Face Swap
Swap faces in any video effortlessly with our completely free AI face swap tool!

Hot Article
Hot Tools

Notepad++7.3.1
Easy-to-use and free code editor

SublimeText3 Chinese version
Chinese version, very easy to use

Zend Studio 13.0.1
Powerful PHP integrated development environment

SublimeText3 Linux new version
SublimeText3 Linux latest version

WebStorm Mac version
Useful JavaScript development tools

