
Home >Backend Development >Python Tutorial >A brief analysis of python packaging tools distutils and setuptools
A brief analysis of python packaging tools distutils and setuptools

- 不言Original
- 2018-04-20 14:16:022889browse
Python packages are very common in development. The general usage routine is to make a python module package with all functions, package the module, then publish it, install it and use it. This article introduces you to the relevant knowledge of python packaging tools distutils and setuptools. Friends who are interested should take a look.
There are many ways to install packages in python:
-
Source package: python setup.py install
Online installation: pip install package name (linux) / easy_install package name (window)
Python packages are very common in development. The general usage routine is to make a python module package with all functions, package the module, then publish it, install it and use it. Packaging and installing packages are the most common tasks. During my study, I encountered two packaged tools, distutils and setuptools. I took notes after studying.
distutils
distutils is part of the python standard library. The purpose of this library is to provide developers with a convenient packaging method. Provide users with convenient installation methods. After we develop our own module, use the setup.py package of distutils.
1. Complete the function python

def hello_fun():
 print "i say hello to you"
2. Create the setup.py file
setup.pyfrom distutils.core import setup setup( name="hello_module", version="1.0", author="ljk", author_email="wilber@sh.com", py_modules=['hello'], )
3. Execute the packaging command
<img src="/static/imghwm/default1.png" data-src="https://img.php.cn/upload/article/000/153/291/c9ec895b33001f9a73ccf3328f67de41-1.png" class="lazy" alt="">
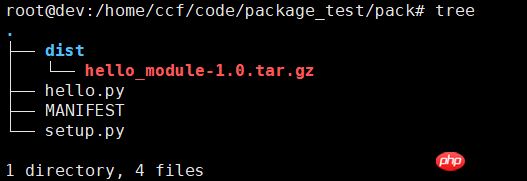
4. Install the module
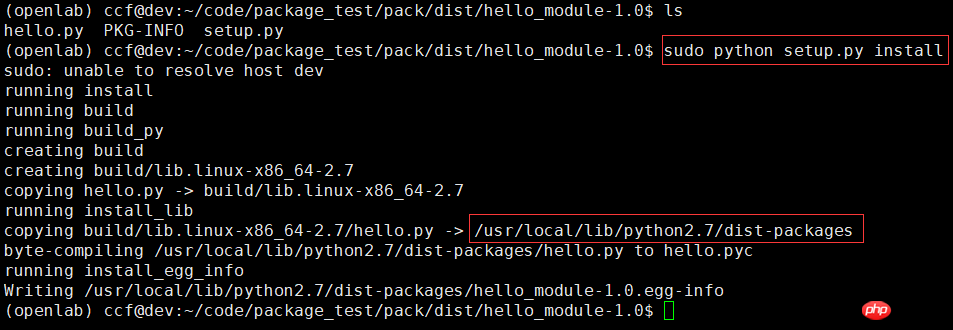
hello_module-1.0.tar.gz is the generated python module. Switch to my python virtual environment and install the module.

python setup.py install to install the module. As can be seen from the path, the module is installed to the specified path of the standard library.
5. Using the module
After installing the module, import the module in the python interactive environment . The module is the hello.py file, which refers to the hello_fun() function in the hello.py file.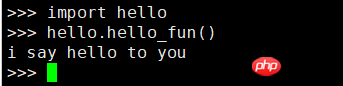
setuptools
setuptools is an enhanced version of distutils. setuptools has an entry_points function which is very convenient, similar to starting a certain service in Linux. For example, firefox can start the Firefox browser in the Linux command line. First check that the command path has no effect before installation.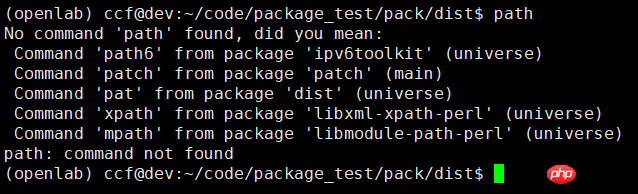
1. Create a function package
Create a folder demo and create get_path in the folder .py and __init__.py two files. get_path.py is a function function, and __init__.py is the identification file of the package.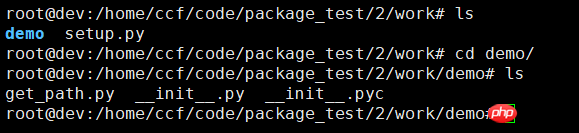
import os
def fun():
 print "i am in the path:"
 print os.getcwd()
##二, Configure the setup.py fileCreate the setup.py file and fill in the necessary packaging information.
setup.py
###-*- encoding: UTF-8 -*-
from setuptools import setup
setup(
name = "demo", # 包名
version = "0.1", # 版本信息
packages = ['demo'], # 要打包的项目文件夹
include_package_data=True, # 自动打包文件夹内所有数据
zip_safe=True, # 设定项目包为安全,不用每次都检测其安全性
install_requires = [ # 安装依赖的其他包(测试数据)
'docutils>=0.3',
'requests',
],
# 设置程序的入口为path
# 安装后,命令行执行path相当于调用get_path.py中的fun方法
entry_points={
'console_scripts':[
'path = demo.get_path:fun'
]
},
)
<br data-filtered="filtered"><br data-filtered="filtered">Write all the dependencies required by the module in the configuration. When installing, Specify the address to download. This method simplifies the installation process when using it, but it is not good enough. The best way is to use pip's automatic download.
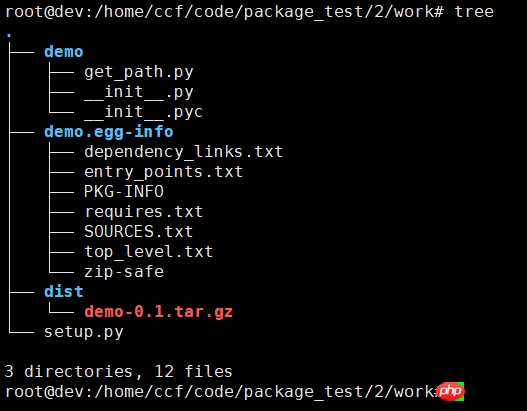
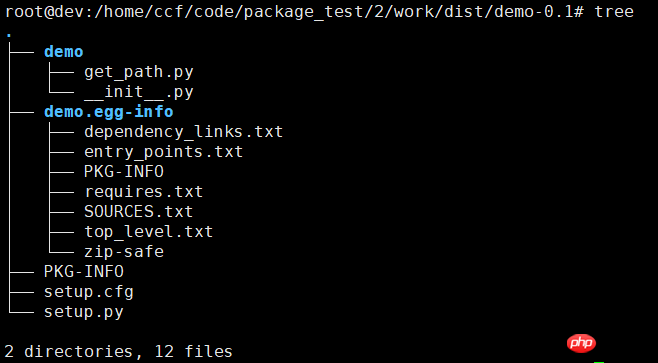
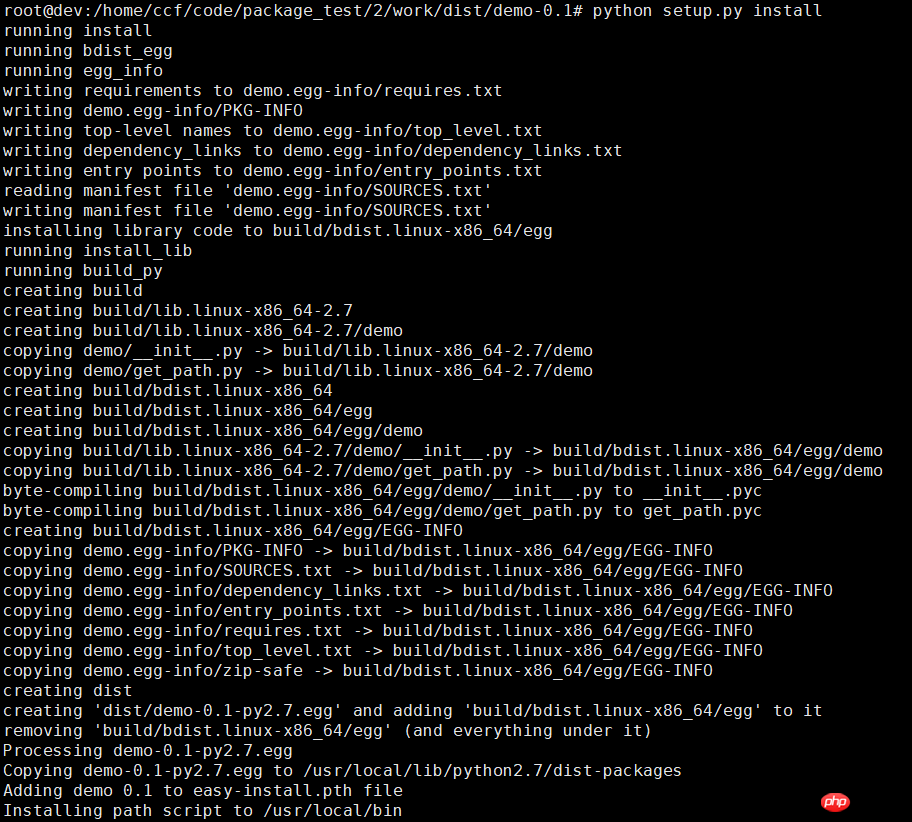
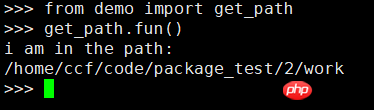
##After packaging, there will be two more folders , respectively demo.egg-info and dist. demo.egg-info is the necessary installation information, and the compressed package in dist is the installation package. 查看dist/demo-0.1.tar.gz解压之后的文件。 四、安装包 五、使用包 安装之后在命令行中直接输入path,回车能够看到调用了get_path.py中的函数fun(),输出字符串。 同时也可以导入使用。 setuptools的进阶使用 上面使用setuptools时只是简单的用一个配置文件setup.py就完成了打包信息填写。在真实的开发环境中,往往是多个文件配合。以openstack的打包为例。openstack中引入了Pbr的管理工具。 pbr是setuptools的辅助工具,最初为openstack开发,基于d2to1。Pbr会读取和过滤setup.cfg中的内容,然后将解析后的数据提供给setup.py作为参数。 setup.cfg提供setup.py的默认参数,同时易于修改。Setup.py先解析setup.cfg文件,然后执行相关命令。包括以下功能: 1、从git中获取Version,AUTHORS和ChangeLog信息 2、SphinxAutodoc。pbr会扫描project,找到所有模块,生成stubfiles 3、Requirements。读取requirements.txt文件,生成setup函数需要依赖包 4、long_description。从README.rst、README.txt或者READMEfile中生成long_description参数 Pbr的文件很简单,如下。配置之后会自动寻找目录下的setup.cfg文件,解析文件参数给setup.py使用。 setup.py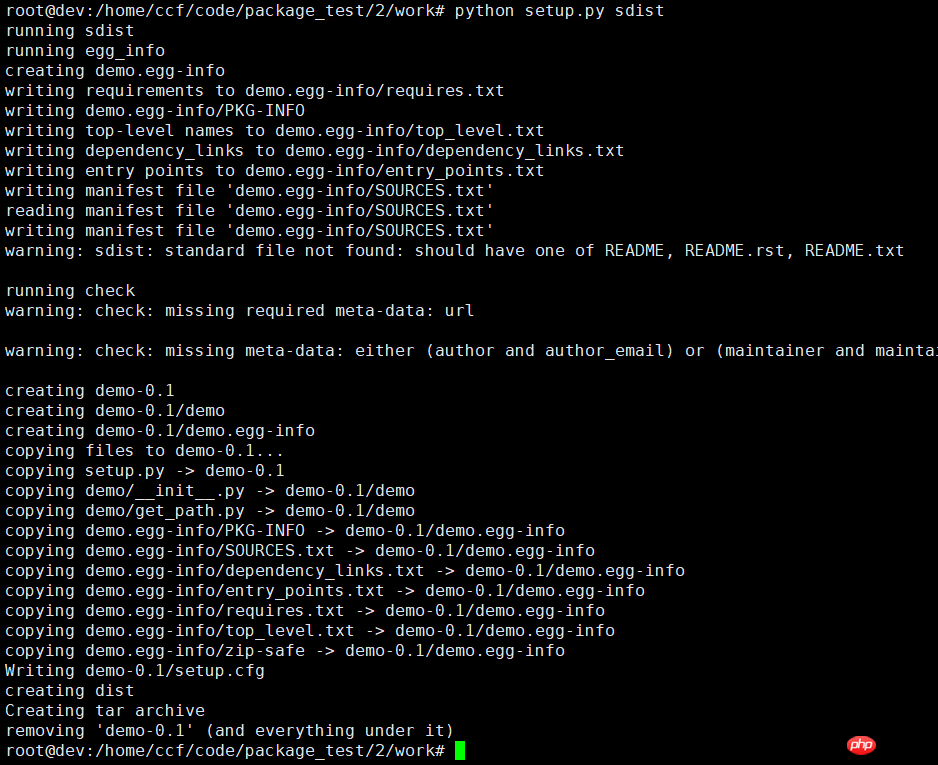

from setuptools import setup
setuptools.setup(
setup_requires=['pbr'],
pbr=True)
setup.cfg

[metadata]
name= keystone
version= 2015.2
summary= OpenStack Identity
description-file=
README.rst
author= OpenStack
author-email= openstack-dev@lists.openstack.org
home-page= http://www.openstack.org/
classifier=
Environment:: OpenStack
IntendedAudience :: Information Technology
IntendedAudience :: System Administrators
License:: OSI Approved :: Apache Software License
OperatingSystem :: POSIX :: Linux
ProgrammingLanguage :: Python
ProgrammingLanguage :: Python :: 2
ProgrammingLanguage :: Python :: 2.7
[files]
packages=
keystone
[global]
setup-hooks=
pbr.hooks.setup_hook
[egg_info]
tag_build=
tag_date= 0
tag_svn_revision= 0
[build_sphinx]
all_files= 1
build-dir= doc/build
source-dir= doc/source
[compile_catalog]
directory= keystone/locale
domain= keystone
The above is the detailed content of A brief analysis of python packaging tools distutils and setuptools. For more information, please follow other related articles on the PHP Chinese website!