
Home >Backend Development >PHP Tutorial >WampServer and Eclipse build PHP environment - CSDN Blog
WampServer and Eclipse build PHP environment - CSDN Blog

- 小云云Original
- 2018-03-09 15:44:572883browse
I have been learning PHP recently and spent a lot of time on how to build a PHP development environment. What is mentioned on the Internet are some semi-finished products, and most of them are articles that are reprinted from each other. Here I record the process of my own exploration and implementation. Here it is for your study and reference.
Since I am engaged in JAVA development, I have JDK and other environments on my computer, so I will not start from scratch. My computer environment is: XP system, JDK1.6. If you use Eclipse, you must first install the JDK environment on your computer. I will not go into too much detail about the software installation. I will mainly introduce the configuration after the software is installed here.
Software environment:
JDK1.6
WampServer
Eclipse-php-helios
After the software is installed The specific configuration steps are as follows:
1. Start the wampServer software and there will be a small icon in the lower right corner of the computer

As shown in the picture above, the small red icon is framed in red . Left-click the small icon and click "Start ALL Services" in the pop-up menu. Under normal circumstances, the small red icon will turn green. Indicates that all servers start successfully. Select PHP---PHP Setting--short open tag and click, this will be useful later.
2. After wampServer starts successfully, we need to test apache. Open the browser and enter http://localhost/ in the address bar. After pressing Enter, the browser interface is as follows:

3. Xdebug configuration: Since wampserver already comes with Xdebug, we don’t need to install it here, we only need simple configuration. The only thing that needs to be configured is to open php.ini under D:\ProgramFiles2\wamp\wamp\bin\apache\Apache2.4.4\bin (this path is based on your own installation path) and find xdebug in the last few lines. remote_enable = off, change to xdebug.remote_enable = on. This is done so that breakpoints can be entered when debugging in eclipse.
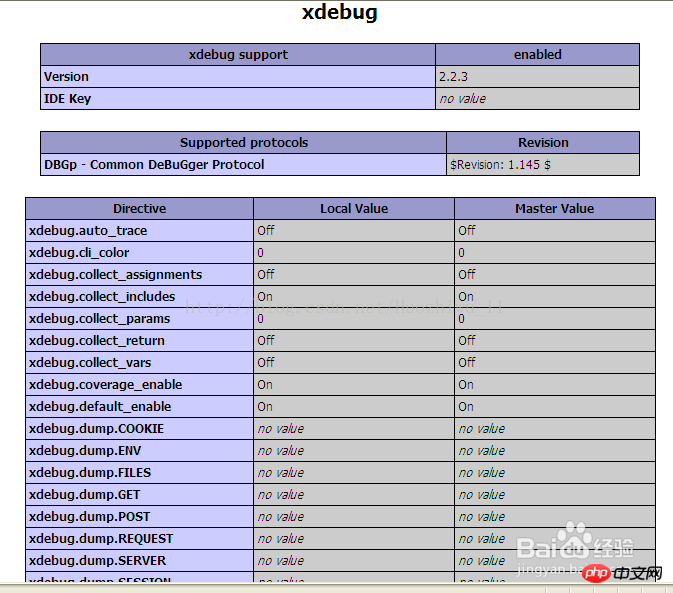
Click the phpinfo() link in http://localhost/. If there is the following information, xdebug has been installed correctly:
4. Configure eclipse: First, you need to configure the workspace of eclipse. This must be set to the www directory of wamp, otherwise debugging will not be possible later. My www directory is D:\ProgramFiles2\wamp\wamp\www.
5. Install the php plug-in. Run eclipse and find "Instal New Software" under Help in the main interface. Then select "All Available Sites" in Work with. Since you need to search, you need to wait patiently. Finally:
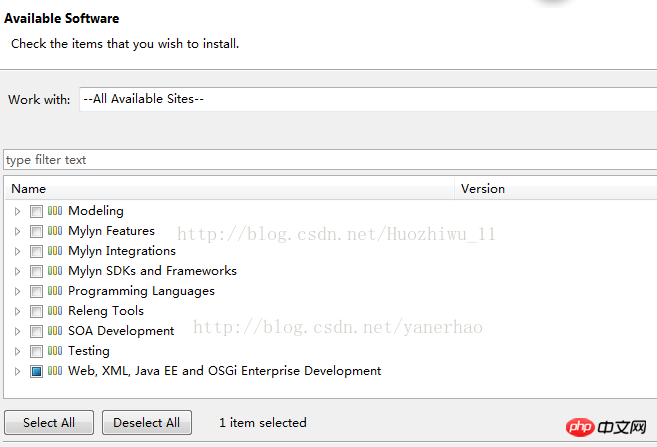
6. Select web development-related software and find PHP Development Tools (PDT) among them. software. Check and click Next.

Find PHP Development Tools (PDT) from the Web.XML, JAVA EE and OSGI options.

7. Click finish to complete the installation of PHP.
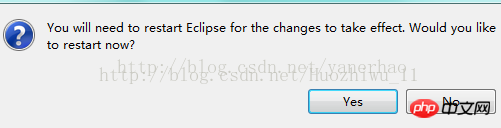
8. Click Yes to restart Eclipse.
9. Enter Preferences to see PHP. (If unsuccessful, you can go to Eclipse official website to download the standard version and install the PHP plug-in.)

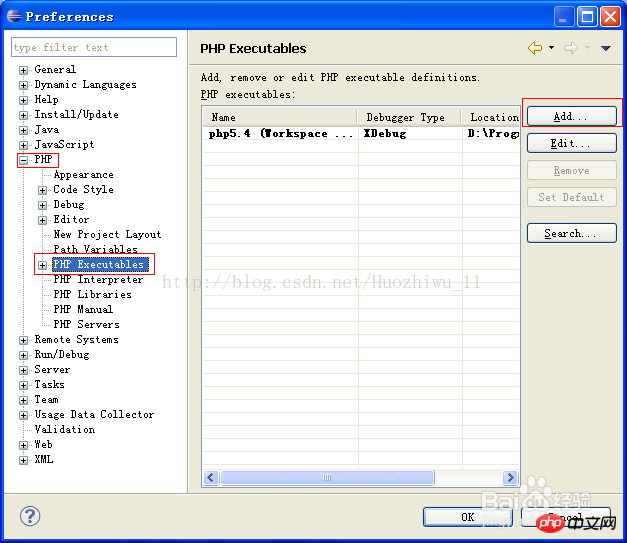
10. After configuring the workspace, you can start eclipse and enter Eclipse —> Window —> Preferences —> PHP Set PHP Executable. The setting interface is as follows:

11. Configure PHP server: The configuration interface is as follows:

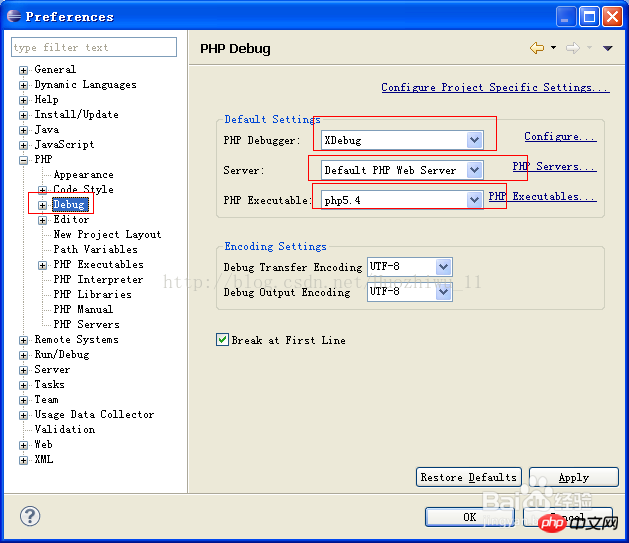
12. Configure Debug. The configuration information is as shown below:
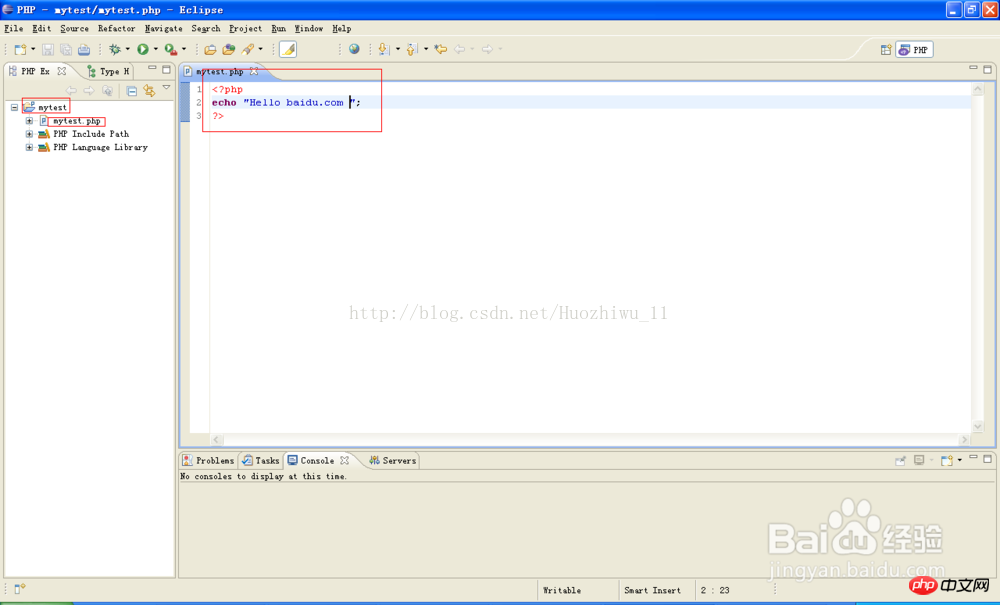
13. After all configurations are successful, restart wampserver, and start all services "Start all services", create a new PHP project in eclipse, and create a new PHP page, as shown below:
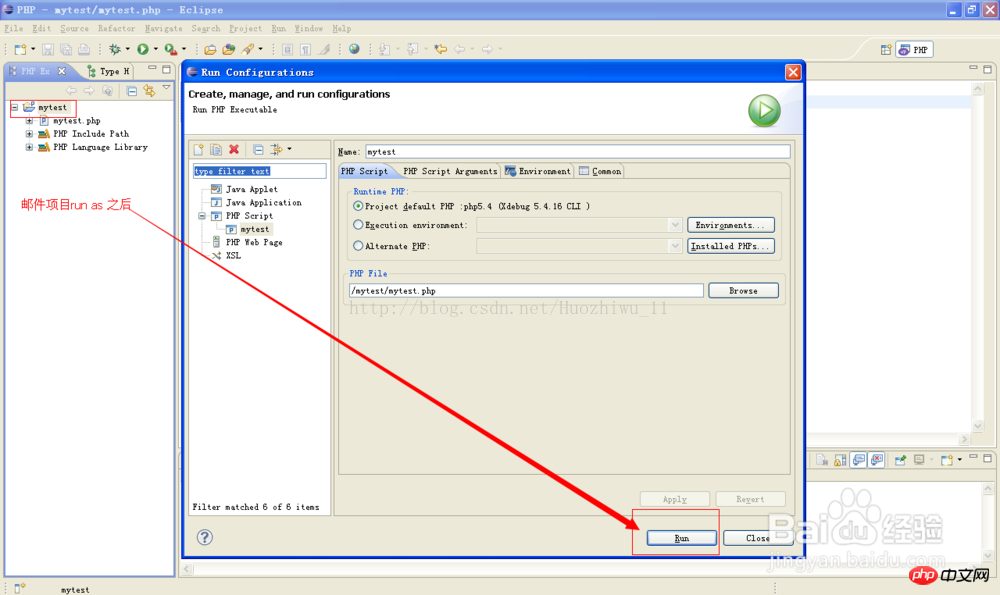
14. After saving the code in the project, right-click the project name and select Run As ---run configurations panel and click the RUN button in the pop-up operation list menu. As shown below:
#15. After the project is successfully started, open the browser and enter http://localhost/mytest/mytest.php in the address bar. What if the interface is as follows? Environment configuration successful:

Related recommendations:
Tutorial on how to install php plug-in in eclipse
Eclipse PHPEclipse specific configuration method
Detailed explanation of PHPEclipse configuration in Eclipse
The above is the detailed content of WampServer and Eclipse build PHP environment - CSDN Blog. For more information, please follow other related articles on the PHP Chinese website!