
 Operation and MaintenanceLinux Operation and MaintenanceSummary of Linux Centos7 system reinforcement knowledge points
This article mainly introduces the relevant knowledge points of Centos7 system reinforcement in LINUX to you in detail. I hope it can help you.
Note: The cloud server in this tutorial uses centos7 or above as an example. The cloud server is purchased from Alibaba Cloud.
The cloud server configurations of other service providers are similar.
Recommendations: It is not recommended to install graphical tools on Linux servers, because they occupy memory, bandwidth, and resources, and the harm far outweighs the benefits.
Manually update the system:
yum -y update
Firewall configuration:
service firewalld start //Start the firewall
systemctl enable firewalld.service //Start automatically after booting
selinux configuration:
vim /etc/selinux/config
Modify:
SELINUX=enforcing //Set enforcement mode
reboot // Restart to take effect
ssh configuration: (anti-brute force cracking)
useradd normal //Create a system user and set that only this user can log in to the system remotely
vim /etc/ssh/sshd_config
Modify:
Port 2000 //The port must be greater than 1024
Protocol 2 //If not, add it, if it is, don’t use it
PermitEmptyPasswords no //Prohibit empty password login
X11Forwarding no //Prohibit port forwarding
PermitRootLogin no //Prohibit root user login
MaxAuthTries 3 //Allow three attempts
LoginGraceTime 20 //In 20 If the login cannot be completed within seconds, disconnect
AllowUsers normal //Add, only allow this user to log in remotely
Save and exit, restart ssh
service sshd restart
Firewall opens ssh port
firewall-cmd --zone=public --add-port=2000/tcp --permanent
firewall-cmd - -reload
selinux opens ssh port
yum -y install policycoreutils-python //Install selinux port management tool
semanage port -a -t ssh_port_t -p tcp 2000 //Add port
semanage port -l |grep ssh //View the ssh port opened by selinux
service sshd restart
Prevent IP SPOOF attacks
vim /etc/host.conf
Add
nospoof on
to prohibit being pinged
vim /etc/sysctl.conf
Modify if yes, add if not
net.ipv4.icmp_echo_ignore_all=0
Save configuration
sysctl -p
Firewall is prohibited from being pinged
firewall-cmd --permanent --add-rich-rule= 'rule protocol value=icmp drop'
firewall-cmd --reload
Note: You can also delete the rules that allow the ICMP protocol in the security group rules of the Alibaba Cloud console
Update the system every ten days, delete unused software, and clear the yum cache
crontab -e
Modify the following content as needed
0 0 */10 * * yum update -y
0 0 */11 * * yum autoremove -y
0 0 */12 * * yum clean all
Firewall prohibits port scanning (centos7 is invalid, the port is still scanned out, I don’t know if it takes effect below centos7)
iptables -F #Clear firewall policy
iptables -A INPUT -p tcp - -tcp-flags ALL FIN,URG,PSH -j Drop
iptables -A INPUT -p tcp --tcp-flags SYN,RST SYN,RST -j Drop
iptables -A INPUT -p tcp --tcp -flags SYN,FIN SYN,FIN -j Drop
iptables -A INPUT -p tcp --tcp-flags SYN,SYN --dport 80 -j Drop
Uninstall Alibaba Cloud's cloud Shield (Server Server), because the server is inherently tight on memory, Cloud Shield does more harm than good, uninstall
wget http://update.aegis.aliyun.com/download/uninstall.sh
chmod +x uninstall.sh
./uninstall.sh
wget http://update.aegis.aliyun.com/download/quartz_uninstall.sh
chmod +x quartz_uninstall.sh
./quartz_uninstall .sh
pkill aliyun-service
rm -fr /etc/init.d/agentwatch /usr/sbin/aliyun-service
rm -rf /usr/local/aegis*
Note: After the uninstallation is completed, the above two script files can be deleted. If you cannot wget the file, please contact the webmaster to request it!
Block Cloud Shield IP, Cloud Shield will regularly scan the server to simulate hacker attacks
vim shield_ip.sh
Add the following content:
#!/bin/bash
echo "开始屏蔽云盾扫描云服务器的IP"
firewall-cmd --permanent --add-rich-rule='rule family=ipv4 source address="140.205.201.0/28" drop'
firewall-cmd --permanent --add-rich-rule='rule family=ipv4 source address="140.205.201.16/29" drop'
firewall-cmd --permanent --add-rich-rule='rule family=ipv4 source address="140.205.201.32/28" drop'
firewall-cmd --permanent --add-rich-rule='rule family=ipv4 source address="140.205.225.192/29" drop'
firewall-cmd --permanent --add-rich-rule='rule family=ipv4 source address="140.205.225.200/30" drop'
firewall-cmd --permanent --add-rich-rule='rule family=ipv4 source address="140.205.225.184/29" drop'
firewall-cmd --permanent --add-rich-rule='rule family=ipv4 source address="140.205.225.183/32" drop'
firewall-cmd --permanent --add-rich-rule='rule family=ipv4 source address="140.205.225.206/32" drop'
firewall-cmd --permanent --add-rich-rule='rule family=ipv4 source address="140.205.225.205/32" drop'
firewall-cmd --permanent --add-rich-rule='rule family=ipv4 source address="140.205.225.195/32" drop'
firewall-cmd --permanent --add-rich-rule='rule family=ipv4 source address="140.205.225.204/32" drop'
firewall-cmd --permanent --add-rich-rule='rule family=ipv4 source address="106.11.224.0/26" drop'
firewall-cmd --permanent --add-rich-rule='rule family=ipv4 source address="106.11.224.64/26" drop'
firewall-cmd --permanent --add-rich-rule='rule family=ipv4 source address="106.11.224.128/26" drop'
firewall-cmd --permanent --add-rich-rule='rule family=ipv4 source address="106.11.224.192/26" drop'
firewall-cmd --permanent --add-rich-rule='rule family=ipv4 source address="106.11.222.64/26" drop'
firewall-cmd --permanent --add-rich-rule='rule family=ipv4 source address="106.11.222.128/26" drop'
firewall-cmd --permanent --add-rich-rule='rule family=ipv4 source address="106.11.222.192/26" drop'
firewall-cmd --permanent --add-rich-rule='rule family=ipv4 source address="106.11.223.0/26" drop'
firewall-cmd --reload
保存退出
chmod +x shield_ip.sh
./shield_ip.sh
注意:这些IP地址段来源于阿里云官方给的云盾服务器IP,来源:(https://help.aliyun.com/knowledge_detail/37436.html)
编码设置:
vim /etc/locale.conf
删除原有,添加如下内容:
LANG=zh_CN.utf8 //中文界面
LC_MESSAGES=en_US.utf8 //英文提示reboot //重启生效
进入阿里云控制台,云服务器ECS–>安全组–>配置规则–>添加安全组规则
安全组添加ssh端口,否则外网是无法进入的,包括ftp和apache的端口不在安全组开放的话
下载xshell远程登录软件,normal用户远程登录至linux系统,xshell的使用不再赘述,登录成功后
su - root //提权
注意:在阿里云控制台远程连接登录系统后,不能以任何用户一直处于登录状态,使用系统完后,必须退出用户登录,界面保持在需要输入用户名的界面
如:在阿里云控制台登录(而不是xshell登录),退出用户登录命令
logout //exit也可以
注意:root用户的话必须退出两次才可以
最后:在阿里云控制台–>安全(云盾)–>态势感知–>开启态势感知服务–>设置邮箱或短信提醒
相关推荐:
Centos7在Linux下安装Mysql5.7.19的教程(图)
The above is the detailed content of Summary of Linux Centos7 system reinforcement knowledge points. For more information, please follow other related articles on the PHP Chinese website!

 CentOS7怎么安装Mysql并设置开机自启动Jun 02, 2023 pm 08:36 PM
centos7不带mysql数据库了,默认的数据库是mariadb(mysql的一个分支)。可以按照以下步骤手动安装mysql数据库。1.下载rpm安装文件wgethttp://repo.mysql.com/mysql-community-release-el7.rpm2.执行rpm安装rpm-ivhmysql-community-release-el7.rpm依赖解析完成后,出现下列选项:dependenciesresolved=================================
 centos7怎么查看php安装目录?三种方法分享Mar 22, 2023 am 10:38 AM
如果你正在使用 CentOS 7 操作系统,需要查看 PHP 安装目录以便定位配置文件、扩展等相关信息,那么就需要了解一些相关命令和技巧。下面,我们将为您介绍一些方法来查看 CentOS 7 上的 PHP 安装目录。
 怎么在CentOS7中使用Nginx和PHP7-FPM安装NextcloudMay 24, 2023 pm 08:13 PM
先决条件64位的centos7服务器的root权限步骤1-在centos7中安装nginx和php7-fpm在开始安装nginx和php7-fpm之前,我们还学要先添加epel包的仓库源。使用如下命令:yum-yinstallepel-release现在开始从epel仓库来安装nginx:yum-yinstallnginx然后我们还需要为php7-fpm添加另外一个仓库。互联网中有很个远程仓库提供了php7系列包,我在这里使用的是webtatic。添加php7-fpmwebtatic仓库:rpm
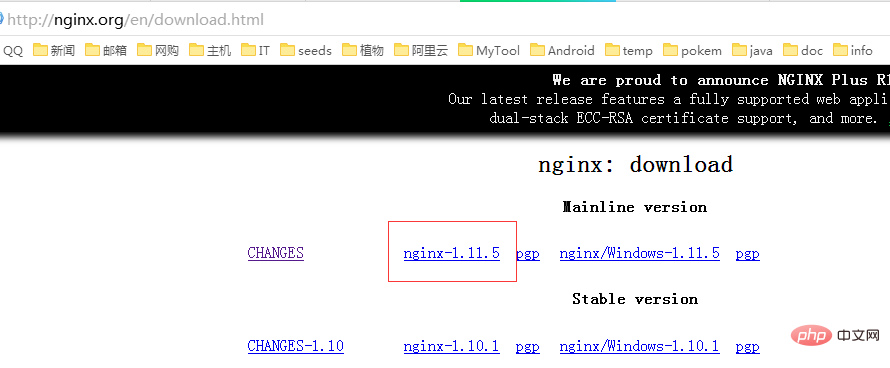 CentOS7如何安装Nginx并配置自动启动May 14, 2023 pm 03:01 PM
1、官网下载安装包选择适合linux的版本,这里选择最新的版本,下载到本地后上传到服务器或者centos下直接wget命令下载。切换到/usr/local目录,下载软件包#cd/usr/local#wgethttp://nginx.org/download/nginx-1.11.5.tar.gz2、安装nginx先执行以下命令,安装nginx依赖库,如果缺少依赖库,可能会安装失败,具体可以参考文章后面的错误提示信息。#yuminstallgcc-c++#yuminstallpcre#yumins
 CentOS7下怎么部署php7.1和开启MySQL扩展May 28, 2023 pm 03:01 PM
简单安装(yum方式)安装软件源添加epel源[root@opstrip.comopt]#rpm--import/etc/pki/rpm-gpg/rpm-gpg-key*[root@opstrip.comopt]#rpm-uvhhttp://mirrors.rit.edu/fedora/epel//7/x86_64/e/epel-release-7-9.noarch.rpm添加remi源[root@opstrip.comopt]#rpm-uvhhttp://rpms.remirepo.net/e
 Centos7改系统时区方法有哪些Mar 03, 2023 am 10:47 AM
Centos7修改系统时区的两种方法:1、使用timedatectl命令,可设定和修改时区信息,语法“timedatectl set-timezone 时区标识”;2、修改用户目录下的“.bash_profile”文件,在文件末尾追加“TZ='时区标识'; export TZ”即可。
 如何在 CentOS 7 中安装并配置 Java 环境变量?Apr 22, 2023 pm 04:28 PM
安装环境:Centos764位Jdk1.864位Xshell免费版win10*64位一、先进来,你需要检查自己的openjdk是否卸载(或者判断是否存在,因为一般centos都会预装openjdk):在xshell或rpm-qa|grepjdk中输入rpm-qa|grepjavarpm-qa|grepjava第二,如果有一个对应的openjdk,并且显示了一个响应列表,那么就需要卸载它。在xshell中输入rpm-e-nodepstzdata-文件名(这个文件名是你查看的openjdk文件列表中
 centos7使用rpm安装mysql5.7的方法May 27, 2023 am 08:05 AM
1.下载4个rpm包mysql-community-client-5.7.26-1.el7.x86_64.rpmmysql-community-common-5.7.26-1.el7.x86_64.rpmmysql-community-libs-5.7.26-1.el7.x86_64.rpmmysql-community-server-5.7.26-1.el7.x86_64.rpm想要用迅雷进行下载得先找到对应的rpm下载路径首先浏览器打开mysql官网:在打开的界面,按键盘f12打开开发者工具


Hot AI Tools

Undresser.AI Undress
AI-powered app for creating realistic nude photos

AI Clothes Remover
Online AI tool for removing clothes from photos.

Undress AI Tool
Undress images for free

Clothoff.io
AI clothes remover

AI Hentai Generator
Generate AI Hentai for free.

Hot Article
Hot Tools

Dreamweaver Mac version
Visual web development tools

VSCode Windows 64-bit Download
A free and powerful IDE editor launched by Microsoft

MinGW - Minimalist GNU for Windows
This project is in the process of being migrated to osdn.net/projects/mingw, you can continue to follow us there. MinGW: A native Windows port of the GNU Compiler Collection (GCC), freely distributable import libraries and header files for building native Windows applications; includes extensions to the MSVC runtime to support C99 functionality. All MinGW software can run on 64-bit Windows platforms.

PhpStorm Mac version
The latest (2018.2.1) professional PHP integrated development tool

SAP NetWeaver Server Adapter for Eclipse
Integrate Eclipse with SAP NetWeaver application server.

