Home >WeChat Applet >Mini Program Development >WeChat mini program button sliding function code
WeChat mini program button sliding function code
- 小云云Original
- 2018-01-30 13:21:473741browse
This article mainly introduces the method of realizing button sliding in WeChat applet. I hope this article can help everyone realize such a function. Friends who need it can refer to it. I hope it can help everyone.
How to implement button sliding in WeChat mini program
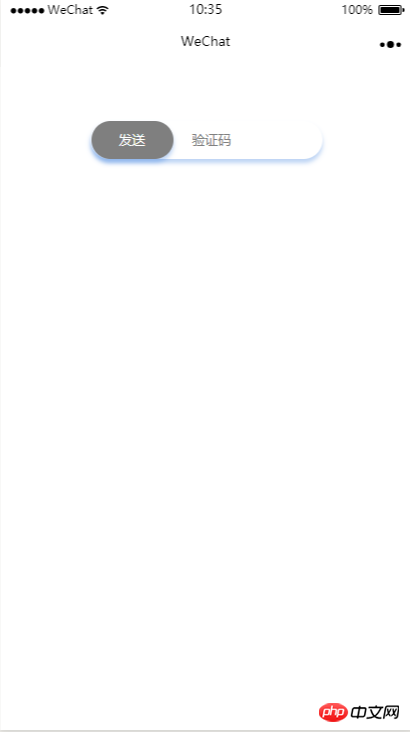
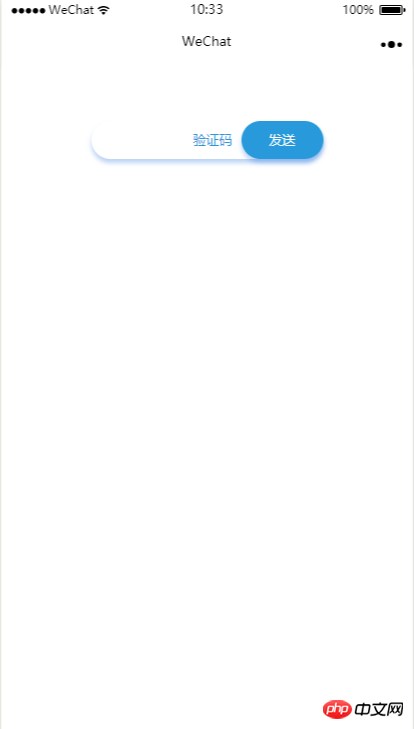
1. Look at things first

Before sliding

After sliding
2. Add the code again
index.wxml
<view class="content">
  <view class="sliderContent">
    <input placeholder="验证码" placeholder-class="input-placeholder" disabled="{{disabled}}" />
    <view class="slider" bindtouchstart="moveSendBtnStart" bindtouchend="moveSendBtnEnd" bindtouchmove="moveSendBtn" style="left:{{moveSendBtnLeft}}rpx;background-color:{{SendBtnColor}}">发送</view>
  </view>
</view>
index.wxss
.content {
  margin-top: 100rpx;
  font-size: 24rpx;
}

.sliderContent{
  position: relative;
  margin: 0 auto;
  margin-bottom: 50rpx;
  padding-left: 60rpx;
  width: 425rpx;
  box-sizing: border-box;
  height: 70rpx;
  line-height: 70rpx;
  border-radius: 60rpx;
  background-color: #fff;
  color: #289adc;
  box-shadow: 0px 4px 6px 0px rgba(37, 114, 219, 0.3);
}

.sliderContent input {
  line-height: 70rpx;
  height: 70rpx;
  box-sizing: border-box;
  padding-left: 40rpx;
  width: 250rpx;
}

.input-placeholder {
  text-align: center;
  color: #289adc;
}


 .slider {
  position: absolute;
  top: 0;
  left: 0;
  width: 150rpx;
  border-radius: 60rpx;
  text-align: center;
  background-color: #7f7f7f;
  color: #fff;
  box-shadow: 0px 4px 6px 0px rgba(37, 114, 219, 0.3);
}
index.js
Page({
  data: {
    moveStartX: 0, //起始位置
    moveSendBtnLeft: 0, //发送按钮的left属性
    moveEndX: 0, //结束位置
    screenWidth: 0, //屏幕宽度
    moveable: true, //是否可滑动
    disabled: true,//验证码输入框是否可用,
    SendBtnColor: "#7f7f7f" //滑动按钮颜色
  },

  onLoad: function () {
    var that = this;
    // 获取屏幕宽度
    wx.getSystemInfo({
      success: function (res) {
        that.setData({
          screenWidth: res.screenWidth
        })
      },
    })
  },
  //  开始移动
  moveSendBtnStart: function (e) {
    if (!this.data.moveable) {
      return;
    }
    console.log("start");
    console.log(e);
    this.setData({
      moveStartX: e.changedTouches["0"].clientX
    })
  },
  //移动发送按钮
  moveSendBtn: function (e) {
    if (!this.data.moveable) {
      return;
    }
    var that = this;
    // console.log(e.touches[0]);
    var left = ((e.touches[0].clientX - that.data.moveStartX) / (that.data.screenWidth / 750))
    console.log(left)
    if (left <= 275.5) {
      this.setData({
        moveSendBtnLeft: left
      })
    } else {

      this.setData({
        moveSendBtnLeft: 275.5
      })
    }
  },
  // 结束移动
  moveSendBtnEnd: function (e) {
    console.log("end");
    var that = this;
    var left = ((e.changedTouches[0].clientX - that.data.moveStartX) / (that.data.screenWidth / 750))
    console.log(left);
    if (left < 275.5) {
      for (let i = left; i >= 0; i--) {

        that.setData({
          moveSendBtnLeft: i
        })
      }
    } else {
      that.setData({
        moveEndX: e.changedTouches[0].clientX,
        moveable: false,
        disabled: false,
        SendBtnColor: "#289adc"
      })
    }
  }


})
Three. By the way
1. Button sliding event
bindtouchstart //Button starts sliding
bindtouchend //Button ends sliding
bindtouchmove //Button is sliding
When the button starts sliding, it is the starting position of recording
At the end of sliding, it is necessary to determine whether the button has slid to the far right. If it has only slid to the middle, it will bounce back.
During the sliding process, the distance from the initial position must be calculated, and then the distance of the button must be calculated and changed. left attribute value
2. Calculation of button sliding distance
Because the values returned by sliding events are all in px as the unit, and we use px in interface design rpx, here we need to perform numerical calculations. In onLoad, we get the width of the current device. When rpx is used as the unit, the logical width of the current device is considered to be 750rpx. Assume that the actual width of the screen is 400px, then 1px = 400/750 rpx , then the sliding distance = actual interaction distance / (400/750) rpx
After conversion, we can get the sliding distance in rpx as the unit.
Related recommendations:
The above is the detailed content of WeChat mini program button sliding function code. For more information, please follow other related articles on the PHP Chinese website!
Related articles
See more- WeChat Mini Program Simple DEMO layout, logic, and style exercises
- Detailed explanation and examples of WeChat applet wx.request (interface calling method)
- WeChat Mini Program - Detailed explanation of WeChat login, WeChat payment, and template messages
- WeChat applet (application account) simple example application and detailed explanation of the example
- Detailed explanation of WeChat applet for loop

