
Home >Backend Development >PHP Tutorial >Sharing of graphic tutorials on configuring svn in Phpstorm
Sharing of graphic tutorials on configuring svn in Phpstorm

- 黄舟Original
- 2017-10-16 09:37:061579browse
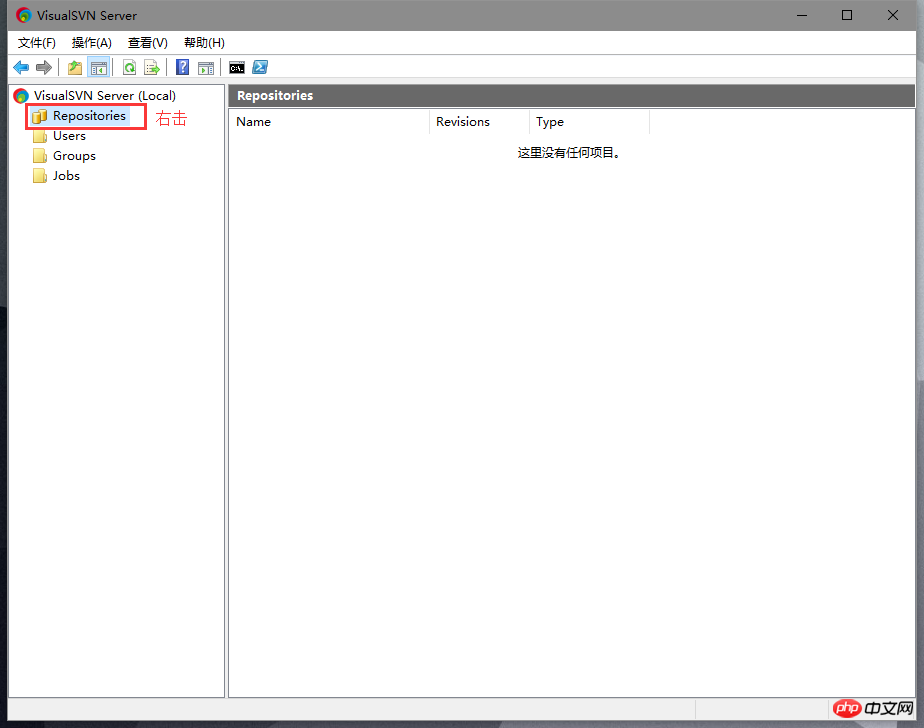
1. Set up the SVN environment
1. Download VisualSVN Sever. Download address: https://www.visualsvn.com/server/download/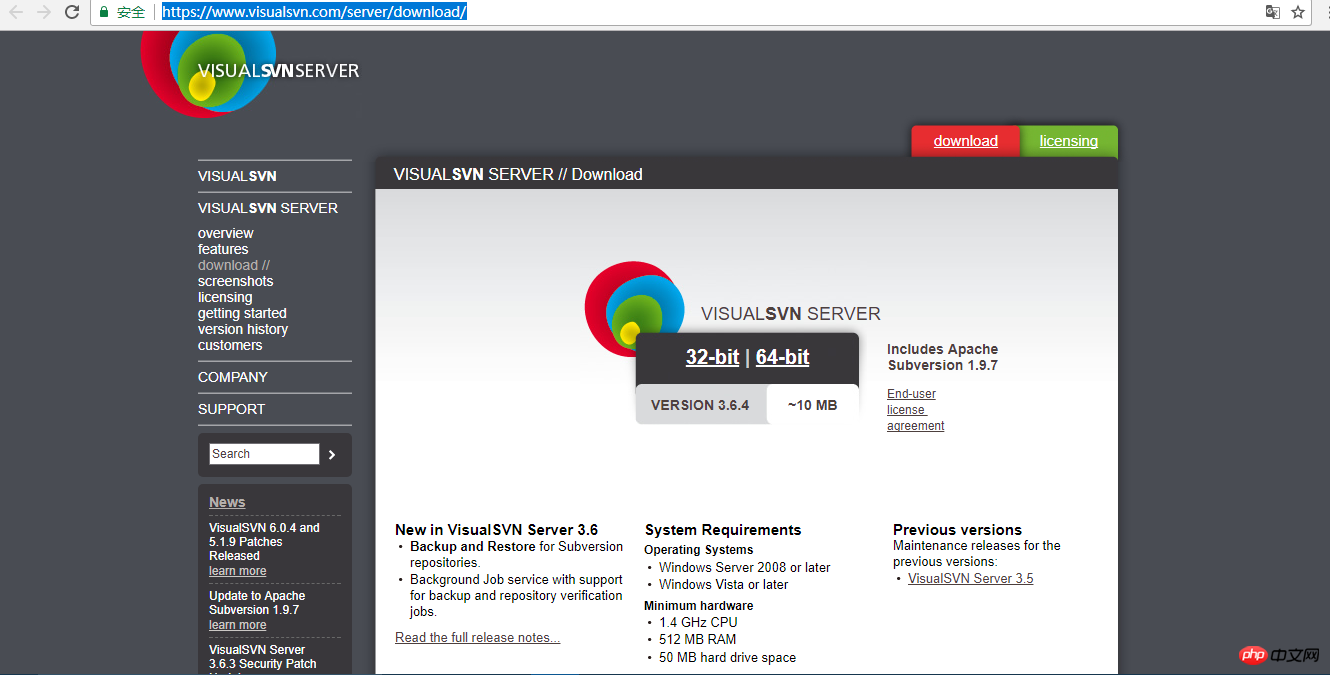
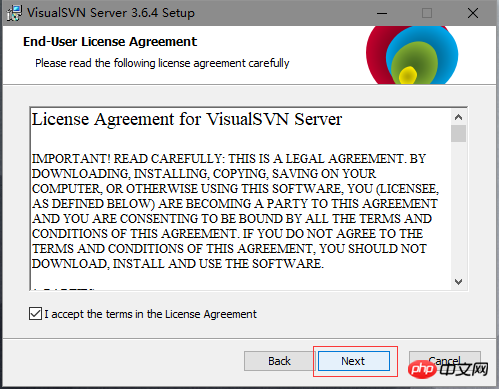
2. Install VisualSVN Server.
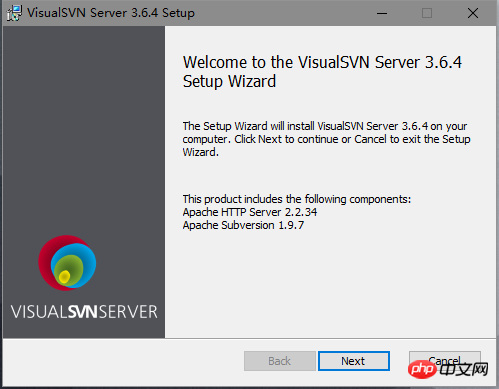
Click "Next".
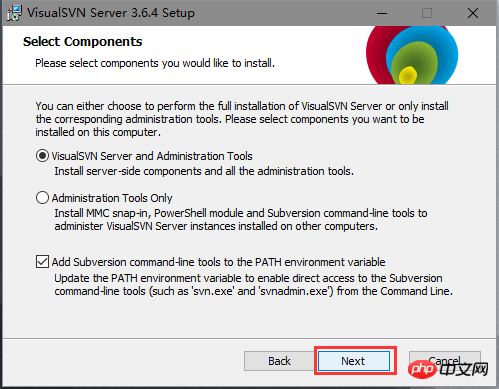
Click "Next", next step, by default, install the SVN server and management console. The following is also checked by default to add the SVN command line. Tools to environment variables.
Click 'Next' and select the installed version. By default, the standard version is selected

##After clicking 'Standard Edition', the following picture will appear. The parameters here are by default


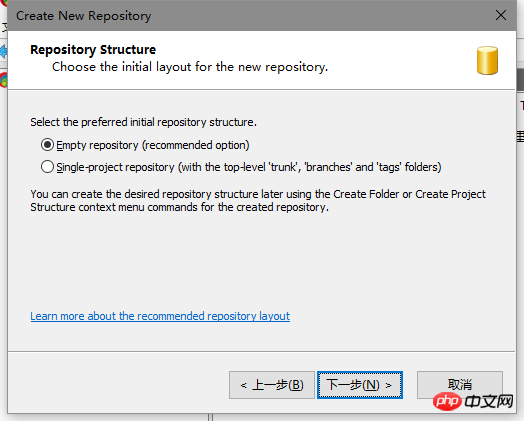 ##Next step, select permissions, the default here is, All users have read and write permissions
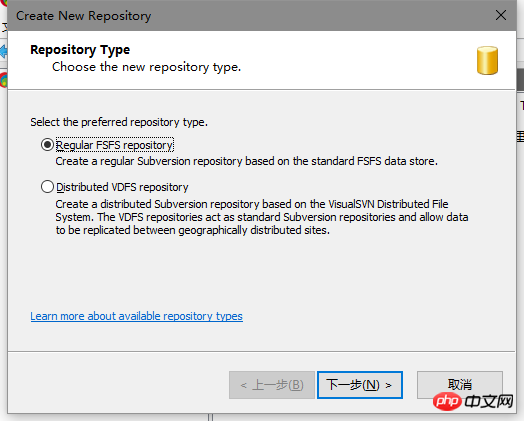
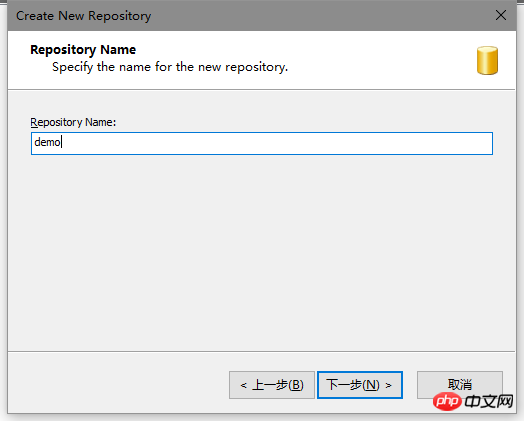
 Click "Create"
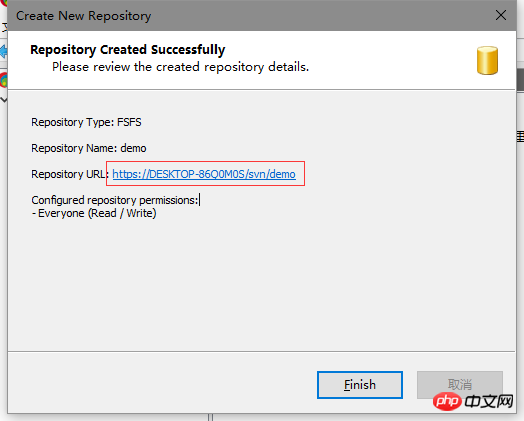 The address here is very important and needs to be copied. This is the address of the code library. Click "Finish" to create an empty code library.
3. Create a user.
 Right-click on 'Users', "Create User", or "New" ->"User"
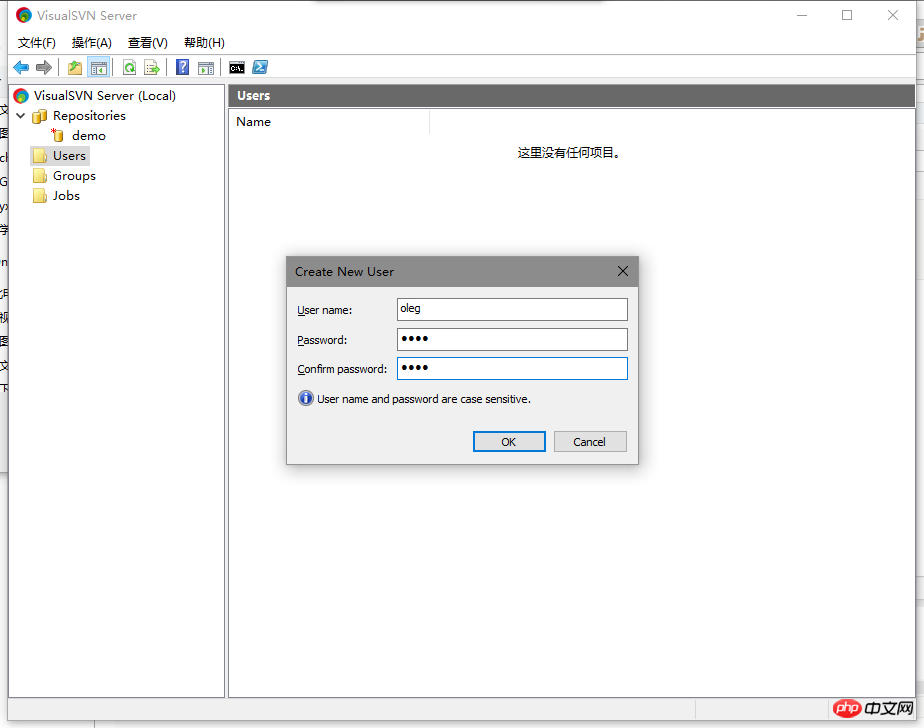 Enter the user name and password, click "OK" to create a user
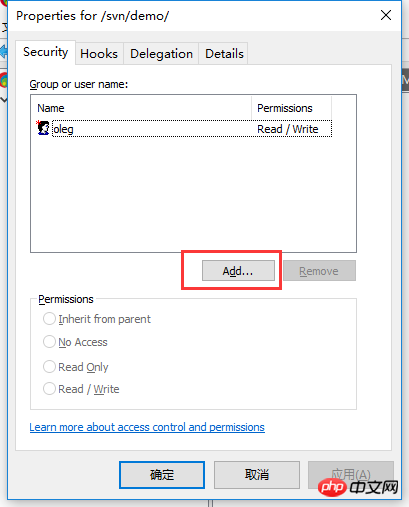
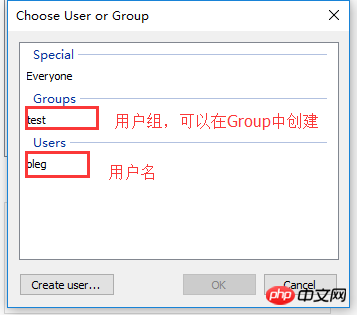
# #Add users to the new code base, right-click on the new code base ->'properties'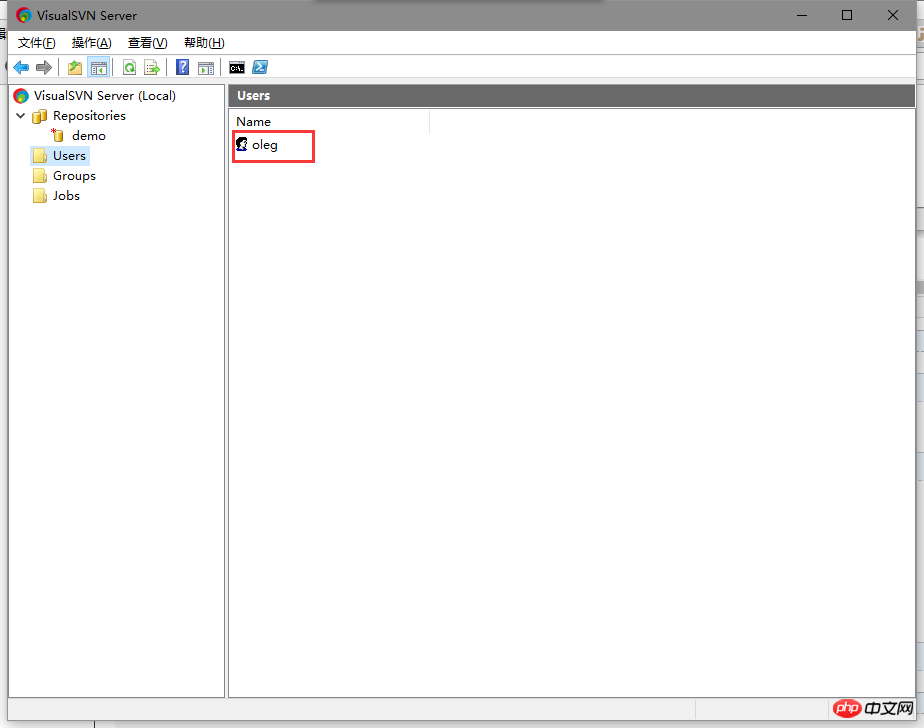
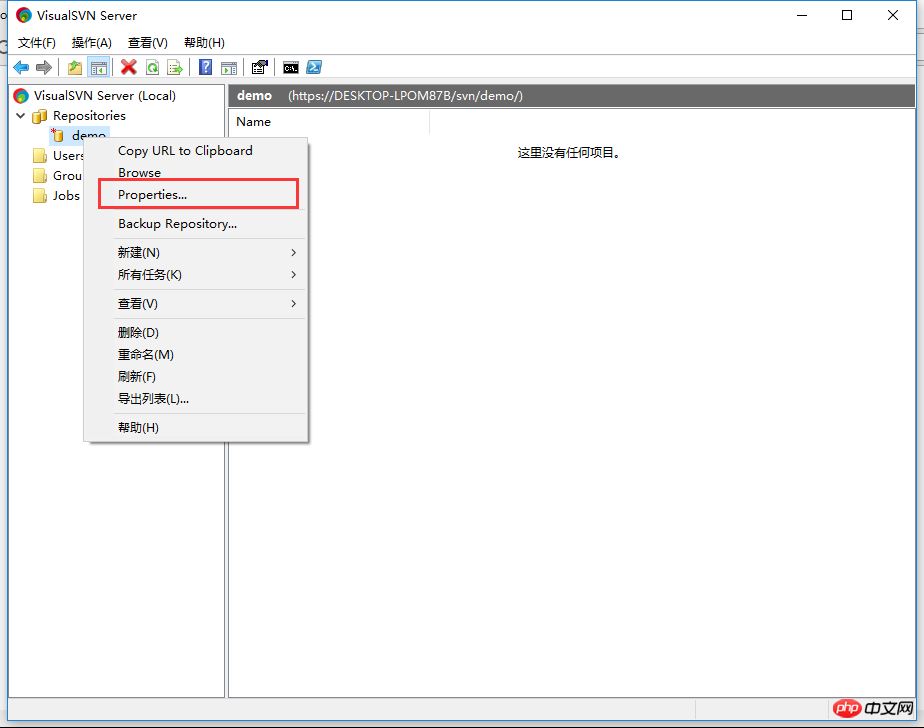 #Then add a user. The default is an 'Everyone' user. Delete it and add a user. You can select permissions below
 ## 2. Using SVN in Phpstorm
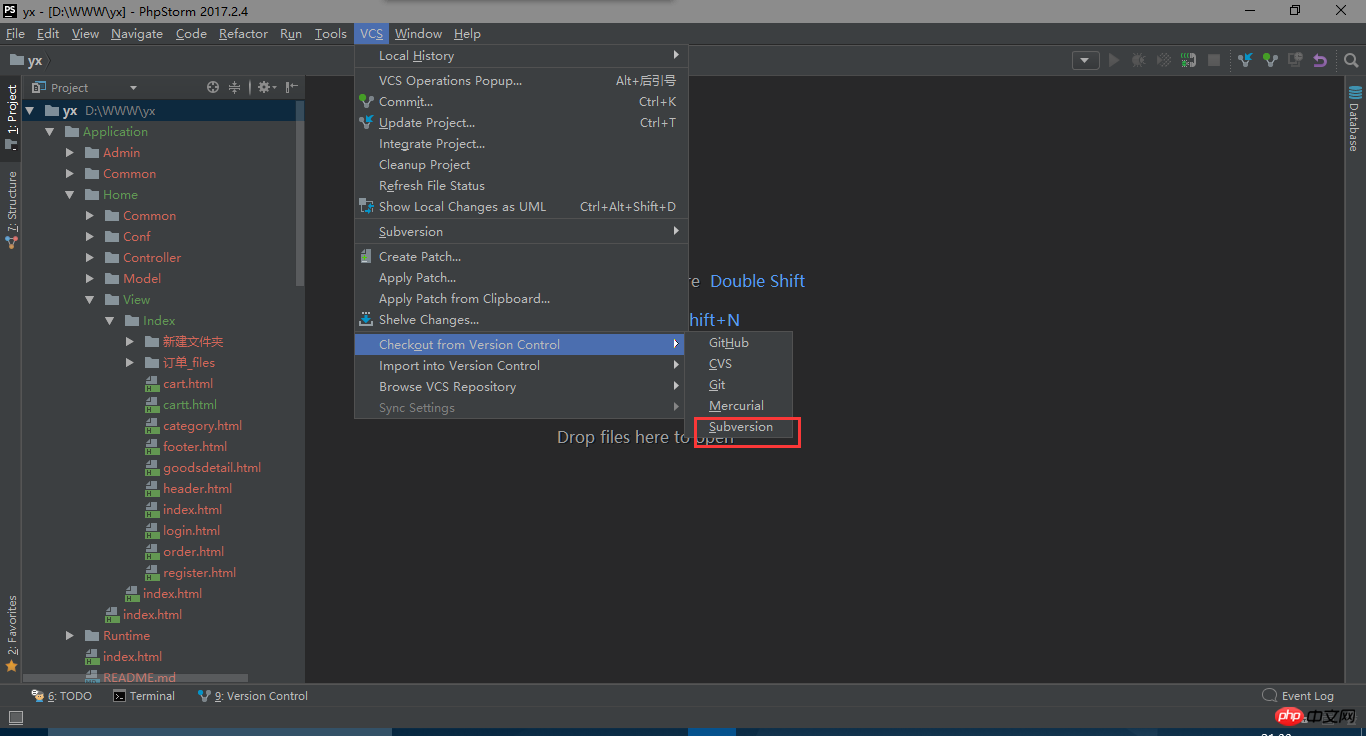
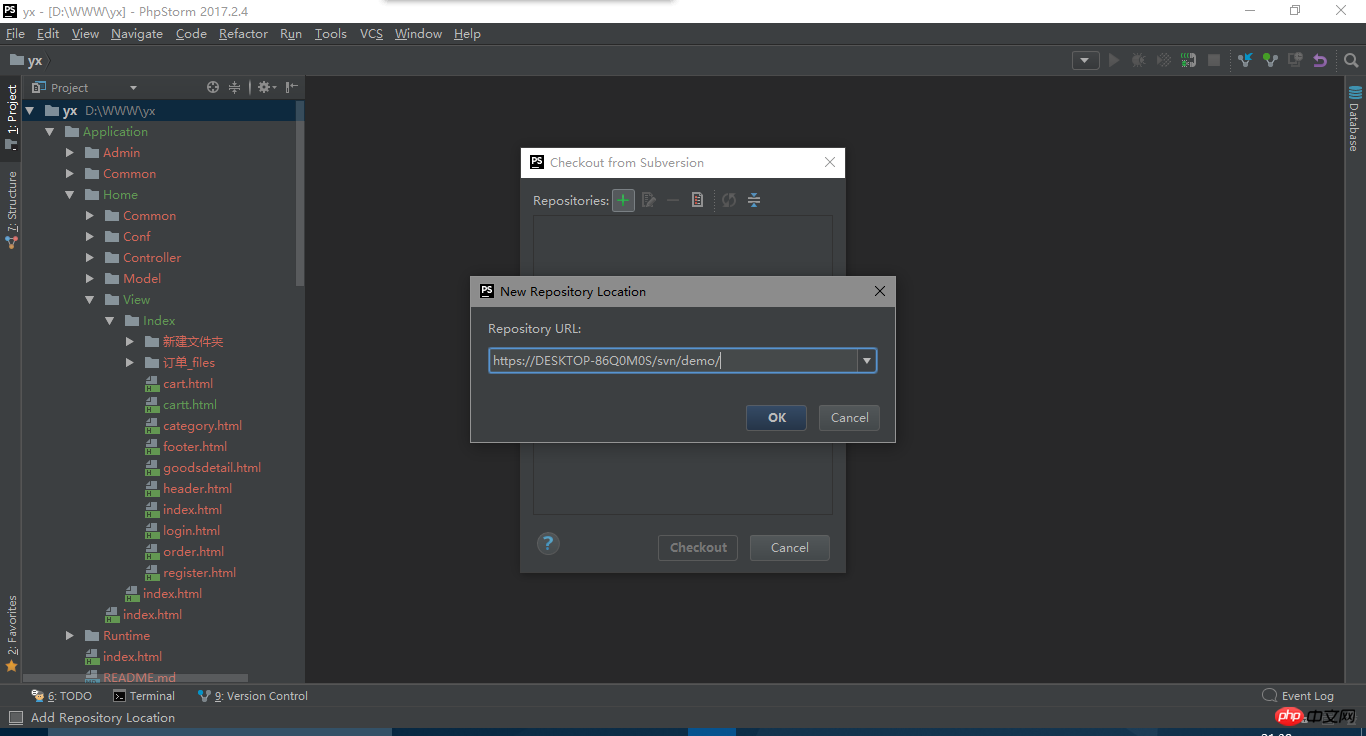
1. Open PhpStorm, find the tool VCS—>Checkout from Version Control—>Subversion
##Click to enter, click " +" sign, and then enter the svn address (the link copied in the above step, the link to the code library). Click OK.
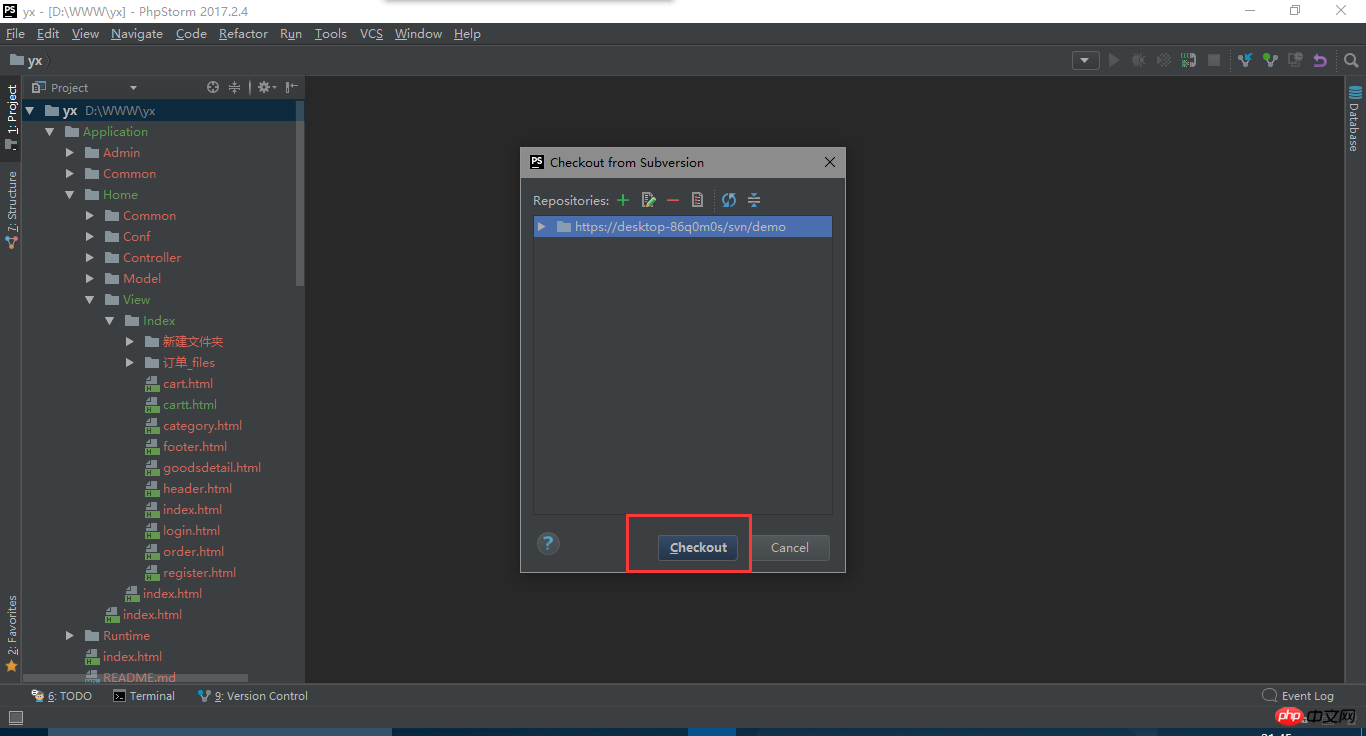
2. SVN checkout, at this time we select the svn link just added, and then 'Checkout'.
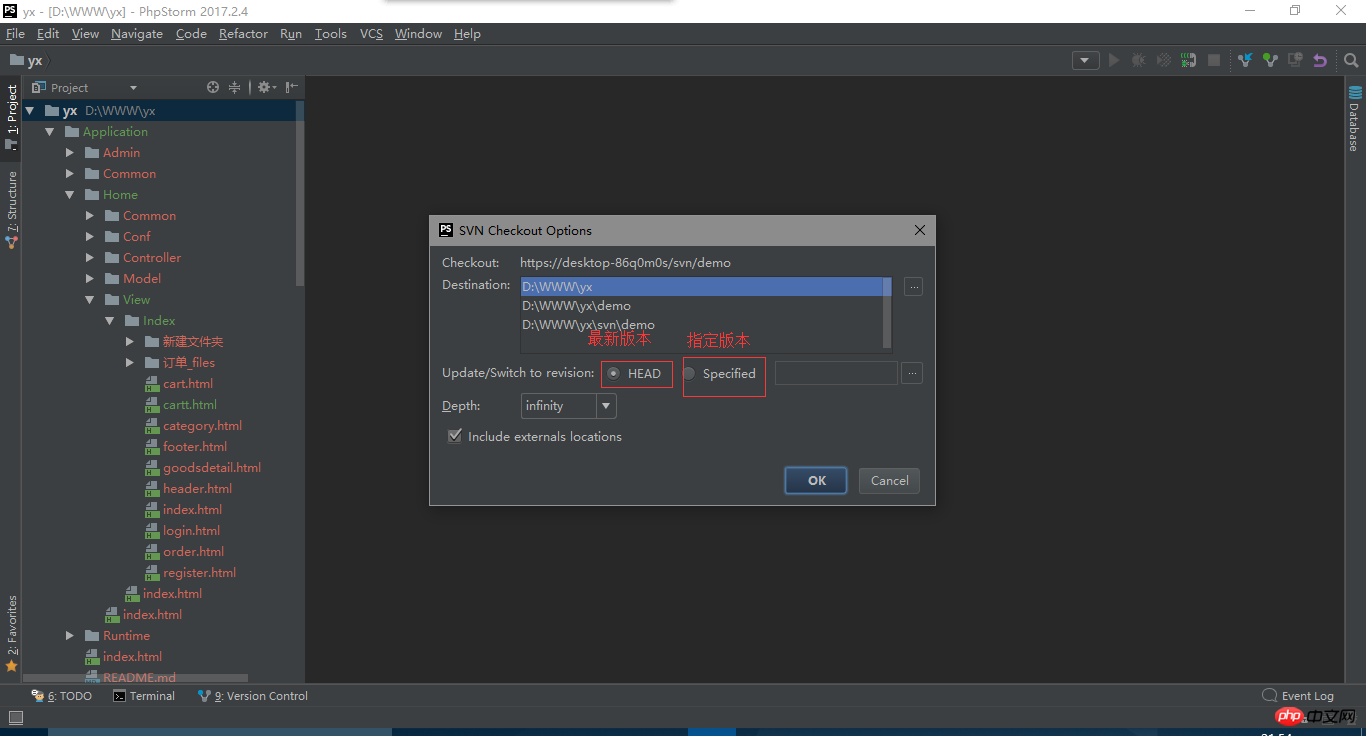
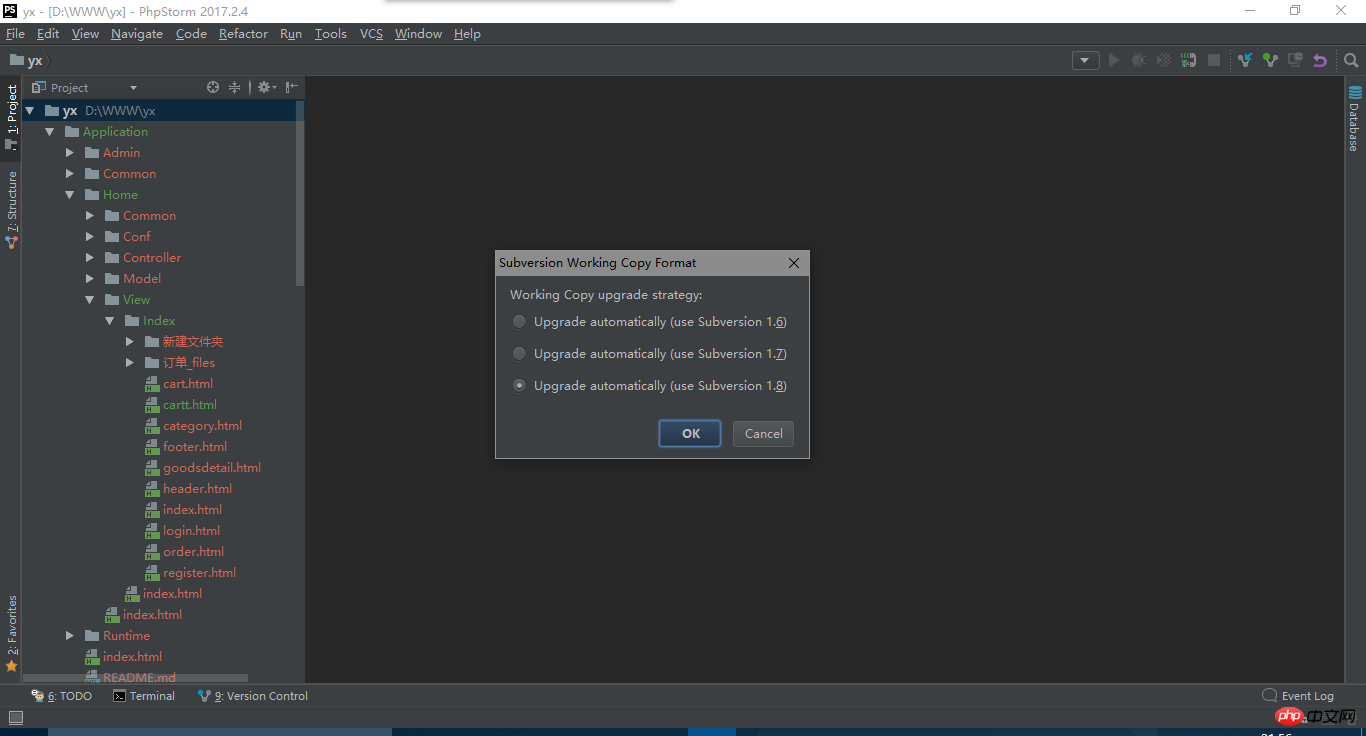
3, check out locally. Select a local target directory and click OK. Select the version that needs to be updated to the local version and click OK. Select the svn server version and click OK. 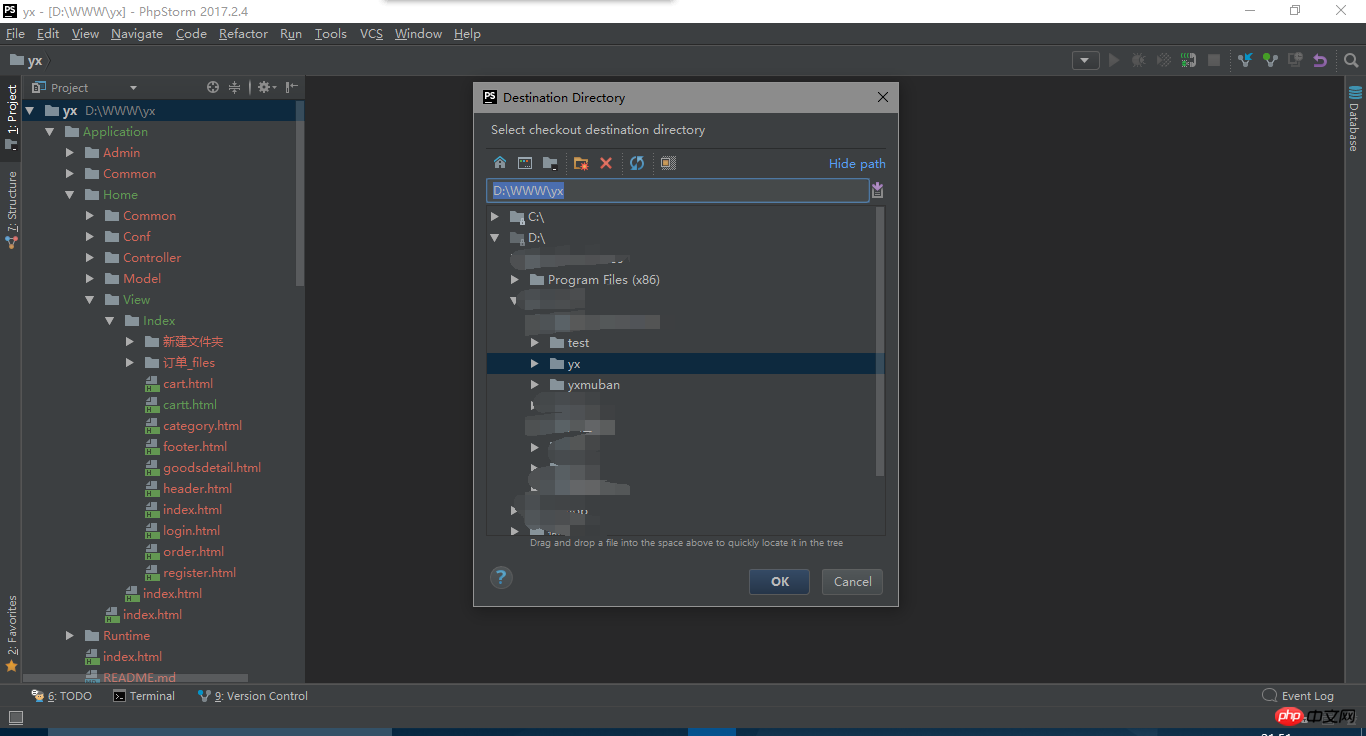
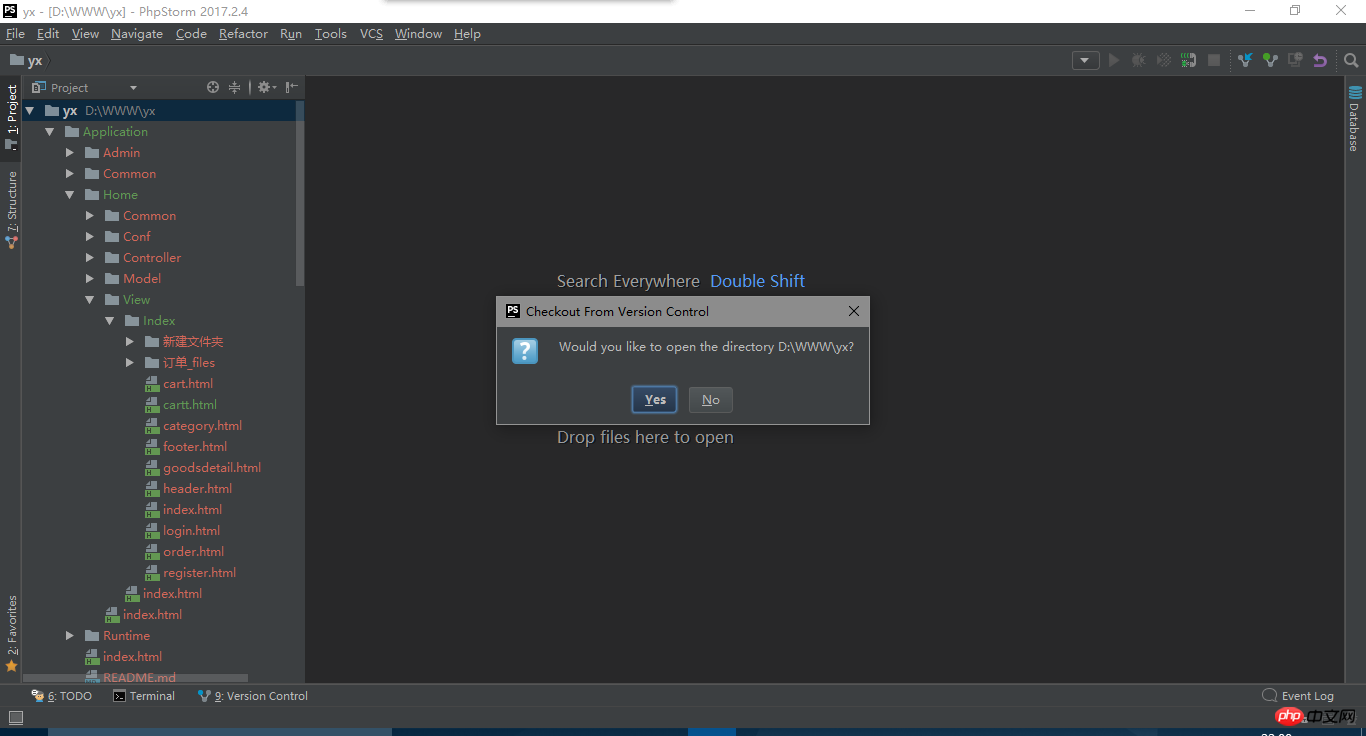
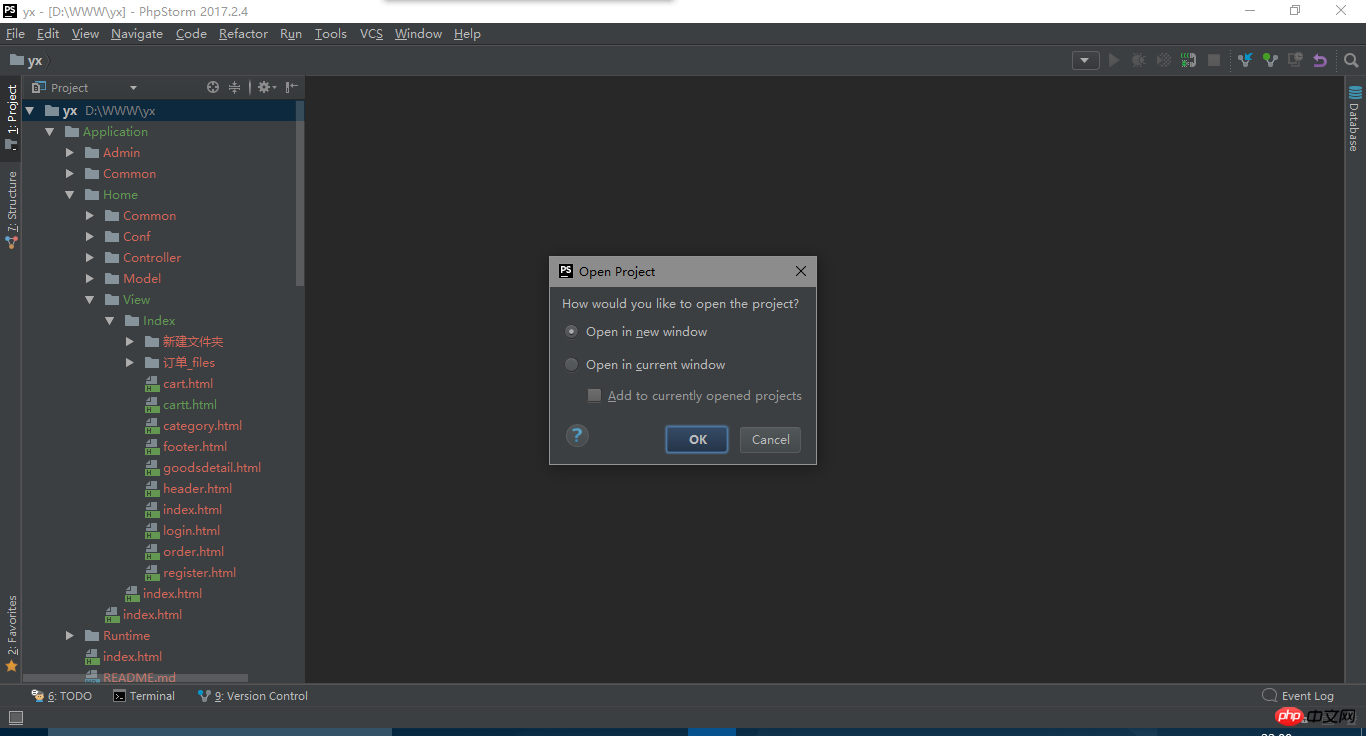
You will be asked if you want to open this directory, 'YES', and then you will be asked whether to open it in a new window or the current one Open in the window and click "OK"
##The first update may take a little longer. Wait patiently. So far the project has been updated locally.
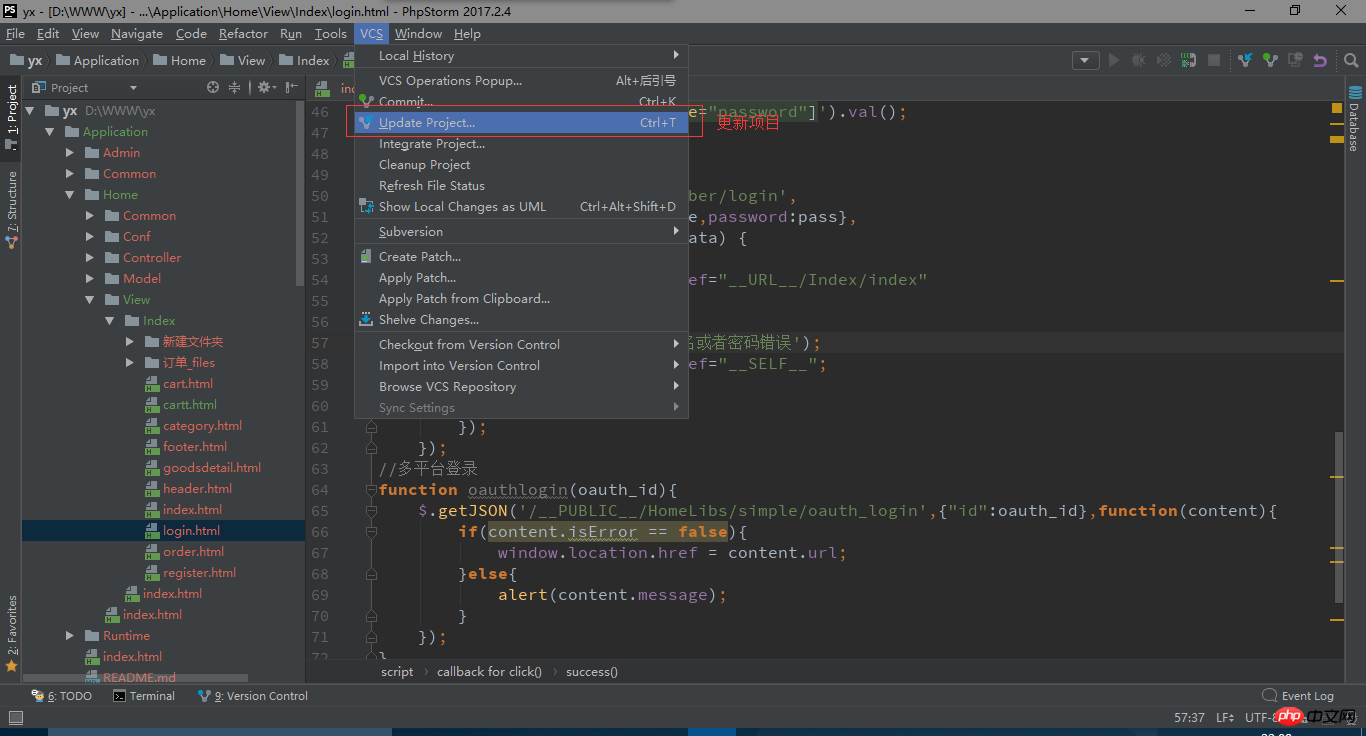
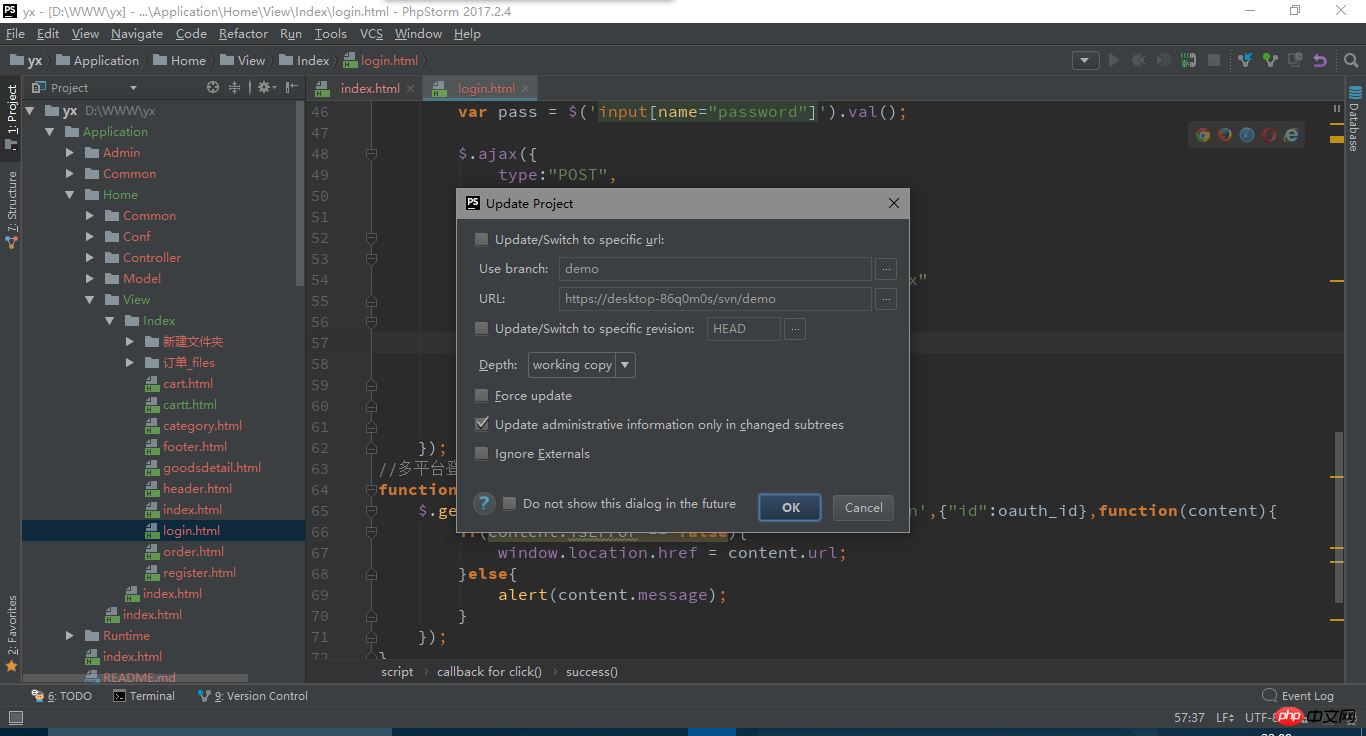
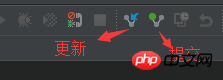
4. Update the project. "VCS"->"Update Project", then "OK". If you need to enter a user password during the process, please enter the user and password created by the SVN server
Let’s talk about other functions of SVN in PHPstorm:
##View local history
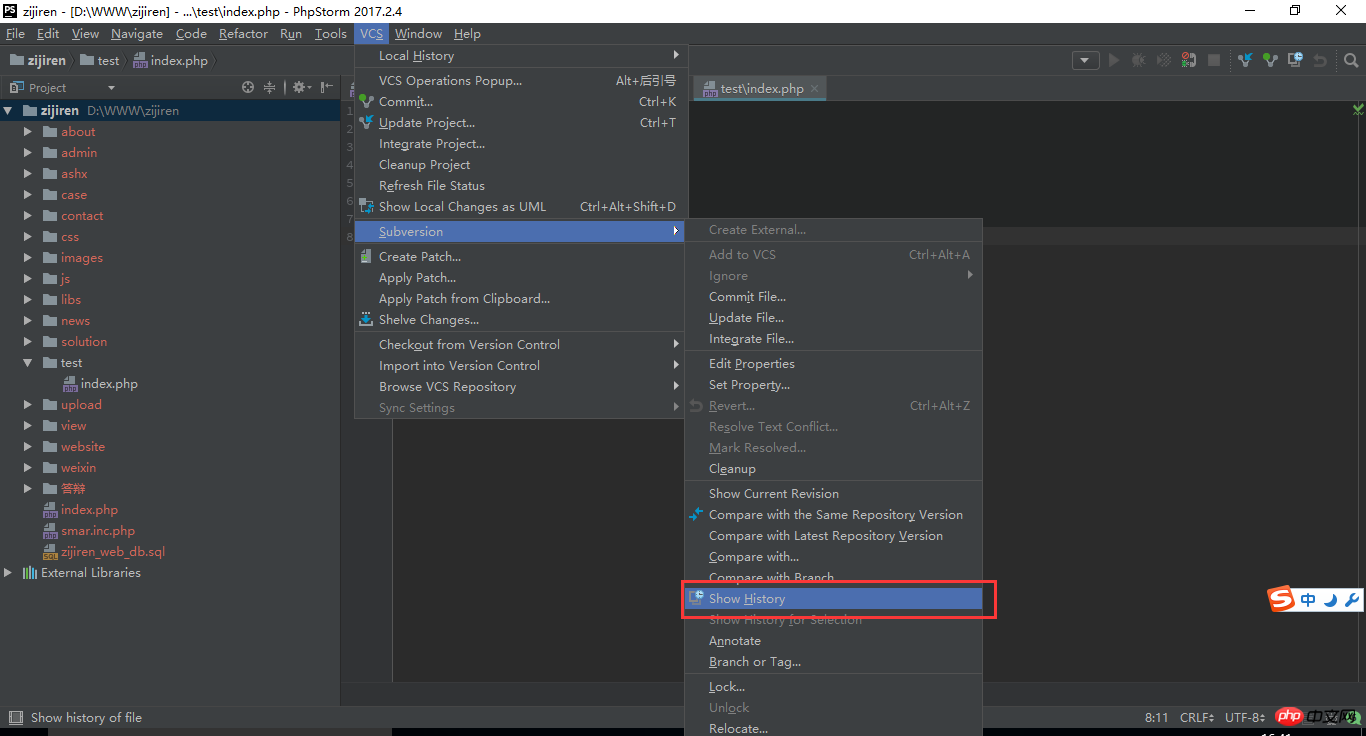
"VCS"->"Local History"->"Show History"

When you want to see what was updated in each previous update This function will be used "VCS"->"Subversion"->"Show History"


#Simulate multi-user update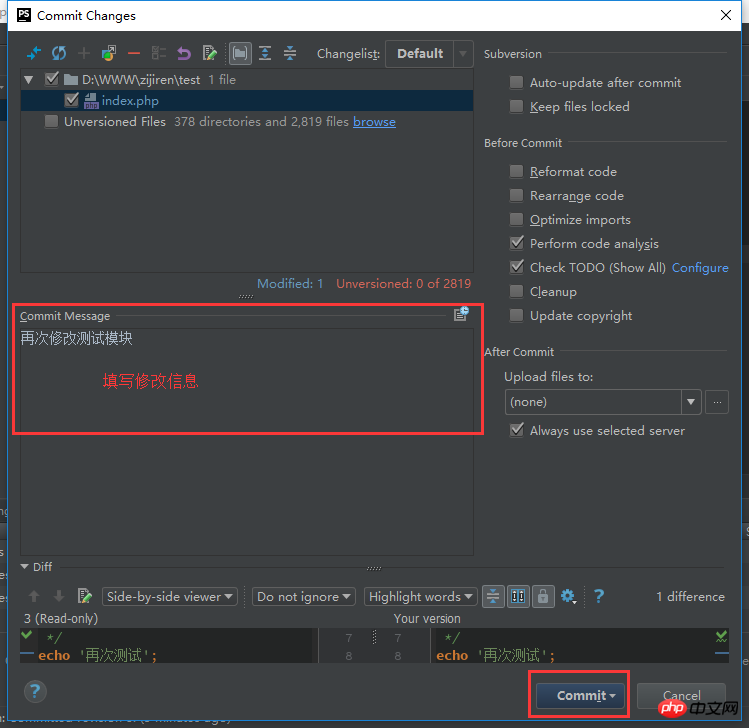
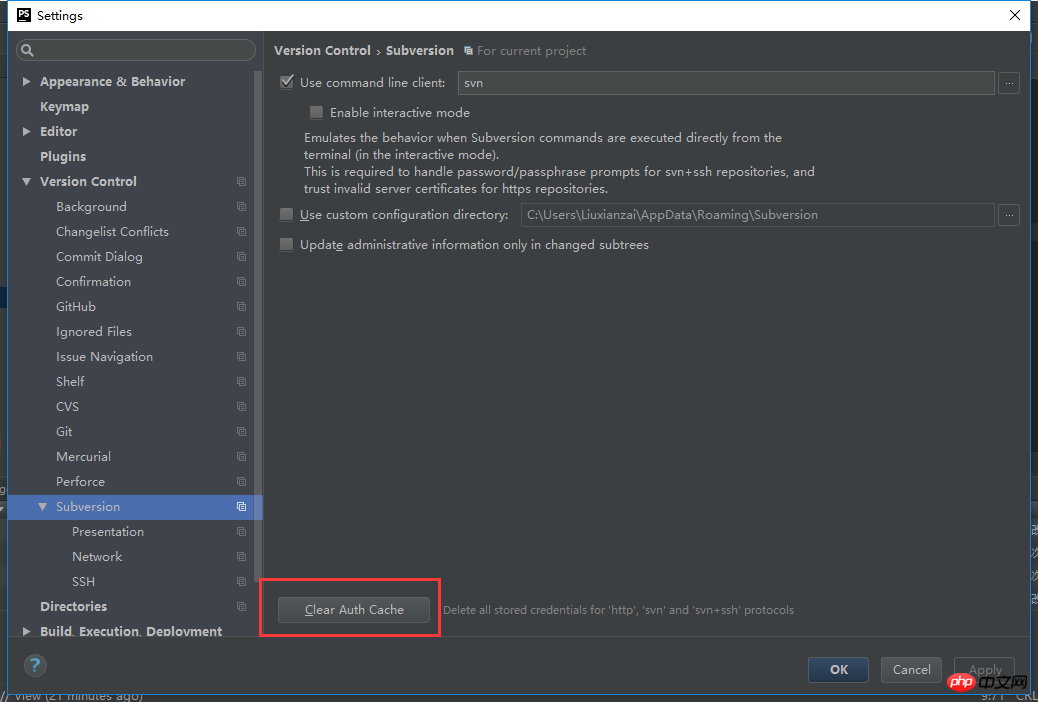
First, you need to delete the previous 'File'->'setting'->'version control'->'Subversion' Click 'Clear Auth Cache', click 'Yes'

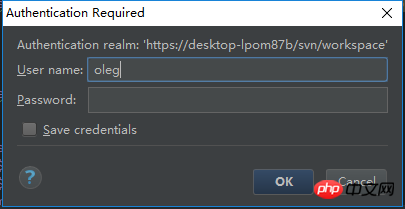
After that, just like the checkout mentioned before, you need to enter other accounts and passwords set on SVN
Click OK
## Check the files to be submitted, modify the comment information, and click 'commit' to complete.
The above is the detailed content of Sharing of graphic tutorials on configuring svn in Phpstorm. For more information, please follow other related articles on the PHP Chinese website!