Home >Backend Development >PHP Tutorial >Laravel installation steps using Composer under Windows
Laravel installation steps using Composer under Windows
- 黄舟Original
- 2017-09-20 09:36:342598browse
First, install Composer
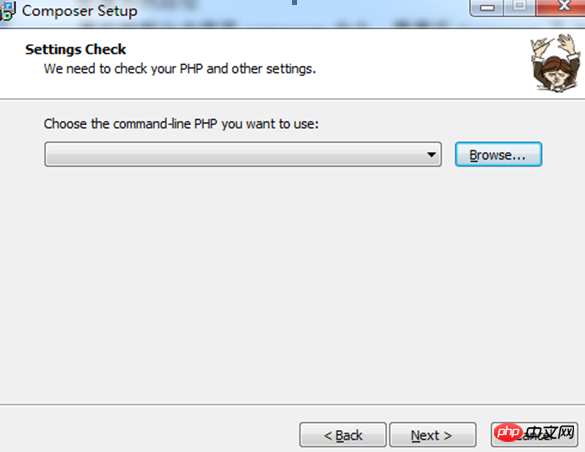
Download the latest version of Composer under Windows: Composer-Setup.exe. After the installation is completed, if the installation/update of the Composer installation package is slow, you can configure the use of domestic mirrors to install and upgrade package dependencies. If there is a prompt box to select the path for PHP installation during installation, select the PHP version corresponding to your laravel version.

Second, configure the system path
To use the composer command in the console, you need to add the Composer and PHP executable files (.exe /.bat) is configured into the system environment variable Path. The php.exe corresponding to PHP is found in the phpStudy installation directory. Here is php5.3: D:\phpStudy\php\php-5.3.29-nts/php.exe. The Composer installation file environment is now configured. There is no need to configure php and composer separately.
Use Composer to install Laravel
After the above preparations are completed, you can officially start installing the new Laravel application. First we install Laravel directly through Composer.
cd /Your installation directory, in this directory, execute the following Composer command:
Disable the php extension xdebug first, so that no error will be reported.
Third , Installation
Laravel 4.0 installation command: composer create-project laravel/laravel --prefer-dist.
If it is stuck, change to the Chinese composer image:
Method 1: Modify the global configuration file of composer. It is recommended to use
composer config -g repo.packagist composer https://packagist.phpcomposer. com
Method 2: Modify the composer.json configuration file of the current project:
composer config repo.packagist composer https://packagist.phpcomposer.com
Enter the root directory of your project (that is, composer. json file), execute the following command:
The above command will automatically add the mirror configuration information at the end of the composer.json file in the current project (you can also add it manually):
"repositories": {
      "packagist": {
          "type": "composer",
          "url": "https://packagist.phpcomposer.com"
      }
  }
Take the composer.json configuration file of the laravel project as an example. After executing the above command, it will look as follows (note the last few lines):
{
  "name": "laravel/laravel",
  "description": "The Laravel Framework.",
  "keywords": ["framework", "laravel"],
  "license": "MIT",
  "type": "project",
  "require": {
  "php": ">=5.5.9",
  "laravel/framework": "5.2.*"  },
  "config": {
  "preferred-install": "dist"  },
  "repositories": {
  "packagist": {
  "type": "composer",
  "url": "https://packagist.phpcomposer.com"  }
  }
}Fourth, Error handling:
Sometimes composer will report an error when install/update:
The solution is to set a local or global composer configuration:
composer config secure-http false
Global settings:
##
composer config -g secure-http falsemeaning is to disable the HTTPS request by default, then you can install the specified version
composer create-project laravel/laravel=5.0.* --prefer-dist
or #
composer create-project laravel/laravel=5.0.* demo --prefer-dist
update composer
# #
composer self-update
The above is the detailed content of Laravel installation steps using Composer under Windows. For more information, please follow other related articles on the PHP Chinese website!

