Home >Backend Development >PHP Tutorial >Example of generating QR code with Thinkphp3.2 and phpqrcode
Example of generating QR code with Thinkphp3.2 and phpqrcode
- 黄舟Original
- 2017-09-19 09:11:022035browse
First, download phpqrcode and extract it to the project ThinkPHP\Library\Vendor directory.
Index_index.html (the template can be configured by yourself)
    尺寸大小:

    边距大小:

            1px
            2px
            3px
            5px

    容错级别:

        Low (7%)
        Medium (15%)
        Quartile (25%)
        High (30%)

    二维码内容:

    二维码logo:
Controller: IndexController.class.php
<?php
namespace Home\Controller;use Think\Controller;class IndexController extends Controller {
public function index(){
$config = array(
'maxSize' => 3145728,
'rootPath' => './upload/',
'savePath' => '',
'saveName' => array('uniqid',''),
'exts' => array('jpg', 'gif', 'png', 'jpeg'),
'autoSub' => true,
'subName' => array('date','Ymd'),
); $upload = new \Think\Upload($config);// 实例化上传类
// 上传单个文件
$info = $upload->uploadOne($_FILES['test']);
if(!$info) {// 上传错误提示错误信息
$qrcode_path_new = './Public/Home/images/code'.'_'.date("Ymdhis").'.png';
$content = $_POST['content'];
$matrixPointSize = $_POST['matrixPointSize'];
$matrixMarginSize = $_POST['matrixMarginSize'];
$errorCorrectionLevel = $_POST['errorCorrectionLevel'];
makecode_no_pic($content,$qrcode_path_new,$matrixPointSize,$matrixMarginSize,$errorCorrectionLevel);
$this->assign('img',$qrcode_path_new);
}else{
$qrcode_path = "./upload/".$info['savepath'].$info['savename'];
$content = $_POST['content'];
$matrixPointSize = $_POST['matrixPointSize'];
$matrixMarginSize = $_POST['matrixMarginSize'];
$errorCorrectionLevel = $_POST['errorCorrectionLevel'];
$url = "./upload/qrcode/".date("YmdHis").".png";
makecode($qrcode_path,$content,$matrixPointSize,$matrixMarginSize,$errorCorrectionLevel,$url);
$this->assign('img',$url);
}
$this->display();
}
}Then create a new function.php under the project Application/Home/Common
<?php
function makecode($qrcode_path,$content,$matrixPointSize,$matrixMarginSize,$errorCorrectionLevel,$url){
/** 参数详情:
* $qrcode_path:logo地址
* $content:需要生成二维码的内容
* $matrixPointSize:二维码尺寸大小
* $matrixMarginSize:生成二维码的边距
* $errorCorrectionLevel:容错级别
* $url:生成的带logo的二维码地址
* */
ob_clean ();
Vendor('phpqrcode.phpqrcode');
$object = new \QRcode();
$qrcode_path_new = './Public/Home/images/code'.'_'.date("Ymdhis").'.png';//定义生成二维码的路径及名称
$object::png($content,$qrcode_path_new, $errorCorrectionLevel, $matrixPointSize, $matrixMarginSize);
$QR = imagecreatefromstring(file_get_contents($qrcode_path_new));//imagecreatefromstring:创建一个图像资源从字符串中的图像流
$logo = imagecreatefromstring(file_get_contents($qrcode_path));
$QR_width = imagesx($QR);// 获取图像宽度函数
$QR_height = imagesy($QR);//获取图像高度函数
$logo_width = imagesx($logo);// 获取图像宽度函数
$logo_height = imagesy($logo);//获取图像高度函数
$logo_qr_width = $QR_width / 4;//logo的宽度
$scale = $logo_width / $logo_qr_width;//计算比例
$logo_qr_height = $logo_height / $scale;//计算logo高度
$from_width = ($QR_width - $logo_qr_width) / 2;//规定logo的坐标位置
imagecopyresampled($QR, $logo, $from_width, $from_width, 0, 0, $logo_qr_width, $logo_qr_height, $logo_width, $logo_height);
/**
imagecopyresampled ( resource $dst_image , resource $src_image , int $dst_x , int $dst_y , int $src_x , int $src_y , int $dst_w , int $dst_h , int $src_w , int $src_h )
* 参数详情:
* $dst_image:目标图象连接资源。
* $src_image:源图象连接资源。
* $dst_x:目标 X 坐标点。
* $dst_y:目标 Y 坐标点。
* $src_x:源的 X 坐标点。
* $src_y:源的 Y 坐标点。
* $dst_w:目标宽度。
* $dst_h:目标高度。
* $src_w:源图象的宽度。
* $src_h:源图象的高度。
* */
Header("Content-type: image/png"); //$url:定义生成带logo的二维码的地址及名称
imagepng($QR,$url);
} function makecode_no_pic($content,$qrcode_path_new,$matrixPointSize,$matrixMarginSize,$errorCorrectionLevel){
ob_clean ();
Vendor('phpqrcode.phpqrcode');
$object = new \QRcode();
$object::png($content,$qrcode_path_new, $errorCorrectionLevel, $matrixPointSize, $matrixMarginSize);
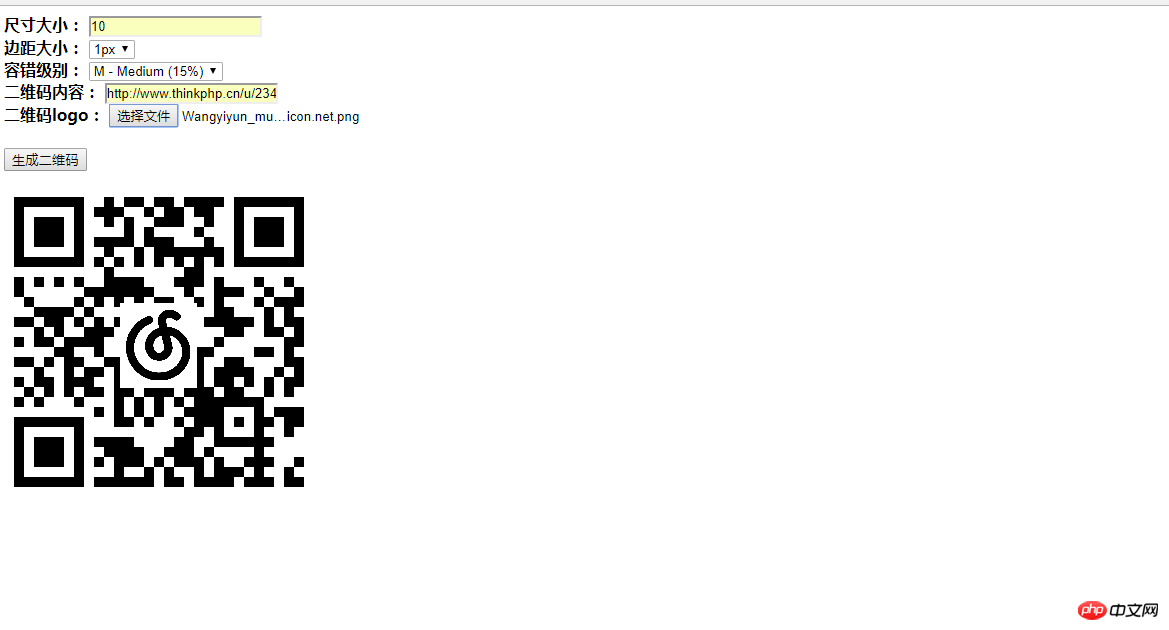
}When there is no picture uploaded, the QR code generated is just a simple QR code. Only when a logo is uploaded, the QR code with the logo will be generated.
The picture below is the QR code generated when there is no logo:

The picture below is The QR code generated when a picture is uploaded:

The above is the detailed content of Example of generating QR code with Thinkphp3.2 and phpqrcode. For more information, please follow other related articles on the PHP Chinese website!

