Home >Java >javaTutorial >Detailed graphic explanation of how to convert Java files into UML class diagrams using MyEclipse
Detailed graphic explanation of how to convert Java files into UML class diagrams using MyEclipse
- 黄舟Original
- 2017-09-16 10:56:163188browse
Use MyEclipse to convert java files into UML class diagrams
When learning design patterns or interacting with others about the ideas of design patterns, the production of UML class diagrams is essential. Usually, we draw UML class diagrams directly. For students, the common tool is Microsoft Visio. This tool must be often used by everyone to draw various diagrams, such as flow charts, network diagrams, data flow diagrams, and of course UML class diagrams. Diagram is very convenient to use, but the weak point of Visio is that it does not support JAVA's UML class diagram. It is probably developed by Microsoft itself, so it supports C and C++ under its own VS. Leaving aside this for now, how do JAVA programmers draw UML class diagrams? You can create a new UML project directly under eclipse, and then draw it according to the UML class diagram drawing method, but this is not the focus of this article. Many beginners or people who have never drawn UML class diagrams at first, after writing a project, want to get an overview of what the UML class diagram of the JAVA program they designed looks like. At this time, it is too troublesome to draw UML class diagrams step by step. Well, I guess no one is willing to do this, so is there a way to directly convert the design into a UML class diagram for browsing? The answer is of course: yes. There are many methods, and this article only introduces the one I often use.
Preparation tools: MyEclipse or Eclipse and UML plug-in (Green), the plug-in link is: click to open the link
This article uses MyEclipse2015, There is a cracked version of this, which is very easy to use. Many plug-ins are available, so I have been using this one. Since it was downloaded on campus, there is no link. You can find it online by yourself.
The first step is to prepare a designed project, which must have at least two or three classes and some interfaces, as well as their direct inheritance and implementation relationships. After this conversion It makes sense. My project is shown in Figure 1.

Figure 1 Step 1
The second step is to click New--Other and follow the picture For option 2, create a new UML model. There are two options here, both are fine. I prefer to use 2.

Figure 2 Step 2
In the third step, after clicking New UML2 Model, a pop-up will appear The following options are shown in Figure 3. Here you need to select the UML folder.
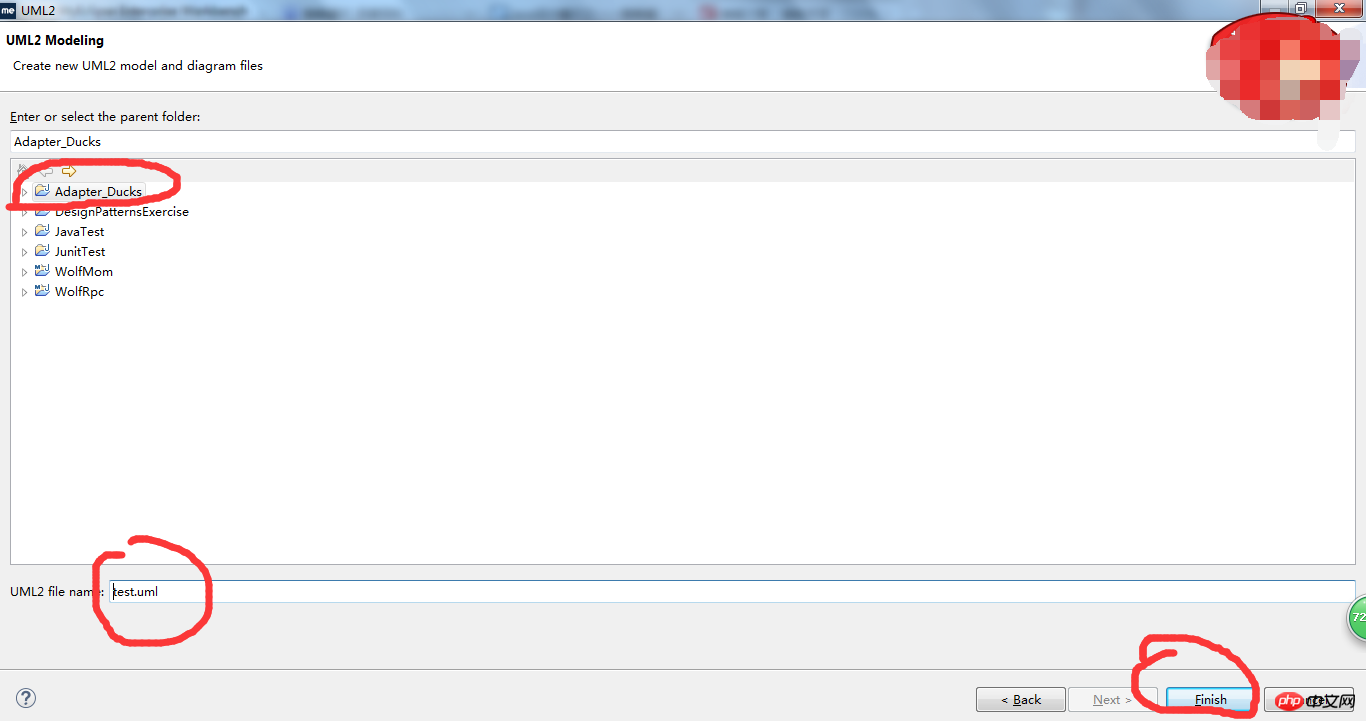
Figure 3 Step 3
The fourth step is to build the UML model as shown in Figure 4 Then you can draw the UML class diagram directly in it, but these steps are redundant for directly converting the JAVA file into a UML class diagram.
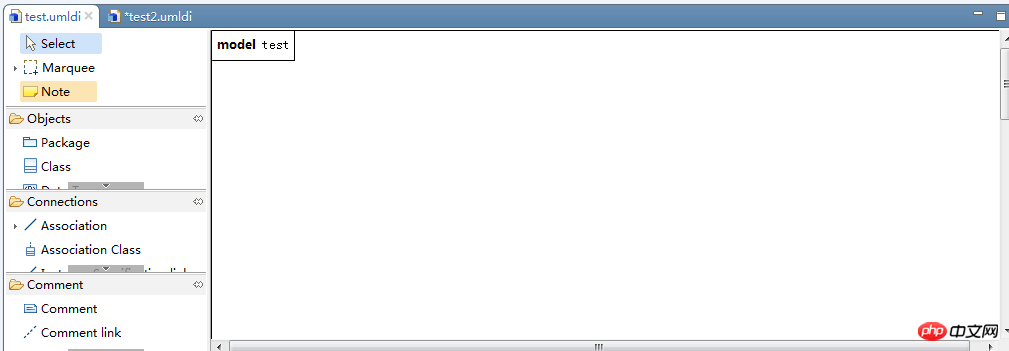
Figure 4 Step 4
The fifth step is actually the step of directly generating the UML class diagram step. Taking this project as an example, directly right-click the package "headfirst.adapter.ducks" in the project, and then a series of options will pop up. Then click MyEclipse---Generate UML2 Class Diagram..., and the interface shown in Figure 5 will appear. Enter the name of the UML class diagram and click Finish. The generated UML class diagram is shown in Figure 6.
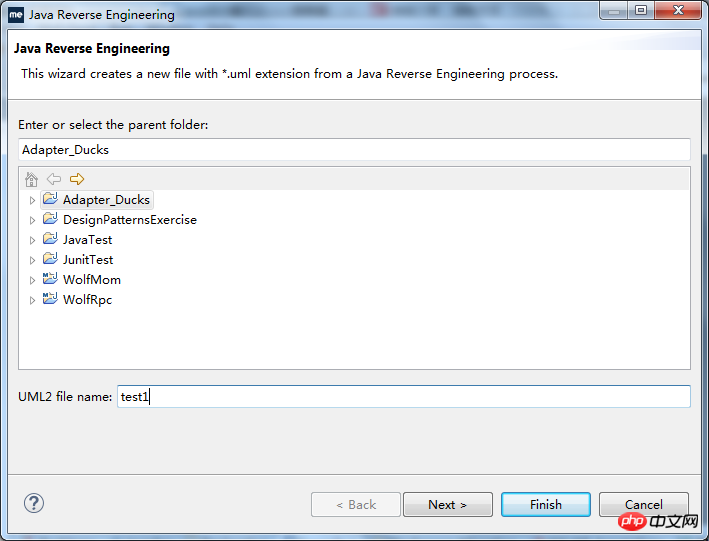
Figure 5 Step 5
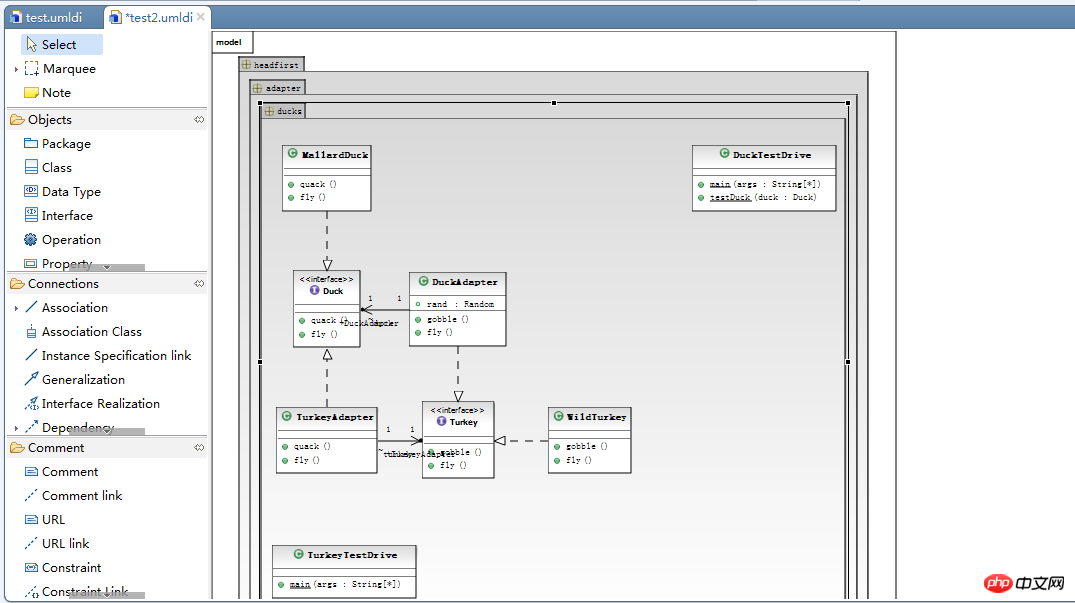
Figure 6 Generated UML class diagram
In short, the first four steps mainly talk about how to create a new UML model and then use it to draw pictures. The fifth step introduces how to directly use it in a project. Method to generate UML class diagram from JAVA files in the package. The method is not limited to this one, everyone is welcome to add.
A brief look at the directory structure and UML use case diagram:
Directory structure preview:

Use case diagram preview:
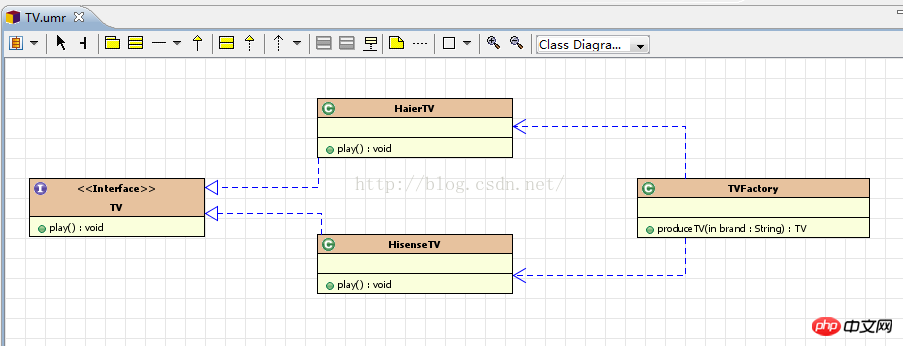
Detailed steps (not many, five steps in total):
1. New JAVA Project
Open MyEclipse->New->Java Project->Enter the project name (TV)->Finish (->If there is a pop-up window at this time Select yes)


First expand the project root directory, right-click src->New->Other-> find and expand MyEclipse-> in the list, then find UML in the expanded item and expand->UML1 Model-> Next->Choose a name (TV)->Finish->yes (if yes, yes, if not, forget it)


3. Draw UML
Draw the UML use case based on the UML preview above (This step is not difficult, just follow the steps below and draw the picture. Double-click the corresponding position in the class diagram or interface diagram to enter the code in the picture)


 4. Generate JAVA classes through UML
Select UML->Generate Java...->Select All->Finish-> in the menu bar ;yes (if the use case diagram is not saved, a save prompt will pop up, just select yes)


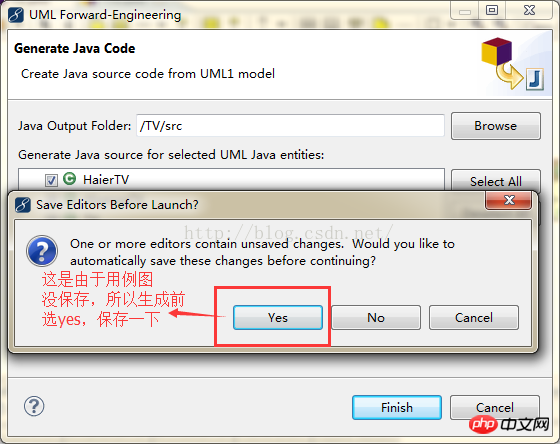
##5. Complete the code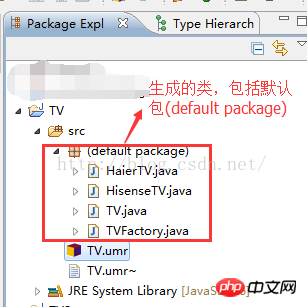
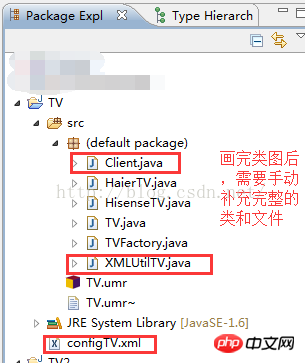
The above is the detailed content of Detailed graphic explanation of how to convert Java files into UML class diagrams using MyEclipse. For more information, please follow other related articles on the PHP Chinese website!

