
Home >Backend Development >PHP Tutorial >An explanation of the process of developing Laravel using PHPStorm editor
An explanation of the process of developing Laravel using PHPStorm editor
- 巴扎黑Original
- 2017-08-17 08:55:463418browse
Abstract: This article mainly talks about how to use PHPStorm's Laravel plug-in and Laravel IDE Helper to develop Laravel programs in the PHPStorm editor, combined with a little personal experience. It shows that using PHPStorm editor to develop programs is very convenient. The content is mainly based on PHPStorm official document Lara...
This article mainly involves the following skills:
Composer Initialization
Laravel IDE Helper Installation
Laravel Plugin Installation
PHPStorm’s support for the Laravel framework
PHPStorm’s support for the Blade template engine
Using PHPStorm to debug Laravel programs
Use the unit testing function of PHPStorm
Use the database function of PHPStorm
1. Some preparations
(1), initializing composer
PHPStorm provides composer configuration function, you can create a new empty project in PHPStorm, and then create a new empty project in the root directory of the empty project Right-click and select Composer|Init Composer..., then click Download from getcomposer.org. PHPStorm will automatically download the composer.phar file and save it in the project root The composer.json file is generated in the directory, and the speed is also very fast: 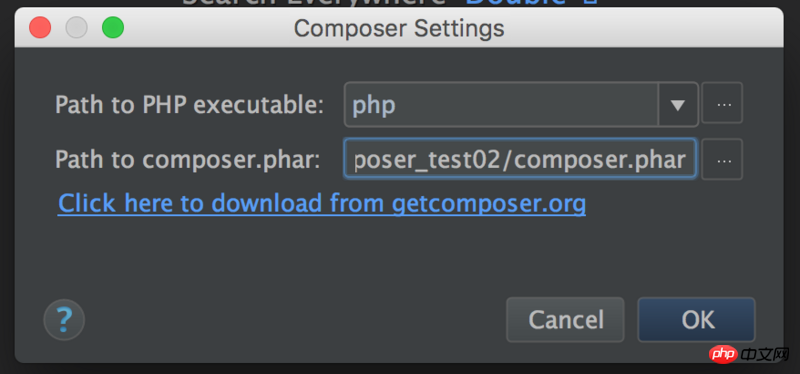
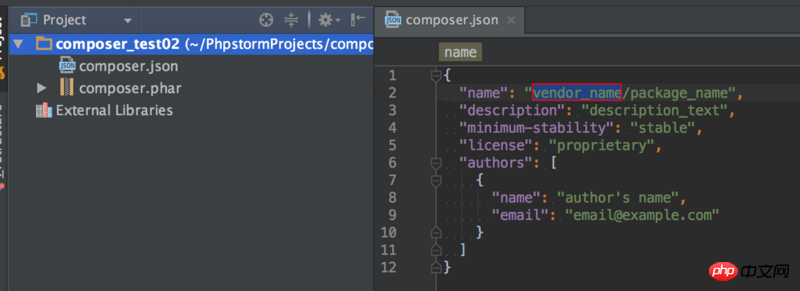
For the array key field value in the composer.json file, you can find relevant explanations on the Composer official website, including important require and require-dev field explanations . (2), Install Laravel IDE Helper
Installation is also very simple, you still need to right-click on the project root directory to find Composer and select Add Dependancy..., search for laravel-ide Just choose to install -helper. If "minimum-stability":"stable" is in the composer.json file, then you must install a stable version. I choose the v2.1.2 stable version here. After installation, a vendor folder will be automatically generated in the root directory, which stores various dependency packages. Of course, you can also add the require field value and the corresponding laravel-ide-helper value directly to composer.json, and then php composer.phar composer.json update. For details, you can search in packagist.org laravel-ide-helper finds the corresponding installation method. 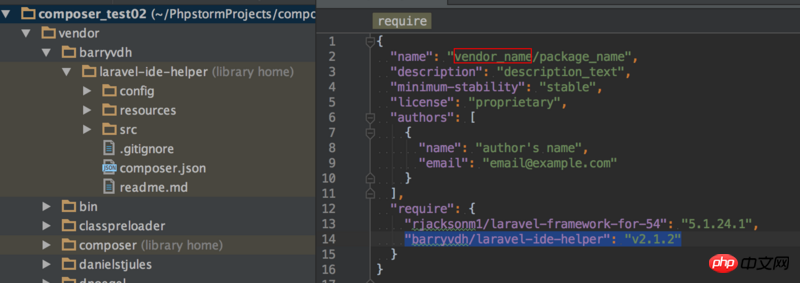
In fact, Laravel IDE Helper is a third-party installation package. After installation, there will be some code prompts and other benefits. You can also choose not to install it. Of course, the installation is relatively simple. After installation, you need to register Service Provider in config/app.php:
    return array(        // ...
        'providers' => array(            // ...
            'Barryvdh\LaravelIdeHelper\IdeHelperServiceProvider', // Laravel IDE helper
        ),        // ...
    );
There is a video about Laravel Ide Helper on the Laracasts official website, you can watch it ,PHPStorm's Laravel Facades Issue
(3), Install Laravel Plugin
Select Preference or Command + ,, select Browse repositories...# below ##Browse the plug-in repository, choose to install Laravel Plugin, and restart PHPStorm. Finally, select enable plugin for this project in Preference|Other Settings|Laravel Plugin and then restart PHPStorm. OK: 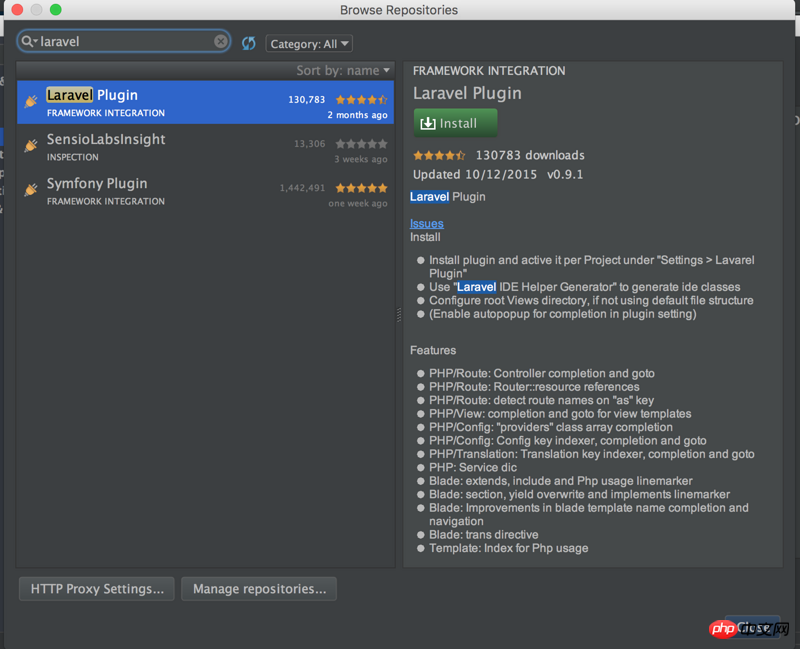 So, what are the benefits of installing Laravel Plugin: mainly code completion. Code completion for
Routes/Controllers/Views/Configuration/Services/Translations is more convenient. You don’t have to install it if you are too lazy to install it. Give an example of view code completion: 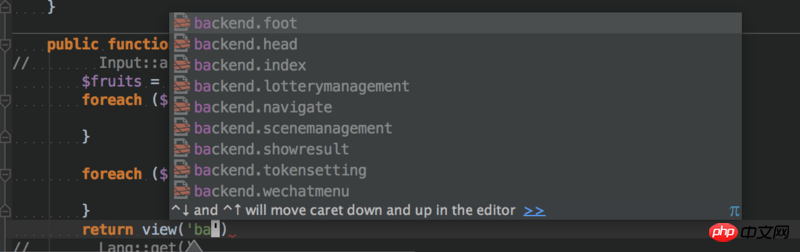 The efficiency will be much higher, and the installation is also very simple, so there is no harm in installing one.
2. PHPStorm supports Blade templates
PHPStorm provides syntax highlighting for Blade templates, and also includes completion and browsing of some instructions, such as @include/@section/@extendsWait, it is very convenient when writing code: 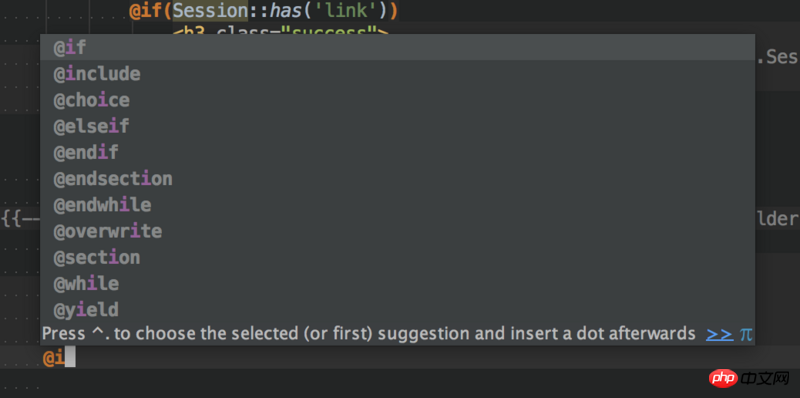

Generally speaking, PHPStorm still supports the code prompts and completion of Blade templates relatively well. , very easy to use.
Here, I also recommend a Laravel Live Templates for PhpStorm, installation address: https://github.com/koomai/php..., this small dependency package is also easier to use, It is recommended to install it in PHPStorm. You can check out the installation method and benefits. The installation is very simple.
3、使用Xdebug来调试Laravel程序
Xdebug是调试PHP程序的神器,尤其在调试Laravel代码时会非常有用。在PHPStorm中配置Xdebug也很简单,首先看下PHP版本中是否安装了Xdebug扩展:
php -m[PHP Modules]apcu
bcmath
bz2
calendar
Core
ctype
curl
date
dom
exif
fileinfofilterftp
gd
gettext
gmp
hash
http
iconv
imap
intl
json
ldap
libxml
mbstring
mcrypt
mysqli
mysqlnd
openssl
pcntl
pcre
PDO
pdo_mysql
pdo_pgsql
pdo_sqlite
pgsql
Phar
posix
propro
raphf
readline
Reflection
session
shmop
SimpleXML
soap
sockets
SPL
sqlite3
standard
sysvmsg
sysvsem
sysvshm
tidy
tokenizer
wddx
xdebug
xml
xmlreader
xmlrpc
xmlwriter
xsl
Zend OPcache
zip
zlib[Zend Modules]Xdebug
Zend OPcache
如果没有装Xdebug扩展的话需要装一下,装完后修改下php.ini把xdebug.so前的路径';'去掉,并重启下PHP就行。如果你是本地开发,是MAC系统的话,可以装集成环境MAMP,该PHP中都有xdebug.so,不过需要使能下php.ini中xdebug扩展。
安装好后xdebug后,需要配置下PHP: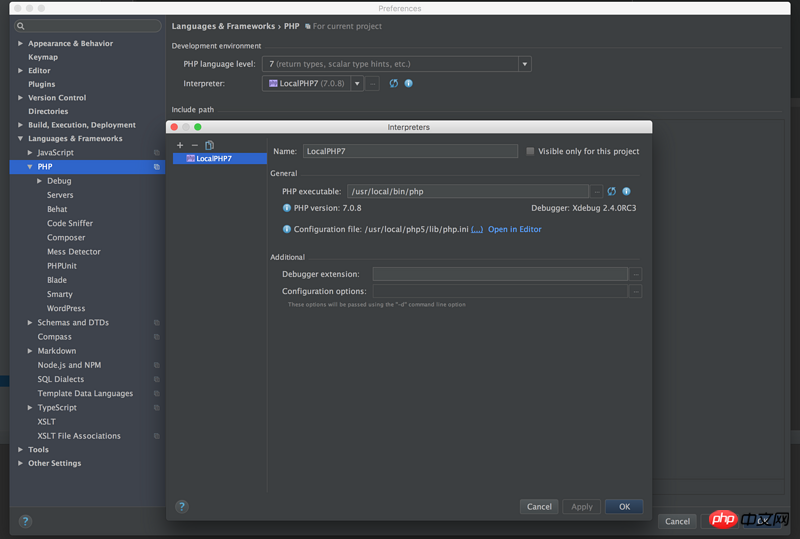
Enable Debug Listening in PHPStorm: Click Run->Start listening for PHP Debug Connections, then click the lower triangle in the upper right corner to set:
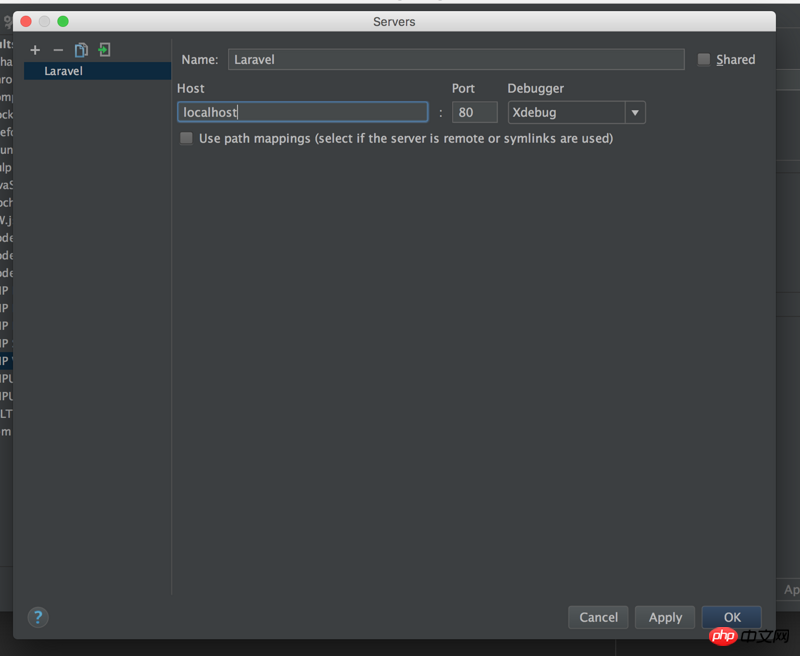
You can choose Create a new PHP Web Application or PHP Script. If you choose PHP Web Application, you need to configure the Server. By default, local development and routing are localhost. The configuration is as follows:
Here is PHP Script For example, as follows: 
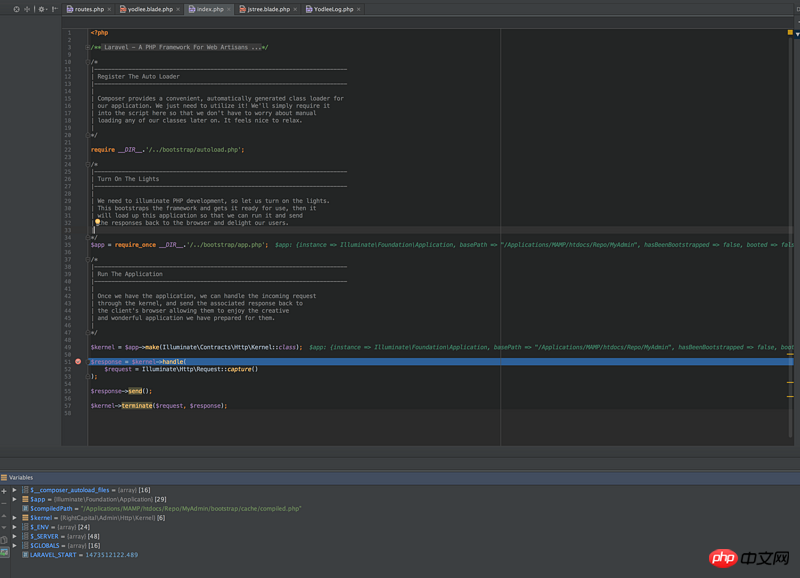
Then click the crawler icon in the upper right corner to perform debugging, and the values of each variable are displayed in the debugging console:
We probably talked about configuring Xdebug in PHPStorm, no matter what In this way, you must configure Xdebug, which is very useful when reading code, especially Laravel source code.
4、使用PHPUnit单元测试Laravel程序
首先需要在本地安装下PHPUnit:
 wget https://phar.phpunit.de/phpunit.phar
 chmod +x phpunit.phar
 sudo mv phpunit.phar /usr/local/bin/phpunit
 phpunit --version
然后在PHPStorm中配置下PHPUnit:
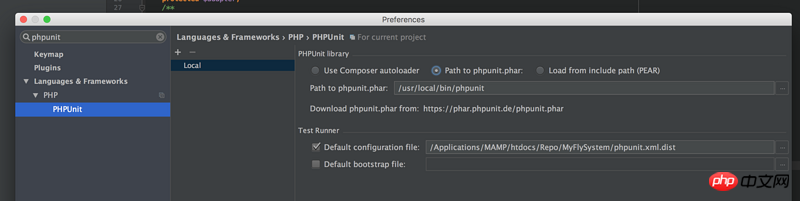
Configuration file指向本地的phpunit.xml.dist文件,该文件是用来配置phpunit的测试套件的,可以看官网中文版的:[用 XML 配置来编排测试套件][16],比如本人这里的套件配置:
<?xml version="1.0" encoding="UTF-8"?><phpunit backupGlobals="false"
         backupStaticAttributes="false"
         bootstrap="vendor/autoload.php"
         colors="true"
         convertErrorsToExceptions="true"
         convertNoticesToExceptions="true"
         convertWarningsToExceptions="true"
         processIsolation="false"
         stopOnFailure="false"
         syntaxCheck="true"
         verbose="true">
    <testsuites>
        <testsuite name="flysystem/tests">
            <directory suffix=".php">./tests/</directory>
        </testsuite>
    </testsuites>
    <filter>
        <whitelist>
            <directory suffix=".php">./src/</directory>
        </whitelist>
    </filter>
    <listeners>
        <listener class="Mockery\Adapter\Phpunit\TestListener" file="./vendor/mockery/mockery/library/Mockery/Adapter/Phpunit/TestListener.php"></listener>
    </listeners>
    <logging>
        <!--<log type="coverage-text" target="php://stdout" showUncoveredFiles="true"/>-->
        <!--<log type="coverage-html" target="coverage" showUncoveredFiles="true"/>-->
        <!--<log type="coverage-clover" target="coverage.xml" showUncoveredFiles="true"/>-->
    </logging></phpunit>
在写好PHPUnit测试后,可以在终端执行phpunit命令就行,或者单独执行某个测试类,可以在测试类里右键选择Run xxxTest.php就行,如: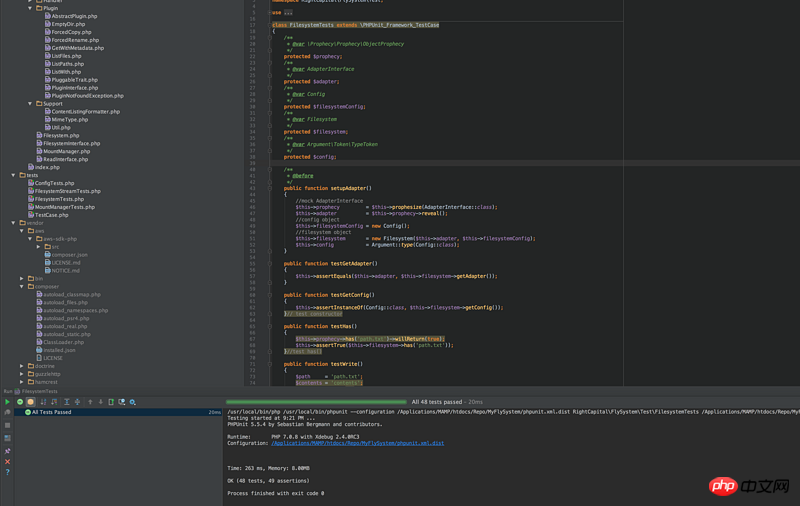
写测试还是很有必要的,而且是必须的。PHPUnit写测试,以后还会详聊。
5. Use PHPStorm’s Database to link to the Laravel program database
PHPStorm provides a database plug-in, which is also relatively powerful. I think everyone who has used PHPStorm should know how to use it. Let’s talk about the next one that is very useful. a function of. I often encounter this situation: the database is installed in the database server db.test.com, but you cannot log in locally, but you can connect to the database server on the development server host.company.com. How to use database to connect? What about the database server?
Can be connected through SSH tunnel, such as: 
Here the Auth type can choose Password or Key Pair. If you log in to the development server through a password, choose Password; If you log in through a key, select Key Pair. Then configure the database server in the general tab and it will be OK.
PHPStorm also provides the Remote Host plug-in to connect to the remote server. Click Tools->Deployment->Browse Remote Host to see that this plug-in is as convenient as Database to view server things and can Upload local modifications to the server instead of logging in to the remote server in Terminal and view the modifications on Terminal.
The above is the detailed content of An explanation of the process of developing Laravel using PHPStorm editor. For more information, please follow other related articles on the PHP Chinese website!