 Web Front-end
 JS Tutorial
 Explanation on using plug-ins in bootstraptable to implement table query, paging and sorting operations
This article mainly introduces the use of bootstraptable plug-in to implement query, paging, and sorting operations of table records. Friends in need can refer to Bootstrap tutorial.
In business system development, querying, paging, sorting and other processing of table records are very common. In Web development, many powerful plug-ins can be used to meet the requirements and can be extremely efficient. Greatly improve development efficiency, this essay introduces bootstrap-table, which is a very famous open source table plug-in and is widely used in many projects. The Bootstrap-table plug-in provides a very rich set of attributes, which can implement query, paging, sorting, check boxes, setting display columns, Card view, master-slave table display, merge columns, internationalization processing and other processing functions, and the plug-in At the same time, it also provides some good extension functions, such as moving rows, moving column positions and other special functions. The plug-in can be set using the HTML5-based data-* attribute identifier, or it can be set using Javascript, which is very convenient. This essay introduces the application of bootstrap-table plug-in in my actual project, and summarizes the experience in dealing with problems encountered in related use.
1. Introduction to Bootstrap-table resources and usage
There are two ways for Bootstrap-Table to display data into tables, one is client mode, One is server mode.
The so-called client mode refers to loading the data to be displayed in the table in the server at one time, and then converting it into JSON format and transmitting it to the interface to be displayed. The client mode is relatively simple. It is Load the data at once and put it on the interface, and then automatically generate paging according to the number of records per page you set. When the second page is clicked, the data will be automatically loaded and no more requests will be sent to the server. At the same time, users can use its own search function to achieve full data search. This method can be used when the amount of data is small.
The so-called server mode refers to sending data to the server for query based on the set number of records per page and the current page number to be displayed, and then displaying it in the table. This method can dynamically load data according to user needs, saving server resources, but it cannot use its own full data search function.
Bootstrap-table is a plug-in developed based on Boosttrap, so when using it, you need to introduce Bootstrap scripts and styles.
If the relevant files are not introduced in our project, these style and script files need to be introduced, as shown below.

<link rel="stylesheet" href="bootstrap.min.css" rel="external nofollow" >
<script src="jquery.min.js"></script>
<script src="bootstrap.min.js"></script>
However, the above content must be available when we develop the project, so we still focus on the import files required to use this plug-in.
CSS file introduction
<link rel="stylesheet" href="bootstrap-table.css" rel="external nofollow" >
Script file introduction
<script src="bootstrap-table.js"></script>
<--汉化文件,放在 bootstrap-table.js 后面-->
<script src="bootstrap-table-zh-CN.js"></script>
Generally speaking, if we develop a system based on MVC, the CSS and JS codes are placed in BundleConfig. Initialized in cs, as shown below
The use of bootstrap-table in the page can be divided into two types. One is purely written in HTML5, and various attribute settings are specified through data-*. One is the HTML+JS method to achieve flexible settings.
If we initialize the HTML code using the HTML5 identifier, it is the following code.
<table data-toggle="table" data-url="data1.json">
 <thead>
  <tr>
   <th data-field="id">Item ID</th>
   <th data-field="name">Item Name</th>
   <th data-field="price">Item Price</th>
  </tr>
 </thead>
</table>
If we use JS code to initialize the table plug-in, then we only need to declare a table object in HTML, as shown in the following code.
<table id="table"></table>
Then the simple JS code initialization is as follows
$('#table').bootstrapTable({
 url: 'data1.json',
 columns: [{
  field: 'id',
  title: 'Item ID'
 }, {
  field: 'name',
  title: 'Item Name'
 }, {
  field: 'price',
  title: 'Item Price'
 }, ]
});
However, in fact, the JS configuration function we use bootstrap-table is definitely much more complicated than this. The following interface effect is the data display of the actual table .

2. Detailed use of bootstrap-table
1) The entire JS attribute configuration
is in the picture above , we use JS to initialize the table content. The JS code is as follows
 var $table;
  //初始化bootstrap-table的内容
  function InitMainTable () {
   //记录页面bootstrap-table全局变量$table,方便应用
   var queryUrl = '/TestUser/FindWithPager?rnd=' + Math.random()
   $table = $('#grid').bootstrapTable({
    url: queryUrl,      //请求后台的URL(*)
    method: 'GET',      //请求方式(*)
    //toolbar: '#toolbar',    //工具按钮用哪个容器
    striped: true,      //是否显示行间隔色
    cache: false,      //是否使用缓存,默认为true,所以一般情况下需要设置一下这个属性(*)
    pagination: true,     //是否显示分页(*)
    sortable: true,      //是否启用排序
    sortOrder: "asc",     //排序方式
    sidePagination: "server",   //分页方式:client客户端分页,server服务端分页(*)
    pageNumber: 1,      //初始化加载第一页,默认第一页,并记录
    pageSize: rows,      //每页的记录行数(*)
    pageList: [10, 25, 50, 100],  //可供选择的每页的行数(*)
    search: false,      //是否显示表格搜索
    strictSearch: true,
    showColumns: true,     //是否显示所有的列(选择显示的列)
    showRefresh: true,     //是否显示刷新按钮
    minimumCountColumns: 2,    //最少允许的列数
    clickToSelect: true,    //是否启用点击选中行
    //height: 500,      //行高,如果没有设置height属性,表格自动根据记录条数觉得表格高度
    uniqueId: "ID",      //每一行的唯一标识,一般为主键列
    showToggle: true,     //是否显示详细视图和列表视图的切换按钮
    cardView: false,     //是否显示详细视图
    detailView: false,     //是否显示父子表
    //得到查询的参数
    queryParams : function (params) {
     //这里的键的名字和控制器的变量名必须一直,这边改动,控制器也需要改成一样的
     var temp = {
      rows: params.limit,       //页面大小
      page: (params.offset / params.limit) + 1, //页码
      sort: params.sort,  //排序列名
      sortOrder: params.order //排位命令(desc,asc)
     };
     return temp;
    },
    columns: [{
     checkbox: true,
     visible: true     //是否显示复选框
    }, {
     field: 'Name',
     title: '姓名',
     sortable: true
    }, {
     field: 'Mobile',
     title: '手机',
     sortable: true
    }, {
     field: 'Email',
     title: '邮箱',
     sortable: true,
     formatter: emailFormatter
    }, {
     field: 'Homepage',
     title: '主页',
     formatter: linkFormatter
    }, {
     field: 'Hobby',
     title: '兴趣爱好'
    }, {
     field: 'Gender',
     title: '性别',
     sortable: true
    }, {
     field: 'Age',
     title: '年龄'
    }, {
     field: 'BirthDate',
     title: '出生日期',
     formatter: dateFormatter
    }, {
     field: 'Height',
     title: '身高'
    }, {
     field: 'Note',
     title: '备注'
    }, {
     field:'ID',
     title: '操作',
     width: 120,
     align: 'center',
     valign: 'middle',
     formatter: actionFormatter
    }, ],
    onLoadSuccess: function () {
    },
    onLoadError: function () {
     showTips("数据加载失败!");
    },
    onDblClickRow: function (row, $element) {
     var id = row.ID;
     EditViewById(id, 'view');
    },
   });
  };
The configuration properties of the above JS code are basically commented out, which is relatively easy to understand.
2) Query and paging
The table data paging here uses server paging. Data records are returned from the server according to the search conditions, and the sorting method is used. The queryParams here The parameters are the parameters submitted to the server.
 //得到查询的参数
    queryParams : function (params) {
     //这里的键的名字和控制器的变量名必须一直,这边改动,控制器也需要改成一样的
     var temp = {
      rows: params.limit,       //页面大小
      page: (params.offset / params.limit) + 1, //页码
      sort: params.sort,  //排序列名
      sortOrder: params.order //排位命令(desc,asc)
     };
     return temp;
    },
In addition, we see that the URL address interface for returning data is FindWithPager. Let’s take a look at how this MVC controller method handles data return.
/// <summary>
  /// 根据条件查询数据库,并返回对象集合(用于分页数据显示)
  /// </summary>
  /// <returns>指定对象的集合</returns>
  public override ActionResult FindWithPager()
  {
   //检查用户是否有权限,否则抛出MyDenyAccessException异常
   base.CheckAuthorized(AuthorizeKey.ListKey);

   string where = GetPagerCondition();
   PagerInfo pagerInfo = GetPagerInfo();
   var sort = GetSortOrder();

   List<TestUserInfo> list = null;
   if (sort != null && !string.IsNullOrEmpty(sort.SortName))
   {
    list = baseBLL.FindWithPager(where, pagerInfo, sort.SortName, sort.IsDesc);
   }
   else
   {
    list = baseBLL.FindWithPager(where, pagerInfo);
   }

   //Json格式的要求{total:22,rows:{}}
   //构造成Json的格式传递
   var result = new { total = pagerInfo.RecordCount, rows = list };
   return ToJsonContent(result);
  }
The above code processes two parts of object information, one is paging entity class information, and the other is sorting information, and then obtains records based on these conditions and returns something like
{total:22,rows:{ }}JSON data record in
format.
var result = new { total = pagerInfo.RecordCount, rows = list };
   return ToJsonContent(result);
The code to obtain the paging parameter information is as follows
 /// <summary>
  /// 根据Request参数获取分页对象数据
  /// </summary>
  /// <returns></returns>
  protected virtual PagerInfo GetPagerInfo()
  {
   int pageIndex = Request["page"] == null ? 1 : int.Parse(Request["page"]);
   int pageSize = Request["rows"] == null ? 10 : int.Parse(Request["rows"]);

   PagerInfo pagerInfo = new PagerInfo();
   pagerInfo.CurrenetPageIndex = pageIndex;
   pagerInfo.PageSize = pageSize;
   return pagerInfo;
  }
The code to obtain the sorting parameter information is as follows
 /// <summary>
  /// 获取排序的信息
  /// </summary>
  /// <returns></returns>
  protected SortInfo GetSortOrder()
  {
   var name = Request["sort"];
   var order = Request["sortOrder"];
   return new SortInfo(name, order);
  }
最后就是具体实现具体条件、具体页码、具体排序条件下的数据记录了,这部分可以根据自己的要求实现逻辑,这里只是给出一个封装好的处理调用即可。
baseBLL.FindWithPager(where, pagerInfo, sort.SortName, sort.IsDesc);
实际情况下,我们列表的展示,一般需要使用不同的条件进行数据的查询的,虽然这个Bootstrap-table控件提供了一个默认的查询按钮,不过一般是在客户端分页的情况下使用,而且略显简单,我们一般使用自己查询条件进行处理,如下界面所示。

或者如下的

那么这样对于上面的js属性就需要调整下接受查询条件参数queryParams 了
 //得到查询的参数
    queryParams : function (params) {
     //这里的键的名字和控制器的变量名必须一直,这边改动,控制器也需要改成一样的
     var temp = {
      rows: params.limit,       //页面大小
      page: (params.offset / params.limit) + 1, //页码
      sort: params.sort,  //排序列名
      sortOrder: params.order //排位命令(desc,asc)
     };
     return temp;
    },
对于自定义查询条件,我们可以用下面的常规方式增加参数,如下所示

但是查询条件的参数我们不方便一一设置,我们想通过一种较为快捷的方式来处理,那么就需要对这个处理方式进行一个特别的修改了,首先添加一个扩展函数来处理表单的条件
 //自定义函数处理queryParams的批量增加
  $.fn.serializeJsonObject = function () {
   var json = {};
   var form = this.serializeArray();
   $.each(form, function () {
    if (json[this.name]) {
     if (!json[this.name].push) {
      json[this.name] = [json[this.name]];
     }
     json[this.name].push();
    } else {
     json[this.name] = this.value || '';
    }
   });
   return json;
  }
然后我们就可以批量处理表单的查询条件了
 queryParams : function (params) {
     //这里的键的名字和控制器的变量名必须一直,这边改动,控制器也需要改成一样的
     var temp = $("#ffSearch").serializeJsonObject();
     temp["rows"] = params.limit;      //页面大小
     temp["page"] = (params.offset / params.limit) + 1; //页码
     temp["sort"] = params.sort;       //排序列名
     temp["sortOrder"] = params.order;     //排位命令(desc,asc)

     //特殊格式的条件处理
     temp["WHC_Age"] = $("#WHC_Age").val() + "~" + $("#WHC_Age2").val();
     temp["WHC_BirthDate"] = $("#WHC_BirthDate").val() + "~" + $("#WHC_BirthDate2").val();

     return temp;
    },
然后后端统一按照逻辑处理查询参数即可。
3)格式化输出函数及其他
对于上面JS的配置信息,我们再来回顾一下,例如对于数据转义函数,可以格式化输出的内容的,如下界面代码。

格式化的数据转义函数如下,主要就是根据内容进行格式化输出的JS函数,好像是需要放在一个文件内。
//连接字段格式化
function linkFormatter(value, row, index) {
return "<a href='" + value + "' title='单击打开连接' target='_blank'>" + value + "</a>";
}
//Email字段格式化
function emailFormatter(value, row, index) {
return "<a href='mailto:" + value + "' title='单击打开连接'>" + value + "</a>";
}
//性别字段格式化
function sexFormatter(value) {
if (value == "女") { color = 'Red'; }
else if (value == "男") { color = 'Green'; }
else { color = 'Yellow'; }
return '<p style="color: ' + color + '">' + value + '</p>';
}另外,我们看到行记录的最后增加了几个操作按钮,方便对当前记录的查看、编辑和删除操作,如下效果图所示。

这部分我们也是通过格式化函数进行处理的

//操作栏的格式化
function actionFormatter(value, row, index) {
var id = value;
var result = "";
result += "<a href='javascript:;' class='btn btn-xs green' onclick=\"EditViewById('" + id + "', view='view')\" title='查看'><span class='glyphicon glyphicon-search'></span></a>";
result += "<a href='javascript:;' class='btn btn-xs blue' onclick=\"EditViewById('" + id + "')\" title='编辑'><span class='glyphicon glyphicon-pencil'></span></a>";
result += "<a href='javascript:;' class='btn btn-xs red' onclick=\"DeleteByIds('" + id + "')\" title='删除'><span class='glyphicon glyphicon-remove'></span></a>";
return result;
} 
如果我们需要双击弹出编辑界面的层,我们可以处理表格的双击事件,如下代码所示。
      onDblClickRow: function (row, $element) {
          var id = row.ID;
          EditViewById(id, 'view');
        },
如果我们需要设置行的不同的样式展示,可以通过增加rowStyle的JS处理函数即可,如下代码所示
       rowStyle: function (row, index) { //设置行的特殊样式
          //这里有5个取值颜色['active', 'success', 'info', 'warning', 'danger'];
          var strclass = "";
          if (index == 0) {
            strclass = "warning";
          }
          return { classes: strclass }
        }
对于表格记录的获取,我们可以通过下面的代码进行获取:$table.bootstrapTable('getSelections')
      var rows = $table.bootstrapTable('getSelections');
      if (rows.length > 0) {
        ID = rows[0].ID;
      }
如果是多条记录的处理,例如删除记录
//实现删除数据的方法
function Delete() {
var ids = "";//得到用户选择的数据的ID
var rows = $table.bootstrapTable('getSelections');
for (var i = 0; i < rows.length; i++) {
ids += rows[i].ID + ',';
}
ids = ids.substring(0, ids.length - 1);
DeleteByIds(ids);
}如果需要设置显示列显示,如下界面所示

以及排序处理

这些需要在JS代码开启相关的属性即可。

还有就是一种CardView的卡片视图格式,如下所示。

另外一种是父子表的展开明细的格式,如下所示

以上就是bootstrap-table插件在我实际项目中的应用情况,基本上对JS各个属性的使用进行了一些介绍了,具体的应用我们可以参考它的文档,获取对应属性、方法、事件的详细说明,这样我们就可以更加详细的应用这个插件的各种功能了。
The above is the detailed content of Explanation on using plug-ins in bootstraptable to implement table query, paging and sorting operations. For more information, please follow other related articles on the PHP Chinese website!
 如何使用 JavaScript 实现表格列宽拖拽调整功能?Oct 21, 2023 am 08:14 AM
如何使用JavaScript实现表格列宽拖拽调整功能?随着Web技术的发展,越来越多的数据以表格的形式展示在网页上。然而,有时候表格的列宽并不能满足我们的需求,可能会出现内容溢出或者宽度不足的情况。为了解决这个问题,我们可以使用JavaScript实现表格的列宽拖拽调整功能,使用户可以根据需求自由调整列宽。实现表格列宽拖拽调整功能,需要以下三个主
 css怎么去掉表格重复的边框Sep 29, 2021 pm 06:05 PM
在css中,可以使用border-collapse属性来去掉表格中重复的边框,该属性可以设置表格边框是折叠为单一边框还是分开的,只需要将值设置为collapse即可把重叠的边框合并在一起,成为一个边框,实现单线边框的效果。
 表格有一条虚线外打印不到怎么办Mar 28, 2023 am 11:38 AM
表格有一条虚线外打印不到的解决办法:1、打开excel文件,在打开的页面中点击“打印”;2、在预览页找到“无缩放”,选择调整为一页;3、选择打印机打印文档即可。
 Vue中如何实现表格数据的导出和导入Oct 15, 2023 am 08:30 AM
Vue中如何实现表格数据的导出和导入,需要具体代码示例在使用Vue开发的Web项目中,经常会遇到需要将表格数据导出为Excel或导入Excel文件的需求。本文将介绍如何使用Vue来实现表格数据的导出和导入功能,并提供具体的代码示例。一、表格数据的导出安装依赖首先,我们需要安装一些依赖,用于导出Excel文件。在Vue项目中的命令行中运行以下命令:npmin
 使用JavaScript实现表格筛选功能Aug 10, 2023 pm 09:51 PM
使用JavaScript实现表格筛选功能随着互联网技术的不断发展,表格成为了网页中常见的展示数据的方式。然而,当数据量庞大时,用户往往会面临找到特定数据的困难。因此,为表格添加筛选功能,让用户可以快速找到所需的数据,成为了很多网页设计的需求。本文将介绍如何使用JavaScript实现表格筛选功能。首先,我们需要有一份表格数据。下面是一个简单的例子:<t
 如何使用 JavaScript 实现表格分页功能?Oct 20, 2023 pm 06:19 PM
如何使用JavaScript实现表格分页功能?随着互联网的发展,越来越多的网站都会使用表格来展示数据。在一些数据量较大的情况下,需要将数据进行分页展示,以提升用户体验。本文将介绍如何使用JavaScript实现表格分页功能,并提供具体的代码示例。一、HTML结构首先,我们需要准备一个HTML结构来承载表格和分页按钮。我们可以使用<tab
 Vue文档中的表格勾选和全选函数操作方法Jun 20, 2023 pm 10:33 PM
Vue是一种流行的JavaScript框架,它可以让开发人员轻松地构建交互式、响应式的Web界面。Vue框架提供了一系列的组件和指令,用于构建常见的页面元素,如表格、表单、菜单等。在这篇文章中,我们将探讨Vue文档中的表格勾选和全选函数操作方法。在Vue中,我们可以使用v-model指令将表单元素与Vue实例中的数据进行双向绑定。这使得我们可以轻松地收集用户
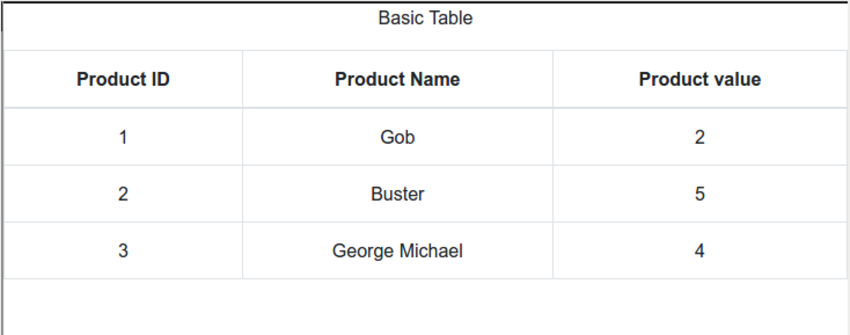 React中使用表格:第一部分Sep 04, 2023 pm 07:21 PM
用于呈现数据的最常见的用户界面元素之一是表格。事实证明,使用表格时需要控制很多方面,例如:定义列和标题各种单元格格式(文本、数字、复选框)调整大小过滤动态成长样式在这个由两部分组成的系列中,您将了解使用ReactBootstrapTable组件在React中处理表格数据的细节。您将能够轻松创建复杂且具有专业外观的表格,并且能够自定义各个方面。开始使用 首先,您应该熟悉React本身。如果您需要React入门知识,EnvatoTuts+有一个很棒的系列可以帮助您开始使用React。在本教程中,我们


Hot AI Tools

Undresser.AI Undress
AI-powered app for creating realistic nude photos

AI Clothes Remover
Online AI tool for removing clothes from photos.

Undress AI Tool
Undress images for free

Clothoff.io
AI clothes remover

AI Hentai Generator
Generate AI Hentai for free.

Hot Article

Hot Tools

SAP NetWeaver Server Adapter for Eclipse
Integrate Eclipse with SAP NetWeaver application server.

EditPlus Chinese cracked version
Small size, syntax highlighting, does not support code prompt function

Dreamweaver Mac version
Visual web development tools

Notepad++7.3.1
Easy-to-use and free code editor

VSCode Windows 64-bit Download
A free and powerful IDE editor launched by Microsoft


