Home >Operation and Maintenance >Linux Operation and Maintenance >KVM virtualization details
KVM virtualization details
- 巴扎黑Original
- 2017-07-17 09:29:372256browse
KVMVirtualization
The system environment requires a graphical system to be installedKVM
1. Check whether the machine supports virtualization
Check the IntelCPU:cat / proc/cpuinfo | grep --color vmx
View the CPU of AMD: cat /proc/cpuinfo | grep --color svm
The picture below shows the CPU of
Intel 
Support virtualization
2. Install the KVM module
[root@localhost ~]# yum -y install kvm virt-manager libvirt virt-viewer
kvm : KVM Virtualization module
virt-manager: KVM Graphical management tool
libvirt: Virtualization service
virt-viewer: A minimal tool that displays the graphical console of a virtual machine
1)Start KVMService
[root@localhost ~]# service libvirtd start

2)Set auto-start at boot
[root@localhost ~]# chkconfig libvirtd on
3)Make sure it is loaded correctly kvm Module
[root@localhost ~]# lsmod | grep kvm

4) Check KVM If the installation is successful, you can use the virsh command to check the status of the virtual machine
[root@localhost ~]# virsh list

3、Configuration KVM Bridge function
Bridge introduction: What we often callBridge device is actually a bridge device, which is equivalent to now The Layer 2 switch is used to connect all machines in the same network segment, so our purpose is to add the network device eth0 to br0. At this time, br0 becomes the so-called switch device, and the eth0 of our physical machine is also connected to it. .
1) Installation package
[root@localhost ~]# rpm -ivh /mnt/Packages/bridge-utils-1.2-10.el6.x86_64.rpm
2) Tie eth0 to the br0 bridge On the device:
[root@localhost ~]# cd /etc/sysconfig/network-scripts/
#Back up eth0
[root@localhost network-scripts]# cp ifcfg-eth0 /tmp/
#Edit the configuration file to the following content
[root@localhost network-scripts]# vim ifcfg-eth0
DEVICE=eth0
NM_CONTROLLED=yes
IPADDR=192.168.200.111 # Next, these blue contents need to be deleted
NETMASK=255.255.255.0
GATEWAY=192.168.200.1
DNS1=192.168.200.1
ONBOOT=yes
TYPE=Ethernet
BOOTPROTO=none
IPV6INIT =no
USERCTL=no
PREFIX=24
DEFROUTE=yes
IPV4_FAILURE_FATAL=yes
NAME="eth0"
HWADDR=00:0C:29:12:EC:1E
BRIDGE="br0" #Insert this line at the end of the file
3) Make the bridge file
[root@localhost network- scripts]# cp ifcfg-eth0 ifcfg-br0
DEVICE=br0
NM_CONTROLLED=yes
ONBOOT=yes
IPADDR=192.168.200.111
##NETMASK=255.255.255.0
GATEWAY=192.168.200.1
##DNS1=192.168.200.1
BOOTPROTO=none
TYPE=BridgeIPV6INIT=no
USERCTL=no
After configuration, closeNetworkManager, and then restart the network card[root@localhost ~]# service NetworkManager stop
[root@localhost ~]# service network restart

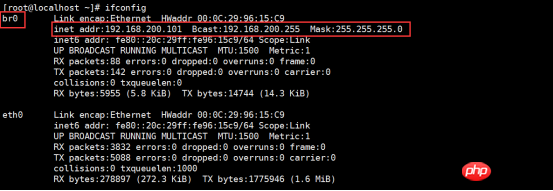
IP address
Upload the image file to the directory /var/lib/libvirt/images/under


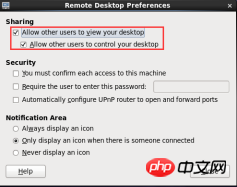
##After turning it on, you can use vnc software to remotely connect to the server
View the bridge information: [root@localhost ~]# brctl show 
Open the virtual machine in
VNCTerminal Manager[root@localhost ~]# virt-manager
Right-click to create a new virtual machine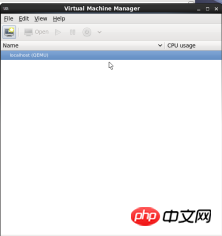
Select the image path and installation version 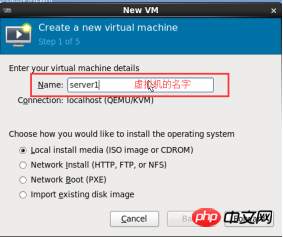
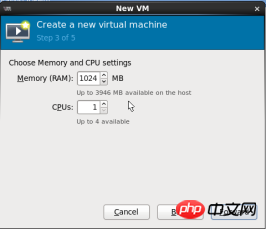 Set the memory size and
number, followed by VMwareInstallation is similar
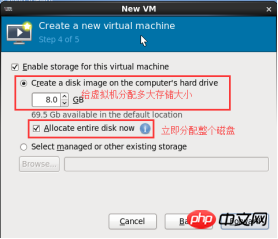
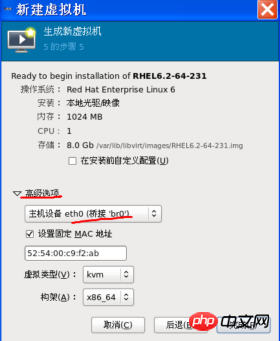
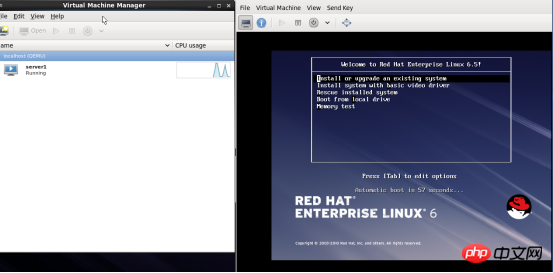 Virtual machine installation completed
Virtual machine configuration
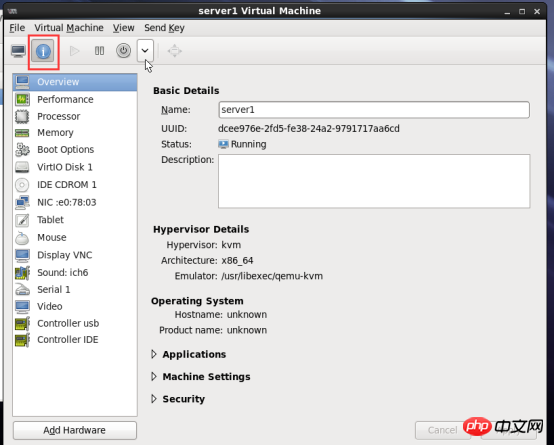
Common commands for virtual machines
[root@localhost ~]# virsh list #Only display running virtual machines
 [root@localhost ~]# virsh list --all
[root@localhost ~]# virsh start server1 #Start
serverVirtual machine [root@localhost ~]# virsh shutdown server #Closeserver Virtual machine Solution shutdown Cannot shut downKVM Problems with virtual machines After installation KVM Linux Install and start the acpi service in the virtual machine, virsh shutdown The command controls the power of the virtual machine by sending acpi commands, and kvm virtual machine installationlinux # The ## system does not have the acpi service installed by default, so it will not be processed. Solution: Just install and start the acpid service in the virtual machine. Execute the command as follows: Configure networkyumSource Install httpdService on the real machine (This is how it is mounted in a virtual machine. On a real machine, you can directly upload the image to the machine and then mount it in the corresponding directory.) ConfigurationKVMyumSource #View running server status #Closeserver1Virtual host #Set server1 to After the physical machine is turned on, it will automatically start [root@localhost ~]# virsh list View Closed Author: compy Date: 2017-07-15 02:16 QQ:2071959367


The above is the detailed content of KVM virtualization details. For more information, please follow other related articles on the PHP Chinese website!

