
Home >Backend Development >C#.Net Tutorial >Introduction to SignalR Self Host multi-terminal message push service (2)
Introduction to SignalR Self Host multi-terminal message push service (2)

- 零下一度Original
- 2017-07-02 11:59:582018browse
This article mainly introduces the second article of multi-terminal message push services such as SignalR Self Host+MVC in detail. It has certain reference value. Interested friends can refer to it
1. Overview
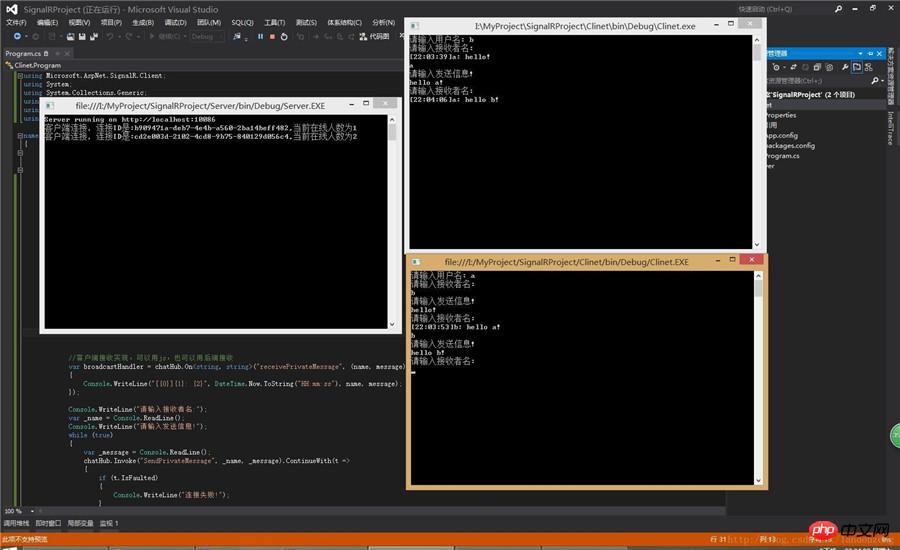
In the last article, we simply implemented the SignalR self-hosted server. Today we will implement the console program to call the SignalR server to push information. Since we were previously We plan to push approval messages, so our demo direction is to send messages to designated people. As for chat messages and global broadcasts, we will not demonstrate them here.
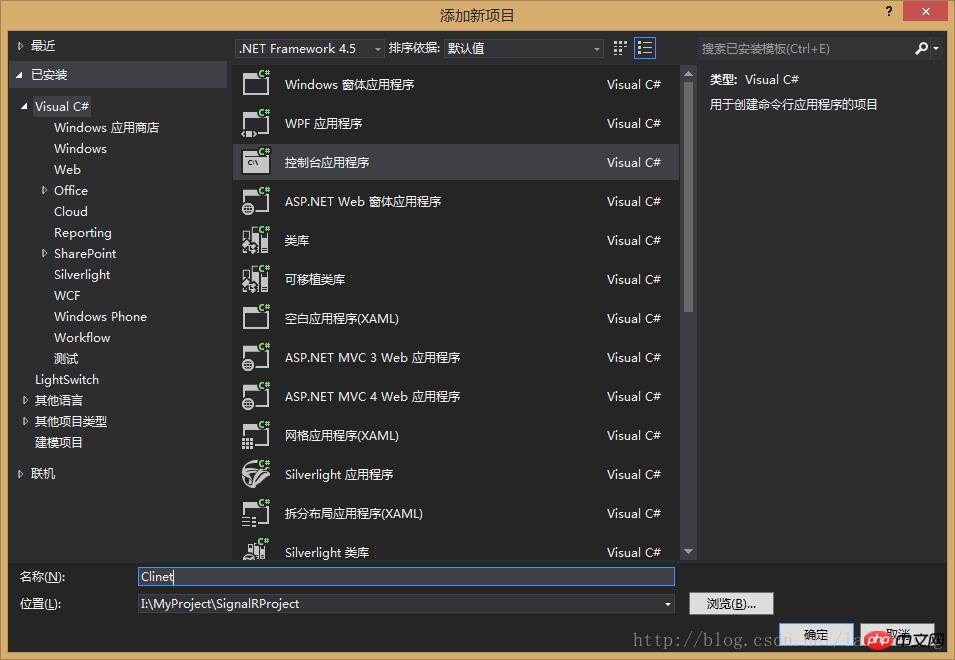
2. Create a console client
1. Create a new console named Clinet under the SignalRProject solution
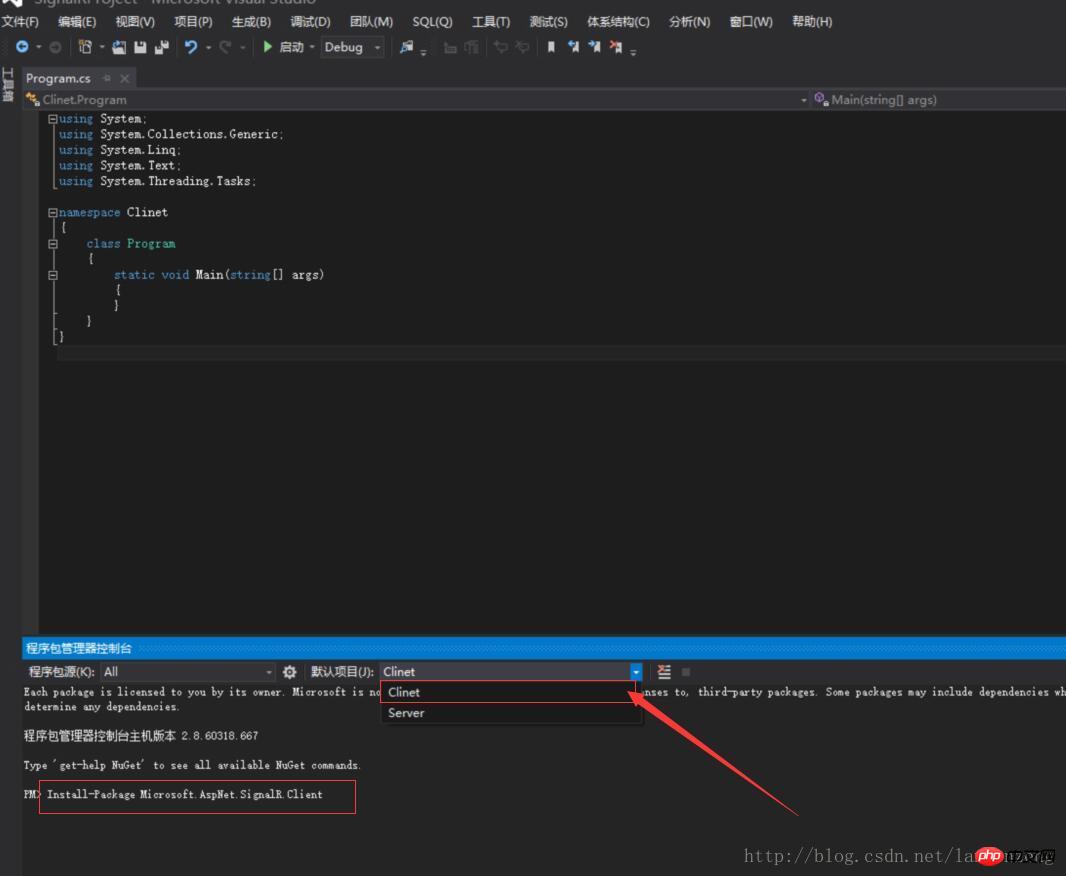
2. Enter the following command in the package management console
Install-Package Microsoft.AspNet.SignalR.Client
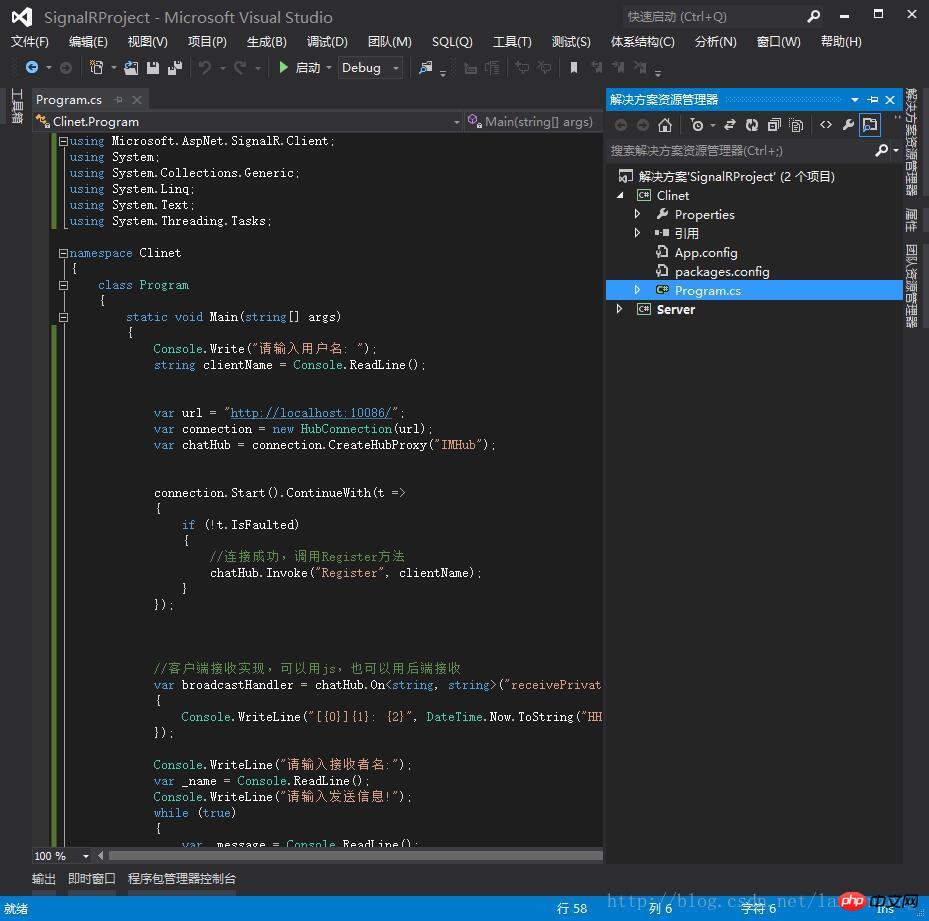
3. Modify the Program in the Clinet project. cs code
using Microsoft.AspNet.SignalR.Client;
using System;

namespace Clinet
{
  class Program
  {
    static void Main(string[] args)
    {
      Console.Write("请输入用户名: ");
      string clientName = Console.ReadLine();


      var url = "http://localhost:10086/";
      var connection = new HubConnection(url);
      var chatHub = connection.CreateHubProxy("IMHub");

      connection.Start().ContinueWith(t =>
      {
        if (!t.IsFaulted)
        {
          //连接成功,调用Register方法
          chatHub.Invoke("Register", clientName);
        }
      });

      //客户端接收实现,可以用js,也可以用后端接收
      var broadcastHandler = chatHub.On<string, string>("receivePrivateMessage", (name, message) =>
      {
        Console.WriteLine("[{0}]{1}: {2}", DateTime.Now.ToString("HH:mm:ss"), name, message);
      });

      Console.WriteLine("请输入接收者名:");
      var _name = Console.ReadLine();
      Console.WriteLine("请输入发送信息!");
      while (true)
      {
        var _message = Console.ReadLine();
        chatHub.Invoke("SendPrivateMessage", _name, _message).ContinueWith(t =>
        {
          if (t.IsFaulted)
          {
            Console.WriteLine("连接失败!");
          }
        });
        Console.WriteLine("请输入接收者名:");
        _name = Console.ReadLine();
        Console.WriteLine("请输入发送信息!");
      }
    }
  }
}
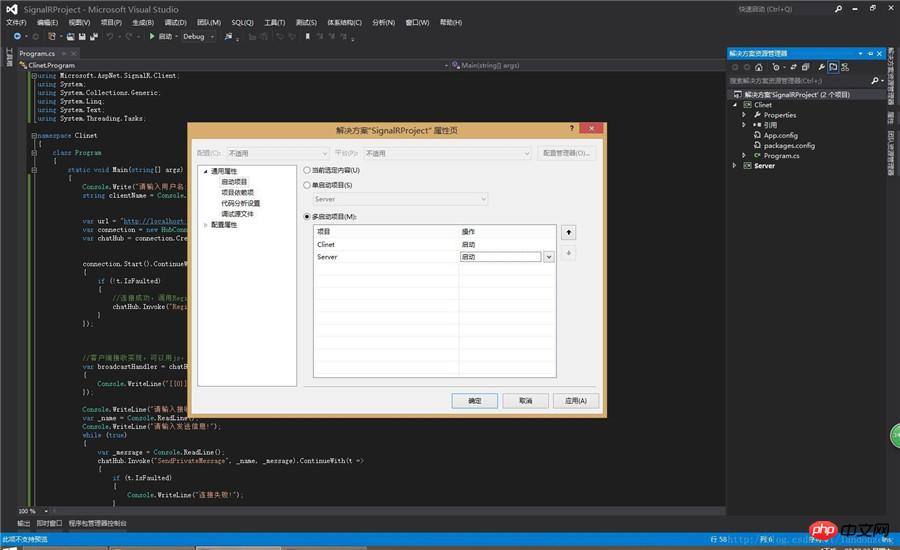
4. Right-click the solution——>SelectProperties——> Startup project——>Multiple startup projects——>Set Clinet and Server to startup, as follows:
The above is the detailed content of Introduction to SignalR Self Host multi-terminal message push service (2). For more information, please follow other related articles on the PHP Chinese website!