1, Various usage instructions
A. The simplest usage:
mysqldump -uroot -pPassword [database name]
> [dump file]
The above command will back up the specified database to a dump file (dump file), for example:
mysqldump -uroot -p123 test > test.dump
The generated test.dump file contains table creation statements (generating database structures) and insert statements for inserting data.
B. --opt
If you add the --opt parameter, the generated dump file will be slightly different:
. The table creation statement contains drop table if exists tableName
. Before insert, it contains a lock table statement lock tables tableName write, and after insert, it contains unlock tables
C. Cross-host backup
Use the following command to copy the sourceDb on host1 to the targetDb of host2, provided that the targetDb database has been created on the host2 host:
mysqldump --host=host1 --opt sourceDb| mysql --host=host2 -C targetDb
-C indicates between hosts The data transfer uses data compression
D. Only the table structure will be backed up
mysqldump --no-data --databases mydatabase1 mydatabase2 mydatabase3 > test.dump
Will only back up the table structure. --databases indicates the databases on the host to be backed up. If you want to back up all databases on a MySQL host, you can use the --all-databases option, as follows:
mysqldump --all-databases> test.dump
E. From Backup files and restore database
mysql [database name]
Back up multiple databases
Syntax:
mysqldump -u username -p --databases dbname2 dbname2 > Backup.sql
Added the --databases option, followed by multiple databases
mysqldump -u root -p --databases test mysql > D:\backup.sql
Back up all databases
mysqldump The syntax of the command to back up all databases is as follows:
mysqldump -u username -p -all-databases > BackupName.sql
Example:
mysqldump -u -root -p -all-databases > D:\all.sql
2, Combined with the Linux cron command to achieve scheduled backup
For example, if you need to back up all databases on a certain host at 1:30 a.m. every day and compress the dump file into gz format, you can do it in /etc/ Add the following line of code to the crontab configuration file:
30 1 * * * root mysqldump -u root -pPASSWORD --all-databases | gzip > /mnt/disk2/database_`date '+%m-%d-%Y'`.sql.gz
The first five parameters represent minutes, hours, days, months, and years respectively. The asterisk means any. date '+%m-%d-%Y' gets the current date in MM-DD-YYYY format.
3, A complete Shell script to back up MySQL database example
#vi /backup/backup.sh#!bin/bash
cd /backupecho "You are in backup dir"mv backup* /oldbackupecho "Old dbs are moved to oldbackup folder"File = backup-$Now.sql
mysqldump -u user -p password database-name > $Fileecho "Your database backup successfully completed"
The above script file is saved as backup.sh , and two directories /olcbackup and /backup have been created in the system. Each time backup.sh is executed, all files with names starting with backup in the /backup directory will be moved to the /oldbackup directory.
Develop an execution plan for the above script as follows:
#crontab -e30 1 * * * /backup.sh
4, mysqldump full backup + mysqlbinlog binary log increment Backup
Restoring data from the mysqldump backup file will lose the updated data starting from the backup point, so it needs to be combined with the mysqlbinlog binary log incremental backup. Make sure my.ini or my.cnf contains the following configuration to enable binary logging, or mysqld --log-bin:
[mysqld]
log-bin=mysql-bin
The mysqldump command must be carried with --flush-logs option to generate a new binary log file:
mysqldump --single-transaction --flush-logs --master-data=2 > backup.sql
The incremental binary log file generated in this way is, for example, mysql-bin.000003, then the data recovery is as follows:
|
1
2
|
##shell> mysql -uroot -pPwd ##shell> mysqlbinlog mysql-bin.000003 | mysql -uroot -pPwd |
5.9.3.1. 指定恢复时间
对于MySQL 4.1.4,可以在mysqlbinlog语句中通过--start-date和--stop-date选项指定DATETIME格式的起止时间。举例说明,假设在今天上午10:00(今天是2005年4月20日),执行SQL语句来删除一个大表。要想恢复表和数据,你可以恢复前晚上的备份,并输入:
mysqlbinlog --stop-date="2005-04-20 9:59:59" /var/log/mysql/bin.123456 \
     | mysql -u root -pmypwd
该命令将恢复截止到在--stop-date选项中以DATETIME格式给出的日期和时间的所有数据。如果你没有检测到几个小时后输入的错误的SQL语句,可能你想要恢复后面发生的活动。根据这些,你可以用起使日期和时间再次运行mysqlbinlog:

mysqlbinlog --start-date="2005-04-20 10:01:00" /var/log/mysql/bin.123456 \
     | mysql -u root -pmypwd \
在该行中,从上午10:01登录的SQL语句将运行。组合执行前夜的转储文件和mysqlbinlog的两行可以将所有数据恢复到上午10:00前一秒钟。你应检查日志以确保时间确切。下一节介绍如何实现。

5.9.3.2. 指定恢复位置
也可以不指定日期和时间,而使用mysqlbinlog的选项--start-position和--stop-position来指定日志位置。它们的作用与起止日选项相同,不同的是给出了从日志起的位置号。使用日志位置是更准确的恢复方法,特别是当由于破坏性SQL语句同时发生许多事务的时候。要想确定位置号,可以运行mysqlbinlog寻找执行了不期望的事务的时间范围,但应将结果重新指向文本文件以便进行检查。操作方法为:
mysqlbinlog --start-date="2005-04-20 9:55:00" --stop-date="2005-04-20 10:05:00" \
      /var/log/mysql/bin.123456 > /tmp/mysql_restore.sql
该命令将在/tmp目录创建小的文本文件,将显示执行了错误的SQL语句时的SQL语句。你可以用文本编辑器打开该文件,寻找你不要想重复的语句。如果二进制日志中的位置号用于停止和继续恢复操作,应进行注释。用log_pos加一个数字来标记位置。使用位置号恢复了以前的备份文件后,你应从命令行输入下面内容:

mysqlbinlog --stop-position="368312" /var/log/mysql/bin.123456 \
    | mysql -u root -pmypwd

mysqlbinlog --start-position="368315" /var/log/mysql/bin.123456 \
    | mysql -u root -pmypwd \
上面的第1行将恢复到停止位置为止的所有事务。下一行将恢复从给定的起始位置直到二进制日志结束的所有事务。因为mysqlbinlog的输出包括每个SQL语句记录之前的SET TIMESTAMP语句,恢复的数据和相关MySQL日志将反应事务执行的原时间。
The above is the detailed content of Detailed explanation of using mysqldump command example. For more information, please follow other related articles on the PHP Chinese website!
 如何恢复您的 Steam 云存档May 28, 2023 pm 10:25 PM
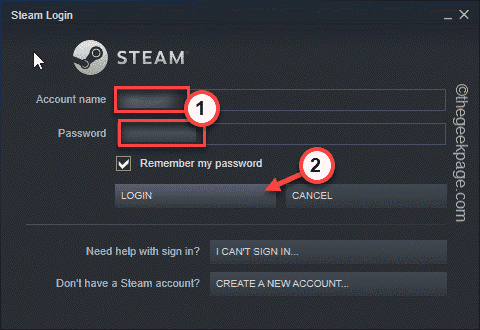
Steam会在您玩游戏时保存您的游戏进度并将其存储在Steam云中。当您在多台设备上玩Steam游戏时,此功能非常有用。只需在所有设备上使用您的Steam凭据登录,安装游戏即可!所有用户设置、游戏保存数据、您朋友的聊天框等等。修复1–检查游戏是否受支持所有Steam游戏均不支持Steam云存档功能。因此,您必须检查游戏是否真的支持此功能。1.在您的系统上打开Steam应用程序。2.现在,您必须使用您的凭据登录Steam。3.然后,输入您的用户名和密码,然后点击“登录
 联想小新一键恢复小孔还原系统教程Jul 15, 2023 am 10:09 AM
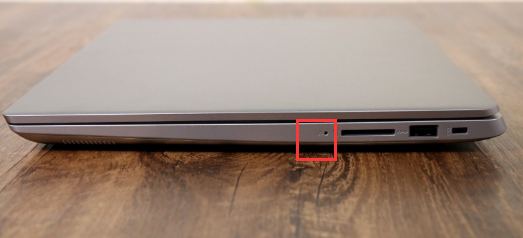
当我们的电脑遇到问题时,很多小伙伴都会使用恢复出厂设置来还原系统解决问题,今天要讲的就是联想电脑一键恢复系统的特点,我们都知道联想笔记本上都有一个小孔,大部分小伙伴都不知道这个小孔的用处,接下来小编就把联想一键恢复小孔的使用方法带给大家。 联想小新一键恢复小孔: 1.首先我们准备一个卡针,然后使用卡针捅一下机器左侧的一键恢复孔。 2.接着使用键盘上的按键选择“systemrecovery”,按回车。 3.在选择一个选项页面中,我们选择“疑难解答”。 4.我们点击“重置此电脑”选项。
 Windows 11 Recovery USB:下载、安装和创建Jul 05, 2023 pm 01:05 PM
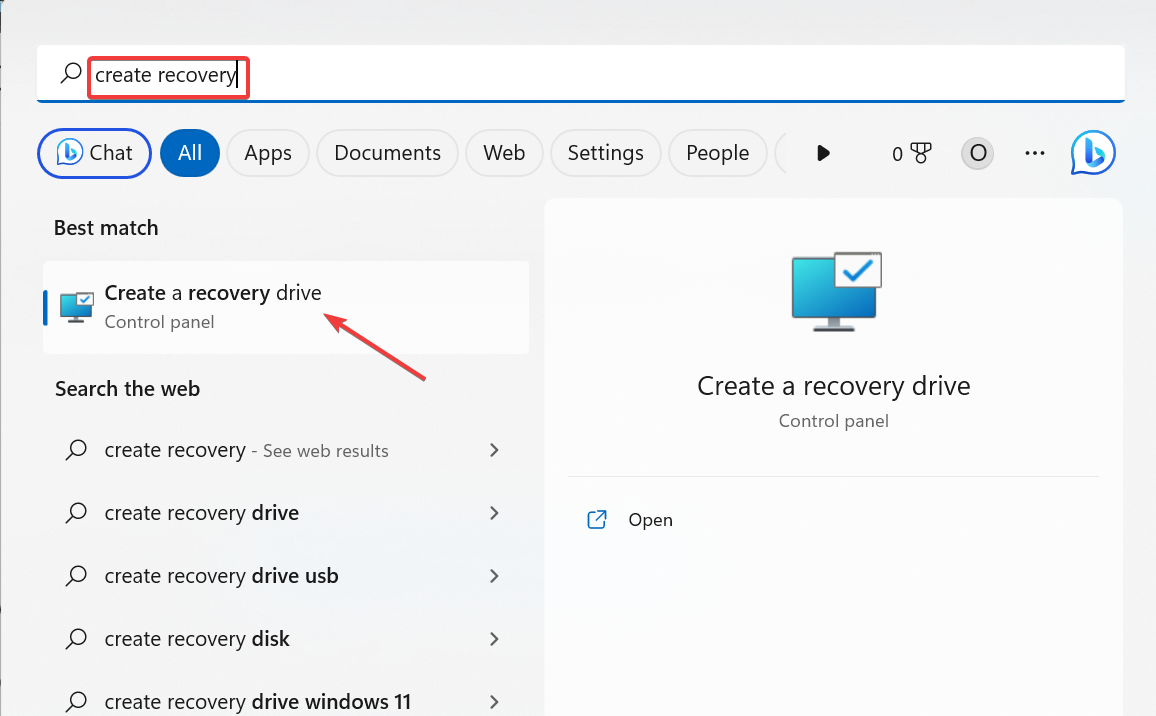
您的PC有时会遇到问题,导致难以正常启动。在这种情况下,您可以使用Windows11恢复USB恢复它。虽然这一切看起来简单明了,但您仍然需要知道如何创建和使用恢复USB。在本指南中,我们将引导您完成轻松执行此任务所需的步骤。我可以下载Windows11恢复USB吗?如果您的操作系统完全崩溃,您可以从另一台运行良好的PC下载Windows11恢复USB。但是,要从中创建恢复驱动器的电脑必须与你的电脑具有相同的体系结构。最好的选择仍然是在PC正常运行时从PC创建USB。这消除了任何兼容性风险。或者,
 windows7键盘失灵应该怎么办windows7键盘失灵如何恢复Jul 15, 2023 am 09:21 AM
有一些笔记本windows7顾客遇到了键盘失灵的情况,导致很多操作过程都不能进行,这种事情要怎么办呢?如果只是一部分功能按键不能使用得话,你可以尝试消除功能按键。若不是得话,你也就打开系统属性提示框,进入网络适配器,之后找寻电脑的键盘机械设备,鼠标点击选择升级驱动程序,以后按照步骤去重装一下电脑键盘的驱动程序就能够。windows7键盘失灵应该怎么办:一、消除笔记本键盘看一下是不是具备一些键按下去没法弹上来,这种事情还会继续导致其他键不能用;二、修改笔记本驱动1.依据“我的电脑”打开系统属性,选
 教大家win7电脑怎么恢复出厂设置Jul 12, 2023 pm 03:09 PM
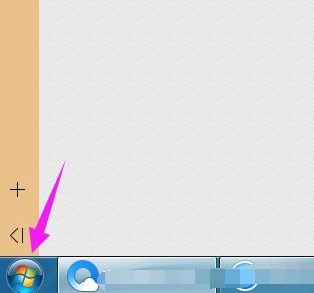
出厂设置恢复到出厂时的默认状态,删除所有的文件和软件。在手机上很多朋友都会设置出厂设置,那么你们知道电脑如何恢复出厂设置吗?下面小编就以win7为例和大家分享一下过程吧。1、首先打开下电脑,看到win7图标点开。2、接着我们打开下【控制面板】。3、然后我们找到【系统】点击并打开。4、在系统窗口中我们点击【系统保护】。5、接着我们选择【系统还原】选项。6、接着我们来到这个界面,点击下一步即可。7、选择还原点,一般都是默认的初始的状态。8、最后我们来到这个界面,点击完成就可以进入到还原过程。以上就是
 win11改win10系统教程的详细介绍Jul 08, 2023 pm 09:21 PM
微软6月24号正式公布了win11系统,可以看到用户界面、开始菜单等和Windows10X中发现的非常相似。有的朋友在使用预览版的时候发现用的不习惯,想要改win10系统开使用,那么我们要如何操作呢,下面我们就来看看win11改win10系统教程,一起来学习一下吧。1、第一步是从Windows11打开新设置。在这里,您需要转到图像中显示的系统设置。2、在系统设置下,选择“恢复”选项。在这里,您将能够看到“以前版本的窗口”选项。您还可以在它旁边看到一个“返回”按钮,单击此按钮。3、您可以指定要返回
 如何使用ThinkPHP6实现数据库备份与恢复Jun 20, 2023 pm 07:25 PM
在开发业务系统过程中,数据库是非常重要的一环。因此,对数据库进行备份和恢复是非常必要的操作。本文将结合ThinkPHP6框架实例,介绍如何使用ThinkPHP6实现数据库备份与恢复。一、数据库备份1.1环境准备在进行数据库备份之前,需要确认如下几点:1、需要设置好mysql数据库的bin目录地址,并把其路径加入系统Path变量中;2、需要安装好mysqld
 如何应对Linux系统中的文件系统损坏和恢复问题Jun 29, 2023 pm 08:01 PM
如何应对Linux系统中的文件系统损坏和恢复问题在使用Linux系统时,由于各种原因,文件系统可能会遭受损坏,这可能导致数据丢失和系统无法正常运行。因此,我们需要知道如何应对文件系统损坏和恢复问题,以保护我们的数据和系统的稳定性。如何判断文件系统是否损坏?当文件系统受损时,将会出现一些明显的迹象。例如,文件或文件夹无法访问、文件大小异常、系统启动慢或无法启动


Hot AI Tools

Undresser.AI Undress
AI-powered app for creating realistic nude photos

AI Clothes Remover
Online AI tool for removing clothes from photos.

Undress AI Tool
Undress images for free

Clothoff.io
AI clothes remover

AI Hentai Generator
Generate AI Hentai for free.

Hot Article

Hot Tools

Notepad++7.3.1
Easy-to-use and free code editor

Atom editor mac version download
The most popular open source editor

Dreamweaver Mac version
Visual web development tools

Dreamweaver CS6
Visual web development tools

DVWA
Damn Vulnerable Web App (DVWA) is a PHP/MySQL web application that is very vulnerable. Its main goals are to be an aid for security professionals to test their skills and tools in a legal environment, to help web developers better understand the process of securing web applications, and to help teachers/students teach/learn in a classroom environment Web application security. The goal of DVWA is to practice some of the most common web vulnerabilities through a simple and straightforward interface, with varying degrees of difficulty. Please note that this software


