
Home >Backend Development >PHP Tutorial >Detailed explanation of edusoho's implementation of code scanning login function example
Detailed explanation of edusoho's implementation of code scanning login function example

- 零下一度Original
- 2017-06-30 15:51:023334browse
1. Project Introduction and Requirements
edusoho is a commercial version of the online education platform. The project itself is developed based on the symfony2 framework. Now it has its own APP, and there are not many requirements. Based on modifying edusoho's own code, the client can scan the QR code to log in to the PC. The reason why the edusoho code is not modified too much is to avoid errors when upgrading the main version next time.
2. Version information and required applications
edusoho 7.5.14
php 5.5.25
php GD library
memcache (memcache is used as the storage medium this time and can be replaced by redis) Click here to download
phpqrcde (php QR code generation plug-in)
3. Implementation ideas
Click the page scan code button to send a request to PHP. PHP generates a QR code and saves the sign verification string to memcache. After the request is successful, the page displays the second page The QR code waits for the code to be scanned, and uses ajax to request the background method in a polling manner to check whether the code has been scanned. After scanning the code with your mobile phone, access the URL link in the QR code. PHP saves the scanned code identification and returns the scanned code status to ajax. The front page prompts that the code has been scanned and sends an ajax poll again to confirm whether the login has been confirmed. After the code scanning is completed, the APP will display the login page. Click to confirm and pass the user name and sign verification string to the background method. After the background verification is passed, the user name, sign and status code will be returned to the front-end ajax.
Since the requirement is not to change edusoho's own code, we borrow edusoho's own login when logging in, that is, fill in the user name returned by ajax into the user name box, fill in sign into the password box, and trigger the login submit button. Only a few lines of code were added to the login password verification area, and the password verification was changed to sign verification. (The login method used by symfony2 is security configured login. We will talk about where to change the password verification later. If you are not familiar with it, you can refer to security secure login)
4. Implementation code and steps
1. Generate login QR code
(1) First configure the access route in routing.yml under custom (please refer to the configuration for other routing methods by yourself. The routing configuration of the following methods will not be repeated)

(2) Click the js code of the scan button (the key can be stored in the cookie, this example is written directly into the hidden field of the page)
   //点击扫码弹出框$('.scanqrcode').click(function (){
        $('.login-section').hide();//隐藏登陆框$('.qrcode').show();//弹窗$('.timeout').hide();
        $('.barcode-container.scanned .status.scanned, .barcode-container.scanned .mask').hide();
        $('.login_op').show();//显示遮罩层//请求二维码        $.ajax({
            type: "POST",
            dataType: "json",
            url: "/login/create/qrcode",
            success: function (data) {if(data.status==1){var qrcodeimg = '../../assets/img/qrcodeimg/'+data.msg+'.png';//把key放进隐藏域$('#key').val(data.msg);//替换二维码$('.qrcode-img').attr('src',qrcodeimg);//触发定时任务,查看是否已扫码var inter = setInterval("is_sacn_qrcode();",3000);
                    $('#timing').val(inter);
                }
            }
        });
    });
(3) Write the PHP code for the createQrcode method to generate a QR code image (the doString method is an algorithm for generating sign strings. Please invent and create by yourself. It is best if the generated results are different every time. )
//生成登录二维码public function CreateQrcodeAction(){ob_start();$url = 'http://'.$_SERVER['HTTP_HOST'];//获取当前的url$http = $url.'/login/mobile/scan/qrcode';//确认扫码的url方法$key = $this->getRandom(30);//存放在memcache中的键值,随机32位字符串$_SESSION['qrcode_name'] = $key;//把key当做图片的名字存在session里$sgin_data = $this->doString();//生成sign字符串的基本算法$sgin = strrev(substr($key,0,2)) . $sgin_data;//截取前两位并反转$value = $http.'?key='.$key.'&type=1';//二维码内容$errorCorrectionLevel = 'H';//容错级别$matrixPointSize = 8;//生成图片大小
//生成二维码图片\QRcode::png($value, 'qrcode.png', $errorCorrectionLevel, $matrixPointSize, 0);$logo = "assets/img/qrcodeimg_logo.png";//准备好的logo图片$QR = 'qrcode.png';//已经生成的原始二维码图if ($logo !== FALSE) {$QR = imagecreatefromstring(file_get_contents($QR));$logo = imagecreatefromstring(file_get_contents($logo));$QR_width = imagesx($QR);//二维码图片宽度$QR_height = imagesy($QR);//二维码图片高度$logo_width = imagesx($logo);//logo图片宽度$logo_height = imagesy($logo);//logo图片高度$logo_qr_width = $QR_width / 3;$scale = $logo_width/$logo_qr_width;$logo_qr_height = $logo_height/$scale;$from_width = ($QR_width - $logo_qr_width) / 2;//重新组合图片并调整大小imagecopyresampled($QR, $logo, $from_width, $from_width, 0, 0, $logo_qr_width,$logo_qr_height, $logo_width, $logo_height);
}//输出图片$img = imagepng($QR, 'assets/img/qrcodeimg/'.$key.'.png');$return = array('status'=>0,'msg'=>'');if($img){$mem = new \Memcache();$mem->connect('127.0.0.1',11211);$res = json_encode(array('sign'=>$sgin,'type'=>0));//存进memcache,过期时间三分钟$mem->set($key,$res,0,180);//180$return = array('status'=>1,'msg'=>$key);
}return $this->createJsonResponse($return);
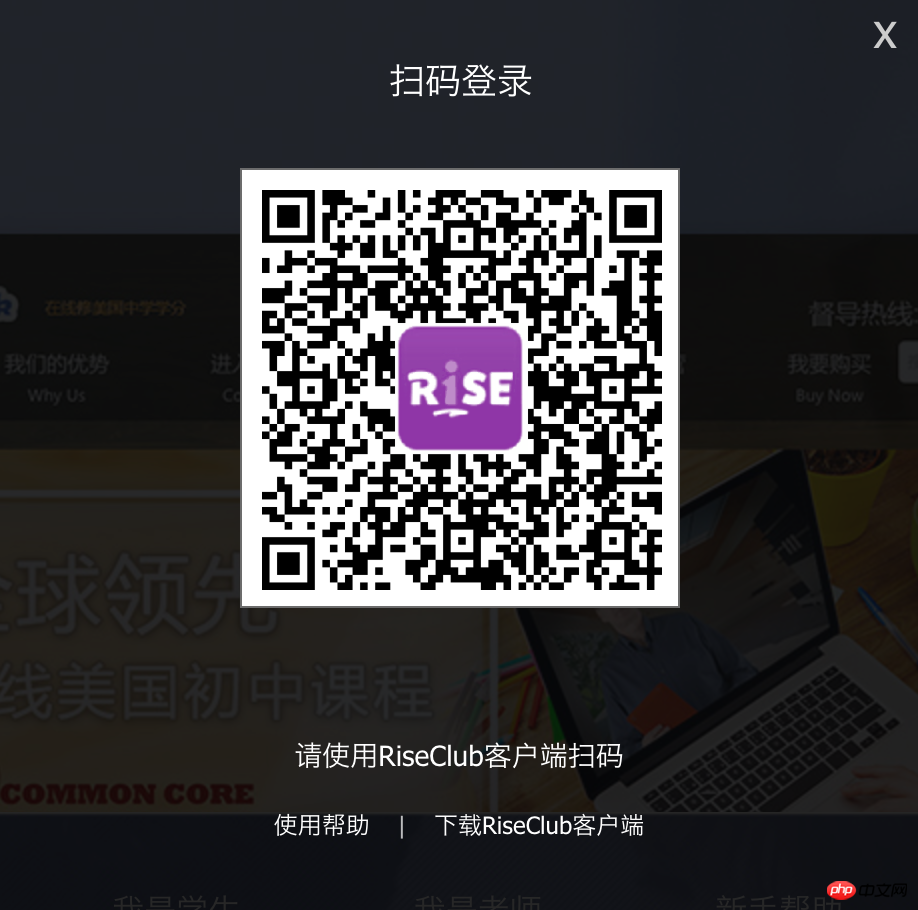
}2. jquery pops up the QR code on the page and starts ajax polling to query whether to scan the code
(1) Display rendering:
(2) JS code that requests whether to scan the QR code (continuously polling if the QR code is not scanned, close the "check whether the QR code has been scanned" method, and enable the "check whether the login is confirmed" method) Polling, close the QR code box to clear all methods)
//查看是否已扫码function is_sacn_qrcode (){
    $.ajax({
        type: "POST",
        dataType: "json",
        url: " /login/scan/qrcode",
        success: function (data) {if(data.status==1){//扫码成功$('.barcode-container.scanned .status.scanned, .barcode-container.scanned .mask').show();//取消定时任务,清除cookieclearInterval($('#timing').val());
                $('#timing').val('');////定时2秒关闭弹窗//setTimeout(function(){//    $('.qrcode').hide();//},2000);//查看是否已确认登录var is_login = setInterval("is_login();",3000);
                $('#is_login').val(is_login);//$.cookie('is_login', is_login);}else if(data.status==2){
                $('.timeout,.mask').show();//取消定时任务,清除cookieclearInterval($('#timing').val());
                $('#timing').val('');
            }
        }
    });
}
(3) Check whether the php code has been scanned
= ['qrcode_name' = ->connect('127.0.0.1',11211 = json_decode(->get(),(( = ('status'=>2,'msg'=>'已过期'(['type' = ('status'=>1,'msg'=>'成功' = ('status'=>0,'msg'=>'' ->createJsonResponse(( 4) PHP code scanned by the client
//移动设备扫码public function mobileScanQrcodeAction(Request $request,$key){$key = $_GET['key'];$url = 'http://'.$_SERVER['HTTP_HOST'];$agent=$_SERVER["HTTP_USER_AGENT"];if (!(strpos($agent, 'MicroMessenger') === false)) {// 获取版本号
//preg_match('/.*?(MicroMessenger\/([0-9.]+))\s*/', $agent, $matches);$app_url = 'http://club.risecenter.com/wap_app.html';// 微信浏览器,跳转至下载APP页面(可判断非指定app浏览器都跳转至此页面)return $this->redirect($app_url);
}$http = $url.'/login/qrcodedoLogin';//返回确认登录的链接$mem = new \Memcache();$mem->connect('127.0.0.1',11211);$data = json_decode($mem->get($key),true);$data['type']=1;//增加type值,用来判断是否已扫码$res = json_encode($data);$mem->set($key,$res,0,180);$http = $http.'?key='.$key.'&type=scan';$return = array('status'=>1,'msg'=>$http);return $this->createJsonResponse($return);
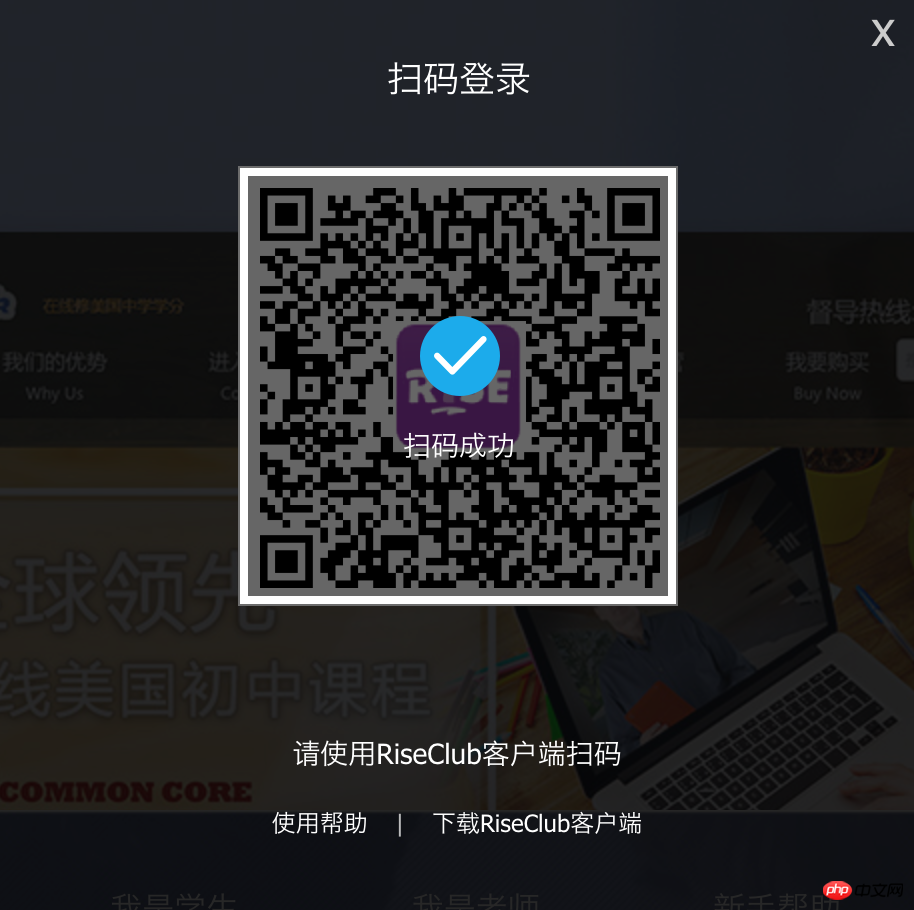
}3. Determine whether to confirm login after successfully scanning the code
(1) Successful scanning rendering:
(2) After successfully scanning the code, query whether to log in js code (the client passes the user name to ajax after confirming login, and js fills the user name and sign into the user name and password form, triggering Submit login button hidden on the page)
//查看是否已确认登录function is_login(){var key = $('#key').val();
    $.ajax({
        type: "POST",
        dataType: "json",
        url: "/login/entry/login",
        data:{
            key:key
        },
        success: function (data) {if(data.status==1){var uid = data.uid;var sign = data.sign;//取消定时任务,清除cookieclearInterval($('#is_login').val());
                $('#is_login').val('');//隐藏扫码成功$('.barcode-container.scanned .status.scanned, .barcode-container.scanned .mask').hide();//弹出已确认$('.confirmed,.mask').show();//定时1秒确认登陆setTimeout(function(){//确认登录$('#login_username').val(data.user);
                    $('#login_password').val(data.sign);
                    $('#login-form').submit();
                },1000);

            }else if(data.status==2){//取消定时任务,清除cookieclearInterval($('#is_login').val());
                $('#is_login').val('');
                alert(data.msg);
            }
        }
    });
}
(3) PHP code to query whether the login has been confirmed
/**
* 客户端扫码后登录
* $sign 客户端扫码时传递标识,与memcache中的做对比
* $key 网页端二维码中传递的key
* $uid 客户端登陆后扫码传递的用户id
* @return void */public function qrcodeDoLoginAction(Request $request,$login,$key,$sign){$login = $_GET['login'];$key = $_GET['key'];$sign = $_GET['sign'];$mem = new \Memcache();$mem->connect('127.0.0.1',11211);$data = json_decode($mem->get($key),true);//取出memcache的值if($data['sign']!=$sign){//验证传递的sign$return = array('status'=>0,'msg'=>'验证错误');return $this->createJsonResponse($return);
}else{if($login){//手机扫码网页登陆,把用户名存进memcache$data['login'] = $login;$res = json_encode($data);$mem->set($key,$res,0,180);$return = array('status'=>1,'msg'=>'登录成功');return $this->createJsonResponse($return);
}else{$return = array('status'=>0,'msg'=>'请传递正确的用户信息');return $this->createJsonResponse($return);
}
}
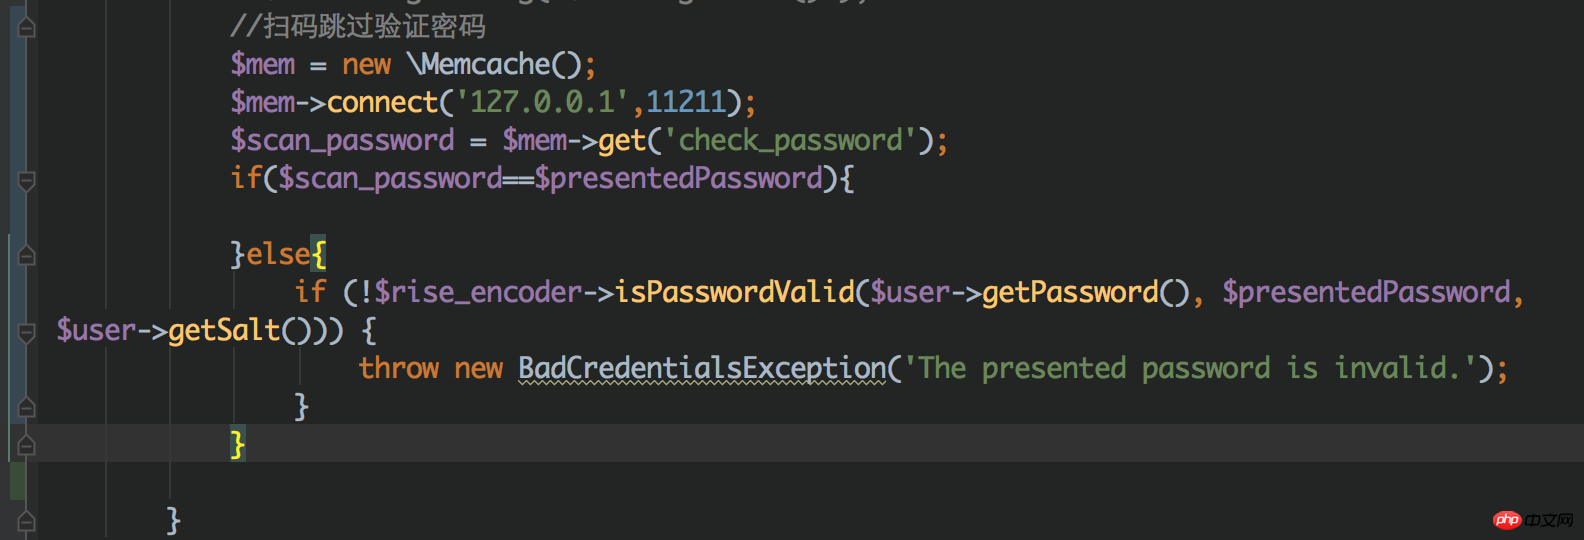
}4. Confirm login
At this point, we have reached the last step of scanning the QR code to log in, and it is also the most critical step. I don’t know if you readers have noticed the security login mechanism of symfony2. How is it? Let’s ignore the principle for now. After all, it is not within the scope of this discussion. Let’s just talk about what should be changed. The checkAuthentication method in
/src/topxia/WebBundle/Handler/AuthenticationProvider.php can be changed directly, or it can be inherited from custom and then changed.
php code is as follows:
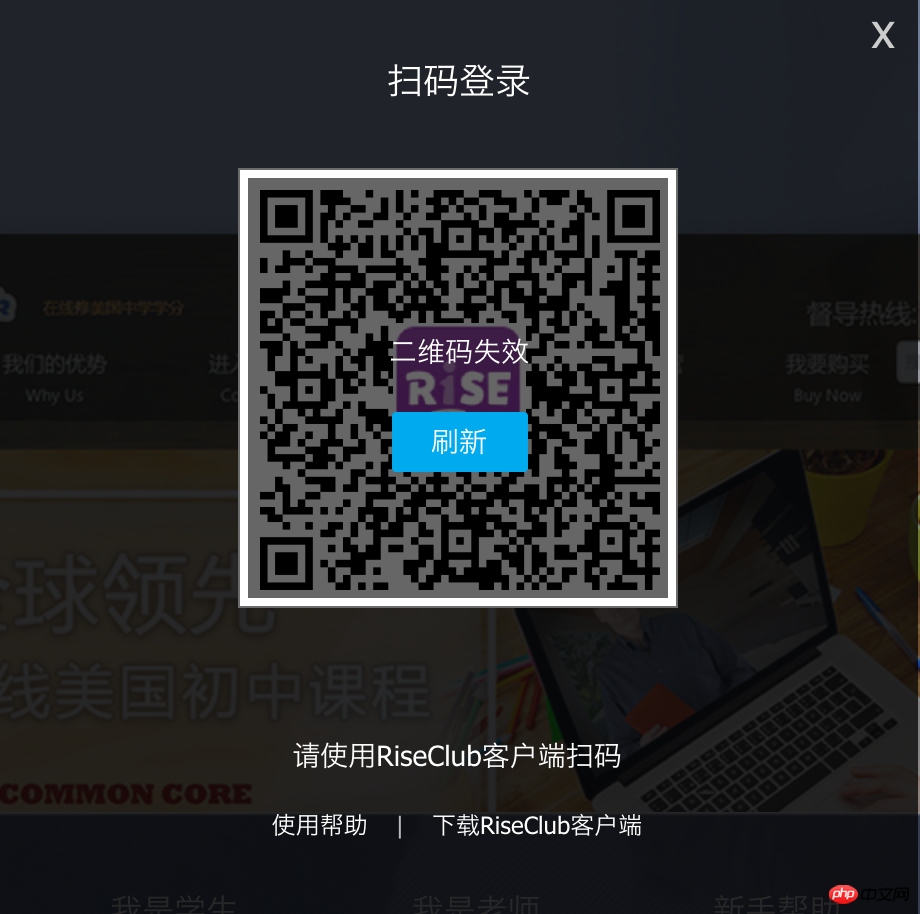
5. QR code expiration setting
For security reasons, setting the QR code expiration is very important. As a step, in all PHP codes, the data stored in memcache has a time limit. The time in this example is 3 minutes. After expiration, memcache will delete the original data records. When the ajax request cannot be When entering data, it should be displayed on the page that the QR code has expired and the QR code must be refreshed.
The renderings are as follows:
Conclusion:
1. PHP scan code login is only a confirmation process. Every time you access the interface Security verification is particularly important when using this method. This method does not involve the verification algorithm. Please make additional adjustments according to your own projects. Let’s have a concept first.
2. Is the ajax polling method low? Well, low. There are better implementation methods, such as websocket, goeasy, etc. Everyone has different opinions, but it seems that Alipay and JD.com's QR code scanning is polling, please forgive me if it is wrong.
3. This scan code login is just a concept, not only for the edusoho platform, everything can be transplanted and used, but just be safe.
4. You won’t ask me for the html and css codes of the front-end QR code box. After all, you are all experts.
5. I’m really grateful that I can see this. I didn’t write a story in vain. In addition, the big guys should be more merciful when they attack. I also have a second version, which may be better than this one.
The above is the detailed content of Detailed explanation of edusoho's implementation of code scanning login function example. For more information, please follow other related articles on the PHP Chinese website!