 Web Front-end
 HTML Tutorial
 Detailed explanation of examples of dynamically setting font size on mobile terminals
rem origin: font size of the root element, then rem is a unit, and the unit size is determined by the size of its first-generation ancestor font-size. Now front-end coders are silently sacrificing their own health in order to see a healthy webpage on every screen, because not only do they need to know that rem is a unit, but more importantly, they need to know how to render pages at different resolutions. Very NB.
Cause of the accident:
1.px unit is very popular on PC. When looking at the mobile phone screen, MLGB, the same 12px unit is smaller. Like ants.
2. After finally adjusting it to normal on iPhone 4, when I changed to a Chrysanthemum brand phone, the MBD became unsightly.
3. I know how to use rem, but what is the appropriate font-size of html? Damn it~.
Okay, let’s solve these problems now.
Before solving the problem, please understand some things that you may not want to know (warning: if you don’t understand these, you cannot know the truth~):
1 .Physical pixel(physical pixel)
Every screen we see is composed of small particles (physical pixels) that are difficult to see with the naked eye.
2. Logical pixel
is a point in the computer coordinate system. This point represents a virtual pixel that can be used by the program (such as CSS pixel ).
3. The device pixel ratio (device pixel ratio) is referred to as DPR
Its value reflects the physical pixels and logical pixels The relationship between them, the size of the DPR of the device can be calculated using the formula:
DPR = 物理像素 / 逻辑像素
So after understanding the above concepts, you can know why the css says ## on the PC #font-size=12px;But it became smaller when I switched to a mobile phone? Because of DPR, brother~.
Yes, our DPR on the computer screen is 1, but the mobile phone is different. It may be 2 or 3. There are still ways to get the device DPR:
1. In JavaScript, get it through window.devicePixelRatio
2. In css , can be passed -webkit-device-pixel-ratio, -webkit-min-device-pixel-ratio and -webkit-max-device-pixel-ratioPerform media query and make some style adaptations for different DPR devices (this is only for browsers and webviews with webkit core).
I have also read a lot of articles on dynamically setting rem on the Internet. Here are a few commonly used ones:
First, use media queries to set the font-size of html:
@media screen and (min-width: 320px) {html {font-size: 14px;}
}

@media screen and (min-width: 360px) {html {font-size: 16px;}
}

@media screen and (min-width: 400px) {html {font-size: 18px;}
}

@media screen and (min-width: 440px) {html {font-size: 20px;}
}

@media screen and (min-width: 480px) {html {font-size: 22px;}
}

@media screen and (min-width: 640px) {html {font-size: 28px;}
}
Second, use js to dynamically set
!(function(doc, win) {var docEle = doc.documentElement,
        evt = "onorientationchange" in window ? "orientationchange" : "resize",
        fn = function() {var width = docEle.clientWidth;
            width && (docEle.style.fontSize = 20 * (width / 320) + "px");
        };

    win.addEventListener(evt, fn, false);
    doc.addEventListener("DOMContentLoaded", fn, false);

}(document, window));
I What I want to talk about is the last one, which I think is a better implementation method at present:
Use js to calculate the DPR of the current device, dynamically set it on the html tag, and dynamically set the of the html font-size, use the css selector to set the font size under different DPR according to DPR (this method is very good~)
<span style="font-size: 18px"><code>!<span class="hljs-function"><span class="hljs-keyword">function(<span class="hljs-params">win, lib) {<span class="hljs-keyword">var timer,
doc = win.document,
docElem = doc.documentElement,
vpMeta = doc.querySelector(<span class="hljs-string">'meta[name="viewport"]'),
flexMeta = doc.querySelector(<span class="hljs-string">'meta[name="flexible"]'),
dpr = <span class="hljs-number">0,
scale = <span class="hljs-number">0,
flexible = lib.flexible || (lib.flexible = {}); <span class="hljs-comment">// 设置了 viewport meta<span class="hljs-keyword">if (vpMeta) { <span class="hljs-built_in">console.warn(<span class="hljs-string">"将根据已有的meta标签来设置缩放比例");<span class="hljs-keyword">var initial = vpMeta.getAttribute(<span class="hljs-string">"content").match(<span class="hljs-regexp">/initial\-scale=([\d\.]+)/); <span class="hljs-keyword">if (initial) {
scale = <span class="hljs-built_in">parseFloat(initial[<span class="hljs-number">1]); <span class="hljs-comment">// 已设置的 initialScale
dpr = <span class="hljs-built_in">parseInt(<span class="hljs-number">1 / scale); <span class="hljs-comment">// 设备像素比 devicePixelRatio
}
}<span class="hljs-comment">// 设置了 flexible Meta<span class="hljs-keyword">else <span class="hljs-keyword">if (flexMeta) {<span class="hljs-keyword">var flexMetaContent = flexMeta.getAttribute(<span class="hljs-string">"content");<span class="hljs-keyword">if (flexMetaContent) { <span class="hljs-keyword">var initial = flexMetaContent.match(<span class="hljs-regexp">/initial\-dpr=([\d\.]+)/),
maximum = flexMetaContent.match(<span class="hljs-regexp">/maximum\-dpr=([\d\.]+)/); <span class="hljs-keyword">if (initial) {
dpr = <span class="hljs-built_in">parseFloat(initial[<span class="hljs-number">1]);
scale = <span class="hljs-built_in">parseFloat((<span class="hljs-number">1 / dpr).toFixed(<span class="hljs-number">2));
} <span class="hljs-keyword">if (maximum) {
dpr = <span class="hljs-built_in">parseFloat(maximum[<span class="hljs-number">1]);
scale = <span class="hljs-built_in">parseFloat((<span class="hljs-number">1 / dpr).toFixed(<span class="hljs-number">2));
}
}
} <span class="hljs-comment">// viewport 或 flexible<span class="hljs-comment">// meta 均未设置<span class="hljs-keyword">if (!dpr && !scale) {<span class="hljs-comment">// QST<span class="hljs-comment">// 这里的 第一句有什么用 ?<span class="hljs-comment">// 和 Android 有毛关系 ?<span class="hljs-keyword">var u = (win.navigator.appVersion.match(<span class="hljs-regexp">/android/gi), win.navigator.appVersion.match(<span class="hljs-regexp">/iphone/gi)),
_dpr = win.devicePixelRatio; <span class="hljs-comment">// 所以这里似乎是将所有 Android 设备都设置为 1 了
dpr = u ? ( (_dpr >= <span class="hljs-number">3 && (!dpr || dpr >= <span class="hljs-number">3))
? <span class="hljs-number">3
: (_dpr >= <span class="hljs-number">2 && (!dpr || dpr >= <span class="hljs-number">2))
? <span class="hljs-number">2
: <span class="hljs-number">1
)
: <span class="hljs-number">1;
scale = <span class="hljs-number">1 / dpr;
}
docElem.setAttribute(<span class="hljs-string">"data-dpr", dpr); <span class="hljs-comment">// 插入 viewport meta<span class="hljs-keyword">if (!vpMeta) {
vpMeta = doc.createElement(<span class="hljs-string">"meta");
vpMeta.setAttribute(<span class="hljs-string">"name", <span class="hljs-string">"viewport");
vpMeta.setAttribute(<span class="hljs-string">"content",<span class="hljs-string">"initial-scale=" + scale + <span class="hljs-string">", maximum-scale=" + scale + <span class="hljs-string">", minimum-scale=" + scale + <span class="hljs-string">", user-scalable=no"); <span class="hljs-keyword">if (docElem.firstElementChild) {
docElem.firstElementChild.appendChild(vpMeta)
} <span class="hljs-keyword">else {<span class="hljs-keyword">var div = doc.createElement(<span class="hljs-string">"div");
div.appendChild(vpMeta);
doc.write(div.innerHTML);
}
} <span class="hljs-function"><span class="hljs-keyword">function <span class="hljs-title">setFontSize(<span class="hljs-params">) {<span class="hljs-keyword">var winWidth = docElem.getBoundingClientRect().width; <span class="hljs-keyword">if (winWidth / dpr > <span class="hljs-number">540) {
(winWidth = <span class="hljs-number">540 * dpr);
} <span class="hljs-comment">// 根节点 fontSize 根据宽度决定<span class="hljs-keyword">var baseSize = winWidth / <span class="hljs-number">10;
docElem.style.fontSize = baseSize + <span class="hljs-string">"px";
flexible.rem = win.rem = baseSize;
} <span class="hljs-comment">// 调整窗口时重置
win.addEventListener(<span class="hljs-string">"resize", <span class="hljs-function"><span class="hljs-keyword">function(<span class="hljs-params">) {
clearTimeout(timer);
timer = setTimeout(setFontSize, <span class="hljs-number">300);
}, <span class="hljs-literal">false);
<span class="hljs-comment">// 这一段是我自己加的<span class="hljs-comment">// orientationchange 时也需要重算下吧
win.addEventListener(<span class="hljs-string">"orientationchange", <span class="hljs-function"><span class="hljs-keyword">function(<span class="hljs-params">) {
clearTimeout(timer);
timer = setTimeout(setFontSize, <span class="hljs-number">300);
}, <span class="hljs-literal">false);
<span class="hljs-comment">// pageshow<span class="hljs-comment">// keyword: 倒退 缓存相关
win.addEventListener(<span class="hljs-string">"pageshow", <span class="hljs-function"><span class="hljs-keyword">function(<span class="hljs-params">e) {<span class="hljs-keyword">if (e.persisted) {
clearTimeout(timer);
timer = setTimeout(setFontSize, <span class="hljs-number">300);
}
}, <span class="hljs-literal">false); <span class="hljs-comment">// 设置基准字体<span class="hljs-keyword">if (<span class="hljs-string">"complete" === doc.readyState) {
doc.body.style.fontSize = <span class="hljs-number">12 * dpr + <span class="hljs-string">"px";
} <span class="hljs-keyword">else {
doc.addEventListener(<span class="hljs-string">"DOMContentLoaded", <span class="hljs-function"><span class="hljs-keyword">function(<span class="hljs-params">) {
doc.body.style.fontSize = <span class="hljs-number">12 * dpr + <span class="hljs-string">"px";
}, <span class="hljs-literal">false);
}
setFontSize();
flexible.dpr = win.dpr = dpr;
flexible.refreshRem = setFontSize;
flexible.rem2px = <span class="hljs-function"><span class="hljs-keyword">function(<span class="hljs-params">d) {<span class="hljs-keyword">var c = <span class="hljs-built_in">parseFloat(d) * <span class="hljs-keyword">this.rem;<span class="hljs-keyword">if (<span class="hljs-string">"string" == <span class="hljs-keyword">typeof d && d.match(<span class="hljs-regexp">/rem$/)) {
c += <span class="hljs-string">"px";
}<span class="hljs-keyword">return c;
};
flexible.px2rem = <span class="hljs-function"><span class="hljs-keyword">function(<span class="hljs-params">d) {<span class="hljs-keyword">var c = <span class="hljs-built_in">parseFloat(d) / <span class="hljs-keyword">this.rem; <span class="hljs-keyword">if (<span class="hljs-string">"string" == <span class="hljs-keyword">typeof d && d.match(<span class="hljs-regexp">/px$/)) {
c += <span class="hljs-string">"rem";
}<span class="hljs-keyword">return c;
}
}(<span class="hljs-built_in">window, <span class="hljs-built_in">window.lib || (<span class="hljs-built_in">window.lib = {}));<br/><br/></span></span></span></span></span></span></span></span></span></span></span></span></span></span></span></span></span></span></span></span></span></span></span></span></span></span></span></span></span></span></span></span></span></span></span></span></span></span></span></span></span></span></span></span></span></span></span></span></span></span></span></span></span></span></span></span></span></span></span></span></span></span></span></span></span></span></span></span></span></span></span></span></span></span></span></span></span></span></span></span></span></span></span></span></span></span></span></span></span></span></span></span></span></span></span></span></span></span></span></span></span></span></span></span></span></span></span></span></span></span></span></span></span></span></span></span></span></span></span></span></span></span></span></span></span></span></span></span></span></span></span></span></span></span></span></span></span></span></span></span></span></span></span></span></span></span></span></span></span></span></span></span></span></code>手机淘宝很多页面用的就是这种方法来适配终端的。<br/><br/><br/><br/></span>The above is the detailed content of Detailed explanation of examples of dynamically setting font size on mobile terminals. For more information, please follow other related articles on the PHP Chinese website!
 如何调整Win10文件夹字体大小?Jun 30, 2023 pm 08:02 PM
win10电脑文件夹字体大小怎么设置?win10文件夹字体大小设置方法是首先点击左下角开始,然后选择打开设置。很多小伙伴不知道怎操作,小编下面整理了文件夹字体大小设置方法步骤,如果你感兴趣的话,跟着小编一起往下看看吧!文件夹字体大小设置方法步骤1、首先点击左下角开始,然后选择打开设置。2、之后去点击“系统”。3、点击左侧的“屏幕”。4、在右边找到“更改文本、应用等项目的大小”。5、最后点击下拉,选择100%即可。以上就是【win10电脑文件夹字体大小怎么设置-文件夹字体大小设置方法步骤】全部内容
 怎样设置win11电池充电上限Jul 01, 2023 pm 10:41 PM
怎样设置win11电池充电上限?用户想知道win11电脑中要怎么去设置电池充电上限呢,如果使用的是win11联想电脑,就打开电脑上的电脑管家,然后点击电池充电图标,点击更改电池阈值即可设置啦,若是华为win11电脑,就打开myasus软件,点击电池健康充电选项,选择保养模式即可开始设置电源充电上限啦,不会的话,小编下面整理了win11设置电池充电上限教程,一起往下看看吧!win11设置电池充电上限教程1、联想电脑需要先下载安装联想电脑管家2、打开它,点击底部的电池充电图标,点击上方的更改电池阈值
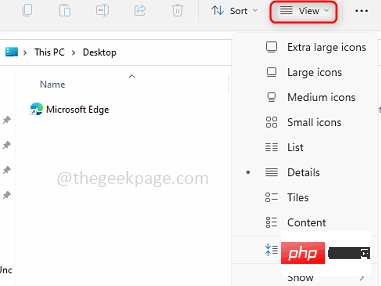 如何为所有文件夹在Windows 11中设置相同的文件夹视图?Apr 26, 2023 pm 10:31 PM
在Windows中,我们可以在文件资源管理器中查看文件夹、文件和其他文档。您可能已经观察到,很少有文件和文件夹具有较小的图标,而很少有较大的图标。因此可以理解,有一个定制选项可用。根据文件的性质,默认设置了不同的文件夹模板。例如,在包含照片的名为Picture的文件夹中,图像具有不同的视图。包含音乐文件的音乐文件夹将具有不同的模板。同样,对于文档、视频等文件夹,每个文件夹根据其类别包含不同的模板。您还可以选择文件夹的模板并将其设置为所有其他相同类型的文件夹。在本文中,我们将学习如何将文件夹视图应
 Win10分屏指南:如何设置分屏显示Jun 29, 2023 pm 10:37 PM
win10如何分屏操作?Win10系统中内置一个多窗口分屏功能,而这个功能很实用,不过有很多用户其实不知道要如何去为电脑进行分屏,其实实际操作起来还是非常简单的,下面就跟着小编一起来看看Win10设置分屏显示的方法,有需要的用户可不要错过。Win10设置分屏显示的指南第1步:同时单击(Windows键+I)打开Windows设置,或者您也可以单击Windows开始按钮,然后单击设置。第2步:单击系统并在左侧窗格中向下滚动,直到看到多任务处理选项。单击多任务处理。第3步:在右侧窗格中,通过单击切换
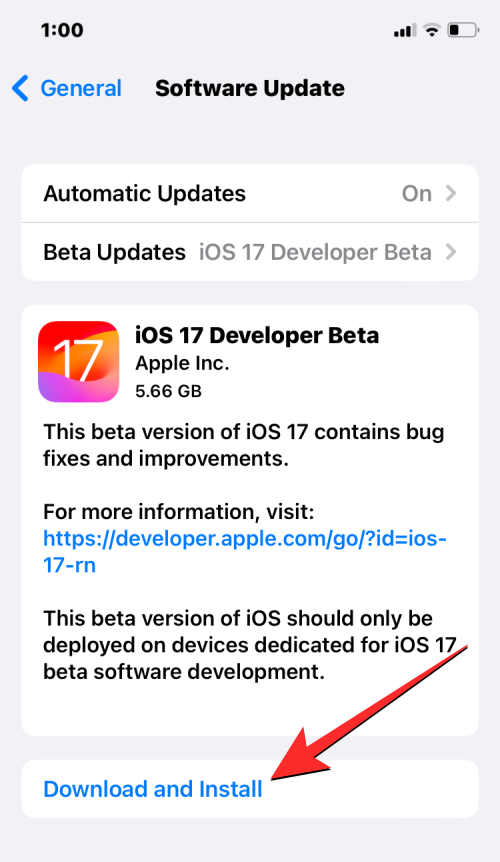 如何在 iPhone 上使用多计时器与 iOS 17Jun 21, 2023 am 08:18 AM
什么是iOS17上的多计时器?在iOS17中,Apple现在为用户提供了在iPhone上一次设置多个计时器的能力。这是一个可喜的变化,许多人多年来一直期待的变化。时钟应用程序在iOS16之前只允许用户一次设置一个计时器,现在可用于激活任意数量的计时器,使其成为您一次完成多个任务的理想选择。您可以在计时器屏幕中设置任意数量的计时器。启动计时器后,所有活动计时器都将在锁屏界面和通知中心显示为“实时活动”通知。从这里,您可以查看计时器关闭、暂停或停止计时器的剩余时间,而无需打开时钟应用程序。当您在时钟
![如何为您的 Windows lComputer 设置首选频段 [2023]](https://img.php.cn/upload/article/000/465/014/168773917841923.png) 如何为您的 Windows lComputer 设置首选频段 [2023]Jun 26, 2023 am 08:26 AM
如何为您的 Windows lComputer 设置首选频段 [2023]Jun 26, 2023 am 08:26 AM几乎所有最新品牌的笔记本电脑都配备了双品牌WiFi。您可以将WiFi设置为5GHz或2.4GHz带宽。但是,事情并没有那么简单。笔记本电脑上的此功能很好地隐藏在设备管理器中,您无法从“设置”页面执行此操作。按照我们的指南为您的笔记本电脑、PC设置首选频段。注意–要切换到5GHz带宽WiFi,您需要WiFi路由器和设备都支持双频WiFi。如果它们中的任何一个都没有支持,则无法更改WiFi带宽。如何在设备上设置首选的WiFi频段设置首选频段以充分利用您的WiFi非常容易。方式1–设置首选频段步骤1–
 Win10专业版的鼠标dpi数值如何设置Jun 29, 2023 pm 02:08 PM
Win10专业版的鼠标dpi数值如何设置?鼠标是常用办公硬件之一,我们通常需要对鼠标的灵敏度进行调节,调整到合适我们使用的数值,不过很多用户对鼠标dpi比较陌生,不知鼠标dpi在哪里调,要怎么调,很多小伙伴不知道怎么详细操作,小编下面整理了Win10调鼠标dpi的技巧,如果你感兴趣的话,跟着小编一起往下看看吧! Win10调鼠标dpi的技巧 1、进入Windows设置选择打开备 2、左侧的选项栏切换到鼠标,在右侧的相关设置下选择他鼠标选项 3、在鼠标属性口将上方选项卡切换到针选项在下方的
 如何在 Windows 11 上快速设置动态壁纸Apr 25, 2023 pm 02:13 PM
桌面屏幕上的壁纸是系统启动后最令人兴奋和最引人注目的功能之一。它对人们产生有利的影响,并鼓励他们在感到快乐的同时提高工作效率。另一方面,更换壁纸并定期寻找它是一项耗时的任务。那么,如果你的桌面屏幕有一个动态的动态壁纸,可以让你看到各种轻松的壁纸,那不是很好吗?这也将允许用户下载任何GIF并将其设置为系统上的壁纸。在这篇文章中,我们将教您如何使用MicrosoftStore在您的PC上创建或获取动态壁纸。如何使用MicrosoftStore在Windows11上快速设置或获取动态壁


Hot AI Tools

Undresser.AI Undress
AI-powered app for creating realistic nude photos

AI Clothes Remover
Online AI tool for removing clothes from photos.

Undress AI Tool
Undress images for free

Clothoff.io
AI clothes remover

AI Hentai Generator
Generate AI Hentai for free.

Hot Article

Hot Tools

SublimeText3 Linux new version
SublimeText3 Linux latest version

WebStorm Mac version
Useful JavaScript development tools

Dreamweaver CS6
Visual web development tools

SAP NetWeaver Server Adapter for Eclipse
Integrate Eclipse with SAP NetWeaver application server.

SublimeText3 Chinese version
Chinese version, very easy to use


