
Home >Backend Development >Python Tutorial >Introduction to python installation and usage
Introduction to python installation and usage

- PHP中文网Original
- 2017-06-21 16:39:372478browse
Python installation
#1、下载安装包
https://www.python.org/downloads/
2、安装
默认安装路径:C:\python273、配置环境变量
【右键计算机】--》【属性】--》【高级系统设置】--》【高级】--》【环境变量】--》【在第二个内容框中找到 变量名为Path 的一行,双击】 --> 【Python安装目录追加到变值值中,用 ; 分割】
如:原来的值;C:\python27,切记前面有分号
linux, Mac :
1 无需安装,原装Python环境2 3 ps:如果自带2.6,请更新至2.7
Update python:
1 windows: 2 3 1、卸载重装即可 4 5 linux: 6 7 Linux的yum依赖自带Python,为防止错误,此处更新其实就是再安装一个Python 8 9 查看默认Python版本10 python -V11 12 1、安装gcc,用于编译Python源码13 yum install gcc14 2、下载源码包,15 3、解压并进入源码文件16 4、编译安装17 ./configure18 make all19 make install20 5、查看版本21 /usr/local/bin/python2.7 -V22 6、修改默认Python版本23 mv /usr/bin/python /usr/bin/python2.624 ln -s /usr/local/bin/python2.7 /usr/bin/python25 7、防止yum执行异常,修改yum使用的Python版本26 vi /usr/bin/yum27 将头部 #!/usr/bin/python 修改为 #!/usr/bin/python2.6View Code

 Getting started with python
1 print("hello,world")
Execute the hello.py file, that is: python /home/dev/hello.py
The internal execution process of python is as follows:
2. Interpreter:
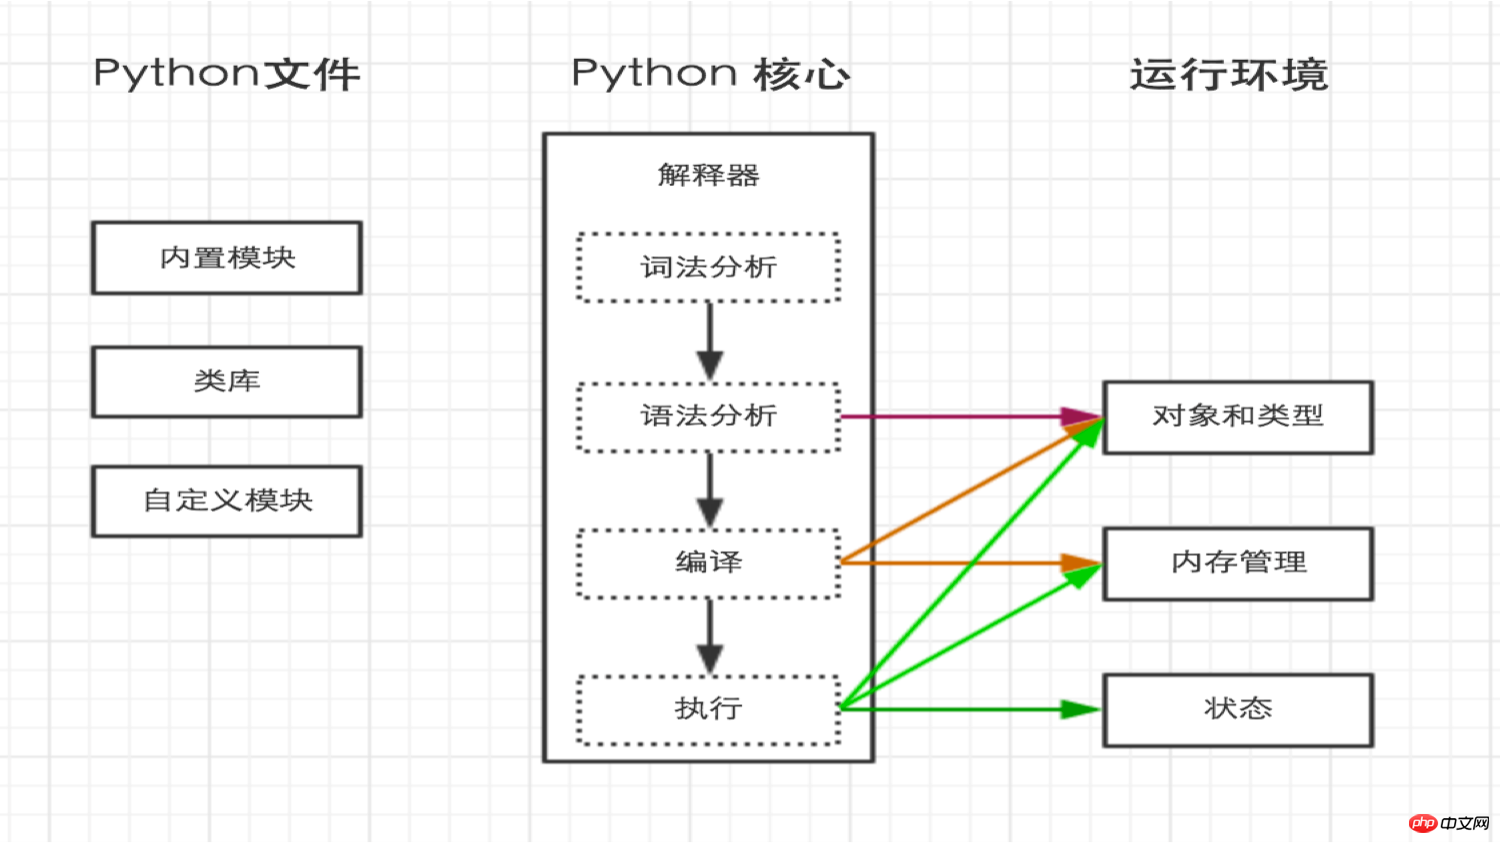 When executing python /home/dev/hello.py in the previous step, it was clearly stated that the hello.py script is executed by the python interpreter.
If you want to execute a python script similar to executing a shell script, for example:
./hello.py, then you need to specify the interpreter at the head of the hello.py file, as follows: 1 #!/usr/bin/env python2 3 print("hello,world")
In this case, execute: ./hello.py
. ps: Hello.py needs to be given execution permission before execution, chmod 755 hello.py
When the python interpreter loads the code in the .py file, it will encode the content (default ascill)
Obviously ASCII code cannot convert all kinds of text in the world and symbols are all represented, so a new encoding that can represent all characters and symbols is needed, namely: Unicode
Unicode (Unicode, Universal Code, Single Code) is a code used on computers Character Encoding. Unicode was created to solve the limitations of traditional character encoding schemes. It sets a unified and unique binary encoding for each character in each language, stipulating that all characters and symbols must be represented by at least 16 bits (2 bytes), that is: 2 **16 = 65536, 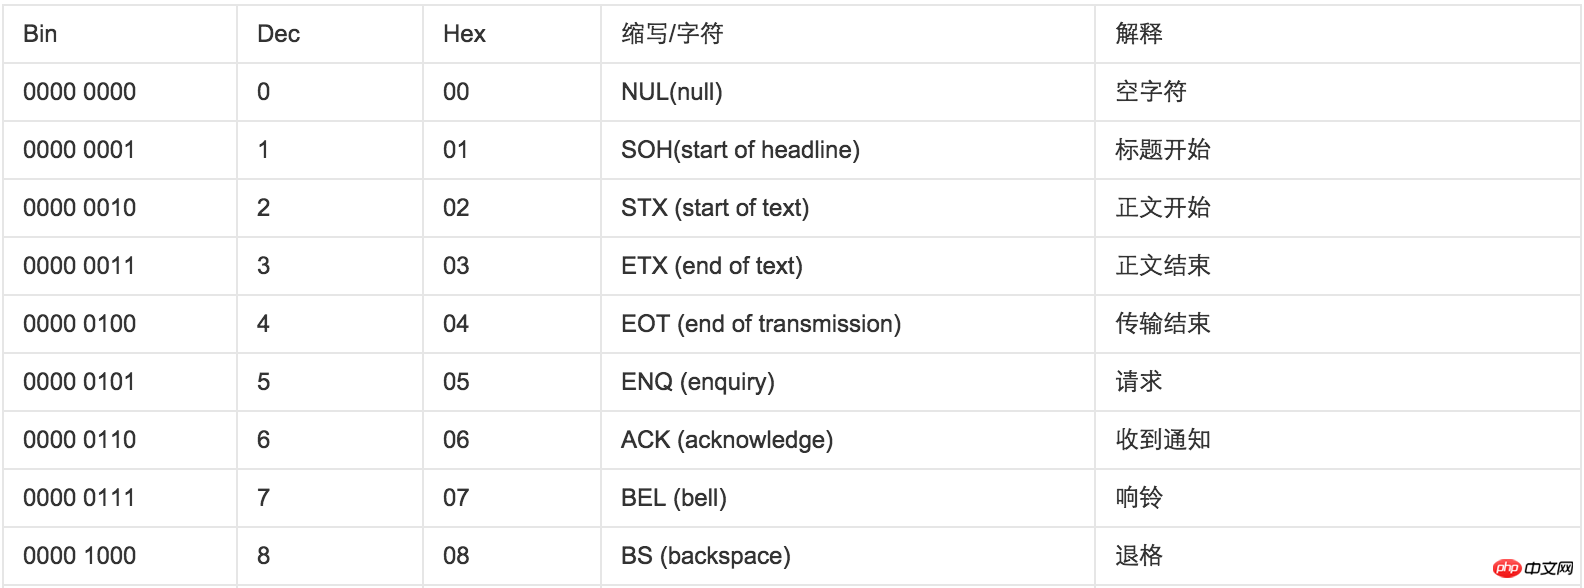 Note: What is mentioned here is at least 2 bytes, possibly more
UTF-8, which is the compression of Unicode encoding And optimization, he no longer uses at least 2 bytes, but classifies all characters and symbols: the content in the ascii code is saved in 1 byte, European characters are saved in 2 bytes, and East Asian characters Save with 3 bytes...
So, when the python interpreter loads the code in the .py file, it will encode the content (default ascill)
4. Comment:
5. pyc file:
When executing Python code, if other .py files are imported, a .pyc with the same name will be automatically generated during execution. file, which is the bytecode generated after compilation by the Python interpreter. ps: The code can be compiled to produce bytecode; the bytecode can also be decompiled to obtain the code.6. Variables:
1. Declare variables
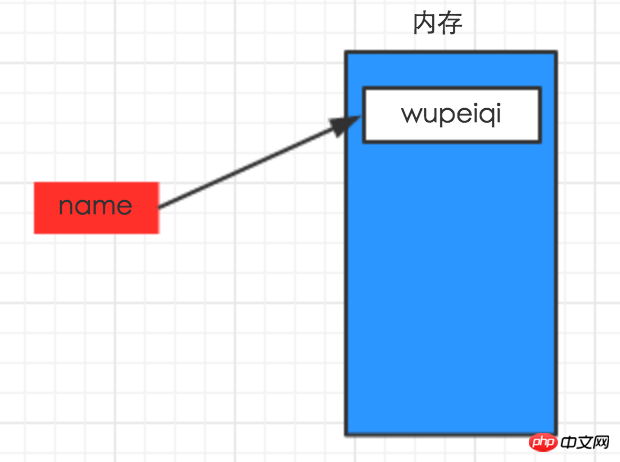
1 #!/usr/bin/env python2 # -*- coding: utf-8 -*-3 4 name = "wupeiqi"
上述代码声明了一个变量,变量名为: name,变量name的值为:"wupeiqi"
变量的作用:昵称,其代指内存里某个地址中保存的内容
变量定义的规则:
变量名只能是 字母、数字或下划线的任意组合
变量名的第一个字符不能是数字
以下关键字不能声明为变量名
['and', 'as', 'assert', 'break', 'class', 'continue', 'def', 'del', 'elif', 'else', 'except', 'exec', 'finally', 'for', 'from', 'global', 'if', 'import', 'in', 'is', 'lambda', 'not', 'or', 'pass', 'print', 'raise', 'return', 'try', 'while', 'with', 'yield']
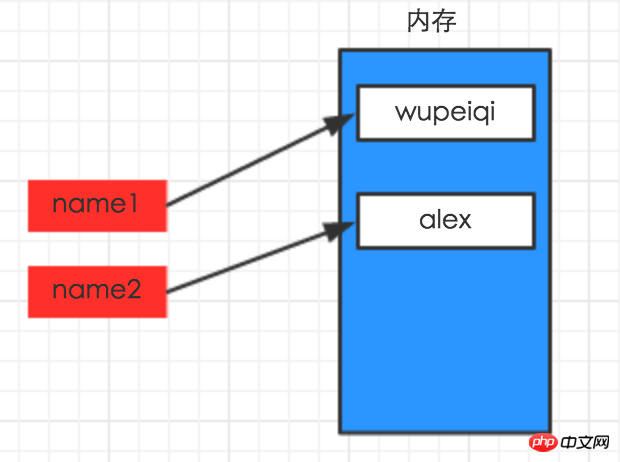
2、变量的赋值:
1 #!/usr/bin/env python2 # -*- coding: utf-8 -*-3 4 name1 = "wupeiqi"5 name2 = "alex"
The above is the detailed content of Introduction to python installation and usage. For more information, please follow other related articles on the PHP Chinese website!