
Home >Web Front-end >HTML Tutorial >Example tutorial on modifying element.style inline style
Example tutorial on modifying element.style inline style

- 零下一度Original
- 2017-06-19 10:24:371884browse
This article mainly introduces you to the modification method of element.style inline style. The article gives a detailed introduction for your reference and study. It has certain reference and learning value for everyone. Let’s take a look together.
Preface
When we write the previous web page style, we will find that sometimes, no matter how we modify the value in style, the style on the page will not be modified. , when you use the tool to view it, you will find that there is a value of element.style in it. You can't find where this value appears, and you can't modify it.
In fact, element.style is an inline style. In many cases, it is hard-coded in some JavaScript code. This method is quite bad. But sometimes, when we use third-party js files, we will encounter. So how do we modify it? In the source code, use !important syntax priority to achieve the effect we want.
For example:
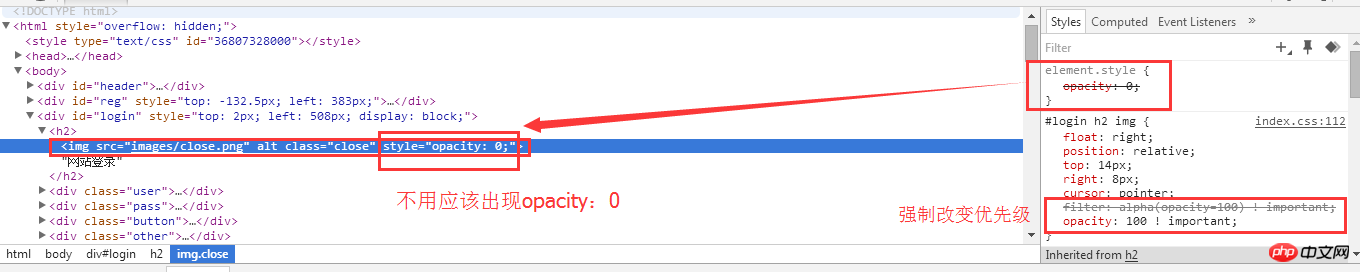
By default, the above picture is transparent and is green, we can’t find it How to modify element.style? At this time, you can modify it in the following CSS style sheet:
As shown above, add an opacity: 100 ! important ; to the CSS style sheet. What you can see is the most The above opacity: 0 is disabled, which means that opacity: 100 is displayed first.
The above is the detailed content of Example tutorial on modifying element.style inline style. For more information, please follow other related articles on the PHP Chinese website!