
Home >Operation and Maintenance >Linux Operation and Maintenance >Linux Learning Part 3: Detailed Introduction to Centos7 Installation of Mysql5.7.16 Database
Linux Learning Part 3: Detailed Introduction to Centos7 Installation of Mysql5.7.16 Database

- 黄舟Original
- 2017-06-02 10:13:362281browse
This article mainly introduces the third article of LinuxLearning in detail, Centos7installationmysql5.7.16 database, which has certain reference value. Interested friends can refer to
Foreword: Installing mysql under Linux is not as simple as under Windows, but it is not difficult either. This article explains to you how to install mysql5.7 version under Centos7. If there are any problems or errors, please point them out.
Version: mysql-5.7.16-1.el7.x86_64.rpm-bundle.tar
Note: Before installation, you need to confirm whether the current system has mysql. If so, it must be uninstalled (centos7 comes with the mariaDb database, so the first The first step is to uninstall the database)
View mysql database:
rpm -qa | grep -i mysql
Uninstall the mysql database:
rpm -e [mysql文件名]
If there are associated files, you cannot uninstall it directly. You can use the following command to force uninstall
rpm -e --nodeps [mysql文件名]
1. Copy mysql-5.7.16-1.el7.x86_64.rpm-bundle.tar to /home/ (When installing software under Linux, you generally need to copy the files to the home directory)
cp mysql-5.7.16-1.el7.x86_64.rpm-bundle.tar /home/
2. Unzip the files
tar -xvf mysql-5.7.16-1.el7.x86_64.rpm-bundle.tar
The following are all the rpm files extracted

3. Unzip and install the rpm file
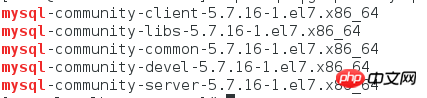
1. Generally, you only need to install the following files
2. Next, use the command to decompress the rpm files one by one and install them.
Note: There is a detail here Everyone needs to pay attention to the fact that the above files are also in order during installation, and they have corresponding priorities. So you need to unzip and install one by one in the following order
mysql-community-common-5.7.16-1.el7.x86_64
mysql-community-libs-5.7.16-1.el7.x86_64
mysql-community-client-5.7.16-1.el7.x86_64
mysql-community-server-5.7.16-1.el7.x86_64
mysql-community-devel-5.7.16-1.el7.x86_64
4. After the installation is successful, start the mysql service
systemctl start mysqld.service
5. Check the 3306 port Whether to enable
netstat -ln | grep 3306

6. Modify the my.cnf configuration file
1. This The first step is to find the my.cnf file. The default path of the my.cnf file is /etc/my.cnf
2. Edit my.cnf
vim /etc/my.cnf
3. Press 'i' to enter After inserting the mode, insert the following code
[mysqld]
datadir=/var/lib/mysql
socket=/var/lib/mysql/mysql.sock
symbolic-links=0
log-error=/var/log/mysqld.log
pid-file=/var/run/mysqld/mysqld.pid
validate_password=off
default-storage-engine=INNODB
character-set-server=utf8
collation-server=utf8_general_ci
Note: validate_password=off means to turn off the password verification plug-in (this sentence must be added because when changing the password It will be very troublesome if you don’t add it.)
4. Save and Exit (After pressing 'esc', enter ':wq')

5 Restart the mysql service
systemctl restart mysqld.service
7. This step is particularly important. Each previous step must be carefully tested and executed successfully.
1. Initialization table
/user/sbin/mysqld --initialize --user=mysql
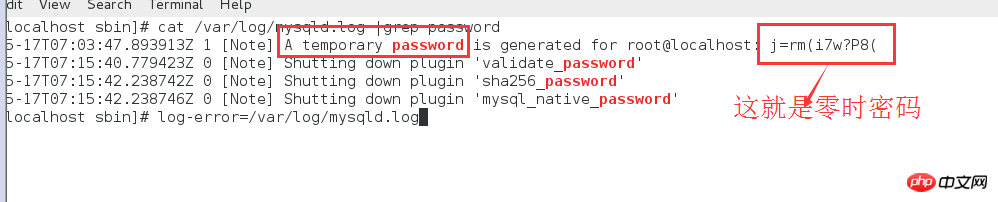
2. After initialization, a mysql zero-time login password will be generated, so where can I check it? The log path configured in the my.cnf file is log-error=/var/log/mysqld.log. Check the mysqld.log log under this path and find the zero-hour password
cat /var/log/mysqld.log |grep password
3. Re-modify the password of the mysql database based on the zero-hour password
mysql_secure_installation
4. After pressing Enter, he will ask you to enter the password. You only need to enter the zero-hour password.
5. After entering the correct password, enter the new password and confirm.
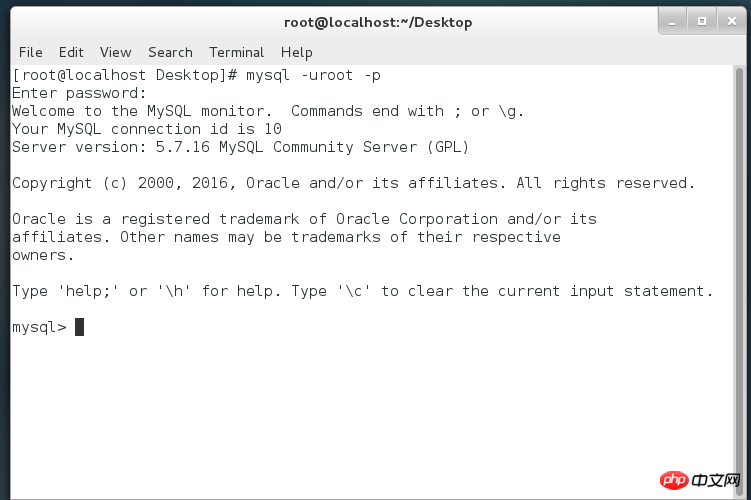
8. After successfully changing the password, you can log in to mysql
The above is the detailed content of Linux Learning Part 3: Detailed Introduction to Centos7 Installation of Mysql5.7.16 Database. For more information, please follow other related articles on the PHP Chinese website!