 Operation and Maintenance
 Windows Operation and Maintenance
 Share a graphic example of Win2003 IIS installation method
Win server2003 IIS installation method, whether it is uninstalling and reinstalling, or installing for the first time, you need to know. By default, iis is not installed.
Generally everyone installs the win2003 system first, graphic tutorial Win2003 server system installation graphic tutorial
It must be installed through the control panel. The specific method is:
1. Enter the "Control Panel".
2. Double-click "Add or RemovePrograms".
3. Click Add/Remove Windows Components.
4. In the "Components" list box, double-click "Application Server".
5. Double-click "Internet Information Services (IIS)".
6. Select "World Wide Web Service" and "File Transfer Protocol (FTP) Service".
7. Double-click "World Wide Web Service" and select "Active Server Pages" and "World Wide Web Service".
After installing IIS, then set up the Web server. The specific method is:
1. Select "Administrative Tools→Internet Information Services (IIS) Manager" in the "Start" menu.
2. Double-click "Local Computer" in "Internet Information Services (IIS) Manager".
3. Right-click "Website", select "New → Website" in the pop-up menu, and open the "Website Creation Wizard".
4. Fill in the "Website Description", "IP Address", "Port Number", "Path" and "Website Access Permissions" in sequence. Finally, default documents (Index.asp, Index.htm) should also be set for easy access.
The above settings are basically the same as the Windows 2000 Server website settings, but at this time the Web service is only applicable to static content, that is, static pages can be browsed normally, and the commonly used Active Server Pages (ASP) function is not enabled. . Therefore, you should also select to allow "Active Server Pages" in the "Web Service Extensions" of "Internet Information Services (IIS) Manager".
a. Install IIS
If the IIS server has not been installed in the operating system, you can open the "Control Panel" and click to start "Add/Remove" Programs", select "Add/Remove Windows Components" in the pop-up dialog box, select "Internet Information Services (IIS)" in the Windows Component Wizard dialog box, then click "Next" and follow the wizard instructions to complete the IIS installation. (Illustrations such as Figure 1 and Figure 2 below. Since Baicha 123 uses the Windows Server 2003 operating system, it is slightly different from your installation interface, but it is generally the same)
Related to this topicPictures are as follows :

Figure 1—Windows Component Wizard 1
Relevant pictures for this topic are as follows:

Figure 2—Windows Component Wizard 2
b. Start Internet Information Services (IIS)
Internet Information Services is referred to as IIS, click Windows Start Menu---All Program---Management Tools---Internet Information Services (IIS) Manager, you can start the "Internet Information Services" management tool (Figure 3)
Relevant pictures for this topic are as follows:

Figure 3 - Internet Information Services (IIS) Manager
c. Configure IIS
After IIS is installed, the system automatically creates A default Web site is created, and the home directory of the site defaults to C:\\Inetpub\\www.root.
Right-click the "Default Web Site" and select "Properties" in the pop-up shortcut menu. At this time, you can open the site property settings dialog box, (Figure 4) In this dialog box, complete the configuration of the site.
Related pictures for this topic are as follows:

Figure 4—Default Web site properties
Home directory and enabled parent path
Click the "Home Directory" label to switch to the home directory setting page (as shown in Figure 5). This page allows you to change or set the home directory. Pay attention to check whether the Enable parent path option is checked. If it is not checked, it will have some impact on future program operation. (As shown in Figure 6), Home Directory—Configuration—Options.
Related pictures of this topic are as follows:

Figure 5 - Default Web site home directory settings
Related pictures of this topic are as follows:

Figure 6—Default Web site enables parent path setting
Set homepage document
Click the "Document" tab to switch to the settings page for the home page document. (As shown in Figure 7) The home page document is accessed by the system by default when the website domain name is entered in the browser and the web page file to be accessed is not specified. Page file. Common homepage file names include index.htm, index.html, index.asp, index.php, index.jap, default.htm, default.html, default.asp, etc.
The default homepage document of IIS is only default.htm and default.asp, as needed, use the "Add" and "Delete" buttons to set the homepage document that can be parsed for the site.
Start and stop the IIS service
The toolbar of the Internet Information Service provides the function of starting and stopping the service. Click to start the IIS server; click to stop the IIS server.
============================================== =========================
1. Enable Asp support
WindowsServer2003 is installed by default and IIS6 is not installed. It is required Install separately. After installing IIS6, you need to enable ASP support separately.
The first step is to enable Asp and go to: Control Panel->Administrative Tools->IIS (Internet Server)-Web Service Extension->ActiveServerPages->Allow
Control Panel->Administrative Tools->IIS (Internet Server)-Web Service Extension->Include files on the server side->Allow
Second step ,enable parent path support.
IIS-Website-Home Directory-Configuration-Options-Enable Parent Path
The third step, permission allocation
IIS-Website-(Specific site)-(right-click) Permissions-Users Full Control
2. Solve the limitation that windows2003 can only upload a maximum of 200K.
First close the iisadminservice service in the service
Find metabase.xml,
Open it, find ASPMaxRequestEntityAllowed and modify it to the required value,
Then restart the iisadminservice service
1. Allow activeserverpages and include files on the server side in the web service extension
2. Modify the properties of each site
Home Directory-Configuration-Options-Enable Parent Path
3. Make it possible to upload files larger than 200k (just change it to the size you want. If you add two 0s at the end, 20m is allowed)
c:\WINDOWS \system32\inetsrv\MetaBase.xml
(Enterprise version of windows2003 is on line 592, the default is AspMaxRequestEntityAllowed="204800", which is 200K
Add two 0s to it, that is, change it to, Now you can upload up to 20M
AspMaxRequestEntityAllowed="20480000"
Some points to note when configuring IIS on WIN2003
Configuring WindowsServer2003--IIS6
MicrosoftKnowledgeBaseArticle-324742
This article Information in applies to:
MicrosoftWindowsServer2003,DatacenterEdition
MicrosoftWindowsServer2003,EnterpriseEdition
MicrosoftWindowsServer2003,StandardEdition
MicrosoftWindowsServer2003,WebEdition
MicrosoftWindowsServer2003,64-BitDatacenterEdition
MicrosoftWindowsServer2003,64-BitEnterpriseEdition
MicrosoftInternetIn
for
mationServicesversion6.0
This step-by-step guide describes how to set up a WWW server for anonymous access in a Windows Server 2003 environment.
Install Internet Information Services
Microsoft Internet Information Services (IIS) is a Web service integrated with Windows Server 2003.
To install IIS, add optional components, or remove optional components, follow these steps:
1. Click Start, point to Control Panel, and then click "Add or Remove Programs."
The "Add or Remove Programs" tool will start.
2. Click Add/Remove Windows Components.
Display the "Windows Components Wizard".
3. In the Windows components list, click Web Application Server.
4. Click Details and then Internet Information Services (IIS).
5. Click Details to view a list of IIS optional components.
6. Select the optional components you want to install. By default, the following components are selected:
---Public Files
---FrontPage2002ServerExtentions
---Internet Information Services Snap-in
---Internet Information Services Manager
---NNTP Service
---SMTP Service
---WorldWideWeb Service
7. Click "WorldWideWeb Service" and then click Details to view IIS optional subcomponents (such as ActiveServerPages components and "Remote Administration (HTML) Tools") list. Select the optional subcomponents you want to install. By default, the following components are selected:
---WorldWideWeb Service
8. Click OK until you return to the "Windows Component Wizard".
9. Click Next and complete the "Windows Components Wizard".
Configure anonymous authentication
To configure anonymous authentication, follow these steps:
1. Click Start, point to Administrative Tools, and then click Internet Information Services (IIS).
2. Expand "*Server Name" (where server name is the name of the server), right-click the Web site, and then click Properties.
3. In the Web site properties dialog box, click the Directory Security tab.
4. Under Authentication and Access Control, click Edit.
5. Click the "Enable anonymous access" checkbox to select it.
Note: The user account in the "Username" box is only used for anonymous access through the Windows guest account.
By default, the server creates and uses the account IUSR_computername. Anonymous user account passwords are used only in Windows; anonymous users do not log in with a username and password.
6. Under Authenticated Access, click the Integrated Windows Authentication check box to select it.
7. Click OK twice.
Basic Web Site Configuration
1. Click Start, point to Administrative Tools, and then click Internet Information Services (IIS).
2. Expand "*Server Name" (where the server name is the name of the server), and then expand the Web site.
3. Right-click Default Web Site and click Properties.
4. Click the Web site tab. If you have assigned multiple IP addresses to your computer, click the IP address that you want to assign to this Web site in the IP address box.
5. Click the Performance tab. Use the Web Site Properties - Performance dialog box to set properties that affect memory, bandwidth usage, and the number of Web connections.
By configuring the network bandwidth on a specific site, you can better control the traffic to that site. For example, by limiting bandwidth on a low priority Web site, you can relax restrictions on the amount of traffic to that site. Likewise, when you specify the number of connections to a Web site, you free up resources for other sites. Settings are site-specific and should be adjusted based on changes in network traffic and usage.
---Click the "Limit the bandwidth available to this Web site" checkbox and select it to configure IIS to adjust the network bandwidth to the selected maximum amount of bandwidth, measured in kilobytes per second (KB/ S) is the unit.
---Click the Web service connection check box and select it to select a specific number or an unlimited number of Web service connections. Limiting connections makes computer resources available for other processes.
Note: Each client browsing a Web site typically uses approximately three connections.
6. Click the Home Directory tab.
---If you want to use web content stored on your local computer, then click "Directory on this computer" and then type the path you want in the Local Path box. For example, the default path is C:\Inetpub\wwwroot.
Note: For added security, please do not create web content folders in the root directory.
---If you want to use web content stored on another computer, click "Shared location on another computer" and then type the desired location in the network directory box that appears.
---If you want to use web content stored at another web address, click "Redirect to URL" and then type the desired location in the "Redirect to" box. Under Customer Delivery, click the appropriate checkbox to select it.
7. Click the Document tab. Please note the list of documents that can be used by IIS as the default startup document. You must add Index.html if you want to use it as the startup document. The adding method is:
a. Click Add.
b. In the Add Default Document dialog box, type Index.html, and then click OK.
c. Click the up arrow button until Index.html is displayed at the top of the list.
8. Click OK to close the Default Web Site Properties dialog box.
9. Right-click the Default Web Site and click Permissions.
10. Please pay attention to the user accounts that have operating permissions on this website. Click Add to add additional user accounts that can operate this website.
11. Click OK to return to the "Internet Information Services" window.
12. Right-click the Default Web Site and click Stop.
13. Right-click Default Web Site and click Start.
Note when installing the OA system on WINDOWS2003:
How to enable ASP support:
WindowsServer2003 is installed by default and IIS6 is not installed. Requires additional installation. After installing IIS6, you need to enable ASP support separately. The method is:
Control Panel->Administrative Tools->Web Service Extensions->ActiveServerPages->Allow.
Q: When the ASP file contains files, it prompts ActiveServerPages error_ASP0131_Parent path not allowed. How to solve it?
A: Select Home Directory-Configuration-Application Options in the site properties and select "Enable Parent Directory".
Q: When logging into the OA system, it prompts "No necessary files for OA found". How to solve the problem?
A: Select Properties - Security - Select the USER group on the OASERVER folder, turn on all permissions, click "Advanced", check "Reset all object permissions and allow propagation of inheritable permissions", and click "OK" "Twice, you can log in later
4. The solution to the problem that IIS cannot download files is to change the properties of the website. Check the execution permissions in the home directory. Set it as a pure script
runas /profile /user:ourcomputeradministrator "mmc gpedit.msc""
[Related recommendations]
1. win2003 Solution to CD-KEY (serial number) failure to verify when installing SQL2000
2. win2003 How to install sqlserver 2005
3. 64-bit How to install Mysql5.7.11 on Win10 system (detailed case explanation)_MySQL
The above is the detailed content of Share a graphic example of Win2003 IIS installation method. For more information, please follow other related articles on the PHP Chinese website!
 win11安装语言包错误0x800f0950什么原因Jul 01, 2023 pm 11:29 PM
win11安装语言包错误0x800f0950什么原因?当我们在给windows11系统安装新语言包时,有时会遇到系统提示错误代码:0x800f0950,导致语言包安装流程无法继续进行下去。导致这个错误代码一般是什么原因,又要怎么解决呢?今天小编就来给大家说明一下win11安装语言包错误0x800f0950的具体解决步骤,有需要的用户们赶紧来看一下吧。win11电脑错误代码0x800f0950解决技巧1、首先按下快捷键“Win+R”打开运行,然后输入:Regedit打开注册表。2、在搜索框中输入“
 如何在 Google Docs 中安装自定义字体Apr 26, 2023 pm 01:40 PM
GoogleDocs在学校和工作环境中变得很流行,因为它提供了文字处理器所期望的所有功能。使用Google文档,您可以创建文档、简历和项目提案,还可以与世界各地的其他用户同时工作。您可能会注意到GoogleDocs不包括MicrosoftWord附带的所有功能,但它提供了自定义文档的能力。使用正确的字体可以改变文档的外观并使其具有吸引力。GoogleDocs提供了大量字体,您可以根据自己的喜好从中选择任何人。如果您希望将自定义字体添加到Google文档,请继续阅读本文。在本文中
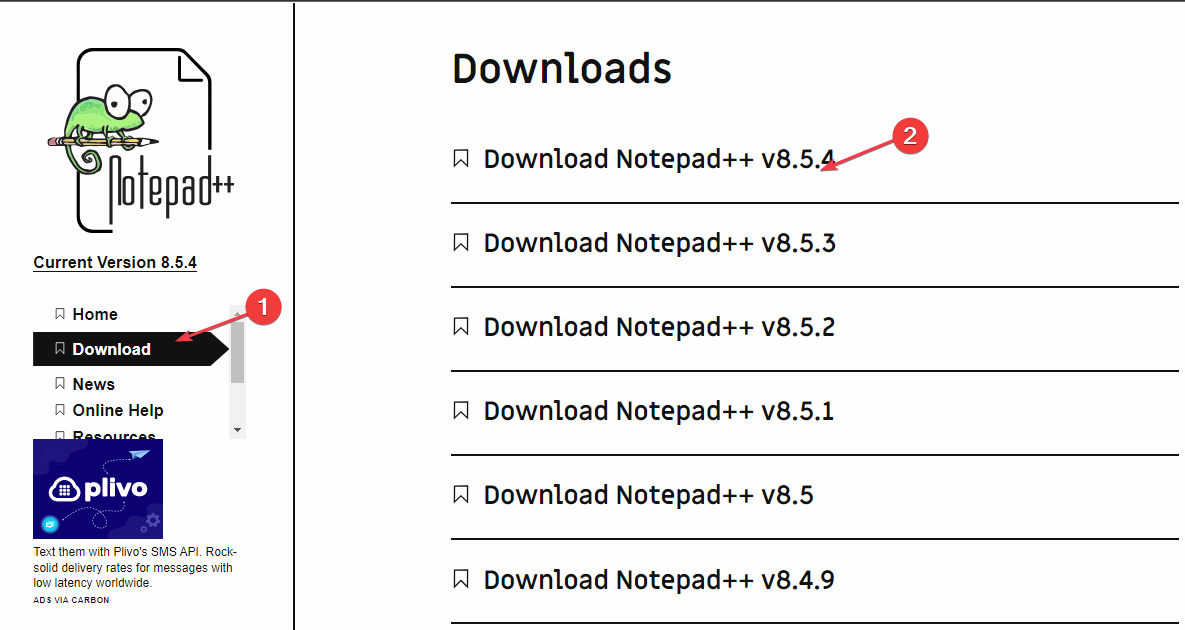 适用于 Windows 11 的记事本++:如何下载和安装它Jul 06, 2023 pm 10:41 PM
Notepad++主要由开发人员用于编辑源代码,由临时用户用于编辑文本。但是,如果您刚刚升级到Windows11,则在您的系统上下载和安装该应用程序可能具有挑战性。因此,我们将讨论在Windows11上下载和安装记事本++。此外,您可以轻松阅读我们关于修复Notepad++在Windows上没有响应的详细指南。记事本++可以在Windows11上运行吗?是的,记事本++可以在Windows11上有效工作,而不会出现兼容性问题。更具体地说,没有臃肿的选项或错误,只需在一个非常小的编辑器中即可。此外
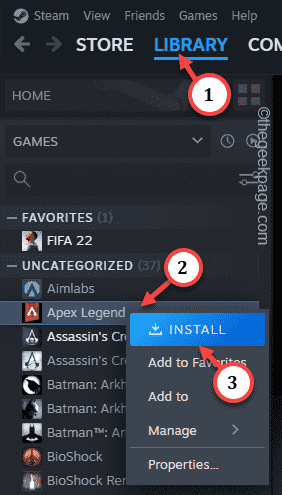 Steam 未检测到 Windows 11/10 中已安装的游戏,如何修复Jun 27, 2023 pm 11:47 PM
Steam客户端无法识别您计算机上的任何游戏吗?当您从计算机上卸载Steam客户端时,会发生这种情况。但是,当您重新安装Steam应用程序时,它会自动识别已安装文件夹中的游戏。但是,别担心。不,您不必重新下载计算机上的所有游戏。有一些基本和一些高级解决方案可用。修复1–尝试在同一位置安装游戏这是解决这个问题的最简单方法。只需打开Steam应用程序并尝试在同一位置安装游戏即可。步骤1–在您的系统上打开Steam客户端。步骤2–直接进入“库”以查找您拥有的所有游戏。第3步–选择游戏。它将列在“未分类
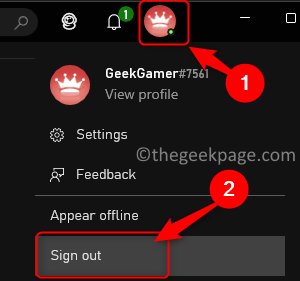 修复:在 Xbox 应用上的 Halo Infinite(Campaign)安装错误代码 0X80070032、0X80070424 或 0X80070005May 21, 2023 am 11:41 AM
<p><strong>HaloInfinite(Campaign)</strong>是一款第一人称射击视频游戏,于2021年11月推出,可供单人和多用户使用。该游戏是Halo系列的延续,适用于Windows、XboxOne和Xbox系列的用户X|S。最近,它还在PC版XboxGamePass上发布,以提高其可访问性。大量玩家报告在尝试使用WindowsPC上的<strong>Xbox应
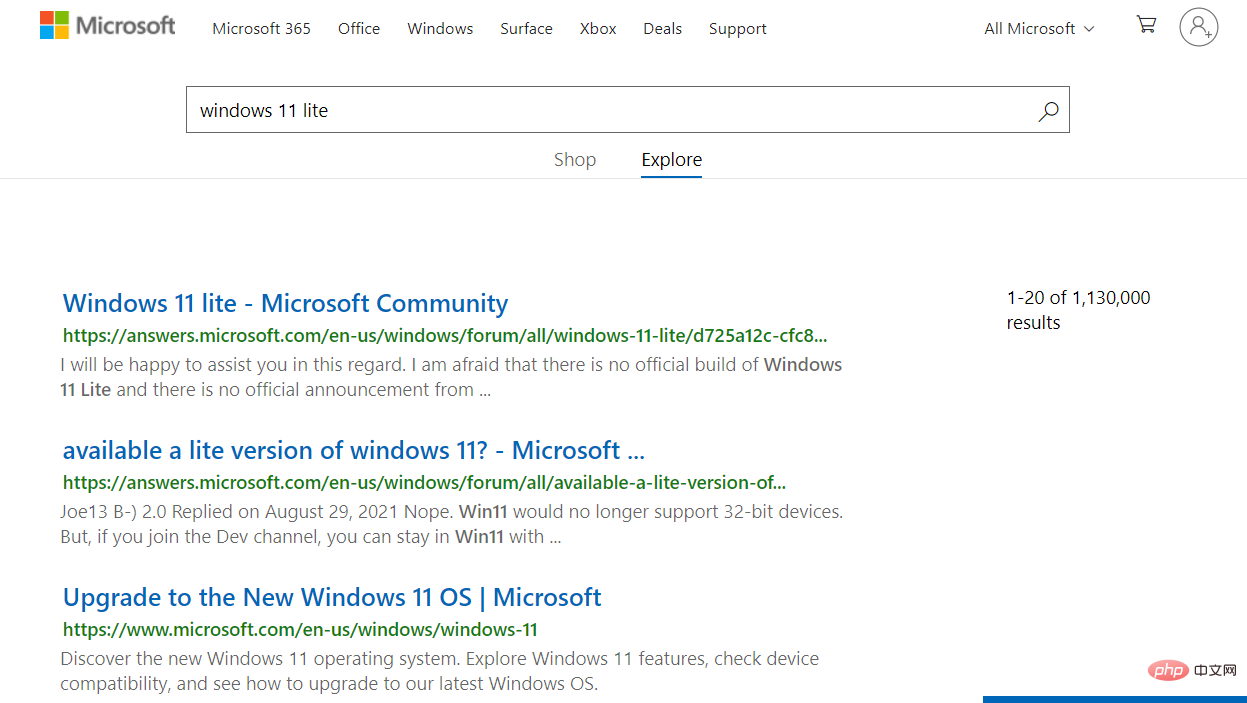 Windows 11 Lite:它是什么以及如何在您的 PC 上安装它Apr 14, 2023 pm 11:19 PM
我们深知MicrosoftWindows11是一个功能齐全且设计吸引人的操作系统。但是,用户一直要求Windows11Lite版本。尽管它提供了重大改进,但Windows11是一个资源匮乏的操作系统,它可能很快就会使旧机器混乱到无法顺利运行的地步。本文将解决您最常问的关于是否有Windows11Lite版本以及是否可以安全下载的问题。跟着!有Windows11Lite版本吗?我们正在谈论的Windows11Lite21H2版本是由Neelkalpa的T
 虚拟机如何安装Win11Jul 03, 2023 pm 12:17 PM
虚拟机怎么安装Win11?近期有用户想要尝试使用VirtualBox虚拟机安装Win11,但是不太清楚具体的操作方法,针对这一情况,小编将为大家演示使用VirtualBox安装Win11的方法,很多小伙伴不知道怎么详细操作,小编下面整理了使用VirtualBox安装Win11的步骤,如果你感兴趣的话,跟着小编一起往下看看吧! 使用VirtualBox安装Win11的步骤 1、要下载VirtualBox,请前往VirtualBox官方下载页面,下载适用于Windows的.exe文件。如果你
 教大家win7精简版如何安装Jul 09, 2023 pm 02:05 PM
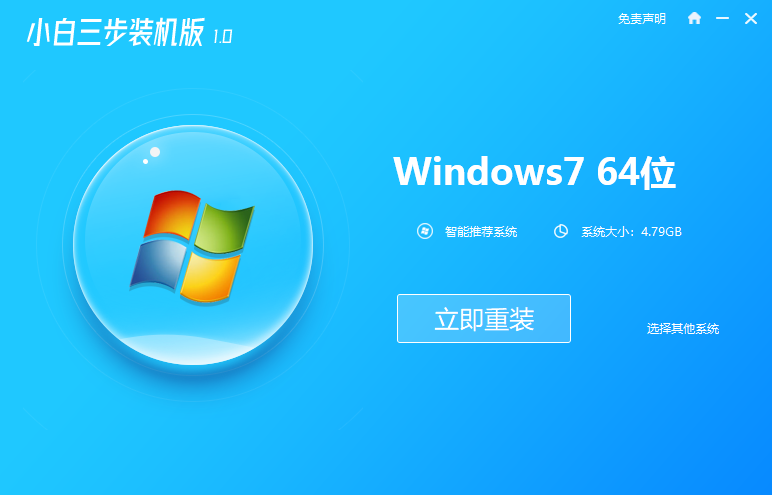
重装系统对于电脑小白来说真不是一件简单的事情,那么下面就和大家聊聊电脑重装精简版win7系统的一个方法吧。1、在小白一键重装系统官网中下载小白三步装机版软件并打开,软件会自动帮助我们匹配合适的系统,然后点击立即重装。2、接下来软件就会帮助我们直接下载系统镜像,只需要耐心等候即可。3、下载完成后软件会帮助我们直接进行在线重装Windows系统,请根据提示操作。4、安装完成后会提示我们重启,选择立即重启。5、重启后在PE菜单中选择XiaoBaiPE-MSDNOnlineInstallMode菜单进入


Hot AI Tools

Undresser.AI Undress
AI-powered app for creating realistic nude photos

AI Clothes Remover
Online AI tool for removing clothes from photos.

Undress AI Tool
Undress images for free

Clothoff.io
AI clothes remover

AI Hentai Generator
Generate AI Hentai for free.

Hot Article

Hot Tools

Dreamweaver Mac version
Visual web development tools

MinGW - Minimalist GNU for Windows
This project is in the process of being migrated to osdn.net/projects/mingw, you can continue to follow us there. MinGW: A native Windows port of the GNU Compiler Collection (GCC), freely distributable import libraries and header files for building native Windows applications; includes extensions to the MSVC runtime to support C99 functionality. All MinGW software can run on 64-bit Windows platforms.

MantisBT
Mantis is an easy-to-deploy web-based defect tracking tool designed to aid in product defect tracking. It requires PHP, MySQL and a web server. Check out our demo and hosting services.

Atom editor mac version download
The most popular open source editor

Notepad++7.3.1
Easy-to-use and free code editor


