Home >Backend Development >Python Tutorial >Mysql database installation and usage tutorial
Mysql database installation and usage tutorial
- Y2JOriginal
- 2017-05-16 13:07:452103browse
In Python web crawlers, it is usually stored in TXT plain text, but it can also be stored in a database; at the same time, in WAMP (Windows, Apache, MySQL, PHP or Python) development websites, it can also be built through Python Web page, so this article mainly talks about the programming knowledge related to Python calling MySQL database
In Python web crawler, it is usually stored in TXT plain text, but it can also be stored in the database; at the same time, in WAMP ( Windows, Apache, MySQL, PHP or Python) can also build web pages through Python, so this article mainly talks about programming knowledge related to Python calling MySQL database. Explain from the following aspects:
1. Configuring MySLQ
2. Basic knowledge of SQL statements
3. Basic knowledge of Python operating MySQL
4. Python calling MySQL example
1. Configure MySQL
First download mysql-5.0.96-winx64.
1. Install MySQL 5.0 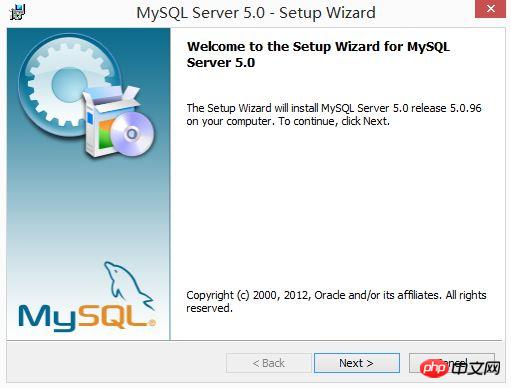
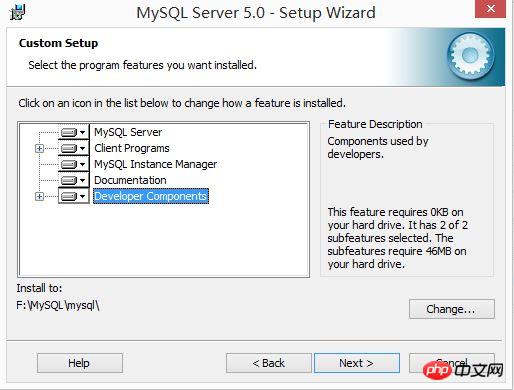
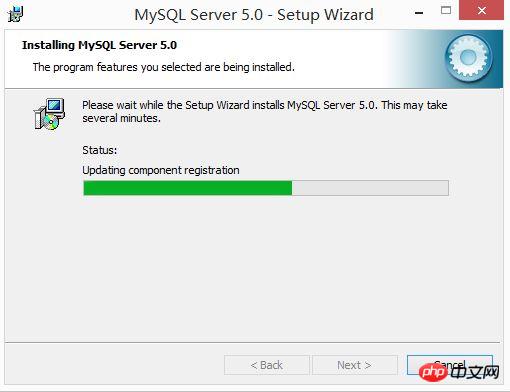 2. Select Manual Configuration, Service Type, Universal Multi-Function and Installation Path
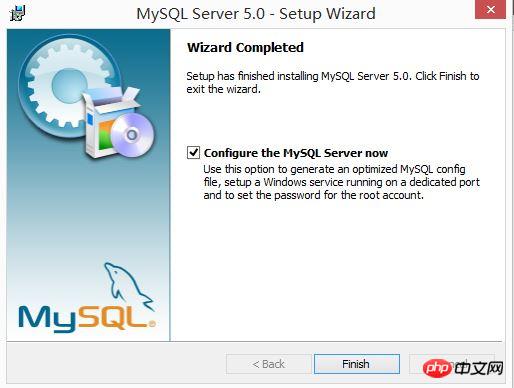
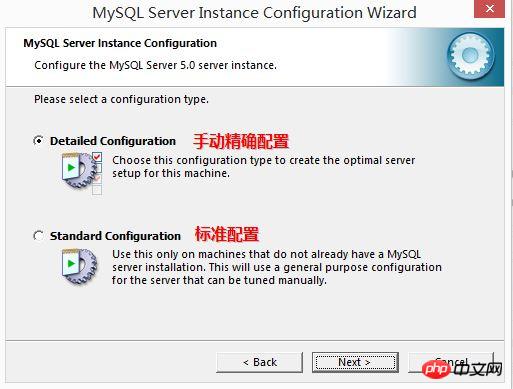
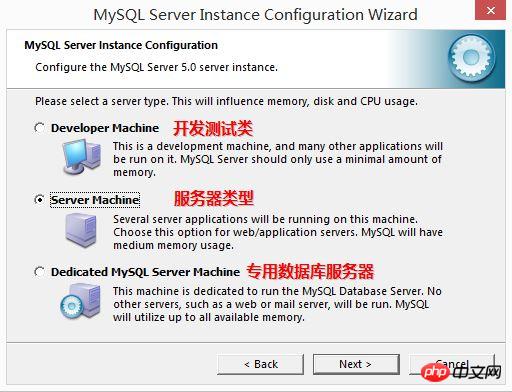
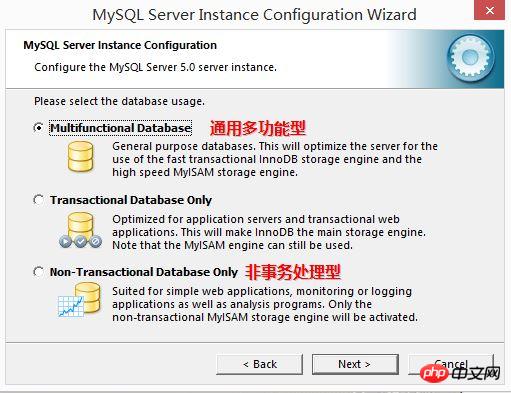 3. Set the number of database access connections to 15 and the port to 3306 (used to set the URL in the code) , the encoding method is utf-8
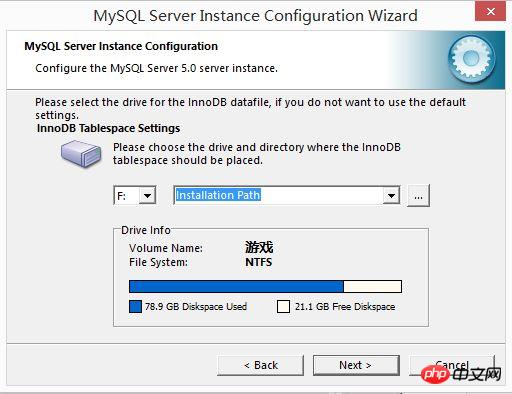
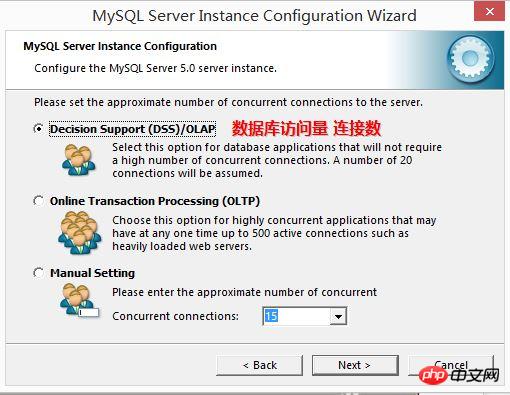
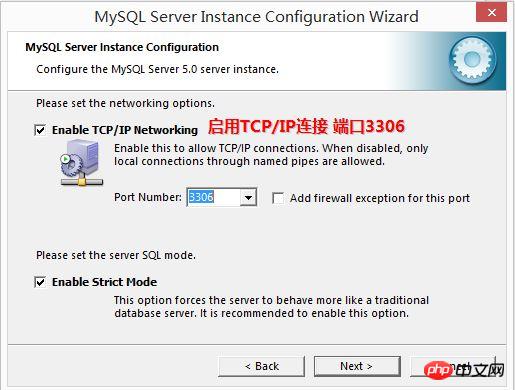
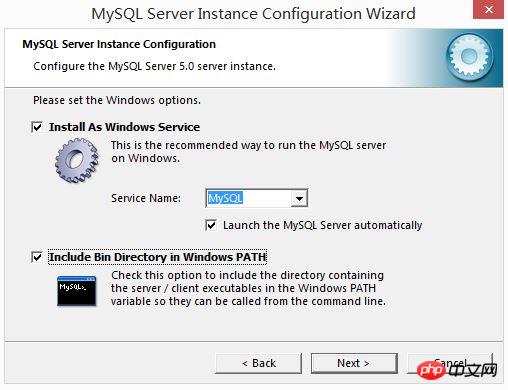
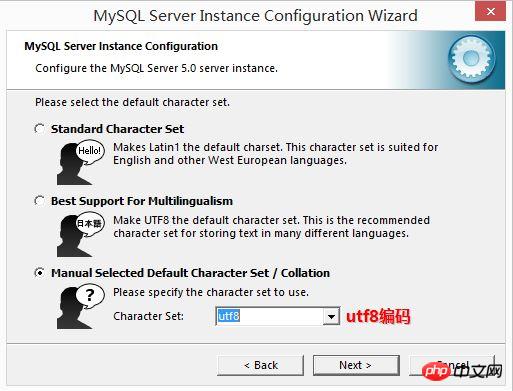 4. Set the user name and password of the default super root user, and finally the installation is successful
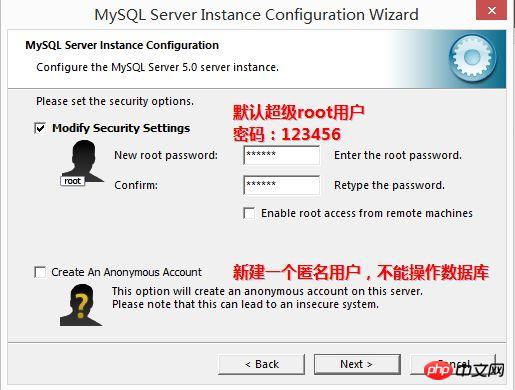
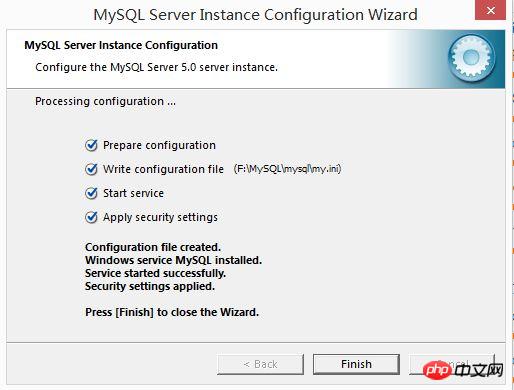
2. Basic knowledge of SQL statements
After successfully installing MySQL 5.0, perform simple operations on the database.
1. Run MySQL and enter the default user password 123456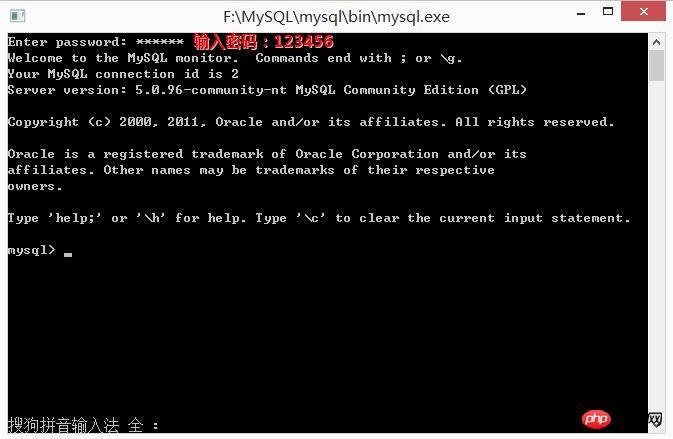 ## 2.
## 2.
Create database
## Display the databases contained in the database: show databases;
## 3. Create table student, in which student number is the primary key
ord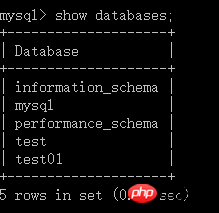 varchar(20),stuid int primary
);
## 4. To display the table structure, use the statement desc student

## 5. Insert data
into the student table
query data
data
## 7. and other operations. It is recommended to install visual software to replace the black box, or use Navicat for MySQL software. The code is as follows:
6.Delete table: drop table student;
Updatedata up
date student set password='000000' where stuid='1';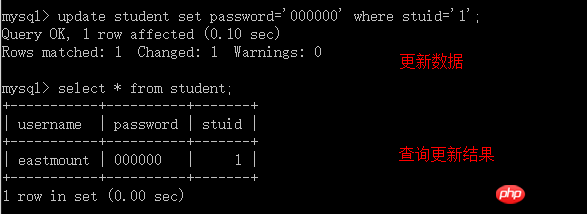
Delete from student where username='eastmount; ## At this point, the basic explanation of MySQL database operation is over. You can also implement database additions, deletions, modifications, transactions,
 Enter password: ******
mysql> show databases;
+--------------------+
| Database |
+--------------------+
| information_schema |
| mysql |
| performance_schema |
| test |
| test01 |
+--------------------+
5 rows in set (0.00 sec)
mysql> use test01;
Database changed
mysql> show tables;
Empty set (0.00 sec)
mysql> create table student(username varchar(20),
-> password varchar(20),
-> stuid int primary key);
Query OK, 0 rows affected (0.33 sec)
mysql> show tables;
+------------------+
| Tables_in_test01 |
+------------------+
| student |
+------------------+
1 row in set (0.00 sec)
mysql> desc student;
+----------+-------------+------+-----+---------+-------+
| Field | Type | Null | Key | Default | Extra |
+----------+-------------+------+-----+---------+-------+
| username | varchar(20) | YES | | NULL | |
| password | varchar(20) | YES | | NULL | |
| stuid | int(11) | NO | PRI | NULL | |
+----------+-------------+------+-----+---------+-------+
3 rows in set (0.03 sec)
mysql> insert student(username, password, stuid)
-> values('eastmount','123456',1)
-> ;
Query OK, 1 row affected (0.05 sec)
mysql> select * from student;
+-----------+----------+-------+
| username | password | stuid |
+-----------+----------+-------+
| eastmount | 123456 | 1 |
+-----------+----------+-------+
1 row in set (0.00 sec)
mysql> update student set password='000000' where stuid='1';
Query OK, 1 row affected (0.10 sec)
Rows matched: 1 Changed: 1 Warnings: 0
mysql> select * from student;
+-----------+----------+-------+
| username | password | stuid |
+-----------+----------+-------+
| eastmount | 000000 | 1 |
+-----------+----------+-------+
1 row in set (0.00 sec)
mysql> delete from student where username='eastmount';
Query OK, 1 row affected (0.08 sec)
mysql> select * from student;
Empty set (0.00 sec)
mysql>
The usual installation method is to use: pip install mysql to install Python MySQL library, but an error is always reported.
Common errorsFor example: Microsoft Visual C++ 9.0 is required (Unable to find vcvarsall.bat)mysql.c(42): fatal error C1083: Cannot open include file: 'config-win .h': No such file or directory
These may be driver problems.
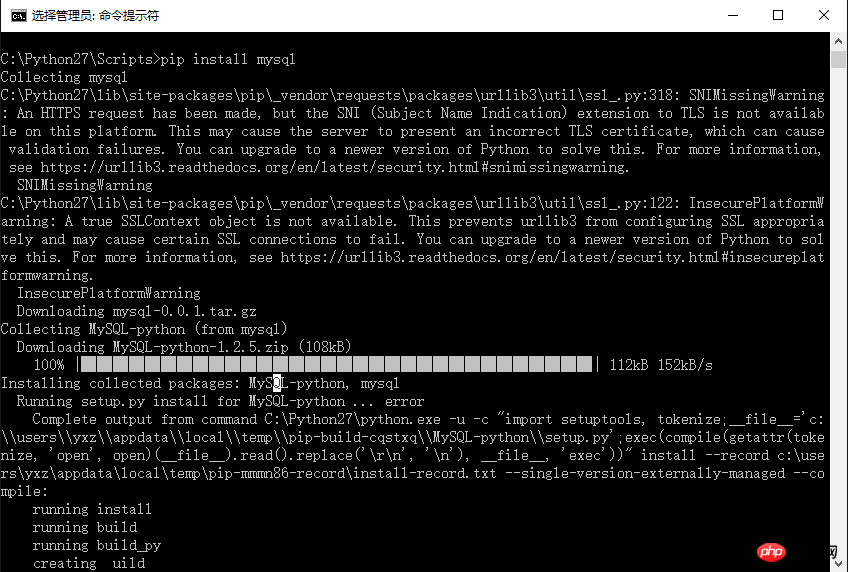 Correct installation method:
Official website address: pypi.python.org/pypi/MySQL-python/
Download address: www.jb51.net/softs/73369.html
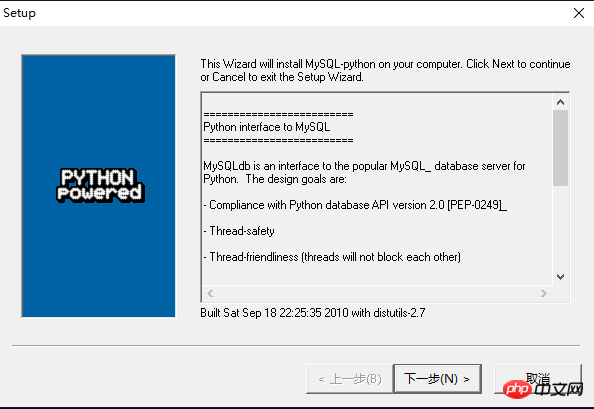 Next we will learn more about Python database
. Accessing the database from Python requires an interface program. The interface program is a Python module that provides an interface to the database client library (usually written in C language) for you to access. Note: Python interface programs must comply with the Python DB-API specification. DB-API is a specification. It defines a series of necessary objects
and database access methods to provide consistent access interfaces for a variety of underlying database systems and a variety of database interface programs. DB-API provides a consistent access interface for different databases, making it easy to transplant code between different databases.
1. Module
AttributesThe following characteristics and attributes in the DB-API specification must be provided. A DB-API compatible module definition is as follows:
apilevel:模块兼容的DB-API版本号
threadsafety:线程安全级别
paramstyle:支持sql语句参数风格
connect():连接数据库
Python calls MsSQL and needs to import the MySQLdb library, as follows: import MySQLdb
FunctionThe main method used is the connect object. The connect() method generates a connect object for accessing the database. Its parameters are as follows:
user:Username
password:Password
host:Hostname
database:DatabaseName
dsn:Data source name
Note that not all interface programs strictly follow this format, such as MySQLdb.
import MySQLdb
conn = MySQLdb.connect(host='localhost', db='test01', user='root', passwd='123456', port=3306, charset='utf8')
The connect() object method is as follows:
close():关闭数据库连接,或者关闭游标对象
commit():提交当前事务
rollback():取消当前事务
cursor():创建游标或类游标对象
errorhandler(cxn,errcls,errval):作为已给游标的句柄
Note that when the close() method is executed, the above connection The object method can no longer be used, otherwise an exception will occur. commit(), rollback(), and cursor() may be more meaningful for databases that support transactions. Database transaction (Database Trans
action 3.游标对象 下面通过简单的示例进行讲解。 四. Python调用MySQL示例 在前面数据库中我们创建了数据库“test01”和表“student”,同时插入了数据。那么,怎样通过Python来显示呢? 其中通过链接数据库代码为: 如果不知道本地数据库的名称,可以通过该方法,先查询数据库中包含哪些数据库,然后再连接该数据库进行相关的操作。 2.查询表 输出结果如图所示: 3.创建表 输出结果如下所示,插入教师表,包含字段:教师序号(id)、教师名称(name)、教师性别(sex)。 插入数据也可以通过execute(sql)方法实现,如: 输出结果如下所示: 同样,对数据库的增删改插都可以进行,请读者自行阅读。 MySQL数据库中结果如下图所示: 【相关推荐】 1. 特别推荐:“php程序员工具箱”V0.1版本下载 2. Python免费视频教程 3. Python基础入门教程
) refers to a series of operations performed as a single logical unit of work, either completely executed or not executed at all. Once you have completed the database connection, close the cursor object, then execute commit() to submit your operation, and then close the connection.
上面说了connect()方法用于提供连接数据库的接口,如果要对数据库操作那么还需要使用游标对象。游标对象的属性和方法:fetchone():可以看作fetch(取出) one(一个),也就是得到结果集的下一行(一行)。
fetchmany(size):可以看作fetch(取出)many(多个),这里的参数是界限,得到结果集的下几行(几行)
fetchall():顾名思义,取得所有。
execute(sql):执行数据库操作,参数为sql语句。
close():不需要游标时尽可能的关闭
1.查询所有数据库
首先,我们查看本地数据库中所包含的数据库名称,通过“show databases”语句。import MySQLdb
try:
conn=MySQLdb.connect(host='localhost',user='root',passwd='123456',port=3306)
cur=conn.cursor()
res = cur.execute('show databases')
print res
for data in cur.fetchall():
print '%s' % data
cur.close()
conn.close()
except MySQLdb.Error,e:
print "Mysql Error %d: %s" % (e.args[0], e.args[1])
conn=MySQLdb.connect(host='localhost',user='root',passwd='123456',port=3306)
访问root超级用户,其密码为“123456”,端口为“3306”,其结果如下: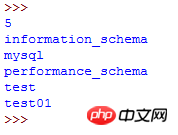
下面介绍查询表student中数据,代码如下,代码的具体含义是通过connect()连接数据库,通过conn.cursor()定义游标,然后调用游标的excute(sql)执行数据库操作,此处为查询操作,再通过fetchall()函数获取所有数据。# coding:utf-8
import MySQLdb
try:
conn=MySQLdb.connect(host='localhost',user='root',passwd='123456',port=3306, db='test01', charset='utf8')
cur=conn.cursor()
res = cur.execute('select * from student')
print u'表中包含',res,u'条数据\n'
print u'数据如下:(姓名 密码 序号)'
for data in cur.fetchall():
print '%s %s %s' % data
cur.close()
conn.close()
except MySQLdb.Error,e:
print "Mysql Error %d: %s" % (e.args[0], e.args[1])
对应的MySQL中的结果是一致的,下图是对应的结果。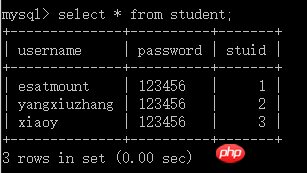
下面这段代码是创建一张教师表,主要是通过commit()提交数据。# coding:utf-8
import MySQLdb
try:
conn=MySQLdb.connect(host='localhost',user='root',passwd='123456',port=3306, db='test01', charset='utf8')
cur=conn.cursor()
#查看表
print u'插入前包含表:'
cur.execute('show tables')
for data in cur.fetchall():
print '%s' % data
#插入数据
sql = '''create table teacher(id int not null primary key auto_increment,
name char(30) not null,
sex char(20) not null
)'''
cur.execute(sql)
#查看表
print u'\n插入后包含表:'
cur.execute('show tables')
for data in cur.fetchall():
print '%s' % data
cur.close()
conn.commit()
conn.close()
except MySQLdb.Error,e:
print "Mysql Error %d: %s" % (e.args[0], e.args[1])
cur.execute("insert into student values( 'yxz', '111111', '10')")
但插入的新数据通常是通过变量进行赋值,而不是固定的,所以要对这条语句中的值做修改。我们可以做如下修改:# coding:utf-8
import MySQLdb
try:
conn=MySQLdb.connect(host='localhost',user='root',passwd='123456',port=3306, db='test01')
cur=conn.cursor()
#插入数据
sql = '''insert into student values(%s, %s, %s)'''
cur.execute(sql, ('yxz','111111', '10'))
#查看数据
print u'\n插入数据:'
cur.execute('select * from student')
for data in cur.fetchall():
print '%s %s %s' % data
cur.close()
conn.commit()
conn.close()
except MySQLdb.Error,e:
print "Mysql Error %d: %s" % (e.args[0], e.args[1])>>>
插入数据:
esatmount 123456 1
yangxiuzhang 123456 2
xiaoy 123456 3
yxz 111111 10
>>>
推荐资料:python使用mysql数据库 - 虫师
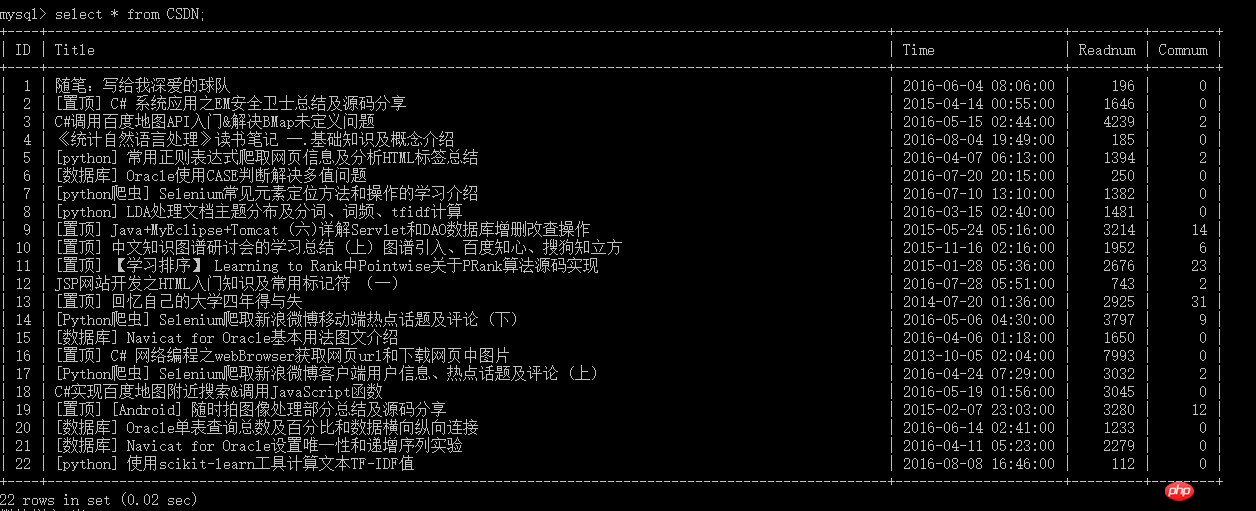
后面我会结合Python爬虫讲述,如何将爬取的内容存储在数据库中,如我CSDN的博客,爬取博客标题、发布时间、阅读量和评论数。
The above is the detailed content of Mysql database installation and usage tutorial. For more information, please follow other related articles on the PHP Chinese website!

