Home >Backend Development >Python Tutorial >Detailed explanation of the steps to create your own IDE plug-in using vim+python
Detailed explanation of the steps to create your own IDE plug-in using vim+python
- 高洛峰Original
- 2017-03-22 09:36:272449browse
Today, a colleague suddenly told me that the editorsublime3 he was using caused the notebook to suddenly freeze. It seemed that the memory at the time was 30G, and his notebook only had a total of 8G of memory. It was suspected to be a memory leak. Decisively switched back to the original PyCharm. Because I also use PyCharm to learn python, and I know that its memory usage is basically more than 1G. After hearing his news, I decided to switch back to vim, which I have always been used to, after all, the "God of Editors" It's not a false name.
The so-called creation is actually to find some plug-ins that suit you. Let me briefly summarize some plug-ins that I have personally tested. Before we start, let me explain one thing. The plug-ins mentioned here are all very powerful and famous, but the one that suits you is the best. The shortcomings mentioned in the article are only relative personal feelings and do not apply to everyone. people. I share it just to give you a reference when making your choice. Thank you~
1.vim plug-in manager
vim-pathogen VS Vundle.vim:
These two plug-ins can be said to be vim’s artifacts, used for vim Plug-in management. The convenience of using pathogen after it is configured is that you only need to put the vim plug-in you downloaded in the ~/.vim/bundle (can also be customized) directory. Vundel needs to change the vimrc file every time, but vundel is convenient. The point is that after changing the vimrc file, you can use:PluginInstall directly in vim to perform one-click installation of the plug-in. The principle is to automatically download it from sources such as GitHub.
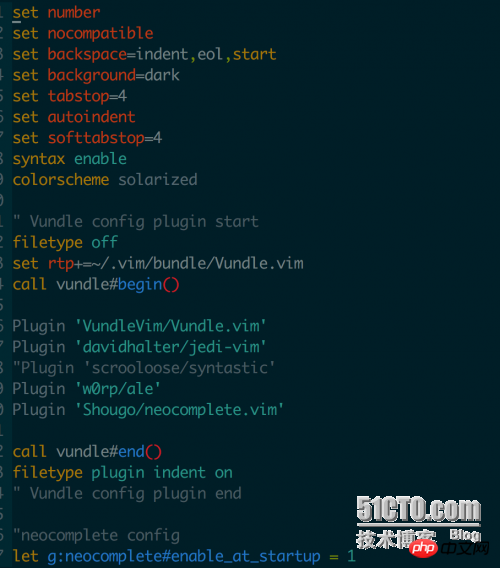
I chose vundle here, because I can see at a glance which plug-ins I have installed from the configuration file, and just comment out the unnecessary plug-ins. As shown in the picture below, the Plugin part is the plug-in I installed, which is clear at a glance.
2. python support
For me, automatic completion and syntax detection are the final choices to use jedi-vim.
Let me briefly talk about my intuitive feelings:
python-mode:
Advantages: It can automatically complete, and it comes with Python syntax detection and code folding functions, which is very powerful. .
Disadvantages: The help information of function is displayed during auto-completion, and the page display is not concise and beautiful enough; the grammar detection function is average.
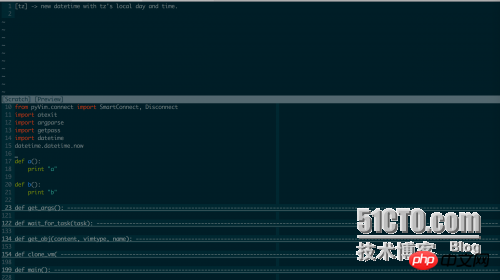
The following is a screenshot example:
YouCompleteMe:
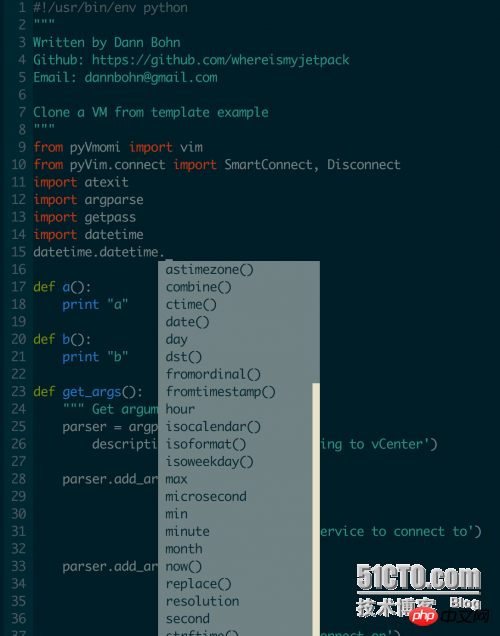
Advantages: automatic completion, simple interface, multi-language support, very powerful function ,whole. Among the three, it has the largest number of stars on github.
Disadvantages: Perhaps because the function is too powerful, loading is relatively slow after syntax detection is added. The configuration is a bit cumbersome.
jedi-vim:
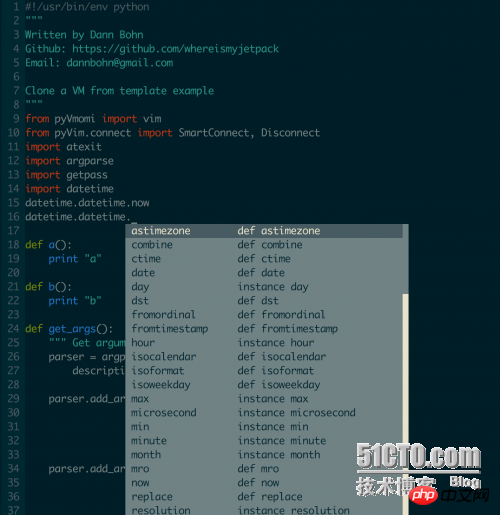
Advantages: The advantage for me is that it makes up for the shortcomings of the above two. The loading speed is very fast and the page is very concise.
Disadvantages: No grammar detection; the function is not as powerful as YCM, but it is enough.
So, in the end I chose jedi-vim.
3.Python syntax detection
After automatic completion comes syntax detection. Personally, I prefer the pep8 standard, and I hope that the grammatical errors can be immediately recognized by the editor after they are corrected.
I have tested using the following checkers:
flake8, pep257, pep8, pycodestyle, syntastic
pydocstyle, pyflakes, pylama, pylint, python
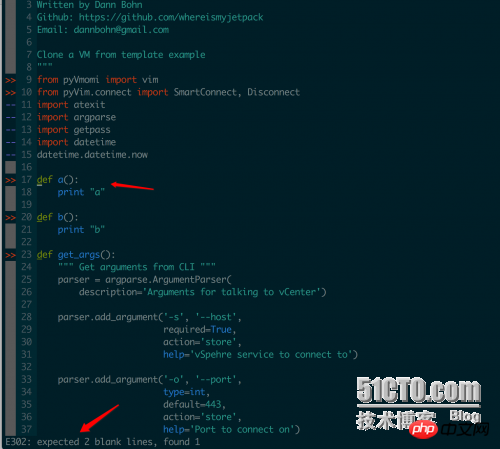
In the end, I chose to use the plug-in: "w0rp/ale". It has the most comprehensive syntax detection, a simple interface, errors can be identified immediately after correction, and it is asynchronous, so there is no need to worry about slow loading and crashes. As shown below:
4. Enhanced version of automatic completion
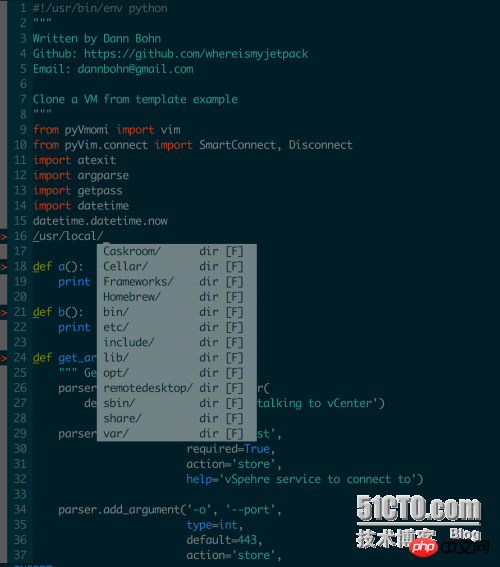
I mentioned before that python’s automatic completion in vim, in order to make vim The function is more powerful. We introduce a plug-in neocomplete.vim. Using it can make vim completion everywhere. As shown below, it will directly complete the shell path.
One thing to note: neocomplete requires Vim 7.3.885+ compiled with if_lua.
5. Directory tree plug-in
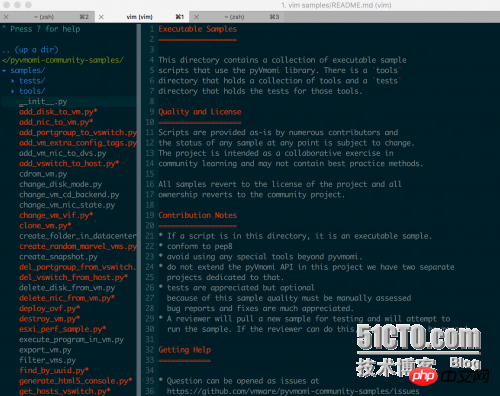
The directory tree plug-in is naturally NERDTree, plus a vim-nerdtree-tabs enhancement function. The renderings are as follows:
# In the end, the same sentence applies, what suits you is the best.
The above is the detailed content of Detailed explanation of the steps to create your own IDE plug-in using vim+python. For more information, please follow other related articles on the PHP Chinese website!

