Home >WeChat Applet >WeChat Development >Use .NET WeChat to develop PC-side WeChat code scanning registration and login function implementation code
Use .NET WeChat to develop PC-side WeChat code scanning registration and login function implementation code
- 高洛峰Original
- 2017-03-20 14:02:552297browse
This article mainly introduces the relevant information on the implementation of the PC-side WeChat code scanning registration and login functions developed by .NET WeChat. It is very good and has reference value. Friends in need can refer to it
1. Preface
Let me first state that the focus of this article is on the implementation ideas. The code and database design are mainly to show the ideas. If there are projects with strict requirements on code efficiency, do not copy them.
I believe that those who have done WeChat development have done a lot of authorization, but generally speaking, we are more authoritative for mobile websites. To be precise, it is an authorization done under WeChat. . One problem I encountered today is that the project supports WeChat and PC, and registration is open. It is required that after registering on the PC side or on the WeChat side, you can log in on the other side. In other words, whether it is PC or WeChat, "you are you" (relevant in some way).
2. Looking for solutions
Thinking in the traditional way, WeChat can completely register through authorization, but on the PC side, the traditional way is just to fill in the mobile phone number, or Email Wait. If you use this method to register, the following problems will occur
1. I first authorize the registration on WeChat, then if I want to log in to the PC, I still have to register.
The solution to this problem can be: after WeChat authorizes registration, it "forces" users to fill in basic information, such as mobile phone number and email. In this way, we can generate the account and password for the user to log in on the PC in some way. For example, use the user's nickname as the account number, the mobile phone number as the password, and so on.
Disadvantages: The user experience is not good, and there are security risks. After all, your WeChat nickname, email or mobile phone number are all exposed.
2. If I register on the PC first, how do I associate the mobile terminal when authorizing WeChat
Of course, there will always be a solution to every problem. The idea is as follows:
Option 1: After the user registers on the PC, it is "forced" that the user must fill in the WeChat nickname. Use this as the association condition when authorizing WeChat. But unfortunately, the WeChat nickname can be changed. How can it be used for association if it is not the only one? The plan died in one fell swoop.
Option 2: After authorization on the WeChat side and registration on the PC side, users are "forced" to fill in their mobile phone number as a link. This creates a problem. We must ensure that the user’s mobile phone is authentic. No problem. This can be achieved through mobile phone verification code (the same is true for email). But let’s assume the following situation. If I have two mobile phone numbers, fill in one when registering on PC and fill in the other when registering on WeChat. Is it related? The answer is unfortunately. Furthermore, after I registered on the PC side, I didn’t fill it in (the reason why I forced double quotes), and then I used the WeChat side to authorize and log in. Well, at this point there will be two pieces of data waiting for you to find a way to correlate them, which is a typical developer digging his own hole. This approach works to some extent, but the rigor is unacceptable to developers.
3. Solution to return to the origin
Analysis: Since the above solutions have problems, let’s put them aside first. To sort out our thoughts, let us return to the root of the problem. The related question requires a unique identifier. The unique identifier is just like our ID card number. When we apply for a credit card, the ID card is necessary. When purchasing a number card under the real-name system, the ID card is required. Assuming we are the system administrator, then I can definitely find out your mobile phone number and bank card number through your ID number.
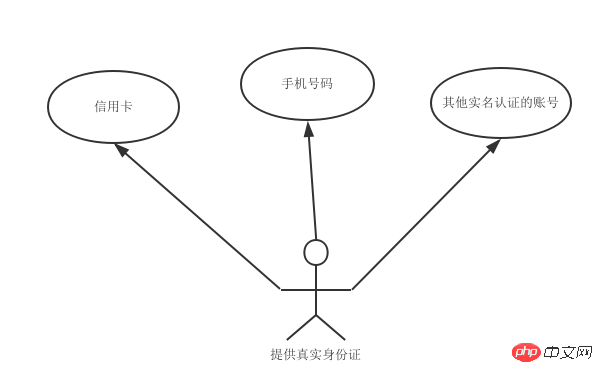
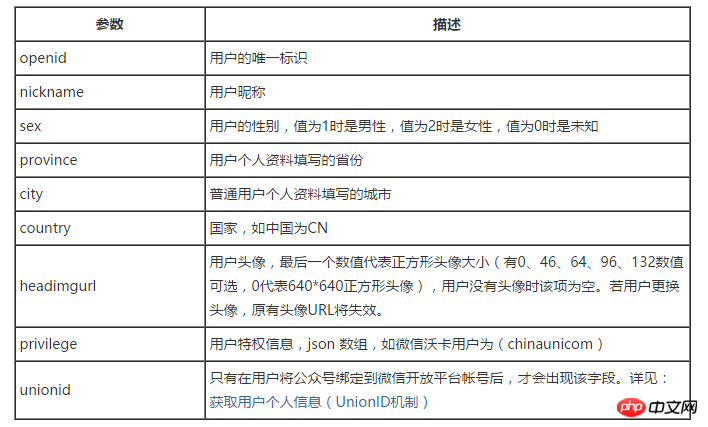
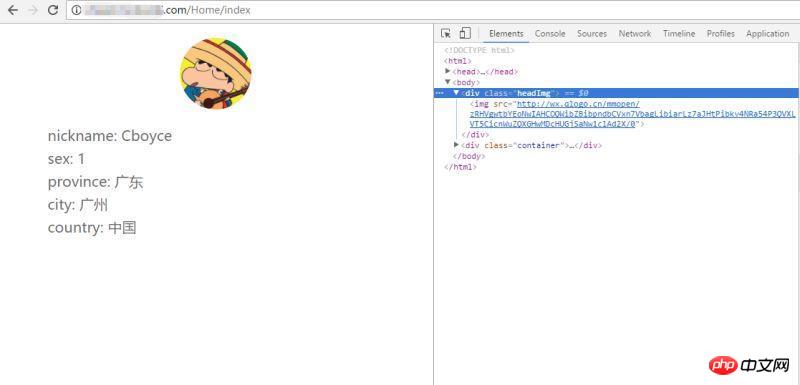
After having the above ideas, all we need to do is to find a unique identifier as an association. There is an important role in WeChat openid. It has the same function as the ID card number we mentioned above. It is the unique identification of a WeChat account for a certain public account.
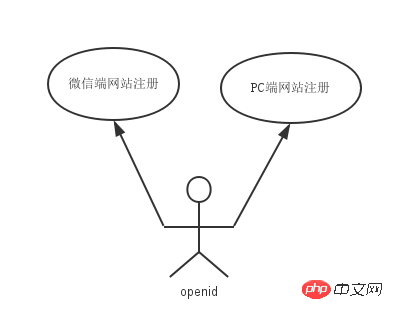
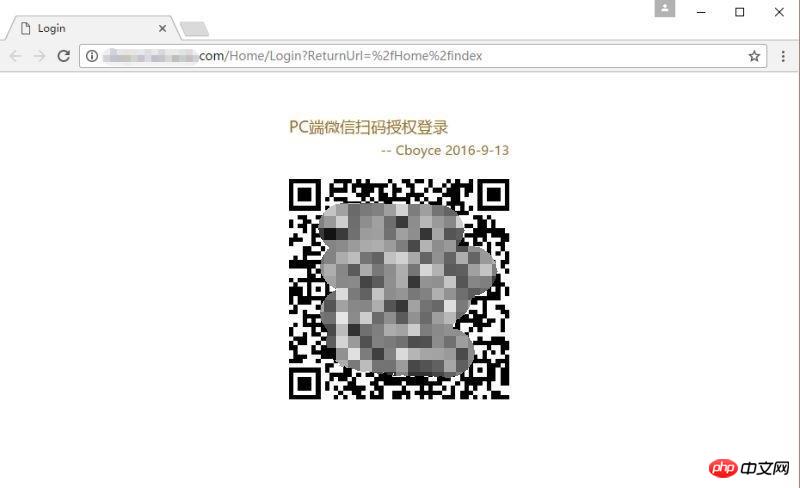
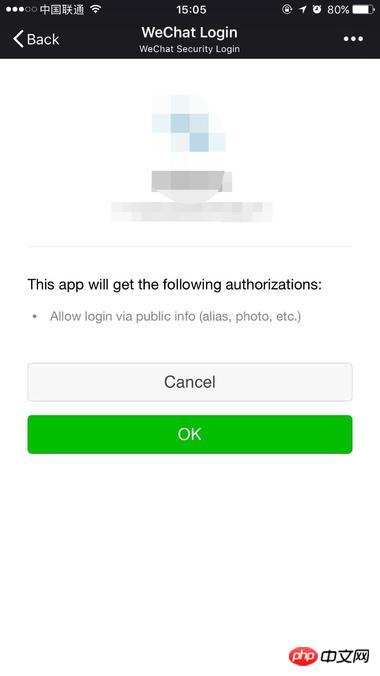
Anyone who has done WeChat development should have no problem getting the WeChat authorization from openid. The question is how to implement the PC side to get the openid when registering or logging in. The author's implementation ideas are as follows. Register on PC, or display a QR code when logging in to guide users to scan the code using WeChat to jump to the authorization page. There is one most critical detail in this step. Please bring a unique authorization code (authCode) with the QR code. Imagine if the user authorizes us, we can write the openid and authCode to the database. Then we can obtain the openid associated with authCode through a certain API on the PC side. If we do this, we can know who is currently scanning the QR code to register or log in on the PC (register if you are not registered, log in directly if you are registered). Did you suddenly feel so easy? If you think the text is a bit abstract, please look at the diagram below
PC WeChat QR code scanning login process
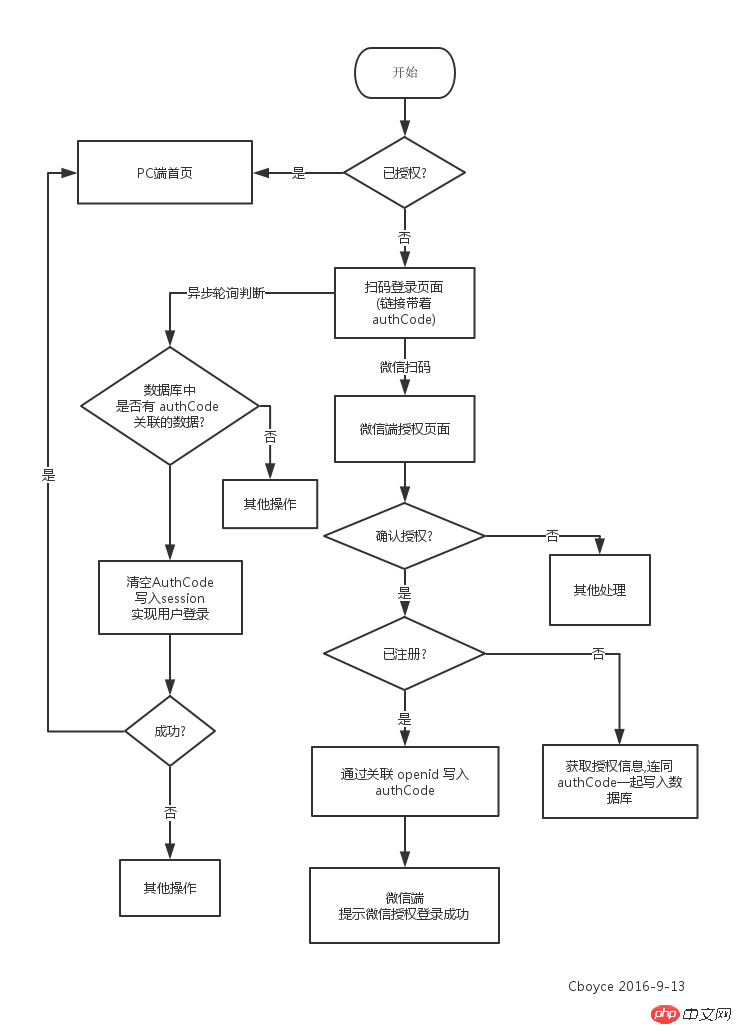
C# language as an example, using MVC + EF (Note: uuid is equivalent to our above-mentioned authCode)
public ActionResult Login()
{
//如果已登录,直接跳转到首页
if (User.Identity.IsAuthenticated)
return RedirectToAction("Index", "Home");
string url = Request.Url.Host;
string uuid = Guid.NewGuid().ToString();
ViewBag.url = "http://" + url + "/home/loginfor?uuid=" + uuid;//构造授权链接
ViewBag.uuid = uuid;//保存 uuid
return View();
}
The plug-in jquery.qrcode.js is used to generate the QR code. Friends who want to know more about it, please go to Github. One thing to note here is that the plug-in can specify the generation method of QR code, canvas or table. Friends who need to support IE please specify to use table to generate
jQuery('#qrcode').qrcode({
render : "table",
text : "http://baidu.com"
});
Back to the topic, the main code of the login page is as follows
<!--生成二维码的容器 p-->
<p>
</p>
<script></script>
<script></script>
<script>
jQuery(function () {
//生成二维码
jQuery('#qrcode-container').qrcode("@ViewBag.url");
//轮询判断用户是否授权
var interval = setInterval(function () {
$.post("@Url.Action("UserLogin","Home")", { "uuid": "@ViewBag.uuid" }, function (data, status) {
if ("success" == status) {
//用户成功授权=>跳转
if ("success" == data) {
window.location.href = '@Url.Action("Index", "Home")';
clearInterval(interval);
}
}
});
}, 200);
})
</script>Polling to determine whether the user authorizes the API code
public string UserLogin(string uuid)
{
//验证参数是否合法
if (string.IsNullOrEmpty(uuid))
return "param_error";
WX_UserRecord user = db.WX_UserRecord.Where(u => u.uuId == uuid).FirstOrDefault();
if (user == null)
return "not_authcode";
//写入cookie
FormsAuthentication.SetAuthCookie(user.OpenId, false);
//清空uuid
user.uuId = null;
db.SaveChanges();
return "success";
}
WeChat authorization Action
public ActionResult Loginfor(string uuid)
{
#region 获取基本信息 - snsapi_userinfo
/*
* 创建微信通用类 - 这里代码比较复杂不在这里贴出
* 迟点我会将整个 Demo 稍微整理放上 Github
*/
WechatUserContext wxcontext = new WechatUserContext(System.Web.HttpContext.Current, uuid);
//使用微信通用类获取用户基本信息
wxcontext.GetUserInfo();
if (!string.IsNullOrEmpty(wxcontext.openid))
{
uuid = Request["state"];
//判断数据库是否存在
WX_UserRecord user = db.WX_UserRecord.Where(u => u.OpenId == wxcontext.openid).FirstOrDefault();
if (null == user)
{
user = new WX_UserRecord();
user.OpenId = wxcontext.openid;
user.City = wxcontext.city;
user.Country = wxcontext.country;
user.CreateTime = DateTime.Now;
user.HeadImgUrl = wxcontext.headimgurl;
user.Nickname = wxcontext.nickname;
user.Province = wxcontext.province;
user.Sex = wxcontext.sex;
user.Unionid = wxcontext.unionid;
user.uuId = uuid;
db.WX_UserRecord.Add(user);
}
user.uuId = uuid;
db.SaveChanges();
}
#endregion
return View();
}
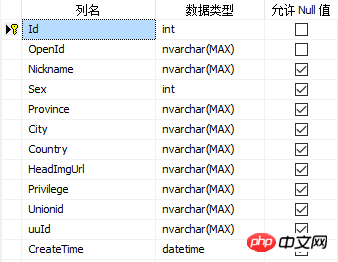

The above is the detailed content of Use .NET WeChat to develop PC-side WeChat code scanning registration and login function implementation code. For more information, please follow other related articles on the PHP Chinese website!
Related articles
See more- Detailed explanation and simple usage of WeChat mini program textarea
- PHP WeChat public account development (2) Baidu BAE construction and database use
- php WeChat public account development (3) php implements simple WeChat text communication
- php WeChat public account development (4) php implements custom keyword reply
- PHP version of WeChat store calling api sample code

