


As the saying goes: If you post pictures without leaving seeds, thousands of people will stab the chrysanthemums! I would like to extend this a bit: If you don’t give examples in teaching, you will be called a fool! Oops, it rhymes a lot, hehe, just kidding!
We have talked about the knowledge of API in four issues. I guess it is very boring for everyone. The previous small example is too simple and does not quench your thirst. However, you cannot become a fat man in one breath. , let me give you a small example below to refresh your mind!
When I talked about drawing a circle earlier, I left you with a thought, or a pitfall, which is how to draw a fan shape? We know that the method of drawing a circle cannot draw a sector at once. I provided a method at that time. I don’t know if you have an impression. It doesn’t matter if you don’t. I will repeat it again: if I draw an arc, Then draw 2 lines in the center of the circle, connecting them to the starting point and end point of the arc respectively. Then isn't this a circle? So can this method draw a circle? In fact, I don’t know, so let’s try it:
The first step is to draw an arc:
//将原点移到100,100的位置
ctx.translate(100, 100);
//画一个圆弧
ctx.arc(0,0,100,30*Math.PI/180, 60*Math.PI/180);
ctx.stroke();

This is us at this time The familiar method of drawing arcs, now we have to start drawing lines. This is the key. Let’s analyze it first. Sharpening a knife does not require chopping wood!
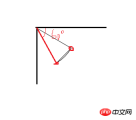
A straight line is composed of 2 points. Now that we know the center of the circle, the second point is the starting point and end point of the arc. So how do we get the coordinates of these 2 points? Let’s draw a picture to analyze it: 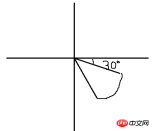
We probably want to draw such a sector, which is rather ugly. Let’s take a look at it. If we follow mathematical ideas and use the angle formula Through general calculation, we may be able to get the coordinates of these two points, but I feel that even if I think about it, I feel how duplicated this calculation is. I am not good at math and I don’t want to do calculations. Is there an easy way to do it without having to do so? Someone who understands? (Sorry, my "memory" is obviously insufficient) I have a bold hypothesis, that is, if the fan shape is not slanted like this, but horizontal on one side, for example: 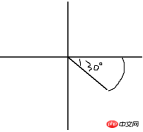
Then I can easily get the first line segment, which is the line on the abscissa, don’t you understand? Okay, it’s like this, we know the coordinates of the center of the circle, we know the radius, then the coordinates of the starting point of the arc are very easy. Understand, how do you get the other line? If you have just read the knowledge of the API in the last issue, we can easily think of the rotate() method while it is still hot. That is, we draw another line from the center of the circle to the starting point. We know the angle of the arc. Okay, we will If you choose the angle of the arc for this newly drawn line, won’t it reach the end point? Damn, I’m so damn smart! Let’s give it a try:
//圆弧
ctx.save();
ctx.translate(100, 100);
ctx.arc(0,0,100,0, 30*Math.PI/180);
ctx.restore();
//第一条线
ctx.save();
ctx.moveTo(100,100);
ctx.lineTo(200,100);
ctx.restore();
//第二条线
ctx.save();
ctx.translate(100, 100);
ctx.moveTo(0,0);
ctx.rotate(30*Math.PI/180);
ctx.lineTo(100,0);
ctx.stroke();
ctx.restore();

Wow, it’s amazing. It really works. According to this idea, if we now This sector is rotated by an angle, and this angle = the angle of the second line - the angle of the first line, then isn't it the sector we need that we get? However, direct rotation of the previous code can only rotate arcs, not lines. Let’s modify it:
Let’s look at this picture, we can change our thinking , if the arc is drawn at the target position, then 2 lines with an angle of 0 are drawn, and then rotated to the starting point and end point of the arc, wouldn't it be enough? (Because we know the starting angle and ending angle of the arc) Try it:
//将原点设置100,100位置
ctx.translate(100,100);
//原点在100,100,则圆心设为0,0 ——> 100,100的位置
ctx.arc(0,0,100,30*Math.PI/180,60*Math.PI/180);
//save(),restore()是为了防止角度旋转的污染
ctx.save();
ctx.rotate(30*Math.PI/180);
ctx.moveTo(0,0);
ctx.lineTo(100,0);
ctx.restore();
ctx.rotate(60*Math.PI/180);
ctx.moveTo(0,0);
ctx.lineTo(100,0);
ctx.stroke();
哎呀,真的可以啊,哈哈,有人会问,你的第一步为什么是设置原点呢,为什么不用moveTo来设置起始点呢?好问题,因为画布的默认原点在0,0的位置上,如果用moveTo来设置起始点,原点依然还在0,0的位置,上一节API我们将变换的时候讲到,变换是以原点为基准点的,即使你设置了起始点,但是起始点不是原点的话,图形旋转依然会围绕0,0点旋转然后自转,得到的图形就不知道是什么图形了,偏差的角度就很难矫正,对此还是不太明白的同学可以自己写一个例子体验一样,或许理解更深刻一点,这里就作为练习题,不在这里写了!
上面的代码还是可以优化的,比如说画第一条线的时候,我们用到了save()和restore(),其作用不只是可以防止外面的属性或方法对里面的绘制产生影响,它的本质意思是save()保存当前环境的状态,restore()返回之前保存路径的状态,这是什么意思,举个栗子,save()就像是在一个迷宫的入口,restore()就想是这个迷宫的出口,但是发现这里就是迷宫的路口,出了迷宫,在迷宫里具体是怎么走的,根本不知道,这就可以防止你的外部因素来影响你走迷宫的路线,那有一个细节大家要注意,就是当你进去的这个门,你出来的时候还是这个门,恩,这个就可以利用了,这就相当于是画笔的触点了,还原触点,我们看一下还原的触点在什么地方:
//将原点设置100,100位置
ctx.translate(100,100);
//原点在100,100,则圆心设为0,0 ——> 100,100的位置
ctx.arc(0,0,100,30*Math.PI/180,60*Math.PI/180);
//save(),restore()是为了防止角度旋转的污染
ctx.save();
ctx.rotate(30*Math.PI/180);
ctx.moveTo(0,0);
ctx.lineTo(100,0);
ctx.restore();
ctx.rotate(60*Math.PI/180);
ctx.lineTo(100,0);
ctx.stroke();
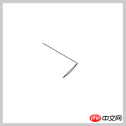
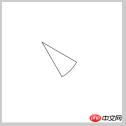
居然得到的是这样的结果,从第2张图可以看出还原的触点的位置在圆弧的初始点,其实这里我们是忽略了一个问题,就是线在旋转的时候,是从它的起点为圆心旋转的,而上面的代码是,第一条线从圆心开始,到圆弧的起点(旋转过后),自然现在的起点就是圆弧的起点了,第二条线怎么画,它旋转的结果都不是我们想要的了,所以这里我们需要特别的注意,现在我们将第一条直线的起点设在(r,0)的位置,旋转后就到了圆弧的起始点,然后在画到圆心地方,那现在的起始点就是圆心了,再画一条线到圆弧,就哦了,现在我们再来一次:
//将原点设置100,100位置
ctx.translate(100,100);
//原点在100,100,则圆心设为0,0 ——> 100,100的位置
ctx.arc(0,0,100,30*Math.PI/180,60*Math.PI/180);
//save(),restore()是为了防止角度旋转的污染
ctx.save();
ctx.rotate(30*Math.PI/180);
ctx.moveTo(100,0);
ctx.lineTo(0,0);
ctx.restore();
ctx.rotate(60*Math.PI/180);
ctx.lineTo(100,0);
ctx.stroke();
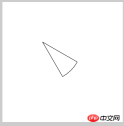
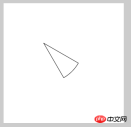
看,这就是我们想要的图形,所以,上面所犯的几个错都是比较容易犯的错,需要特别的注意!
根据这个原理,我们其实还可以用另外一种方式,就是充分使用触点的作用,怎么讲,当我们再画圆弧的时候,画完之后其触点在圆弧的结束位置,如此的天赐良机,为何不直接将这个触点作为起点,画一条到圆心的线,不就可以少旋转一次吗?然后再画第二条线,简直感觉省时省力,我们看看效果吧:
//将原点设置100,100位置
ctx.translate(100,100);
//原点在100,100,则圆心设为0,0 ——> 100,100的位置
ctx.arc(0,0,100,30*Math.PI/180,60*Math.PI/180);
//以圆弧终点为起点画直线
ctx.lineTo(0,0);
ctx.rotate(30*Math.PI/180);
//以0,0为起点画直线
ctx.lineTo(100,0);
ctx.stroke();
你看,用这个理论,就连save(),restore()都可以省了,因为就只有一个旋转,代码也少了好多,效果还一样,哈哈,为了能重复使用,我们需要把他封装一下:
第一种:
CanvasRenderingContext2D.prototype.sector = function(x,y,r,sDeg,eDeg){
            this.save();
            this.translate(x,y);
            this.beginPath();
            this.arc(0,0,r,sDeg*Math.PI/180,eDeg*Math.PI/180);
            this.save();
            this.rotate(sDeg*Math.PI/180);
            this.moveTo(r,0);
            this.lineTo(0,0);
            this.restore();
            this.rotate(eDeg*Math.PI/180);
            this.lineTo(r,0);
            this.restore();
            return this;
        }
        ctx.sector(100,100,100,30,60).stroke();
        ctx.sector(100,100,100,90,120).fill();
        ctx.sector(100,100,100,160,180).stroke();
第二种:
CanvasRenderingContext2D.prototype.sector = function(x,y,r,sDeg,eDeg){
            this.save();
            this.translate(x,y);
            this.beginPath();
            this.arc(0,0,r,sDeg*Math.PI/180,eDeg*Math.PI/180);
            this.lineTo(0,0);
            this.rotate(sDeg*Math.PI/180);
            this.lineTo(r,0);
            this.restore();
            return this;
        }
        ctx.sector(100,100,100,30,60).stroke();
        ctx.sector(100,100,100,90,120).fill();
        ctx.sector(100,100,100,160,180).stroke();
你以为这样就完了吗?当我们充分理解canvasAPI的基础知识的时候,我们还会得到另外一种方式来画扇形,简直6到爆!哈哈哈!究竟是什么呢?我们接着往下看:
前面的基础知识讲到画圆的时候,我们讲到了beginPath()和closePath(),有人会说,这不就是开始路径和封闭路径吗?这跟画扇形有什么关系?没错,你说的一点都没错,好,现在请大声跟我念:封闭路径!封闭路径!封闭路径!重要事情说3遍,现在你的心里是不是有了那么一点感觉,没错,不要觉得害羞,不要觉得压抑,就是它,就是它,大声把它说出来,就是这感觉,什么?你什么感觉都没有,此处有表情,好吧,我来告诉你我的感觉:
上面有一处说,为什么要用translate,而不要moveTo,是因为我们需要旋转,所以就需要原点,现在如果我们不需要旋转,而是正常的画图,那么我们就不需要原点,我们就可以用moveTo,好了,如果我们配合beginPath()和closePath(),就会将一个圆弧封闭起来,想想我们在讲画三角形的时候的那段折线是怎么变成三角形的,没错,现在是否有了一点感觉?还是木有?好吧,我们来看一个栗子:
ctx.beginPath();
//定义起点
ctx.moveTo(100,100);
//以起点为圆心,画一个半径为100的圆弧
ctx.arc(100,100,100,30*Math.PI/180, 60*Math.PI/180);
ctx.closePath();
ctx.stroke();
看看,寥寥数行,就画出了一个扇形,对不上面的图像,是不是一样的?我们封装一下:
CanvasRenderingContext2D.prototype.sector = function(x,y,r,angle1,angle2){
            this.save();
            this.beginPath();
            this.moveTo(x,y);
            this.arc(x,y,r,angle1*Math.PI/180,angle2*Math.PI/180,false);
            this.closePath();
            this.restore();
            return this;
        }
        ctx.sector(100,100,100,30,60).stroke();
        ctx.sector(100,100,100,90,120).fill();
        ctx.sector(100,100,100,160,180).stroke();
效果都一样,只是思路不一样,或许还有别的方式来画扇形,如果大家有更好的方法,希望能留下你的代码,大家互相学习一下!
扇形的方法有了,具体用哪个可以依据自己的喜好,我就按照第3种来写一个小应用,饼图:
CanvasRenderingContext2D.prototype.sector = function(x,y,r,angle1,angle2){
            this.save();
            this.beginPath();
            this.moveTo(x,y);
            this.arc(x,y,r,angle1*Math.PI/180,angle2*Math.PI/180,false);
            this.closePath();
            this.restore();
            return this;
        }
        ctx.fillStyle = 'red';
        ctx.sector(200,200,100,30,150).fill();
        ctx.fillStyle = 'green';
        ctx.sector(200,200,100,150,270).fill();
        ctx.fillStyle = 'blue';
        ctx.sector(200,200,100,270,390).fill();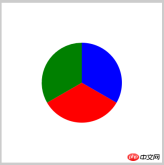
再写一个扇形倒计时:
CanvasRenderingContext2D.prototype.sector = function(x,y,r,angle1,angle2){
            this.save();
            this.beginPath();
            this.moveTo(x,y);
            this.arc(x,y,r,angle1*Math.PI/180,angle2*Math.PI/180,false);
            this.closePath();
            this.restore();
            return this;
        }

        var angle = 0;
        var timer = null;
        ctx.fillStyle = 'green';
        setInterval(function(){
            angle+=5;
            ctx.sector(200,200,100,0,angle).fill();
            if(angle == 360){
                clearInterval(timer);
            }
        },200);
你以为我只是写几个例子给你看吗?你还是太年轻了,之所以要丢出这2个例子,是为了扩展一下思路,我们可以在这些效果上面加一点什么东西,效果是否就不一样了,举个例子,第一个饼图,如果我们在中间加一个白色的圆,会怎么样?
CanvasRenderingContext2D.prototype.sector = function(x,y,r,angle1,angle2){
            this.save();
            this.beginPath();
            this.moveTo(x,y);
            this.arc(x,y,r,angle1*Math.PI/180,angle2*Math.PI/180,false);
            this.closePath();
            this.restore();
            return this;
        }
        ctx.fillStyle = 'red';
        ctx.sector(200,200,100,30,150).fill();
        ctx.fillStyle = 'green';
        ctx.sector(200,200,100,150,270).fill();
        ctx.fillStyle = 'blue';
        ctx.sector(200,200,100,270,390).fill();
        ctx.fillStyle = '#fff';
        ctx.sector(200,200,80,0,360).fill();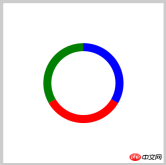
看,这效果是不是就变成另外一个效果了,比如说第二个效果,我们也加一个白色的圆,看有什么效果:
CanvasRenderingContext2D.prototype.sector = function(x,y,r,angle1,angle2){
            this.save();
            this.beginPath();
            this.moveTo(x,y);
            this.arc(x,y,r,angle1*Math.PI/180,angle2*Math.PI/180,false);
            this.closePath();
            this.restore();
            return this;
        }

        var angle = 0;
        var timer = null;
        setInterval(function(){
            angle+=5;
            ctx.fillStyle = 'green';
            ctx.sector(200,200,100,0,angle).fill();
            ctx.fillStyle = '#fff';
            ctx.sector(200,200,80,0,360).fill();
            if(angle == 360){
                clearInterval(timer);
            }

        },200);
看看,这效果是不是可以做很多的效果,当然,因为没有加动画效果,现在的效果很生硬,需要大家来完善,只要你脑洞打开,其实扇形还是能做出很多非常炫酷的效果的,当然了,好的效果都是需要打磨的,在此只是抛砖引玉,如果大家有更好,更炫酷的效果,请不吝分享一下,今天就讲到这里,谢谢大家的支持!
以上就是canvas实践小实例二 —— 扇形 的内容,更多相关内容请关注PHP中文网(www.php.cn)!

 H5 Code Structure: Organizing Content for ReadabilityMay 07, 2025 am 12:06 AM
A reasonable H5 code structure allows the page to stand out among a lot of content. 1) Use semantic labels such as, etc. to organize content to make the structure clear. 2) Control the rendering effect of pages on different devices through CSS layout such as Flexbox or Grid. 3) Implement responsive design to ensure that the page adapts to different screen sizes.
 H5 vs. Older HTML Versions: A ComparisonMay 06, 2025 am 12:09 AM
The main differences between HTML5 (H5) and older versions of HTML include: 1) H5 introduces semantic tags, 2) supports multimedia content, and 3) provides offline storage functions. H5 enhances the functionality and expressiveness of web pages through new tags and APIs, such as and tags, improving user experience and SEO effects, but need to pay attention to compatibility issues.
 H5 vs. HTML5: Clarifying the Terminology and RelationshipMay 05, 2025 am 12:02 AM
The difference between H5 and HTML5 is: 1) HTML5 is a web page standard that defines structure and content; 2) H5 is a mobile web application based on HTML5, suitable for rapid development and marketing.
 HTML5 Features: The Core of H5May 04, 2025 am 12:05 AM
The core features of HTML5 include semantic tags, multimedia support, form enhancement, offline storage and local storage. 1. Semantic tags such as, improve code readability and SEO effect. 2. Multimedia support simplifies the process of embedding media content through and tags. 3. Form Enhancement introduces new input types and verification properties, simplifying form development. 4. Offline storage and local storage improve web page performance and user experience through ApplicationCache and localStorage.
 H5: Exploring the Latest Version of HTMLMay 03, 2025 am 12:14 AM
HTML5isamajorrevisionoftheHTMLstandardthatrevolutionizeswebdevelopmentbyintroducingnewsemanticelementsandcapabilities.1)ItenhancescodereadabilityandSEOwithelementslike,,,and.2)HTML5enablesricher,interactiveexperienceswithoutplugins,allowingdirectembe
 Beyond Basics: Advanced Techniques in H5 CodeMay 02, 2025 am 12:03 AM
Advanced tips for H5 include: 1. Use complex graphics to draw, 2. Use WebWorkers to improve performance, 3. Enhance user experience through WebStorage, 4. Implement responsive design, 5. Use WebRTC to achieve real-time communication, 6. Perform performance optimization and best practices. These tips help developers build more dynamic, interactive and efficient web applications.
 H5: The Future of Web Content and DesignMay 01, 2025 am 12:12 AM
H5 (HTML5) will improve web content and design through new elements and APIs. 1) H5 enhances semantic tagging and multimedia support. 2) It introduces Canvas and SVG, enriching web design. 3) H5 works by extending HTML functionality through new tags and APIs. 4) Basic usage includes creating graphics using it, and advanced usage involves WebStorageAPI. 5) Developers need to pay attention to browser compatibility and performance optimization.
 H5: New Features and Capabilities for Web DevelopmentApr 29, 2025 am 12:07 AM
H5 brings a number of new functions and capabilities, greatly improving the interactivity and development efficiency of web pages. 1. Semantic tags such as enhance SEO. 2. Multimedia support simplifies audio and video playback through and tags. 3. Canvas drawing provides dynamic graphics drawing tools. 4. Local storage simplifies data storage through localStorage and sessionStorage. 5. The geolocation API facilitates the development of location-based services.


Hot AI Tools

Undresser.AI Undress
AI-powered app for creating realistic nude photos

AI Clothes Remover
Online AI tool for removing clothes from photos.

Undress AI Tool
Undress images for free

Clothoff.io
AI clothes remover

Video Face Swap
Swap faces in any video effortlessly with our completely free AI face swap tool!

Hot Article
Hot Tools

EditPlus Chinese cracked version
Small size, syntax highlighting, does not support code prompt function

SublimeText3 Linux new version
SublimeText3 Linux latest version

Dreamweaver Mac version
Visual web development tools

SublimeText3 English version
Recommended: Win version, supports code prompts!

MinGW - Minimalist GNU for Windows
This project is in the process of being migrated to osdn.net/projects/mingw, you can continue to follow us there. MinGW: A native Windows port of the GNU Compiler Collection (GCC), freely distributable import libraries and header files for building native Windows applications; includes extensions to the MSVC runtime to support C99 functionality. All MinGW software can run on 64-bit Windows platforms.

