Dialog boxes are indispensable in Android. When using dialog boxes, you need to use the AlertDialog.Builder class. Of course, in addition to processing the system's default dialog box, you can also customize the dialog box. If the dialog box is set with a button, then event monitoring OnClickListener must be performed on it.
The following is an example of a customized dialog box using the AlertDialog.Builder class. When OK is clicked, it is transferred to the login dialog box. After entering the user name and password, it is transferred to the login progress dialog box
The custom dialog box here is composed of two TextView and two EditText, which is the login dialog box. The layout file of the custom dialog box is the dialog.xml file, see below
In addition Well, to use AlertDialog to create a dialog box, you need to know a few methods
setTitle(); set the title of the dialog box
setIcon(); set the icon of the dialog box
setMessage(); Set the prompt message of the dialog box
setItems(); Set a list to be displayed in the dialog box, generally used to display several commands
setSingleChoiceItems(); Set the dialog box The box displays a radio-selected List
setMultiChoiceItems(); the setting dialog box displays a series of check boxes
setPositiveButton(); adds a "yes" button to the dialog box
setNegativeButton(); Add a "no" button to the dialog box
DialogTest.java
package org.hualang.dialog;

import android.app.Activity;
import android.app.AlertDialog;
import android.app.Dialog;
import android.app.ProgressDialog;
import android.content.DialogInterface;
import android.os.Bundle;
import android.view.LayoutInflater;
import android.view.View;

public class DialogTest extends Activity {
    /** Called when the activity is first created. */
        ProgressDialog mydialog;
    @Override
    public void onCreate(Bundle savedInstanceState) {
        super.onCreate(savedInstanceState);
        setContentView(R.layout.main);
        Dialog dialog=new AlertDialog.Builder(DialogTest.this)
        .setTitle("登录提示")//设置标题
        .setMessage("这里需要登录")//设置对话框显示内容
        .setPositiveButton("确定", //设置确定按钮
        new DialogInterface.OnClickListener() {
                        @Override
                        public void onClick(DialogInterface dialog, int which) {
                                //点击确定转向登录对话框
                                LayoutInflater factory=LayoutInflater.from(DialogTest.this);
                                //得到自定义对话框
                                final View DialogView=factory.inflate(R.layout.dialog, null);
                                //创建对话框
                                AlertDialog dlg=new AlertDialog.Builder(DialogTest.this)
                                .setTitle("登录框")
                                .setView(DialogView)//设置自定义对话框样式
                                .setPositiveButton("确定",
                                new DialogInterface.OnClickListener() {//设置监听事件

                                        @Override
                                        public void onClick(DialogInterface dialog, int which) {
                                                // 输入完成后点击“确定”开始登录
                                                mydialog=ProgressDialog.show(DialogTest.this, "请稍等...", "正在登录...",true);
                                                new Thread()
                                                {
                                                        public void run()
                                                        {
                                                                try
                                                                {
                                                                        sleep(3000);
                                                                }catch(Exception e)
                                                                {
                                                                        e.printStackTrace();
                                                                }finally
                                                                {
                                                                        //登录结束,取消mydialog对话框
                                                                        mydialog.dismiss();
                                                                }
                                                        }
                                                }.start();
                                        }
                                }).setNegativeButton("取消",//设置取消按钮
                                        new DialogInterface.OnClickListener() {

                                                @Override
                                                public void onClick(DialogInterface dialog, int which) {
                                                        //点击取消后退出程序
                                                        DialogTest.this.finish();

                                                }
                                        }).create();//创建对话框
                                dlg.show();//显示对话框
                        }
                }).setNeutralButton("退出",
                        new DialogInterface.OnClickListener() {

                                @Override
                                public void onClick(DialogInterface dialog, int which) {
                                        // 点击退出后退出程序
                                        DialogTest.this.finish();
                                }
                        }).create();//创建按钮
        //显示对话框
        dialog.show();
    }
}
dialog.xml
<?xml version="1.0" encoding="utf-8"?>
<LinearLayout xmlns:android="http://schemas.android.com/apk/res/android"
    android:orientation="vertical"
    android:layout_width="fill_parent"
    android:layout_height="fill_parent"
    >
<TextView
        android:id="@+id/username"
    android:layout_width="wrap_content"
    android:layout_height="wrap_content"
    android:layout_marginLeft="20dip"
    android:layout_marginRight="20dip"
    android:text="用户名"
    android:gravity="left"
    android:textAppearance="?android:attr/textAppearanceMedium"
    />
<EditText
        android:id="@+id/username"
        android:layout_width="fill_parent"
        android:layout_height="wrap_content"
        android:layout_marginLeft="20dip"
        android:layout_marginRight="20dip"
        android:scrollHorizontally="true"
        android:autoText="false"
        android:capitalize="none"
        android:gravity="fill_horizontal"
        android:textAppearance="?android:attr/textAppearanceMedium"
/>
<TextView
        android:id="@+id/password"
        android:layout_width="wrap_content"
        android:layout_height="wrap_content"
        android:layout_marginLeft="20dip"
        android:layout_marginRight="20dip"
        android:text="密码"
        android:gravity="left"
        android:textAppearance="?android:attr/textAppearanceMedium"
/>
<EditText
        android:id="@+id/password"
        android:layout_width="fill_parent"
        android:layout_height="wrap_content"
        android:layout_marginLeft="20dip"
        android:layout_marginRight="20dip"
        android:scrollHorizontally="true"
        android:autoText="false"
        android:capitalize="none"
        android:gravity="fill_horizontal"
        android:password="true"
        android:textAppearance="?android:attr/textAppearanceMedium"

/>
</LinearLayout>
The running results are as follows:

After clicking OK, you will jump to the login dialog box. This login dialog box is a customized dialog box

After entering the user name and password , after clicking OK, enter the dialog box with a progress bar. The dialog box with a progress bar here is the system default, and uses ready-made controls. The dialog box will end after 3 seconds and jump to the corresponding Activity

Supplementary content:
1. Inflater means expansion in English, and it means expansion in android.
The function of LayoutInflater is similar to findViewById(). The difference is that LayoutInflater is used to find the xml layout file in the layout folder and instantiate it! And findViewById() is to find a specific widget control under a certain xml (such as Button, TextView, etc.). It can be used in many places, such as in the getView of BaseAdapter, in custom Dialog to obtain the component widget in the view, etc.
2. AlertDialog.Builder means warning dialog box
3. Unit
px: It is the pixel of the screen
in: inch
mm: millimeter
pt: pound, 1/72 inch
dp: an abstract unit based on density, if a 160dpi screen, 1dp=1px
dip: Same as dp
sp: Similar to dp, but also scaled according to the user's font size preference.
It is recommended to use sp as the unit of text, otherwise use dip
4, dialog.xml description
①android:layout_marginLeft="20dip"
margin means side , the above sentence means that the control is 20 dips from the left. Similarly
android:layout_marginRight="20dip" means that the control is 20dip to the right of the parent control
②android:gravity="left": Indicates that the text of the control is displayed on the left
③android: layout_gravity="center": Indicates that the control is located in the middle of the parent control
④Usage of android:textAppearance
For controls that can display text (such as TextView EditText RadioButton Button CheckBox, etc.), you sometimes need Control font size. The Android platform defines three font sizes.
“?android:attr/textAppearanceLarge”
“?android:attr/textAppearanceMedium”
“?android:attr/textAppearanceSmall”
The usage method is:
android:textAppearance=”?android:attr/textAppearanceLarge”
android:textAppearance=”?android:attr/textAppearanceMedium”
android:textAppearance=”?android:attr/textAppearanceSmall”
or
style=”?android:attr/textAppearanceLarge”
style=”?android:attr/textAppearanceMedium”
style=”?android:attr/textAppearanceSmall”
⑤ android:scrollHorizontally="true": Set the text beyond In the case of the width of the TextView, whether the horizontal bar appears
⑥android:autoText="false": If set, the spelling correction of the input value will be automatically performed. There is no effect here. It works when the input method is displayed and input. If set to false here, the sub-kinetic energy will be turned off
⑦android:capitalize="none": Set the capitalization type of English letters. There is no effect here, you need to pop up the input method to see it
⑧android:password="true": Display the text with a small dot ".", used when entering the password
The above is the content of the Android UI control series: Dialog (dialog box). For more related content, please pay attention to the PHP Chinese website (www.php.cn)!
 如何在 iPhone 和 Android 上关闭蓝色警报Feb 29, 2024 pm 10:10 PM
根据美国司法部的解释,蓝色警报旨在提供关于可能对执法人员构成直接和紧急威胁的个人的重要信息。这种警报的目的是及时通知公众,并让他们了解与这些罪犯相关的潜在危险。通过这种主动的方式,蓝色警报有助于增强社区的安全意识,促使人们采取必要的预防措施以保护自己和周围的人。这种警报系统的建立旨在提高对潜在威胁的警觉性,并加强执法机构与公众之间的沟通,以共尽管这些紧急通知对我们社会至关重要,但有时可能会对日常生活造成干扰,尤其是在午夜或重要活动时收到通知时。为了确保安全,我们建议您保持这些通知功能开启,但如果
 在Android中实现轮询的方法是什么?Sep 21, 2023 pm 08:33 PM
Android中的轮询是一项关键技术,它允许应用程序定期从服务器或数据源检索和更新信息。通过实施轮询,开发人员可以确保实时数据同步并向用户提供最新的内容。它涉及定期向服务器或数据源发送请求并获取最新信息。Android提供了定时器、线程、后台服务等多种机制来高效地完成轮询。这使开发人员能够设计与远程数据源保持同步的响应式动态应用程序。本文探讨了如何在Android中实现轮询。它涵盖了实现此功能所涉及的关键注意事项和步骤。轮询定期检查更新并从服务器或源检索数据的过程在Android中称为轮询。通过
 如何在Android中实现按下返回键再次退出的功能?Aug 30, 2023 am 08:05 AM
为了提升用户体验并防止数据或进度丢失,Android应用程序开发者必须避免意外退出。他们可以通过加入“再次按返回退出”功能来实现这一点,该功能要求用户在特定时间内连续按两次返回按钮才能退出应用程序。这种实现显著提升了用户参与度和满意度,确保他们不会意外丢失任何重要信息Thisguideexaminesthepracticalstepstoadd"PressBackAgaintoExit"capabilityinAndroid.Itpresentsasystematicguid
 Android逆向中smali复杂类实例分析May 12, 2023 pm 04:22 PM
1.java复杂类如果有什么地方不懂,请看:JAVA总纲或者构造方法这里贴代码,很简单没有难度。2.smali代码我们要把java代码转为smali代码,可以参考java转smali我们还是分模块来看。2.1第一个模块——信息模块这个模块就是基本信息,说明了类名等,知道就好对分析帮助不大。2.2第二个模块——构造方法我们来一句一句解析,如果有之前解析重复的地方就不再重复了。但是会提供链接。.methodpublicconstructor(Ljava/lang/String;I)V这一句话分为.m
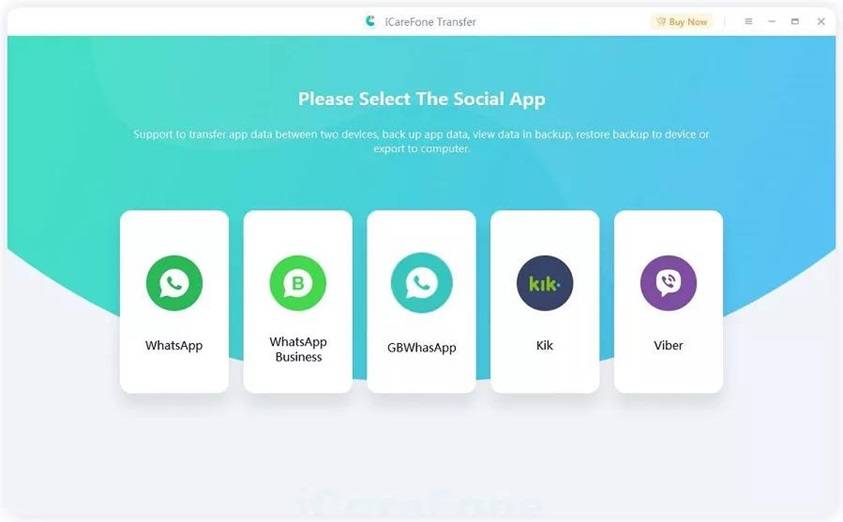 如何在2023年将 WhatsApp 从安卓迁移到 iPhone 15?Sep 22, 2023 pm 02:37 PM
如何将WhatsApp聊天从Android转移到iPhone?你已经拿到了新的iPhone15,并且你正在从Android跳跃?如果是这种情况,您可能还对将WhatsApp从Android转移到iPhone感到好奇。但是,老实说,这有点棘手,因为Android和iPhone的操作系统不兼容。但不要失去希望。这不是什么不可能完成的任务。让我们在本文中讨论几种将WhatsApp从Android转移到iPhone15的方法。因此,坚持到最后以彻底学习解决方案。如何在不删除数据的情况下将WhatsApp
 同样基于linux为什么安卓效率低Mar 15, 2023 pm 07:16 PM
原因:1、安卓系统上设置了一个JAVA虚拟机来支持Java应用程序的运行,而这种虚拟机对硬件的消耗是非常大的;2、手机生产厂商对安卓系统的定制与开发,增加了安卓系统的负担,拖慢其运行速度影响其流畅性;3、应用软件太臃肿,同质化严重,在一定程度上拖慢安卓手机的运行速度。
 Android中动态导出dex文件的方法是什么May 30, 2023 pm 04:52 PM
1.启动ida端口监听1.1启动Android_server服务1.2端口转发1.3软件进入调试模式2.ida下断2.1attach附加进程2.2断三项2.3选择进程2.4打开Modules搜索artPS:小知识Android4.4版本之前系统函数在libdvm.soAndroid5.0之后系统函数在libart.so2.5打开Openmemory()函数在libart.so中搜索Openmemory函数并且跟进去。PS:小知识一般来说,系统dex都会在这个函数中进行加载,但是会出现一个问题,后
 Android APP测试流程和常见问题是什么May 13, 2023 pm 09:58 PM
1.自动化测试自动化测试主要包括几个部分,UI功能的自动化测试、接口的自动化测试、其他专项的自动化测试。1.1UI功能自动化测试UI功能的自动化测试,也就是大家常说的自动化测试,主要是基于UI界面进行的自动化测试,通过脚本实现UI功能的点击,替代人工进行自动化测试。这个测试的优势在于对高度重复的界面特性功能测试的测试人力进行有效的释放,利用脚本的执行,实现功能的快速高效回归。但这种测试的不足之处也是显而易见的,主要包括维护成本高,易发生误判,兼容性不足等。因为是基于界面操作,界面的稳定程度便成了


Hot AI Tools

Undresser.AI Undress
AI-powered app for creating realistic nude photos

AI Clothes Remover
Online AI tool for removing clothes from photos.

Undress AI Tool
Undress images for free

Clothoff.io
AI clothes remover

AI Hentai Generator
Generate AI Hentai for free.

Hot Article

Hot Tools

VSCode Windows 64-bit Download
A free and powerful IDE editor launched by Microsoft

SublimeText3 Mac version
God-level code editing software (SublimeText3)

Zend Studio 13.0.1
Powerful PHP integrated development environment

mPDF
mPDF is a PHP library that can generate PDF files from UTF-8 encoded HTML. The original author, Ian Back, wrote mPDF to output PDF files "on the fly" from his website and handle different languages. It is slower than original scripts like HTML2FPDF and produces larger files when using Unicode fonts, but supports CSS styles etc. and has a lot of enhancements. Supports almost all languages, including RTL (Arabic and Hebrew) and CJK (Chinese, Japanese and Korean). Supports nested block-level elements (such as P, DIV),

SAP NetWeaver Server Adapter for Eclipse
Integrate Eclipse with SAP NetWeaver application server.


