Home >Backend Development >Python Tutorial >How to configure vim on ubuntu 15.10 for Python development
How to configure vim on ubuntu 15.10 for Python development
- 高洛峰Original
- 2017-01-10 13:28:271148browse
1. To install vim, you can use the apt-get tool that comes with ubuntu.
apt-get install vim-gnome
2, after the installation is successful, configure it
1>First perform automatic prompt completion Configuration (pydiction)
Download the latest version from the official http://www.vim.org/scripts/script.php?script_id=850. After decompressing, enter the decompressed directory, execute the following command
# cp python_pydiction.vim /usr/share/vim/vim74/ftplugin
# mkdir /usr/share/vim/vim74/pydiction
# cp complete-dict pydiction.py /usr/share/vim/vim74/pydiction/
# vi ~/.vimrc
Explanation:
The first line is to copy the downloaded file to /usr/share/vim/vim74/ftplugin
th The second line is to create the folder pydiction in the /usr/share/vim/vim74/ directory
The third line copies complete-dict pydiction.py These two files go to
The fourth line opens the .vimc configuration file
Then copy the following three lines of code into it and save it, it should work.
After clicking Esc, execute: wq, save
let g:pydiction_location = '/usr/share/vim/vim74/pydiction/complete-dict'
let g:pydiction_menu_height = 20
autocmd FileType python set omnifunc=pythoncomplete#Complete
2>Install the python_fold automatic folding plug-in and download it from the official http://www.vim.org/scripts /script.php?script_id=515The latest plug-in, after decompression, enter the decompressed directory and execute the following command
# cp python_fold.vim /usr/share/vim/vim74/plugin/
# vi ~/.vimrc
Explanation:
The first line Just copy the downloaded file to /usr/share/vim/vim74/plugin
Open the .vimc configuration file on the second line
Then copy the following line of code into it
set foldmethod=indent
3> Install the automatic highlighting plug-in and download it from the official website: http://www.vim.org/scripts/script.php?script_id=790. Download the latest plug-in and unzip it. After that, enter the decompressed directory and execute the following command
mv /usr/share/vim/vim74/syntax/python.vim /usr/share/vim/vim74/syntax/python.vim_backup cp python.vim /usr/share/vim/vim74/syntax
Explanation:
The first line is to back up python.vim
The second Copy python.vim to the /usr/share/vim/vim74/syntax directory
4> Generate ctag sequence
Enter the directory where the python program script (project) is located, Execute in this directory:
ctags -R *
If you are prompted that ctags is not installed, just execute apt-get install ctags.
Generate a ctags file, which records the analysis sequence records of functions, classes, etc. of the program/project. For detailed usage of ctag, please read the manpage of ctag.
5>Install the taglist plug-in
Download the plug-in from the official website: http://www.vim.org/scripts/script.php?script_id=273, use The latest one is sufficient. After decompressing, enter the decompressed directory and execute the following command.
# cp plugin/taglist.vim /usr/share/vim/vim74/plugin/
# cp doc/taglist.txt /usr/share/vim/vim74/doc/
# vi
Execute the following command
:helptags /usr/share/vim/vim74/doc
:help taglist.txt One line generates the taglist help file list. The second line views the taglist help information. Configure vimrc, vi ~/.vimrc, and add the following code at the end
let Tlist_Show_One_File = 1
let Tlist_Exit_OnlyWindow = 1
let Tlist_Use_Right_Window = 1
let Tlist_Auto_Open=1
let Tlist_File_Fold_Auto_Close=1
Explanation:
The first line does not display the tags of multiple files at the same time, but only displays the tags of the current file.
The second line: If the taglist window is the last window, exit vim.
The third line displays the taglist window in the right window.
The fourth line: After starting vim, automatically open the taglist window.
The fifth line only displays the current file tag, and the tags of other files are folded.
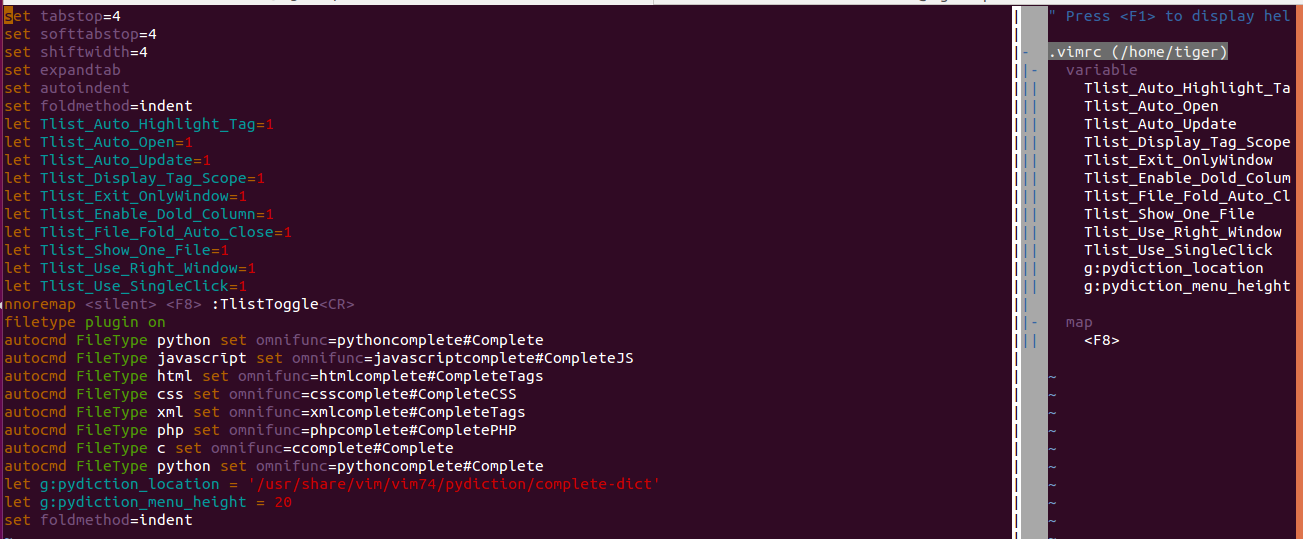
The screenshot of the final configuration result is as follows:

#The content of the configuration file is as follows: you can copy it if needed.
set tabstop=4 set softtabstop=4 set shiftwidth=4 set expandtab set autoindent set foldmethod=indent let Tlist_Auto_Highlight_Tag=1 let Tlist_Auto_Open=1 let Tlist_Auto_Update=1 let Tlist_Display_Tag_Scope=1 let Tlist_Exit_OnlyWindow=1 let Tlist_Enable_Dold_Column=1 let Tlist_File_Fold_Auto_Close=1 let Tlist_Show_One_File=1 let Tlist_Use_Right_Window=1 let Tlist_Use_SingleClick=1 nnoremap <silent> <F8> :TlistToggle<CR> filetype plugin on autocmd FileType python set omnifunc=pythoncomplete#Complete autocmd FileType javascrīpt set omnifunc=javascriptcomplete#CompleteJS autocmd FileType html set omnifunc=htmlcomplete#CompleteTags autocmd FileType css set omnifunc=csscomplete#CompleteCSS autocmd FileType xml set omnifunc=xmlcomplete#CompleteTags autocmd FileType php set omnifunc=phpcomplete#CompletePHP autocmd FileType c set omnifunc=ccomplete#Complete autocmd FileType python set omnifunc=pythoncomplete#Complete let g:pydiction_location = '/usr/share/vim/vim74/pydiction/complete-dict' let g:pydiction_menu_height = 20 set foldmethod=indent
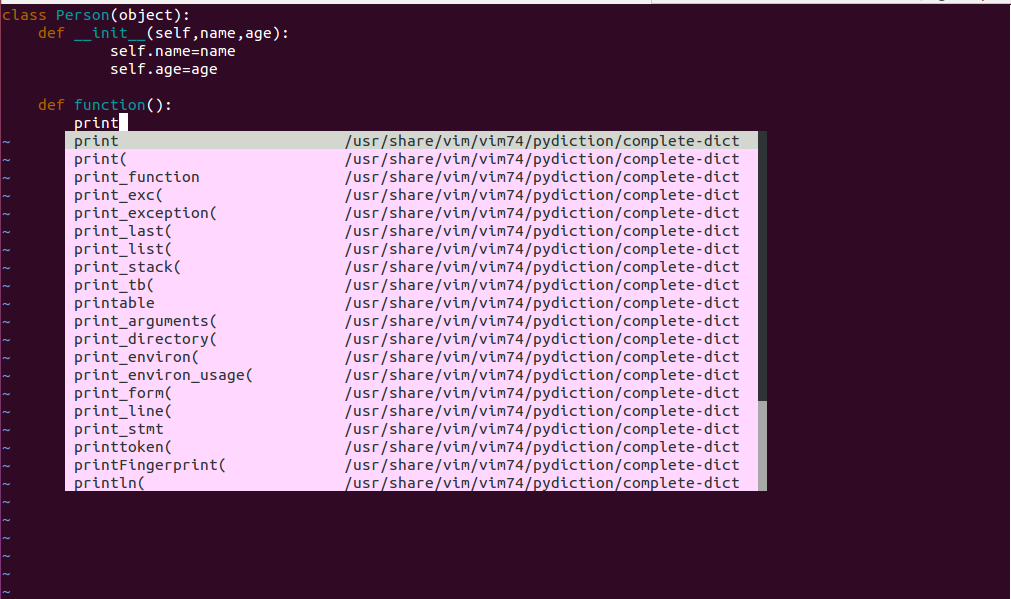
After configuration, the file editing results are as follows:

More Python development on ubuntu 15.10 For articles related to configuring vim, please pay attention to the PHP Chinese website!

