-- Detailed explanation of HTML tags
Detailed explanation of HTML instructions
Structure
<html>
<head>
<title>Title<title>
</head>
<body>......File content. .........
</body>
</html>
1. File title
<title>.....</title>
2. File update--< meta>
【1】Automatically update once after 10 seconds
<meta http-equiv="refresh" content=10>
【2】Automatically link to another file after 10 seconds
<meta http-equiv="refresh" content ="10; URL=URL of the file to be linked">
3. Query form--<isindex>
If you want to set the prompt text before the query field:
<isindex PRompt="Prompt text">
4. Default base path--<base>
<base href="URL of the host where the file is placed">
Layout
1. Title text <h#>............</h#> #=1~6; h1 is the largest font, h6 is the smallest font
2. Font changes <font>......................</font>
【1】Font size <font size=#>. .........</font> #=1~7; The larger the number, the larger the font
【2】Specify the font <font face="font name">..... ..</font>
【3】Text color <font color=#rrggbb>............</font> rr: stands for red (red) color code gg: stands for green (green) color Code bb: blue color code
3. Display small fonts <small>.....</small>
4. Display large fonts <big>..... ...</big>
5. Bold font <b>.....</b>
6. Italic font <i>..........</ i>
7. Typewriter font <tt>............</tt>
8. Bottom line <u>.....</u>
9. Strikethrough <strike>..........</strike>
10. Subscript <sub>..........</sub>
11. Superscript <sup>. .......</sup>
12. Text blinking effect <blink>..........</blink>
13. Line break <br>
14. Segmentation <p >
15. The alignment direction of text <p align="#"> Number # can be left: table aligned to the left (default value) center: table aligned to the center right: table aligned to the right P.S.<p align="# The text after "" will be displayed in the set alignment until another
appears to change its alignment direction, or when the
ⅱ
16. Divider line <hr>
【1】Thickness of the divider line <hr size=points>
【2】Width of the divider line <hr size=points or percentage>
【3】Alignment direction of the divider line <hr align= "#"> The # sign can be left: the table is aligned to the left (default value) center: the table is aligned to the center right: the table is aligned to the right
【4】The color of the dividing line <hr color=#rrggbb>
【5】 Solid dividing line <hr noshade>
17. Align to the center <center>......................</center>
18. Display in original style <pre>.......... </pre>
19. Properties of the command
【1】Background color -- bgcolor <body bgcolor=#rrggbb>
【2】Background pattern -- background <body background="graphic file name">
【 3】Set the background pattern so that it does not scroll -- bgproperties <body bgproperties=fixed>
【4】The color of the document content text -- text <body text=#rrggbb>
【5】The color of the hyperlink text -- link < body link=#rrggbb>
【6】The text color of the hyperlink being selected -- vlink <body vlink=#rrggbb>
【7】The text color of the hyperlink that has been linked -- alink <body alink=#rrggbb>
20. Annotation <!--..........-->21. Special character representation
Symbol logue in &quスt
Blank &nススpp
Pictures
1. Insert picture <img src="graphic file name">
2. Set frame -- border <img src="graphic file name" border=points >
3. Set graphic size -- widthⅱheight <img src="Graphic file name" width=width points height=height points>
4. Set the top, bottom, left and right spaces of the graphic - vspaceⅱhspace Number of empty points>
5. Graphic notes <img src="Graphic file name" alt="Explanation text">
6. Preload pictures
<img src="High-resolution graphic file name" lowsrc="Low-resolution graphic File name"> P.S. It is best to have the same size of the two pictures
7. Image Map <area shape=shape coords=area coordinate list href="URL of connection point">
<area shape=shape coords=area coordinate list href="URL of connection point">
<area shape=shape coords =area coordinate list href="URL of connection point">
<area shape=shape coords=area coordinate list href="URL of connection point"> </map>
【1】Define shape -- shape
shape =rect: rectangle shape=circle: circle shape=poly: polygon
[2] Define the area -- coords
a. Rectangle: Four numbers must be used, the first two numbers are the coordinates of the upper left corner, and the last two numbers are Coordinates of the lower right corner
Example: <area shape=rect coords=100,50,200,75 href="URL">
b. Circle: Three numbers must be used, the first two numbers are the coordinates of the center of the circle, and the last number is the radius length
Example: <area shape=circle coords=85,155,30 href="URL">
c. Any shape (polygon): fill in the coordinates of each turning point of the shape in order
Example: <area shape= poly coords=232,70,285,70,300,90,250,90,200,78 href="URL">
Table
1. Define table <table>..........</table>
【1】Settings The thickness of the border -- border
<table border=points>
【2】Set the width of the grid -- cellspacing
<table cellspacing=points>
【3】Set the distance between the data and the grid -- cellpadding
< table cellpadding=points>
【4】Adjust table width -- width
<table width=points or percentage>
【5】Adjust table height -- height
<table height=points or percentage>
【6】Set table Background color -- bgcolor
<table bgcolor=#rrggbb>
【7】Set table border color -- bordercolor
<table bordercolor=#rrggbb>
2. Display grid lines <table border>
3. Table title
< caption>........................</caption>
Table title position -- align
<caption align="#"> Number # can be top: the table title is placed above the table (default value)
bottom: The table title is placed below the table
4. Define columns <tr>
5. Define fields «1» <td>: Align to the left
«2» <th>: Align to the center ⅱ Bold
【1】 Horizontal position -- align <th align="#">
# number can be left: align to the left
center: align to the center right: align to the right
【2】Vertical position -- align <th align="#" > The # number can be
top: align upwards middle: align to the middle
bottom: align downwards
【3】Field width -- width
<th width=points or percentages >
【4】Fields are merged vertically -- rowspan
<th rowspan=Number of columns to be merged>
【5】Horizontal merging of columns -- colspan
<th colspan=Number of columns to be merged>
List
1. Directory list
<dir><li>Item 1 <li>Item 2 <li>Item 3 </dir> P.S. Each item in the directory list cannot exceed 20 characters (i.e. 10 Chinese characters)
2. Option list <menu> <li>Item 1 < li>Item 2 <li>Item 3 </menu>
3. List with serial numbers <ol> <li>Item 1 <li>Item 2 <li>Item 3 </ol>
【1】Serial number format -- type <ol type=#> or <li type=#> The # number can be A: The uppercase English letters AⅱBⅱCⅱD... are used as the project number. a: The lowercase English letters aⅱbⅱcⅱd... are used. .As the project number I: The table uses uppercase Roman numerals as the project number i: The table uses lowercase Roman numerals as the project number 1: The table uses Arabic numerals as the project number (default value)
[2] Starting number - - start <ol start=The ordinal number to start counting>
【3】Specify the number -- value <li value=The ordinal number to be specified>
4. List without serial number <ul> <li>Item 1 <li>Item 2 <li>Item 3 </ul>
【1】Bullet mark form -- type <ul type=#>or <li type=#> The # number can be disc: solid dot (default value) circle: hollow circle Point square: solid square
【2】Original list -- plain <ul plain>
【3】List arrangement -- warp «1»The list is arranged vertically <ul warp = vert> «2»The list is arranged horizontally <ul warp = horiz>
5. Definition List <dl> <dt>Item 1 <dd>Item 1 Description <dt>Item 2 <dd>Item 2 Description <dt>Item 3 <dd>Item 3 Description </dl>
Close Arrangement -- compact
- P.S. In this way, the content of
- and the content of
- can be placed on the same line, separated by only a few blank spaces without line breaks. However, if the text of
- exceeds a certain length, , the effect of compact disappears!
Form
1. Basic structure <form action="URL of the CGI program used to process data" or "mailto: URL of the e-mail" method="get or post">.......... ........ ..... </form>
2. Input file form <form action="URL" method="post"> <input> <input> .. ........ ..... </form>
【1】Field type -- type <input type=#> Number # can be text: text input passWord: password checkbox : Multi-select button radio: Radio button submit: Accept button reset: Reset button image: Graphic button hidden: Hidden field
【2】Field name -- name P.S. If type For submitⅱreset, the name does not need to be set.
【3】Default value on the document -- value <input value="Default string">
【4】Set the width of the field -- size <input size=word Number of characters>
【5】Limit the maximum input string length -- maxlength <input maxlength=number of characters>
【6】Default the initial value of checkbox or radio -- checked <input type=checkbox checked> <input type =radio checked>
【7】Specify the URL of the graphic -- src <input type=image src="image file name">
【8】Align image and text -- align <input type=image align="#"> # The number can be top: text aligned to the top of the image middle: text aligned to the middle of the image buttom: text aligned to the bottom of the image
3. Selective form <form action="URL" method="post"> <select> <option> < option> .......... ........... </select> </form>
A, <select>'s attributes
【1】Field name -- name <select name="data field name">
【2】Set the number of displayed options -- size <select size=number>
【3】Multiple options -- multiple <select multiple>
B, <option> attributes
【1】Define the return value of the option -- value <option value="return value">
【2】Pre-selected option -- selected <option selected>
4. Multi-column input text area form <form action ="URL" method="post"> <textarea> ........... </textarea> </form>
【1】Variable name of text area -- name <textarea name=variable name>
【2】Set the width of the text input area -- cols <textarea cols=number of characters>
【3】Set the height of the text input area -- rows <textarea rows=number of columns >
【4】Set the default string in the input area <textarea> Default text </textarea>
【5】Wrap automatically or not --wrap
 如何使用Python正则表达式去除HTML标签Jun 22, 2023 am 08:44 AM
HTML(HyperTextMarkupLanguage)是用于创建Web页面的标准语言,它使用标签和属性来描述页面上的各种元素,例如文本、图像、表格和链接等等。但是,在处理HTML文本时,很难将其中的文本内容快速地提取出来用于后续的处理。这时,我们可以使用Python中的正则表达式来去除HTML标签,以达到快速提取纯文本的目的。在Python中,正则表
 如何在Go语言中使用正则表达式提取HTML标签内容Jul 14, 2023 pm 01:18 PM
如何在Go语言中使用正则表达式提取HTML标签内容导读:正则表达式是一种强大的文本匹配工具,它在Go语言中也有着广泛的应用。在处理HTML标签的场景中,正则表达式可以帮助我们快速提取需要的内容。本文将介绍如何在Go语言中使用正则表达式提取HTML标签的内容,并给出相关代码示例。一、引入相关包首先,我们需要导入相关的包:regexp和fmt。regexp包提供
 PHP如何去除字符串中的HTML标签?Mar 23, 2024 pm 09:03 PM
PHP是一种常用的服务器端脚本语言,广泛应用于网站开发和后端应用程序开发中。在开发网站或应用程序时,经常会遇到需要处理字符串中的HTML标签的情况。本文将介绍如何使用PHP去除字符串中的HTML标签,并提供具体的代码示例。为什么需要去除HTML标签?在处理用户输入或从数据库中获取的文本时,经常会包含HTML标签。有时候我们希望在显示文本时去除这些HTML标签
 php中怎么转义html标签Feb 24, 2021 pm 06:00 PM
在PHP中,可以使用htmlentities()函数来转义html,能把字符转换为HTML实体,语法“htmlentities(string,flags,character-set,double_encode)”。PHP中也可以使用html_entity_decode()函数来反转义html,把HTML实体转换为字符。
 如何在Java中从给定的字符串中删除HTML标签?Aug 29, 2023 pm 06:05 PM
String是Java中的final类,它是不可变的,这意味着我们不能改变对象本身,但我们可以更改对象的引用。可以使用String类的replaceAll()方法从给定字符串中删除HTML标签。我们可以使用正则表达式从给定字符串中删除HTML标记。从字符串中删除HTML标签后,它将返回一个字符串作为普通文本。语法publicStringreplaceAll(Stringregex,Stringreplacement)示例publicclassRemoveHTMLTagsTest{&nbs
 如何在HTML表格中使用HTML标签?Sep 08, 2023 pm 06:13 PM
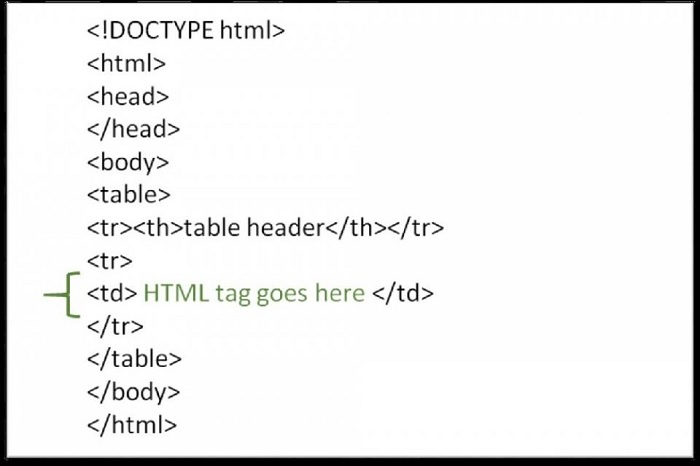
我们可以轻松地在表格中添加HTML标签。HTML标签应放置在<td>标签内。例如,在<td>标签内添加段落<p>…</p>标签或其他可用标签。语法以下是在HTML表格中使用HTMl标记的语法。<td><p>Paragraphofthecontext</p><td>示例1下面给出了在HTML表格中使用HTML标签的示例。<!DOCTYPEhtml><html><head&g
 PHP正则表达式验证基本的HTML标签的方法Jun 24, 2023 am 08:07 AM
PHP是一种高效的网页开发语言,其支持正则表达式功能,能够快速验证输入数据的有效性。在网页开发中,HTML是常见的标记语言,而对HTML标签进行验证,是网页表单验证的一种非常重要的方法。本文将介绍基本的HTML标签验证方法,以及如何使用PHP正则表达式进行验证。一、HTML标签基本结构HTML标签由尖括号包围的元素名称和属性组成,常见的标签包括p、a、div
 HTML标签大全Nov 27, 2023 am 10:05 AM
HTML标签有<!DOCTYPE>、<html>、<head>、<title>、<meta>、<link>、<style>、<script>、<body>、<h1> - <h6>、<p>、<a>、<img>、<div>、<span>、<input>、<button>、<form


Hot AI Tools

Undresser.AI Undress
AI-powered app for creating realistic nude photos

AI Clothes Remover
Online AI tool for removing clothes from photos.

Undress AI Tool
Undress images for free

Clothoff.io
AI clothes remover

AI Hentai Generator
Generate AI Hentai for free.

Hot Article

Hot Tools

SublimeText3 Chinese version
Chinese version, very easy to use

Dreamweaver Mac version
Visual web development tools

WebStorm Mac version
Useful JavaScript development tools

Notepad++7.3.1
Easy-to-use and free code editor

SecLists
SecLists is the ultimate security tester's companion. It is a collection of various types of lists that are frequently used during security assessments, all in one place. SecLists helps make security testing more efficient and productive by conveniently providing all the lists a security tester might need. List types include usernames, passwords, URLs, fuzzing payloads, sensitive data patterns, web shells, and more. The tester can simply pull this repository onto a new test machine and he will have access to every type of list he needs.


