





处理 replacewith 兼容性需先检测浏览器支持,若不支持则使用 before()、after() 和 remove() 组合实现相同效果。具体做法是定义一个兼容函数,内部通过 node.prototype.replacewith 是否存在进行判断,从而在旧版环境中模拟新 api 的行为。

如何检测 replaceWith 是否可用
检测 replaceWith 是否可用最直接的方法是检查 DOM 节点原型上是否存在该方法。可以通过 'replaceWith' in Node.prototype 或 typeof Node.prototype.replaceWith !== 'undefined' 来判断。如果条件成立,说明当前环境支持原生替换;否则需要回退到旧式操作。
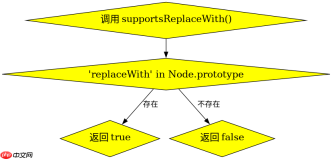
function supportsReplaceWith() {
  return 'replaceWith' in Node.prototype;
}
上述代码返回布尔值,用于后续逻辑分支。在实际项目中,通常将此检测结果缓存,避免重复调用。
如何用 before/after/remove 模拟 replaceWith
当 replaceWith 不可用时,可以使用 insertBefore 或 before() 插入新节点,然后调用 remove() 移除旧节点。注意顺序:先插入新节点,再移除旧节点,以确保文档流正确更新且不会丢失引用。


function polyfillReplaceWith(node, ...nodes) {
  if (supportsReplaceWith()) {
    node.replaceWith(...nodes);
  } else {
    const parent = node.parentNode;
    if (!parent) return;
    // 插入所有新节点
    nodes.forEach(n => parent.insertBefore(n, node));
    // 移除原节点
    node.remove();
  }
}
该函数接受任意数量的节点参数,行为与原生 replaceWith 一致。测试时传入一个 和一个 ,可验证替换结果。replaceWith 对多个子节点的处理方式
replaceWith 支持一次性替换为多个节点,而旧式方法需循环处理。例如,将单个元素替换为三个兄弟节点,原生 API 可直接传入数组或展开参数,而 polyfill 需遍历插入。这体现了现代 DOM API 的设计优势。
Java免费学习笔记:立即使用
解锁 Java 大师之旅:从入门到精通的终极指南