
A brief discussion on subdomain deployment and routing optimization of ThinkPHP3.2 (1)

- WBOYWBOYWBOYWBOYWBOYWBOYWBOYWBOYWBOYWBOYWBOYWBOYWBOriginal
- 2016-12-05 13:26:271785browse
Foreword: Building a website system often contains multiple sub-websites, such as PC official website, mobile official website, and backend management. The data comes from the same database. The entire architecture, from the perspective of ThinkPHP, can be roughly understood as Model(M) It’s the same. Controller (C) contains shared API parts and non-shared parts, while View is completely non-shared. During the entire initial architecture, we can mainly consider the following aspects:
Configure shared database, extend modules in Application, customize view folders, subdomain deployment, simplification of routing....
The specific operations are as follows:
1. Prepare ThinkPHP environment and database
a. Download the full version of ThinkPHP3.2 source code from the official website, unzip it and name it testWeb and place it in the www directory. Visit http://192.168.1.122/testWeb/ and you can see:
 It means there is no problem with the deployment.
b. Prepare a test database books, create a new book table (id, title, price), and prepare test data;
c. Configure the database, refer to the ThinkPHP configuration loading rules, you can use the conventional configuration (ThinkPHP/Conf/convention.php), combined with the application configuration (Application/Common/Conf/config.php), module configuration (Application/current module name/ Conf/config.php),
we use the database configuration for the application configuration:
<span style="color: #008080"> 1</span>     <span style="color: #008000">//</span><span style="color: #008000">数据库配置信息</span>
<span style="color: #008080"> 2</span>     'DB_TYPE'   => 'mysql', <span style="color: #008000">//</span><span style="color: #008000"> 数据库类型</span>
<span style="color: #008080"> 3</span>     'DB_HOST'   => 'localhost', <span style="color: #008000">//</span><span style="color: #008000"> 服务器地址localhost</span>
<span style="color: #008080"> 4</span>     'DB_NAME'   => 'books', <span style="color: #008000">//</span><span style="color: #008000"> 数据库名</span>
<span style="color: #008080"> 5</span>     'DB_USER'   => 'root', <span style="color: #008000">//</span><span style="color: #008000"> 用户名</span>
<span style="color: #008080"> 6</span>     'DB_PWD'    => '', <span style="color: #008000">//</span><span style="color: #008000"> 密码</span>
<span style="color: #008080"> 7</span>     'DB_PORT'   => 3306, <span style="color: #008000">//</span><span style="color: #008000"> 端口</span>
<span style="color: #008080"> 8</span>     'DB_PREFIX' => '', <span style="color: #008000">//</span><span style="color: #008000"> 数据库表前缀</span>
<span style="color: #008080"> 9</span>     'DB_CHARSET'=> 'utf8', <span style="color: #008000">//</span><span style="color: #008000"> 字符集</span>
<span style="color: #008080">10</span>     'DB_DEBUG'  =>  <span style="color: #0000ff">TRUE</span>, <span style="color: #008000">//</span><span style="color: #008000"> 数据库调试模式 开启后可以记录SQL日志 3.2.3新增<br></span>
Next, add an action in the default Index controller:
<span style="color: #008080">1</span>     <span style="color: #0000ff">public</span> <span style="color: #0000ff">function</span> get_book(<span style="color: #800080">$id</span><span style="color: #000000">){
</span><span style="color: #008080">2</span>         <span style="color: #800080">$param</span>['id'] = I('get.id'<span style="color: #000000">);
</span><span style="color: #008080">3</span>         <span style="color: #800080">$model</span> = M('book')->where(<span style="color: #800080">$param</span>)-><span style="color: #000000">find();
</span><span style="color: #008080">4</span>         <span style="color: #800080">$this</span>->ajaxReturn(<span style="color: #800080">$model</span><span style="color: #000000">);
</span><span style="color: #008080">5</span>     }
Visit: http://192.168.1.122/testWeb/index.php/Home/Index/get_book?id=1, you can go to the json data, indicating that the database connection and access are normal so far:

a. Quickly copy the current Home module, rename it to H5 module and modify the namespace in the corresponding controller to: namespace H5Controller,
Visit: http://192.168.1.122/testWeb/index.php/
H5/Index/get_book?id=1. At this time, the data is successfully returned, indicating that the current H5 module is OK; similarly we can restore Make an Admin module.
3. Customized view folder off out important features. Views in ThinkPHP mainly refer to template files and template engines: template files can be simply understood as the basic "small originals" in building building block toys. These "small originals" may be of different shapes, and each shape of "small originals" may be used in building building blocks. One or more are used in the process; the template engine is to build the "concave and convex" buckles in building block toys, forming a rule to combine "small originals".
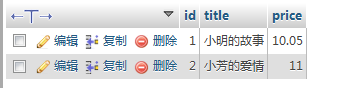
b. View usage: Add the Home module-Index controller-book operation to obtain all books, and create a new Index folder-new book.html under the View folder of the Home module
<span style="color: #008080">1</span> <span style="color: #0000ff">public</span> <span style="color: #0000ff">function</span><span style="color: #000000"> book(){
</span><span style="color: #008080">2</span>     <span style="color: #800080">$models</span> = M('book')-><span style="color: #000000">select();
</span><span style="color: #008080">3</span>     <span style="color: #800080">$this</span>->assign('books',<span style="color: #800080">$models</span><span style="color: #000000">);
</span><span style="color: #008080">4</span>     <span style="color: #800080">$this</span>-><span style="color: #000000">display();
</span><span style="color: #008080">5</span> }
Template file:
<span style="color: #008080">1</span> <span style="color: #0000ff"><</span><span style="color: #800000">body</span><span style="color: #0000ff">></span>
<span style="color: #008080">2</span>     <span style="color: #0000ff"><</span><span style="color: #800000">volist </span><span style="color: #ff0000">name</span><span style="color: #0000ff">="books"</span><span style="color: #ff0000"> id</span><span style="color: #0000ff">="vo"</span><span style="color: #0000ff">></span>
<span style="color: #008080">3</span>         <span style="color: #0000ff"><</span><span style="color: #800000">p</span><span style="color: #0000ff">></span>序号:{$vo.id}<span style="color: #0000ff"></</span><span style="color: #800000">p</span><span style="color: #0000ff">></span>
<span style="color: #008080">4</span>         <span style="color: #0000ff"><</span><span style="color: #800000">p</span><span style="color: #0000ff">></span>书名:{$vo.title}<span style="color: #0000ff"></</span><span style="color: #800000">p</span><span style="color: #0000ff">></span>
<span style="color: #008080">5</span>         <span style="color: #0000ff"><</span><span style="color: #800000">p </span><span style="color: #ff0000">style</span><span style="color: #0000ff">="color: #FF0000"</span><span style="color: #0000ff">></span>价格:{$vo.price}<span style="color: #0000ff"></</span><span style="color: #800000">p</span><span style="color: #0000ff">></span>
<span style="color: #008080">6</span>     <span style="color: #0000ff"></</span><span style="color: #800000">volist</span><span style="color: #0000ff">></span>
<span style="color: #008080">7</span> <span style="color: #0000ff"></</span><span style="color: #800000">body</span><span style="color: #0000ff">></span>
c、 访问:http://192.168.1.122/testWeb/index.php/Home/Index/book,此时可以看到页面:
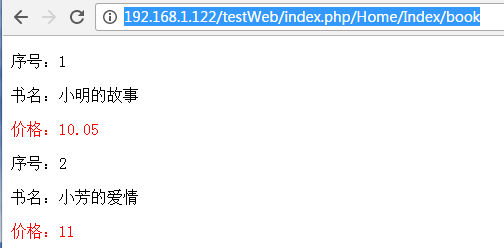
此时,说明这个视图使用是正确的,但是同时也有一些不好的地方,如果模板文件多起来的时候,就不利于模板修改编辑(目录层次太深了),可以在模块配置中,定义当前模块默认的视图目录(Application/Home/Conf/config.php):
<code class="hljs bash"><span class="hljs-string"><span class="hljs-string"> <span class="cnblogs_code"><span style="color: #008080">define</span>('TMPL_PATH','./Public/PC/'); </span><br></span></span></code>
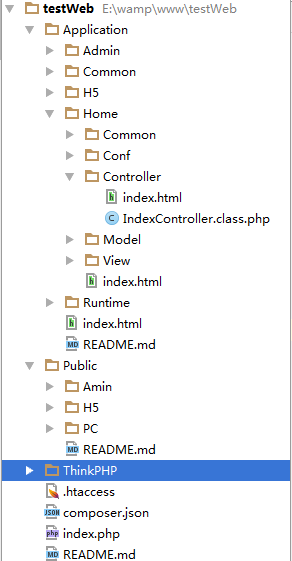
类似定义H5、admin模块的视图目录,最终得到的目录组织,到此,就可以大概有几个不同的子网站的初步架构了。而对于网站的分类:二级菜单、三级菜单就可以分别对应控制器(Controller)和操作(action),根据视图模板构造动态的页面:
4、子域名部署,关于子域名的解析可以参考我之前的文章网站部署一级域名、二级域名、子域名
a、主要修改一些相关配置:
<span style="color: #008080"> 1</span> <span style="color: #0000ff"><</span><span style="color: #800000">VirtualHost </span><span style="color: #ff0000">*:80</span><span style="color: #0000ff">></span>
<span style="color: #008080"> 2</span> <span style="color: #000000">    DocumentRoot "E:/wamp/www/testWeb/"
</span><span style="color: #008080"> 3</span> <span style="color: #000000">    ServerName  chqtest.com
</span><span style="color: #008080"> 4</span> <span style="color: #000000">    ServerAlias m.chqtest.com
</span><span style="color: #008080"> 5</span>     <span style="color: #0000ff"><</span><span style="color: #800000">Directory </span><span style="color: #ff0000">"E:/wamp/www/testWeb/"</span><span style="color: #0000ff">></span>
<span style="color: #008080"> 6</span> <span style="color: #000000">    Allow from all
</span><span style="color: #008080"> 7</span>     <span style="color: #0000ff"></</span><span style="color: #800000">Directory</span><span style="color: #0000ff">></span>
<span style="color: #008080"> 8</span>     <span style="color: #0000ff"><</span><span style="color: #800000">IfModule </span><span style="color: #ff0000">dir_module</span><span style="color: #0000ff">></span>
<span style="color: #008080"> 9</span> <span style="color: #000000">       DirectoryIndex  mobile.php index.html index.htm default.php default.htm default.html
</span><span style="color: #008080">10</span>     <span style="color: #0000ff"></</span><span style="color: #800000">IfModule</span><span style="color: #0000ff">></span>
<span style="color: #008080">11</span> <span style="color: #0000ff"></</span><span style="color: #800000">VirtualHost</span><span style="color: #0000ff">></span>
<span style="color: #008080">12</span>
<span style="color: #008080">13</span> <span style="color: #0000ff"><</span><span style="color: #800000">VirtualHost </span><span style="color: #ff0000">*:80</span><span style="color: #0000ff">></span>
<span style="color: #008080">14</span> <span style="color: #000000">    DocumentRoot "E:/wamp/www/testWeb/"
</span><span style="color: #008080">15</span> <span style="color: #000000">    ServerName  chqtest.com
</span><span style="color: #008080">16</span> <span style="color: #000000">    ServerAlias www.chqtest.com
</span><span style="color: #008080">17</span>     <span style="color: #0000ff"><</span><span style="color: #800000">Directory </span><span style="color: #ff0000">"E:/wamp/www/testWeb/"</span><span style="color: #0000ff">></span>
<span style="color: #008080">18</span> <span style="color: #000000">    Allow from all
</span><span style="color: #008080">19</span>     <span style="color: #0000ff"></</span><span style="color: #800000">Directory</span><span style="color: #0000ff">></span>
<span style="color: #008080">20</span>     <span style="color: #0000ff"><</span><span style="color: #800000">IfModule </span><span style="color: #ff0000">dir_module</span><span style="color: #0000ff">></span>
<span style="color: #008080">21</span> <span style="color: #000000">       DirectoryIndex  index.php index.html index.htm default.php default.htm default.html
</span><span style="color: #008080">22</span>     <span style="color: #0000ff"></</span><span style="color: #800000">IfModule</span><span style="color: #0000ff">></span>
<span style="color: #008080">23</span> <span style="color: #0000ff"></</span><span style="color: #800000">VirtualHost</span><span style="color: #0000ff">></span>
<span style="color: #008080">24</span>
<span style="color: #008080">25</span> <span style="color: #0000ff"><</span><span style="color: #800000">VirtualHost </span><span style="color: #ff0000">*:80</span><span style="color: #0000ff">></span>
<span style="color: #008080">26</span> <span style="color: #000000">    DocumentRoot "E:/wamp/www/testWeb/"
</span><span style="color: #008080">27</span> <span style="color: #000000">    ServerName  chqtest.com
</span><span style="color: #008080">28</span> <span style="color: #000000">    ServerAlias admin.chqtest.com
</span><span style="color: #008080">29</span>     <span style="color: #0000ff"><</span><span style="color: #800000">Directory </span><span style="color: #ff0000">"E:/wamp/www/testWeb/"</span><span style="color: #0000ff">></span>
<span style="color: #008080">30</span> <span style="color: #000000">    Allow from all
</span><span style="color: #008080">31</span>     <span style="color: #0000ff"></</span><span style="color: #800000">Directory</span><span style="color: #0000ff">></span>
<span style="color: #008080">32</span>     <span style="color: #0000ff"><</span><span style="color: #800000">IfModule </span><span style="color: #ff0000">dir_module</span><span style="color: #0000ff">></span>
<span style="color: #008080">33</span> <span style="color: #000000">       DirectoryIndex  index.php index.html index.htm default.php default.htm default.html
</span><span style="color: #008080">34</span>     <span style="color: #0000ff"></</span><span style="color: #800000">IfModule</span><span style="color: #0000ff">></span>
<span style="color: #008080">35</span> <span style="color: #0000ff"></</span><span style="color: #800000">VirtualHost</span><span style="color: #0000ff">></span>
此时,也就是说,有不同子域名(二级网站别名)www.chqtest.com m.chqtest.com admin.chqtest.com都可以直接访问到www/testWeb目录下,如http://www.chqtest.com/index.php/Home/Index/book,
http://m.chqtest.com/index.php/Home/Index/book都是一样的,只是访问到Home模块下的书籍页面(改Home为H5也都指向手机端页面);
b、那么如果要根据不同的子域名,直接绑定到不同的模块怎么办?参考ThinkPHP的域名部署,也就是在惯用配置下补充一些信息:
<span style="color: #008080"> 1</span>     'APP_SUB_DOMAIN_DEPLOY' =>  <span style="color: #0000ff">true</span>,   <span style="color: #008000">//</span><span style="color: #008000"> 是否开启子域名部署
</span><span style="color: #008080"> 2</span> <span style="color: #008000">    //完整域名部署</span>
<span style="color: #008080"> 3</span>     'APP_SUB_DOMAIN_RULES'    =>    <span style="color: #0000ff">array</span>( <span style="color: #008000">//</span><span style="color: #008000"> 子域名部署规则</span>
<span style="color: #008080"> 4</span>         'www.chqtest.com'  => 'Home',   <span style="color: #008000">//</span><span style="color: #008000"> www.chqtest.com域名指向Home模块</span>
<span style="color: #008080"> 5</span>         'm.chqtest.com'   => 'H5',
<span style="color: #008080"> 6</span>         'admin.chqtest.com' => 'Admin',
<span style="color: #008080"> 7</span>     ),
<span style="color: #008080"> 8</span>     'APP_DOMAIN_SUFFIX'     =>  '', <span style="color: #008000">//</span><span style="color: #008000"> 域名后缀 如果是com.cn net.cn 之类的后缀必须设置    </span>
<span style="color: #008080"> 9</span>     'ACTION_SUFFIX'         =>  '', <span style="color: #008000">//</span><span style="color: #008000"> 操作方法后缀</span>
<span style="color: #008080">10</span>     'MULTI_MODULE'          =>  <span style="color: #0000ff">true</span>, <span style="color: #008000">//</span><span style="color: #008000"> 是否允许多模块 如果为false 则必须设置 DEFAULT_MODULE</span>
<span style="color: #008080">11</span>     'MODULE_DENY_LIST'      =>  <span style="color: #0000ff">array</span>('Common','Runtime'),
<span style="color: #008080">12</span>     'MODULE_ALLOW_LIST'    =>    <span style="color: #0000ff">array</span>('Home','H5','Admin'), <span style="color: #008000">//</span><span style="color: #008000"> 允许访问的模块列表</span>
再次访问http://www.chqtest.com/index.php/Home/Index/book,http://m.chqtest.com/index.php/Home/Index/book,会发现有以下错误:
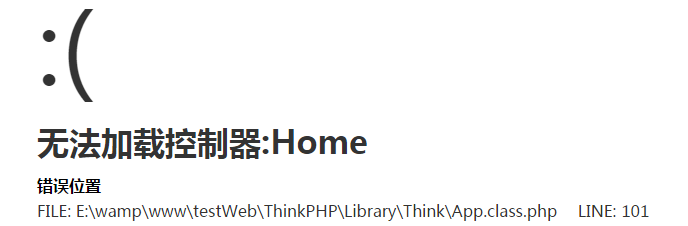 这是因为绑定子域名部署之后,index.php入口文件定位到Application应用目录之前,就已经根据不同的子域名,直接进入相应的目录里面了,这时Home就会被判断要查找的控制器,显然当前控制器只有Index,所以,重新访问:http://www.chqtest.com/index.php/Index/book,http://m.chqtest.com/index.php/Index/book,http://admin.chqtest.com/index.php/Index/book,是不是就都分别访问到相应模块下的操作并返回视图呢:
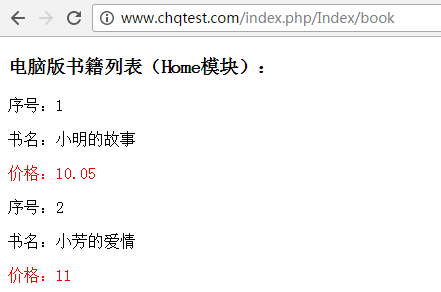
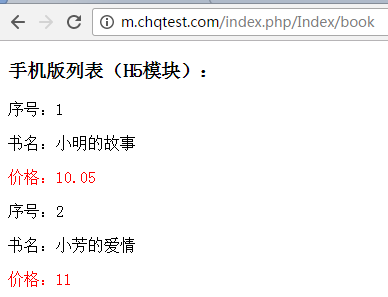
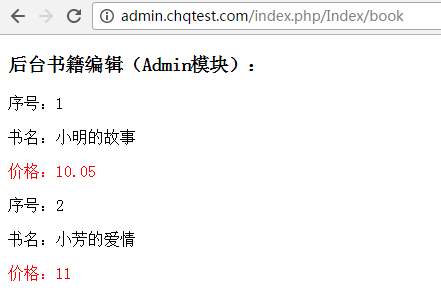
这时,基本就可以搭建了一个大体的网站架构就进一步完善了些,从http://192.168.1.122/testWeb/index.php/H5/Index/book访问手机端书籍页面,到http://m.chqtest.com/index.php/Index/book是不是可以省略了一级资源目录和模块名了呢,
整个结构也清晰了很多。下一篇,将继续说说ThinkPHP关于路由优化,PC、H5网站相互切换的技巧,有兴趣的可以留意下,关于这次例子可以参考Demo