Detailed tutorial on PHP image processing library Grafika
- 高洛峰Original
- 2016-11-08 14:17:153174browse
Picture filtering, filters
grafika provides 11 filter functions to meet the needs of any situation during development.
Here is an operation method: apply: it can apply the filter effect to the picture
Blur the picture
Use the Blur parameter to blur a picture
The blur value range is 0-100, the higher the value The larger the picture, the blurrier the picture
use Grafika\Grafika;
$editor = Grafika::createEditor();
$editor->open( $image, 'yanying-smaller.jpg' );
$filter = Grafika::createFilter('Blur', 50); // 模糊度为10,模糊度取值为0-100
$editor->apply( $image, $filter ); // 将滤镜应用到图片
$editor->save($image,'yanying-blur.jpg');
We adjust the picture blur parameter to 50


Picture brightness adjustment
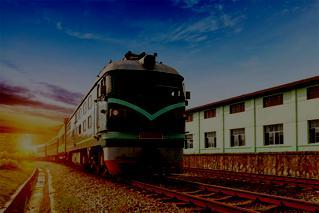
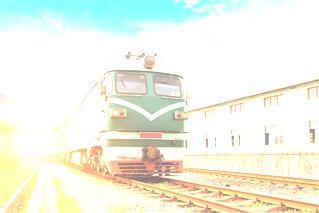
Use Brightness to brighten or darken the picture
where the brightness value range is
-100 to -1, darken
0 The picture has no change
1-100 picture variables
use Grafika\Grafika;
$editor = Grafika::createEditor();
$editor->open( $image, 'yanying-smaller.jpg' );
$filter = Grafika::createFilter('Brightness', -50);
$editor->apply( $image, $filter );
$editor->save($image,'333/yanying-Brightness-1.jpg');

Change the color of the picture
Use the Colorize parameter to adjust the three basic colors of red, green and blue of the picture to change the color of the picture
Color parameters (the value range of red, green and blue is the same)
The value is -100 to -1, the color decreases;
If it is 0, it means no change;
The value is 1-100, which means the color value increases
use Grafika\Grafika;
$editor = Grafika::createEditor();
$editor->open( $image, 'yanying-smaller.jpg' );
$filter = Grafika::createFilter('Colorize', -50,50,-50);
$editor->apply( $image, $filter );
$editor->save($image,'333/yanying-Colorize.jpg');


Change the contrast of the picture
Use the Contrast parameter to change the contrast of the picture
The contrast value is similar to the previous one, -100 to -1, the contrast decreases; 0 does not change; 1 to 100, the contrast increases
Exactly what is contrast? I can’t figure it out on Baidu myself. After all, I’m not a designer
use Grafika\Grafika;
$editor = Grafika::createEditor();
$editor->open( $image, 'yanying-smaller.jpg' );
$filter = Grafika::createFilter('Contrast', 50);
$editor->apply( $image, $filter );
$editor->save($image,'333/yanying-Contrast.jpg');

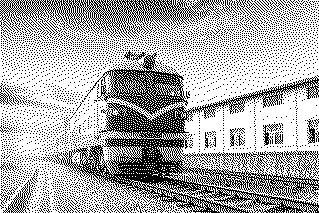
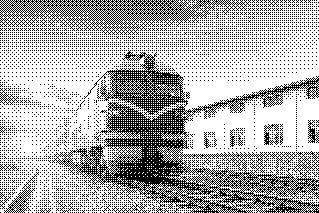
Image level adjustment
Gamma is a parameter that is not commonly used in normal times and is only used in professional images fields will be used. It can be understood as color scale, which is the mathematical relationship between grayscale brightness value and grayscale level.
这里的Gamma功能是校正图像色阶,使得图像看起来颜色更加正确
这里的数字值取值范围只有最小值没有最大值只要 >=1.0都可以
use Grafika\Grafika;
$editor = Grafika::createEditor();
$editor->open( $image, 'yanying-smaller.jpg' );
$filter = Grafika::createFilter('Gamma', 2.0);
$editor->apply( $image, $filter );
$editor->save($image,'333/yanying-Gamma.jpg');


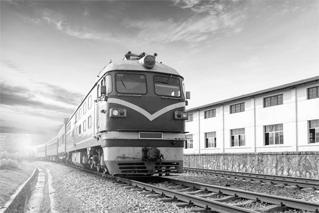
图片灰度
使用Grayscale使图片所有的色彩丢弃,只保留黑白两种颜色,没有取值。
use Grafika\Grafika;
$editor = Grafika::createEditor();
$editor->open( $image, 'yanying-smaller.jpg' );
$filter = Grafika::createFilter('Grayscale');
$editor->apply( $image, $filter );
$editor->save($image,'333/yanying-Grayscale.jpg');

图像反色处理
图像反色,也就是弄得和胶片似得。
使用Invert参数可以达到图像反色效果,也没有可选值
use Grafika\Grafika;
$editor = Grafika::createEditor();
$editor->open( $image, 'yanying-smaller.jpg' );
$filter = Grafika::createFilter('Invert');
$editor->apply( $image, $filter );
$editor->save($image,'333/yanying-Invert.jpg');


图片像素化、栅格化
就是把矢量图形转换成像素点组成的点阵图形,也叫栅格化。搞ps的应该都清楚
该参数有个取值范围只要大于或者等于1就可以,如果值越大,像素点也就越大
use Grafika\Grafika;
$editor = Grafika::createEditor();
$editor->open( $image, 'yanying-smaller.jpg' );
$filter = Grafika::createFilter('Pixelate',10);
$editor->apply( $image, $filter );
$editor->save($image,'333/yanying-Pixelate-10.jpg');
我们取值5和取值10对比下



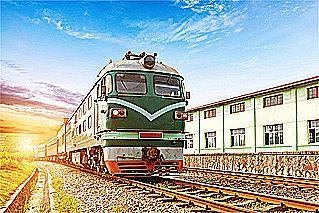
图片锐化
图片锐化就是补偿图像的轮廓,增强图像的边缘及灰度跳变的部分,使图像变得清晰。
使用参数Sharpen可以处理锐化,其取值为1-100(包含)。
use Grafika\Grafika;
$editor = Grafika::createEditor();
$editor->open( $image, 'yanying-smaller.jpg' );
$filter = Grafika::createFilter('Sharpen',50);
$editor->apply( $image, $filter );
$editor->save($image,'333/yanying-Sharpen.jpg');
我们取值50,看下效果

图像查找边缘
通过数学计算检测出图像的边缘,在ps中较为常用。
这里使用Sobel参数达到相同效果,没有值可选
use Grafika\Grafika;
$editor = Grafika::createEditor();
$editor->open( $image, 'yanying-smaller.jpg' );
$filter = Grafika::createFilter('Sobel');
$editor->apply( $image, $filter );
$editor->save($image,'333/yanying-Sobel.jpg');

