Home >Web Front-end >HTML Tutorial >Resolve xampp port conflict
Resolve xampp port conflict
- WBOYWBOYWBOYWBOYWBOYWBOYWBOYWBOYWBOYWBOYWBOYWBOYWBOriginal
- 2016-10-22 11:56:262168browse
Today I pressed xampp on my computer, and when I ran wamp, the following happened:
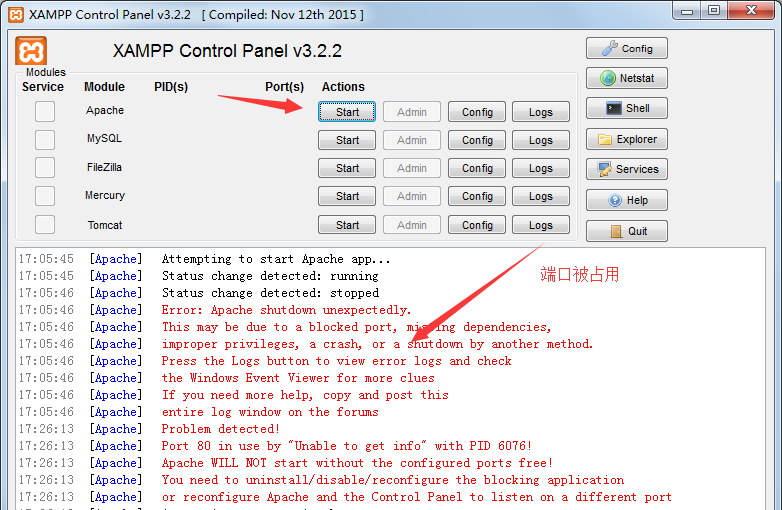
I checked online and found that the port was occupied, so I modified it manually.
1. Modify the port number of xampp
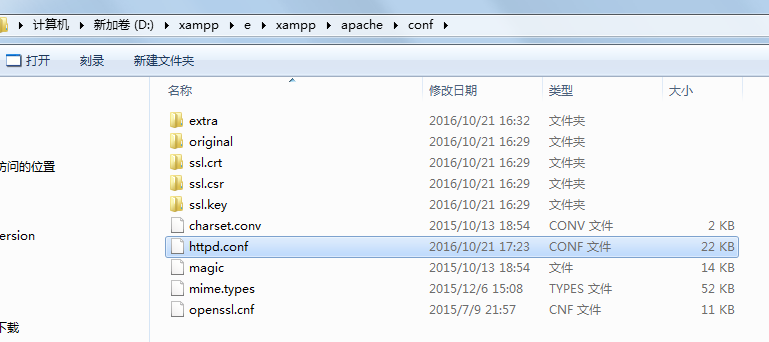
Find in order: XAMPP installation directory (such as D:xampp) apacheconfhttpd.conf, use Notepad or notepad and other tools to open httpd.conf, as shown in the figure
Or open the xampp page directly, as shown in the picture
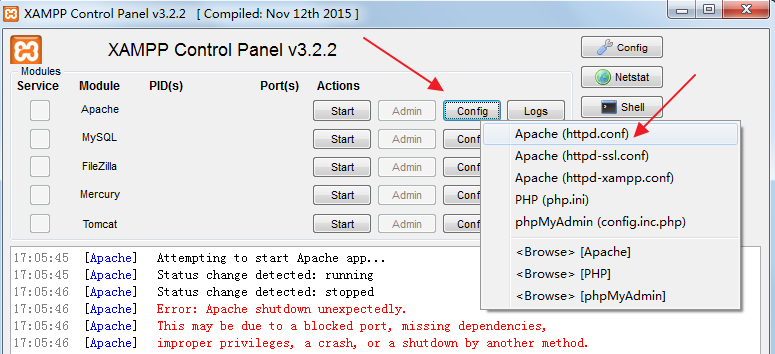
After double-clicking to open it, Ctrl+F searches for listen and changes port 80 to 8081 as shown in the picture
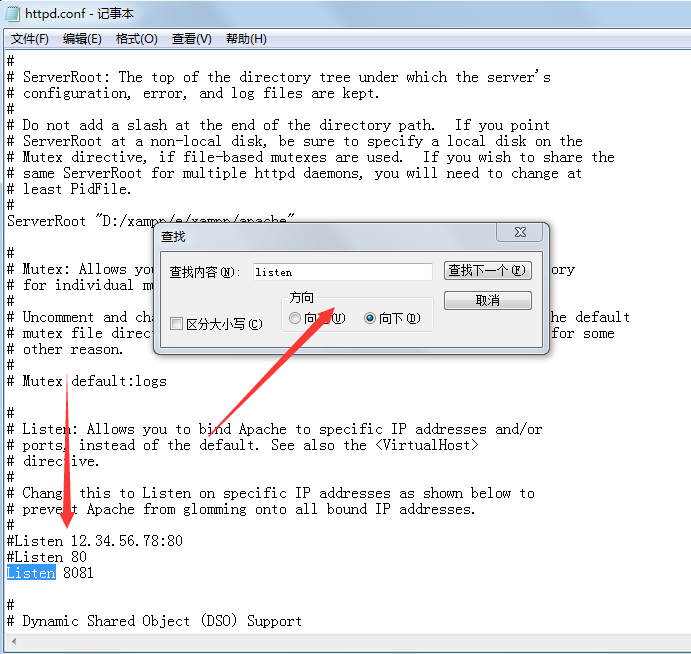
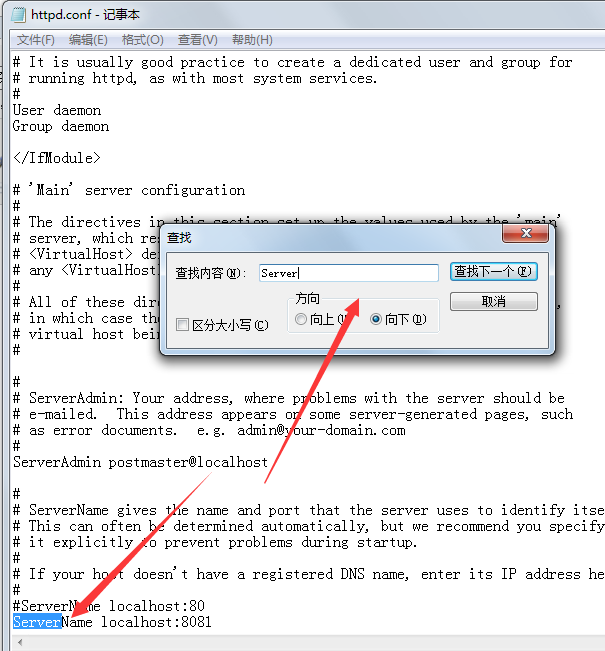
After the modification is completed, search for Server again and change localhost to 8081 as shown in the picture
After the modification, let’s start it again to see if it works, as shown in the picture 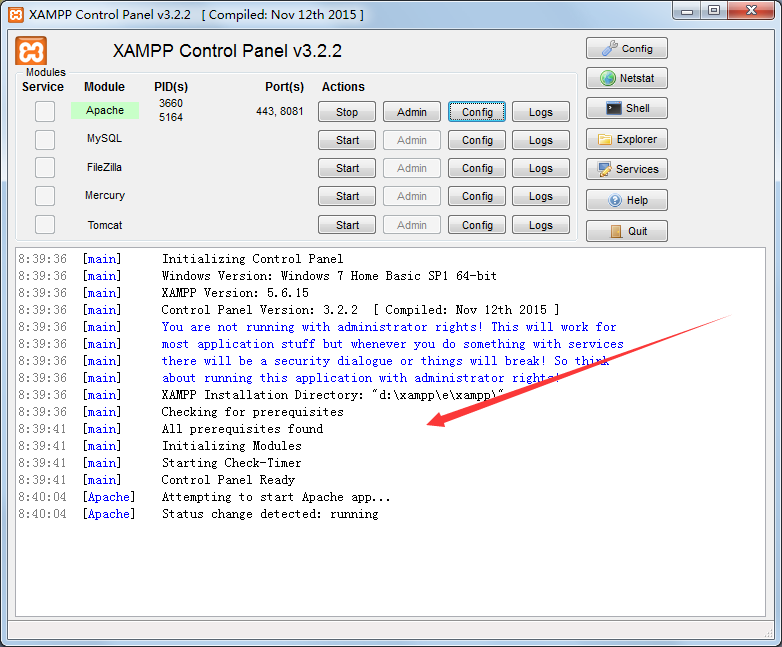
2. Modify the file root directory of xampp: still open httpd.conf, search for document with Ctrl+F, as shown in the picture, and change it to the file directory you want. 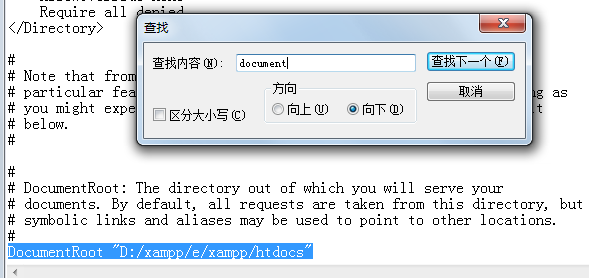
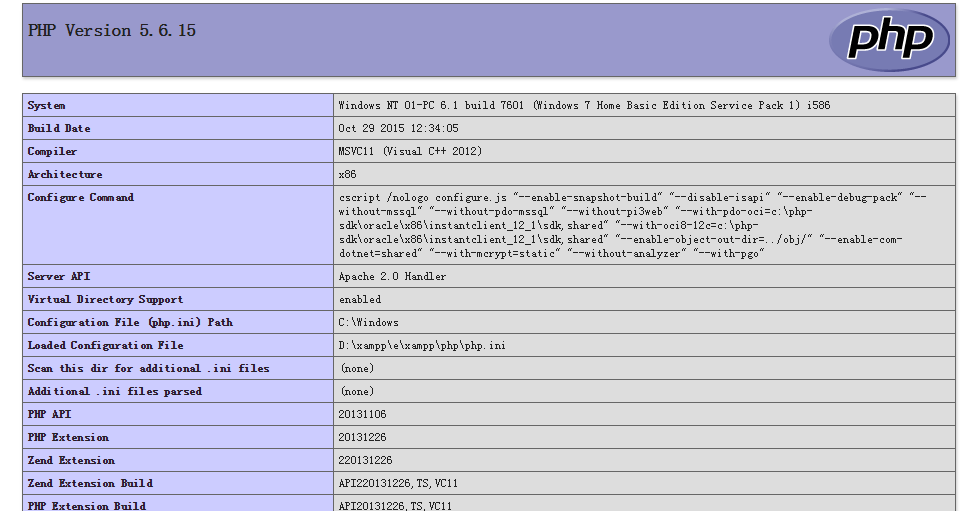
3. Use Dreamweaver to create a new site, start xampp’s Apache, write a test.php page, and test whether it is successful
test.php
<span style="color: #008080">1</span> <?<span style="color: #000000">php
</span><span style="color: #008080">2</span> <span style="color: #008080">phpinfo</span><span style="color: #000000">();
</span><span style="color: #008080">3</span> ?>
Once this appears, it’s ok, as shown below:
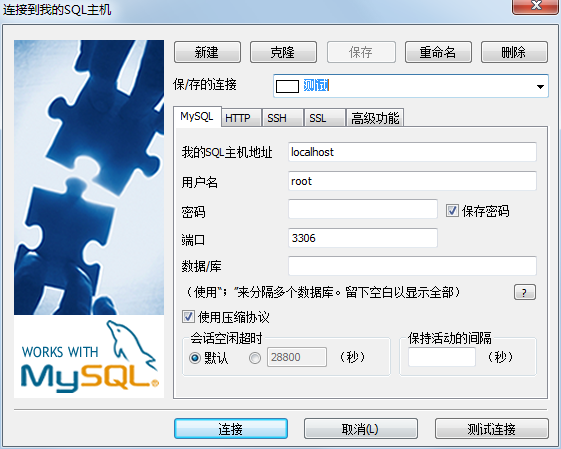
4. When using Sqlyog, open xampp’s mysql. Since nothing related to the database has been changed, just connect normally, as shown in the picture
