
Use Apache+Dreamweaver (or H-builder) to build a php development environment

- WBOYWBOYWBOYWBOYWBOYWBOYWBOYWBOYWBOYWBOYWBOYWBOYWBOriginal
- 2016-10-15 10:31:511981browse
- Instructions on tools usedphp+Apache server+Dreamweaver+mysql database
- DownloadAfter installing wamp, you can directly download it from Baidu online. For convenience, I will put a link to Baidu Cloud. wamp download: Link: http://pan.baidu.com/s/1jH6FbtO Password: zeo6
Download and install it, there is no big problem, just press Enter all the way. One step is to choose the browser, the default is IE. If you want chrome, just change it yourself
-
php environment construction
Integrated development environment, also called IDE environment. The web server + PHP interpreter + database are all configured and can be used directly. We do not need to configure it ourselves.
wamp’s environment refers to: Windows+Apache+mysql+php. If IIS has been installed on the computer before, it will conflict with Apache
-
Wamp directory introduction
Open the wamp installation directory and you can see the following folders
1) WWW directory: It is the root directory of the default website. All websites must be placed under this directory or subdirectory. When we visit When it is like this, t http: // localhost/visit this is the root directory of the website www
http://localhost/test.html. , test.html file
2) mysql directory: Under the wamp installation directory, there is also a folder at the same level as the www directory. This is the folder of our mysql database.目 There is also a folder called Data under the MySQL directory. This is the directory of the database on the MySQL server. Each file below the data corresponds to a database. Building a folder in it is to build a database. We can also do so. Operation, student A has built a database, and student B wants to use it. At this time, we can directly copy the corresponding folder under the data directory of student A and put it under the corresponding folder of student B.
Modify wamp's configuration file (such as modifying the port number, modifying the root directory of the website)
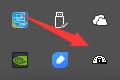
1) Modify the port number of wamp - Double-click to run our wamp, click our small semicircle icon, as shown in the picture:
Select Config files--httpd.conf on the page. This is the main configuration file of Apache.
Right-click to enter this file. After opening, you will see a page like this.
The # sign on the left is a comment, which does not take effect. Search with ctrl+F Listen, search, and find a Listen80 without the # sign, as shown in the picture
What does this sentence mean? Our Apache is currently listening to port 80. If you want to change it to For other ports, just modify them here. Change it as you like, but don't conflict. After the change, Ctrl+s save it, but it still can't be used. We need to restart Apache. We can double-click the small semicircle, select Apache---Restart Service, or double-click Small semicircle--Restart All Serveice
2) Modify the root directory of Apache, do not use the www directory, change it to something elseOr click the small semicircle, select Config files--httpd.conf--search for document, this appears: DocumentRoot" D:/wamp/www" Just change this directory. As shown in the picture
For some other configurations, we can search on Baidu ourselves: Apache configuration file httpd.conf description, just change it according to him. In addition, php: php_ini core configuration option description can also be found on Baidu3) A major difficulty in php: how to view or modify php’s configuration file-php.ini All configurations of php are done here
How php works
The user enters the URL in the client browser: http://www.xxx.com/test.php------> After pressing Enter, the request is sent to the Apache server---->Apache receives After receiving the request, it will look for test.php (if it does not exist, a 404 error will be returned. The resource you requested does not exist; if there is a script in test.php, which Apache does not recognize, Apache will send it. Give it to the php interpreter, the php interpreter will interpret all php into html, and then send it to Apache, and then Apache will send it to the client browser, and the client browser will render the page and present it to User) -
Build a php development environment (no matter how you build it, it must be placed under the www directory. If you want to build multiple websites, you must create subfolders under the www directory)
1) Use Dreamweaver to build a local development environment
Open Dreamweaver, select Site--New Site on the page
Site name: Logical site name, choose it as you like, either Chinese or English, we name it localWeb. Local site folder: The physical site name must be placed under the www directory. Find the www directory---create a new folder, create a localWeb folder, select this folder as the root directory of our website (the logical site name and the physical site name do not have to be written the same, they are written the same to facilitate our management ). As shown in the picture:
It is not completed yet. When we are done, we need to click on the server-select the plus sign in the lower left corner and fill in our basic server settings.
Server name: Start as you like. Connection method: Select local/network. Server folder: Select the one we just created. In the Web URL: http//localhost, this path accesses the root directory of our website (www folder). If we do not modify the port number, just write it like this; if we change the port number of 80 to 8888, then You have to write it like this: http://localhost:8888. If it has not been modified, there is no need to modify it.
Attention! ! ! ! ! ! ! ! ! ! ! ! ! http://localhost only goes to the www directory, because the site we built is localWeb, and the new site also has this name, so our Web URL should be written like this
http://localhost/localWeb, as shown in the picture
Click After saving, please note that there is one more step. Because we are using it for local testing, we need to remove the remote check mark and add the test check mark, as shown in the figure.
How do we know that our site is built?
After the site is built, create a new test.php under our current site. The content inside is as follows:
phpinfo();//Read the pbp configuration file php.ini
?>
Then run it. If the following page appears, it is ready.
We can take a look at the html structure of the page. We can see that our test.php is only one line of code. As a result, our html has so much, you can know that our browser cannot parse php, test .php must be parsed by php before it can be displayed. The source code and the translated code are completely different. This is done for safety. As shown in the picture
2) Use Dreamweaver to build our remote site.
As shown in the picture: the site name can be chosen arbitrarily, we call it the remote site; the local site folder can also be chosen arbitrarily, because we are downloading the files on the remote server to the local, so it does not matter.
Then select the server column, as shown below,
Remember that after this step is completed, the remote column needs to be checked, and the test column also needs to be checked . In this way, a remote site is set up. Let's test the change below. As shown in the figure, the down arrow is to download the content of the remote site to the local, and the up arrow is to upload it to the server.
Next we will do a test and create a new test.php page under the current site with the following content:
header("content-type:text/html;charset=utf-8");
echo "Haha, a php page";
?>
After writing, run it with a browser. Attention! ! ! This file must be uploaded to the server before it can be previewed, and it must be under the domain name bound to the space.(3) H-builder builds a local development environmentIn the open window, select--File--New--web project, the following page will appear
Note: The difference between H-builder and DreamweaverH-builder has a built-in internal web server! ! ! The project name is still a logical site name, and the location is still a physical site nameAttention! ! ! ! ! Notice! ! !As shown in the picture above, after we create the directory, it will become like this: wamp/www/phpStudyHbuilder/phpStudyHbuilder, which means phpStudyHbuilder appears repeatedly (that is, two)In other words, we have to write it like this: As shown below
This will automatically create a new phpStudyHbuilder directory under the www directory! ! ! !Just click Finish after writing this.After the site is completed, we create a test.php test file just like Dreamweaver. The content is still the same.Since H-builder comes with a built-in server, if we open it with the built-in server, it will look like this, as shown below
At this point we want to use our own Apache server, we need to do thisClick on the browser chrome chart---web server settings----external web server settings, create a new external server, and let this external server specify the address of our Apache server
Choose New
Then write the things inside like this, just write localhost
Confirm it after you finish writing it. It is still not used now and needs to be switched. At this time, open our server settings again and change them
Set everything to localhost so you can use our Apache

 Or click the small semicircle, select Config files--httpd.conf--search for document, this appears: DocumentRoot" D:/wamp/www" Just change this directory. As shown in the picture
  3) A major difficulty in php: how to view or modify php’s configuration file-php.ini All configurations of php are done here


Statement:
The content of this article is voluntarily contributed by netizens, and the copyright belongs to the original author. This site does not assume corresponding legal responsibility. If you find any content suspected of plagiarism or infringement, please contact admin@php.cn
Previous article:JS common validation REGNext article:JS common validation REG