


The pop-up layer effect is a very practical function. Many websites use this method to implement login and registration, such as Baidu:

Features of the pop-up layer: When you click login or registration, a login or registration area pops up in the middle of the page and the page has a mask layer, and the login box is above the mask layer, which is the z- of the login box The index value should be greater than the z-index value of the mask layer. Close the login or registration box when clicking the close or mask layer (some web pages do not implement the function of clicking the mask layer to close the login or registration area.).
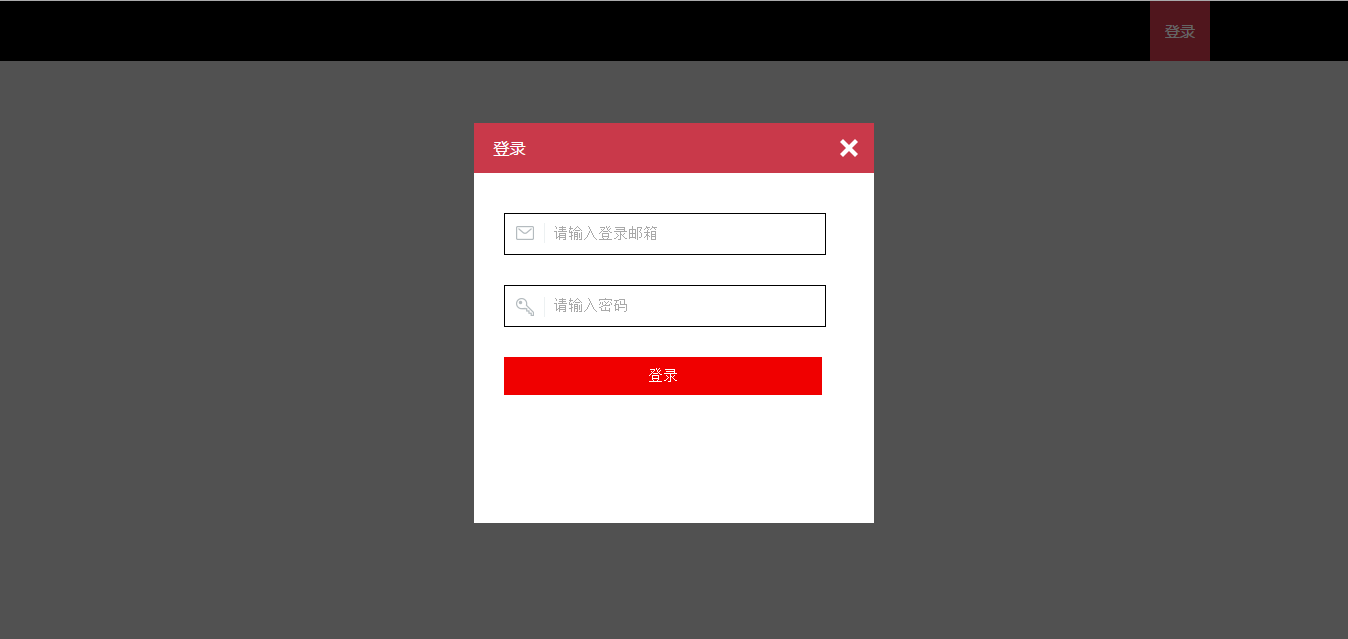
I recently made a similar pop-up layer effect, let’s show the final effect first:
Briefly talk about the implementation process.
First is the mask layer. The mask layer is created during the dynamic loading of the page. Because the mask layer needs to cover the entire page, the height of the mask layer is calculated in JavaScript, and its width is the width of the entire page. This is also very Easy to get. You also need to set a z-index value for it, as large as possible, because it needs to cover the entire page. Of course transparency is also a must.
#mask{
background: #000;
opacity: .6;
filter:alpha(opacity=60);
position:absolute;
left:0;
top:0;
width:100%;
height:1000px;/*动态获取,这里设置高度是为了测试*/
z-index:1000;
}
Dynamicly create a mask layer through JavaScript and add it to the page:
//创建遮罩层节点
var oMask = document.createElement('div');
oMask.id = 'mask';
oMask.style.width = pageWidth + 'px';
oMask.style.height = pageHeight + 'px';
document.body.appendChild(oMask);
The pageWidth and pageHeight in the above code will determine the width and height values of the page, through
//获取页面的高度和宽度
var pageHeight = document.documentElement.scrollHeight;
var pageWidth = document.documentElement.scrollWidth;
Get. This completes the mask layer.
Let’s talk about the effect of the pop-up layer.
The pop-up layer is displayed in the middle part of the page (this is also a key step), that is, the distance between the pop-up layer and the left and right sides of the page is equal, and the distance from the top and bottom of the page is equal. Note that it is in the but area.

The formula expressed is:
left=right=(the page is the width of the area - the width of the pop-up layer)/2; top=bottom=(the page is the height of the area - the height of the pop-up layer)/2
The width of the area here is equal to the width of the page, because there is a scroll bar at the bottom of the page. Web pages with scroll bars at the bottom are also weird. It must have been added to the page before setting its left and top values, otherwise it cannot be set.
oLogin.style.left = (pageWidth - loginWidth) / 2 + 'px';
oLogin.style.top = ( clientHeight- loginHeight) / 2 + 'px';
Script Home would like to remind everyone that the positioning method of the pop-up layer here is fixed, and its z-index value is greater than that of the mask layer.
#login{position:fixed;width:400px;height:400px;background:#fff;z-index: 1001;}
The last step is to add an event response function to the close button.
EventUtil.addHandler(oClose, 'click', function(){
document.body.removeChild(oMask);
document.body.removeChild(oLogin);
});
EventUtil is an object written to be compatible with browser event processing functions. The specific implementation is here:
var EventUtil = {
//添加事件处理函数
addHandler: function(element, type, handler){
if(element.addEventListener){
element.addEventListener(type, handler, false);
}else if(element.attachEvent){
element.attachEvent('on' + type, handler);
}else{
element['on' + type] = handler;
}
},
//删除事件处理函数
removeHandler: function(element, type, handler){
if (element.removeEventListener) {
element.removeEventListener(type, handler, false);
}else if(element.detachEvent){
element.detachEvent('on' + type, handler);
}else{
element['on' + type] = null;
}
}
};
Most of the content is completed here. In fact, it is very simple in reality. As long as you know the principle, the rest is the implementation.
I won’t introduce the function of clicking the login button. Just add an event processing function.
Source code (not standardized):
<!DOCTYPE html>
<html>
<head>
<meta charset="utf-8"/>
<title>遮罩层效果</title>
<style type="text/css">
*{margin:0;padding:0;}
body{background: #ccc;font-family: "微软雅黑";height:2000px;/*用于测试*/}
.clearfix:after,
.clearfix:before{content: "";display: block;}
.clearfix{clear: both;visibility: hidden;}
img{border: 0;}
#header{width:100%;height:60px;line-height:60px;background: #000;}
#header a{display: block;width:60px;height:60px;color:#fff;text-decoration: none;font-size:15px;background:#c9394a;text-align: center;float: right;margin-right:138px;}
#login{position:fixed;width:400px;height:400px;background:#fff;z-index: 1001;}
.title{height:50px;background: #c9394a;line-height: 50px;}
.title span{display:inline-block;color:#fff;padding-left:20px;}
.title a{display: block;float:right;background: url(close.png) no-repeat center;width: 30px;height:30px;padding:20px 20px 0 0;}
.login_content form{padding-top:40px;width:340px;margin: 0 auto;}
.inp_group{margin-bottom:30px;}
#username{
background: url(sprite.png) no-repeat 0 0;
}
#passwd{
background: url(sprite.png) no-repeat 0 -46px;
}
input[type=password],input[type="text"]{
width:272px;height:40px;
outline: none;
padding-left:48px;
border: 1px solid #000;
font-size:15px;
}
input[type=button]{
width:318px;
height:38px;
margin:0 auto;
border:1px solid #f00000;
background-color:#f00000;
color:#fff;
font-size:15px;
outline:none;
cursor:pointer;
transition:all 1s;
}
input[type=button]:hover{
background:#ff0000;
border:1px solid #ff0000;
}
#mask{
background: #000;
opacity: .6;
filter:alpha(opacity=60);
position:absolute;
left:0;
top:0;
width:100%;
height:1000px;/*动态获取,这里设置高度是为了测试*/
z-index:1000;
}
</style>
<script type="text/javascript" src="base.js"></script>
<script type="text/javascript">
function popLogin(){
//获取页面的高度和宽度
var pageHeight = document.documentElement.scrollHeight;
var pageWidth = document.documentElement.scrollWidth;
//可视区域的高度和宽度
var clientHeight = document.documentElement.clientHeight;
//创建遮罩层节点
var oMask = document.createElement('div');
oMask.id = 'mask';
oMask.style.width = pageWidth + 'px';
oMask.style.height = pageHeight + 'px';
document.body.appendChild(oMask);
//创建登录节点
var oLogin = document.createElement('div');
oLogin.id = 'login';
oLogin.innerHTML = '<div class="title"><span>登录</span><a href="javascript:;" id="close"></a></div><div class="login_content"><form method="post" action="?"><div class="inp_group"><input type="text" name="username" id="username" placeholder="请输入登录邮箱"></div><div class="inp_group"><input type="password" name="password" id="passwd" placeholder="请输入密码"></div><input type="button" value="登录"></form></div>';
document.body.appendChild(oLogin);
var loginWidth = oLogin.offsetWidth;
var loginHeight = oLogin.offsetHeight;
console.log(clientHeight);
oLogin.style.left = (pageWidth - loginWidth) / 2 + 'px';
oLogin.style.top = ( clientHeight- loginHeight) / 2 + 'px';
var oClose = document.getElementById('close');
EventUtil.addHandler(oClose, 'click', function(){
document.body.removeChild(oMask);
document.body.removeChild(oLogin);
});
EventUtil.addHandler(oMask, 'click', function(){
document.body.removeChild(oMask);
document.body.removeChild(oLogin);
});
}
window.onload = function(){
var oLoginBtn = document.getElementById('login_btn');
EventUtil.addHandler(oLoginBtn, "click", popLogin);
};
</script>
</head>
<body>
<div id="header">
<a href="javascript:;" id="login_btn">登录</a>
</div>
<!--<div id="mask"></div>-->
<!--<div id="login">
<div class="title">
<span>登录</span>
<a href="javascript:;"></a>
</div>
<div class="login_content">
<form method="post" action="?">
<div class="inp_group">
<input type="text" name="username" id="username" placeholder="请输入登录邮箱">
</div>
<div class="inp_group">
<input type="password" name="password" id="passwd" placeholder="请输入密码">
</div>
<input type="button" value="登录">
</form>
</div>
</div>-->
</body>
</html>
The code ends here. This article is not well written. Please give me your valuable opinions. At the same time, I would like to thank everyone for your continued support of the Script Between website. Here, the editor of Script House wishes everyone a happy New Year.

 JavaScript Engines: Comparing ImplementationsApr 13, 2025 am 12:05 AM
Different JavaScript engines have different effects when parsing and executing JavaScript code, because the implementation principles and optimization strategies of each engine differ. 1. Lexical analysis: convert source code into lexical unit. 2. Grammar analysis: Generate an abstract syntax tree. 3. Optimization and compilation: Generate machine code through the JIT compiler. 4. Execute: Run the machine code. V8 engine optimizes through instant compilation and hidden class, SpiderMonkey uses a type inference system, resulting in different performance performance on the same code.
 Beyond the Browser: JavaScript in the Real WorldApr 12, 2025 am 12:06 AM
JavaScript's applications in the real world include server-side programming, mobile application development and Internet of Things control: 1. Server-side programming is realized through Node.js, suitable for high concurrent request processing. 2. Mobile application development is carried out through ReactNative and supports cross-platform deployment. 3. Used for IoT device control through Johnny-Five library, suitable for hardware interaction.
 Building a Multi-Tenant SaaS Application with Next.js (Backend Integration)Apr 11, 2025 am 08:23 AM
I built a functional multi-tenant SaaS application (an EdTech app) with your everyday tech tool and you can do the same. First, what’s a multi-tenant SaaS application? Multi-tenant SaaS applications let you serve multiple customers from a sing
 How to Build a Multi-Tenant SaaS Application with Next.js (Frontend Integration)Apr 11, 2025 am 08:22 AM
This article demonstrates frontend integration with a backend secured by Permit, building a functional EdTech SaaS application using Next.js. The frontend fetches user permissions to control UI visibility and ensures API requests adhere to role-base
 JavaScript: Exploring the Versatility of a Web LanguageApr 11, 2025 am 12:01 AM
JavaScript is the core language of modern web development and is widely used for its diversity and flexibility. 1) Front-end development: build dynamic web pages and single-page applications through DOM operations and modern frameworks (such as React, Vue.js, Angular). 2) Server-side development: Node.js uses a non-blocking I/O model to handle high concurrency and real-time applications. 3) Mobile and desktop application development: cross-platform development is realized through ReactNative and Electron to improve development efficiency.
 The Evolution of JavaScript: Current Trends and Future ProspectsApr 10, 2025 am 09:33 AM
The latest trends in JavaScript include the rise of TypeScript, the popularity of modern frameworks and libraries, and the application of WebAssembly. Future prospects cover more powerful type systems, the development of server-side JavaScript, the expansion of artificial intelligence and machine learning, and the potential of IoT and edge computing.
 Demystifying JavaScript: What It Does and Why It MattersApr 09, 2025 am 12:07 AM
JavaScript is the cornerstone of modern web development, and its main functions include event-driven programming, dynamic content generation and asynchronous programming. 1) Event-driven programming allows web pages to change dynamically according to user operations. 2) Dynamic content generation allows page content to be adjusted according to conditions. 3) Asynchronous programming ensures that the user interface is not blocked. JavaScript is widely used in web interaction, single-page application and server-side development, greatly improving the flexibility of user experience and cross-platform development.
 Is Python or JavaScript better?Apr 06, 2025 am 12:14 AM
Python is more suitable for data science and machine learning, while JavaScript is more suitable for front-end and full-stack development. 1. Python is known for its concise syntax and rich library ecosystem, and is suitable for data analysis and web development. 2. JavaScript is the core of front-end development. Node.js supports server-side programming and is suitable for full-stack development.


Hot AI Tools

Undresser.AI Undress
AI-powered app for creating realistic nude photos

AI Clothes Remover
Online AI tool for removing clothes from photos.

Undress AI Tool
Undress images for free

Clothoff.io
AI clothes remover

AI Hentai Generator
Generate AI Hentai for free.

Hot Article
Hot Tools

Atom editor mac version download
The most popular open source editor

SAP NetWeaver Server Adapter for Eclipse
Integrate Eclipse with SAP NetWeaver application server.

PhpStorm Mac version
The latest (2018.2.1) professional PHP integrated development tool

Dreamweaver CS6
Visual web development tools

mPDF
mPDF is a PHP library that can generate PDF files from UTF-8 encoded HTML. The original author, Ian Back, wrote mPDF to output PDF files "on the fly" from his website and handle different languages. It is slower than original scripts like HTML2FPDF and produces larger files when using Unicode fonts, but supports CSS styles etc. and has a lot of enhancements. Supports almost all languages, including RTL (Arabic and Hebrew) and CJK (Chinese, Japanese and Korean). Supports nested block-level elements (such as P, DIV),

