
 Backend DevelopmentPHP TutorialIntegrating Apache2 and Tomcat4_PHP Tutorial under jsp+phpWindows2000
============================================= I have tested this article and passed it Got it! ============================================= Title: Integration under Windows 2000 Apache2 and Tomcat4 Author: robornet Date: 2002-10-30 Reason: I have been working on a java project for a while, and when it was time to distribute it, I could not find the latest integrated configuration of Apache2 and Tomcat4, so I watched jakarta for a long time. Based on online information and referring to previous netizens’ articles, I wrote this configuration document for reference. Any corrections are welcome! Contents: 1. Software preparation 2. Software installation 3. Initial configuration and testing 4. Integrated configuration 5. Full line test 6. Deficiencies 7. Thank you 8. Explanation steps: 1. Software preparation: Suppose you have a hard drive that can run win2000 normally. Soft software environment. 1.j2sdk1.4.1: Go to http://java.sun.com/j2se/1.4.1/download.html to download! (Note that it is the sdk version of Windows (all languages, including English)) 2.Apache2.0.43: Go to http://www.apache.inetcosmos.org/dist/httpd/binaries/win32/apache_2.0.43-win32-x86- no_ssl.msi Download! 3.Tomcat4.1.12: Go to http://jakarta.apache.org/builds/jakarta-tomcat-4.0/release/v4.1.12/bin/jakarta-tomcat-4.1.12.exe to download! 4.mod_jk.dll: Go to http://jakarta.apache.org/builds/jakarta-tomcat-connectors/jk/release/v1.2.0/bin/win32/mod_jk-2.0.42.dll to download! (Explanation, since the configuration of mod_jk2-2.0.43.dll and Apache2.0.43 was not successful, mod_jk-2.0.42.dll is used instead) 2. Software installation: (1) Install j2sdk: 1. Follow the installation wizard to install (generally Install to C:j2sdk1.4.1 to facilitate the following operations) (2) Install apache: 1. Follow the installation wizard to install (select the installation directory as C: to facilitate the following operations; after the installation is successful, the path is: C:Apache2) ( 3) Install Tomcat: 1. Follow the installation wizard to install (change the installation directory to C: Tomcat4, if it is just for testing, there is no need to install tomcat as Services to facilitate the following operations), during which you will be asked to enter Admin (system administrator) Password. 3. First-time configuration and testing: Configure the software environment installed above for the first time and test its environment. (1) Configuration--Environment variables: 1. Create a new system variable JAVA_HOME, its value is: C:j2sdk1.4.1 //If you did not install according to the above path, please change it to the correct path 2. Create a new system variable TOMCAT_HOME, its value is: :C:Tomcat4 //Same as above 3. Create a new system variable CLASSPATH, its value is: %JAVA_HOME%lib;%TOMCAT_HOME%lib (2) Modify the error: 1.Apache2.0.43 has a small problem. After the default installation is successful, it will be installed on the Apache2 main There is no index.html file in the htdocs directory. You must rename index.html.en in this directory to index.html (3) Test the default service: Please run Apache2 and Tomcat4 first. 1. Open the browser and click on Enter: http://localhost in the address bar. Verification: At this time, you can see the welcome interface of Apache2 in the browser. It means that Apache2 is working normally. (Note that the default port of Tomcat is 80. If it is occupied by other programs, please change it, as follows There are instructions) 2. Open the browser and enter: http://localhost:8080 in the address bar. Verification: You can see Tomcat’s welcome interface in the browser at this time. It means that Tomcat is working normally. (Note that the default port of Tomcat is 8080. If it is occupied by other programs, please change it. There are instructions below) Summary: If there are no errors at this step, you can continue with the following operations. Let go! (4) Test your project: Now only use Tomcat to test your project Project, for the convenience of this example, assume that you already have a project in the E:ApplicationOA directory (including index.jsp and other jsp files and beans, such as servlets and javabeans under WEB-INFclasses). 1. Set up Tomcat to support your project, open the C:Tomcat4confserver.xml file, add before "" and after "

 Spring Boot与NoSQL数据库的整合使用Jun 22, 2023 pm 10:34 PM
随着互联网的发展,大数据分析和实时信息处理成为了企业的一个重要需求。为了满足这样的需求,传统的关系型数据库已经不再满足业务和技术发展的需要。相反,使用NoSQL数据库已经成为了一个重要的选择。在这篇文章中,我们将讨论SpringBoot与NoSQL数据库的整合使用,以实现现代应用程序的开发和部署。什么是NoSQL数据库?NoSQL是notonlySQL
 UniApp实现Vue.js框架的完美整合Jul 04, 2023 pm 08:49 PM
UniApp实现Vue.js框架的完美整合引言:UniApp是一种基于Vue.js框架的跨平台开发工具,它能够将一个Vue.js项目编译成多个不同平台的应用程序,如iOS、Android、小程序等。UniApp的优势在于能够让开发者只编写一套代码,就能够同时适配多个平台,加快开发效率并降低开发成本。下面将介绍如何使用UniApp实现Vue.js框架的完美整合
 如何进行PHP单元测试?May 12, 2023 am 08:28 AM
在Web开发中,PHP是一种流行的语言,因此对于任何人来说,对PHP进行单元测试是一个必须掌握的技能。本文将介绍什么是PHP单元测试以及如何进行PHP单元测试。一、什么是PHP单元测试?PHP单元测试是指测试一个PHP应用程序的最小组成部分,也称为代码单元。这些代码单元可以是方法、类或一组类。PHP单元测试旨在确认每个代码单元都能按预期工作,并且能否正确地与
 我准备去西藏旅行背包去①背多少升的包合适把你认为最好的配置说下本人170体力不错第一次Jan 07, 2024 am 10:06 AM
我准备去西藏旅行背包去①背多少升的包合适把你认为最好的配置说下本人170体力不错第一次去徒步多就60升或以上的徒步少就60升以下的全程都坐车就不用背包,旅行箱更方便,真要随身带东西,弄个25~40升的就绰绰有馀西藏旅游必备用品:太阳镜、太阳帽、防晒霜、护肤霜、润唇膏、长袖上衣、毛衣;对于特殊旅游或去阿里、藏北、川藏线旅游,建议带:睡袋(防寒)、床单(防脏)、羽绒服、旅游鞋或登山鞋、拖鞋、牙刷、牙膏、毛巾、卷筒纸、纸内裤、消毒湿巾、手电筒、防水火柴、刀具、绳子。前运包能装电脑吗能装电脑,有些背包有
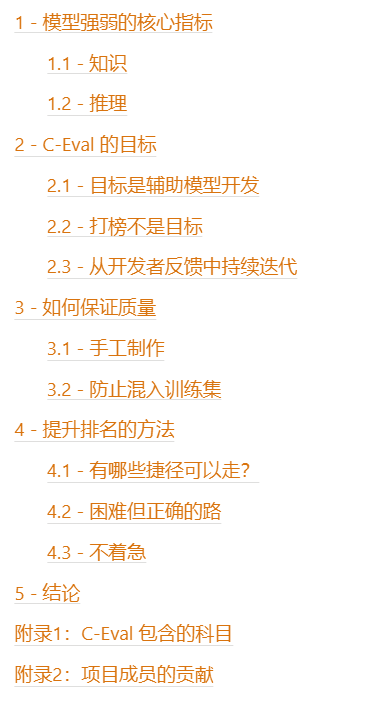 13948道题目,涵盖微积分、线代等52个学科,上交清华给中文大模型做了个测试集May 25, 2023 pm 01:44 PM
ChatGPT的出现,使中文社区意识到与国际领先水平的差距。近期,中文大模型研发如火如荼,但中文评价基准却很少。在OpenAIGPT系列/GooglePaLM系列/DeepMindChinchilla系列/AnthropicClaude系列的研发过程中,MMLU/MATH/BBH这三个数据集发挥了至关重要的作用,因为它们比较全面地覆盖了模型各个维度的能力。最值得注意的是MMLU这个数据集,它考虑了57个学科,从人文到社科到理工多个大类的综合知识能力。DeepMind的Gopher和Chinchi
 Vue3相较于Vue2的变化:更强大的网络请求库整合Jul 08, 2023 pm 08:34 PM
Vue3相较于Vue2的变化:更强大的网络请求库整合随着Vue.js的持续发展和更新,Vue3作为Vue.js的下一个版本,带来了一些令人兴奋的变化和改进。其中一个最显著的变化就是更强大的网络请求库整合。在Vue2中,我们通常使用如axios等第三方库来进行网络请求,而在Vue3中,Vue开发团队已经提供了一个内置的网络请求库,它为我们提供了更直观和灵活的方
 PHP开发中如何使用Jenkins进行自动化测试Jun 27, 2023 pm 02:29 PM
随着Web应用程序规模的不断扩大,PHP语言的应用也越来越广泛。在软件开发过程中,自动化测试可以大大提高开发效率和软件质量。而Jenkins是一个可扩展的开源自动化服务器,它能够自动执行软件构建、测试、部署等操作,今天我们来看一下在PHP开发中如何使用Jenkins进行自动化测试。一、Jenkins的安装和配置首先,我们需要在服务器上安
 PHP开发CMS系统完成后如何进行有效的测试Jun 21, 2023 am 10:58 AM
在日益发展的互联网时代中,CMS系统已经成为了网络建设中的一项重要工具。其中PHP语言开发的CMS系统因其简单易用,自由度高,成为了经典的CMS系统之一。然而,PHP开发CMS系统过程中的测试工作也是至关重要的。只有经过完善、系统的测试工作,我们才可以保证开发出的CMS系统在使用中更加稳定、可靠。那么,如何进行有效的PHP开发CMS系统测试呢?一、测试流程的


Hot AI Tools

Undresser.AI Undress
AI-powered app for creating realistic nude photos

AI Clothes Remover
Online AI tool for removing clothes from photos.

Undress AI Tool
Undress images for free

Clothoff.io
AI clothes remover

AI Hentai Generator
Generate AI Hentai for free.

Hot Article
Hot Tools

EditPlus Chinese cracked version
Small size, syntax highlighting, does not support code prompt function

Safe Exam Browser
Safe Exam Browser is a secure browser environment for taking online exams securely. This software turns any computer into a secure workstation. It controls access to any utility and prevents students from using unauthorized resources.

Dreamweaver CS6
Visual web development tools

SublimeText3 Linux new version
SublimeText3 Linux latest version

mPDF
mPDF is a PHP library that can generate PDF files from UTF-8 encoded HTML. The original author, Ian Back, wrote mPDF to output PDF files "on the fly" from his website and handle different languages. It is slower than original scripts like HTML2FPDF and produces larger files when using Unicode fonts, but supports CSS styles etc. and has a lot of enhancements. Supports almost all languages, including RTL (Arabic and Hebrew) and CJK (Chinese, Japanese and Korean). Supports nested block-level elements (such as P, DIV),

