JSON Basics
Simply put, JSON converts a set of data represented in a JavaScript object into a string, which can then be easily passed between functions, or from a web client in an asynchronous application Passed to the server-side program. This string looks a little weird (you'll see a few examples later), but JavaScript interprets it easily, and JSON can represent more complex structures than name/value pairs. For example, arrays and complex objects can be represented rather than just simple lists of keys and values.
Simple JSON example
In its simplest form, a name/value pair can be represented by JSON like this:
{ "firstName": "Brett" }
This example is very basic and actually takes up more space than the equivalent plain text name/value pair:
firstName=Brett
However, JSON comes into its own when you string multiple name/value pairs together. First, you can create a record containing multiple name/value pairs, such as:
{ "firstName": "Brett", "lastName":"McLaughlin", "email": "brett@newInstance.com" }
Syntax-wise this isn't a huge advantage over name/value pairs, but in this case JSON is easier to use and more readable. For example, it makes it clear that the above three values are part of the same record; the curly braces make the values somehow related.
Array of values
When you need to represent a set of values, JSON can not only improve readability, but also reduce complexity. For example, suppose you want to represent a list of people's names. In XML, many start and end tags are required; if you use typical name/value pairs (like the ones you saw in previous articles in this series), a proprietary data format must be created , or change the key name to the form person1-firstName.
If using JSON, just group multiple records with curly braces together:
{ "people": [
{ "firstName": "Brett", "lastName":"McLaughlin", "email": "brett@newInstance.com" },
{ "firstName" : "Jason", "lastName":"Hunter", "email": "jason@servlets.com" },
{ "firstName": "Elliotte", "lastName":"Harold", "email": "elharo@macfaq.com" }
]}
This is not difficult to understand. In this example, there is only one variable called people, and the value is an array of three entries, each entry being a record for a person containing a first name, last name, and email address. The above example demonstrates how to use parentheses to combine records into a single value. Of course, you can use the same syntax to represent multiple values (each containing multiple records):
{ "programmers": [
{ "firstName": "Brett", "lastName":"McLaughlin", "email": "brett@newInstance.com" },
{ "firstName": "Jason", "lastName":"Hunter", "email": "jason@servlets.com" },
{ "firstName": "Elliotte", "lastName":"Harold", "email": " elharo@macfaq.com" }
],
"authors": [
{ "firstName": "Isaac", "lastName": "Asimov", "genre": "science fiction" },
{ "firstName": "Tad", "lastName": "Williams", "genre": "fantasy" },
{ "firstName": "Frank", "lastName": "Peretti", " genre": "christian fiction" }
],
"musicians": [
{ "firstName": "Eric", "lastName": "Clapton", "instrument": "guitar" },
{ "firstName": "Sergei", "lastName": "Rachmaninoff", "instrument": "piano" }
]
}
The most noteworthy thing here Yes, it can represent multiple values, and each value in turn contains multiple values. However, it should also be noted that the actual name/value pairs in the record can differ between different main entries (programmers, authors, and musicians). JSON is fully dynamic, allowing the way data is represented to change in the middle of the JSON structure.
There are no predefined constraints that need to be adhered to when processing JSON formatted data. Therefore, within the same data structure, the way the data is represented can be changed, and the same thing can even be represented in different ways.
Using JSON in JavaScript
Once you master the JSON format, using it in JavaScript is simple. JSON is a native JavaScript format, which means that processing JSON data in JavaScript does not require any special API or toolkit.
Assign JSON data to variables
For example, you can create a new JavaScript variable and assign the JSON-formatted data string directly to it:
var people =
{ "programmers": [
{ "firstName": "Brett", "lastName":"McLaughlin", "email": "brett@newInstance.com" } ,
{ "firstName": "Jason", "lastName":"Hunter", "email": "jason@servlets.com" },
{ "firstName": "Elliotte", "lastName": "Harold", "email": "elharo@macfaq.com" }
],
"authors": [
{ "firstName": "Isaac", "lastName": "Asimov", " genre": "science fiction" },
{ "firstName": "Tad", "lastName": "Williams", "genre": "fantasy" },
{ "firstName": "Frank", "lastName": "Peretti", "genre": "christian fiction" }
],
"musicians": [
{ "firstName": "Eric", "lastName": "Clapton", "instrument": "guitar" },
{ "firstName": "Sergei", "lastName": "Rachmaninoff", "instrument": "piano" }
]
}
This is very simple; now people contains the data in the JSON format we saw earlier. However, this is not enough as the way to access the data does not seem obvious yet.
Access Data
Although it may not seem obvious, the long string above is actually just an array; you can easily access this array by placing it in a JavaScript variable. In fact, just use dot notation to represent array elements. So, to access the last name of the first entry in the programmers list, just use code like this in JavaScript:
people.programmers[0].lastName;
Note that array indexing is zero-based. So, this line of code first accesses the data in the people variable; then moves to the entry called programmers, then moves to the first record ([0]); and finally, accesses the value of the lastName key. The result is the string value "McLaughlin".
Here are a few examples using the same variable.
people.authors[1].genre // Value is "fantasy"
people.musicians[3].lastName // Undefined. This refers to the fourth entry,
and there isn't one
people.programmers.[2].firstName // Value is "Elliotte"
Using this syntax, any JSON format data can be processed without using any additional JavaScript toolkit or API.
Modify JSON data
Just as data can be accessed using periods and brackets, data can be easily modified in the same way:
people.musicians[1].lastName = "Rachmaninov";
After converting the string into a JavaScript object, you can modify the data in the variable like this.
Convert back to string
Of course, all data modifications are of little value if you can't easily convert the object back to the text format mentioned in this article. This conversion is also simple in JavaScript:
String newJSONtext = people.toJSONString();
That’s it! You now have a text string that you can use anywhere, for example, as a request string in an Ajax application.
More importantly, any JavaScript object can be converted to JSON text. It is not only possible to handle variables originally assigned with JSON strings. To convert an object named myObject, just execute a command of the same form:
String myObjectInJSON = myObject.toJSONString();
This is the biggest difference between JSON and the other data formats discussed in this series. If you use JSON, you only need to call a simple function to get the formatted data, ready to use. For other data formats, conversion between raw and formatted data is required. Even when using an API like the Document Object Model (which provides functions to convert your own data structures to text), you need to learn the API and use the API's objects instead of using native JavaScript objects and syntax.
The final conclusion is that if you are dealing with a large number of JavaScript objects, then JSON is almost certainly a good choice so that you can easily convert the data into a format that can be sent to the server-side program in the request.
Application of JSON in PHP
In today’s Internet, AJAX is no longer an unfamiliar word. Speaking of AJAX, XML that emerged due to RSS may immediately come to mind. XML parsing is probably no longer a problem, especially with PHP5 and the emergence of a large number of XML parsers, such as the most lightweight SimpleXML. However, for AJAX, XML parsing is more inclined to the support of front-end Javascript. I think everyone who has parsed XML will be confused by trees and nodes. It is undeniable that XML is a very good data storage method, but its flexibility makes it difficult to parse. Of course, the difficulty referred to here is relative to the protagonist of this article - JSON.
What is JSON? I won't repeat the concept. In layman's terms, it is a data storage format, just like a PHP serialized string. It is a data description. For example, if we serialize an array and store it, it can be easily deserialized and applied. The same is true for JSON, except that it builds an interactive bridge between client-side Javascript and server-side PHP. We use PHP to generate the JSON string, and then pass this string to the front-end Javascript. Javascirpt can easily convert it into JSON and then apply it. To put it in layman's terms, it really looks like an array.
Back to business, how to use JSON. PHP5.2 has built-in support for JSON. Of course, if it is lower than this version, there are many PHP version implementations on the market, just use whichever one you want. Now we mainly talk about the JSON built-in support of PHP. Very simple, two functions: json_encode and json_decode (very similar to serialization). One for encoding and one for decoding. Let’s first look at the use of encoding:
$arr = array (
'name' => 'Script Home',
'nick' => 'Deep Space',
'contact' => array(
'email' => 'shenkong at qq dot com',
'website' => 'http://www.jb51.net',
)
);
$json_string = json_encode($arr);
echo $json_string;
?>
It is very simple to JSON an array. It should be pointed out that in non-UTF-8 encoding, Chinese characters cannot be encoded, and the result will be null. Therefore, if you use gb2312 to write PHP code, you need to use iconv or mb to convert the content containing Chinese to UTF-8 is then json_encoded, and the above output results are as follows:
{"name":"/u9648/u6bc5/u946b","nick":"/u6df1/u7a7a","contact":{"email":" shenkong at qq dot com","website":"http:////www.jb51.net"}}
I told you it is very similar to serialization, but you still don’t believe it. After encoding, it is necessary to decode. PHP provides the corresponding function json_decode. After json_decode is executed, an object will be obtained. The operation is as follows:
$arr = array(
'name' => 'Script Home',
'nick' => 'Deep Space',
'contact' => array(
'email' => 'shenkong at qq dot com',
'website' => 'http://www.jb51.net',
)
);
$json_string = json_encode($arr);
$obj = json_decode($json_string);
print_r($obj);
?>
Can you access the properties within an object? $obj->name, like this, of course, you can also convert it to an array for easy calling:
$json_string = json_encode($arr);
$obj = json_decode($json_string);
$arr = (array) $obj;
print_r($arr);
The use of PHP to move around is not very big. In addition to cache generation, it feels like directly storing the array. However, when you interact with the front desk, its role comes out. See below See how I use Javascript to use this character:
above , directly assign this string to a variable, and it becomes a Javascript array (the professional terminology should not be called an array, but due to PHP's habits, I will always call it an array for easier understanding). In this way, you can easily traverse arr or do whatever you want. I haven’t mentioned AJAX yet, right? Yes, think about it, if the responseText returned by the server uses a JSON string instead of XML, wouldn't it be very convenient for the front-end Javascript to process it? This is how dog skin plaster is used.
Actually, as I write this, except for the different data storage formats, there is not much difference between JSON and XML, but I will mention one thing below. Although it has little to do with XML, it can illustrate the wider application of JSON, that is, cross-domain data calls. Due to security issues, AJAX does not support cross-domain calls. It is very troublesome to call data under different domain names. Although there are solutions (Stone mentioned proxies in his lecture, I don’t understand it but I know it) can be solved). I wrote two files, which are enough to demonstrate cross-domain calls.
Main file index.html
The adjusted file profile.php
$arr = array(
'name' => 'Script Home',
'nick' => ' deep space',
'contact' => array(
'email' => 'shenkong at qq dot com',
'website' => 'http://www.jb51. net',
)
);
$json_string = json_encode($arr);
echo "getProfile($json_string)";
?>
Obviously, when index.html calls profile.php, a JSON string is generated and passed into getProfile as a parameter, and then the nickname is inserted into the div. In this way, a cross-domain data interaction is completed. Isn't it particularly simple? Since JSON is so simple and easy to use, what are you waiting for? ^_^
Server-side JSON
Send JSON to server
Sending JSON to the server is not difficult, but it is crucial and there are some important choices to make. But once you decide to use JSON, the choices you make are simple and limited, so there's not much to think about and focus on. The important thing is to be able to send a JSON string to the server, preferably as quickly and as easily as possible.
Send JSON as name/value pairs via GET
The easiest way to send JSON data to a server is to convert it to text and send it as a name/value pair. It's important to note that the JSON-formatted data is a fairly long object and might look like Listing 1:
Listing 1. Simple JavaScript object in JSON format
var people = { "programmers": [ { "firstName": "Brett", "lastName":"McLaughlin",
"email": "brett@newInstance.com" }, { " firstName": "Jason", "lastName":"Hunter",
"email": "jason@servlets.com" }, { "firstName": "Elliotte", "lastName":"Harold",
"email": "elharo@macfaq.com" } ], "authors": [ { "firstName": "Isaac",
"lastName": "Asimov", "genre": "science fiction" }, { "firstName": "Tad",
"lastName": "Williams", "genre": "fantasy" }, { "firstName": "Frank",
"lastName": "Peretti", " genre": "christian fiction" } ], "musicians": [
{ "firstName": "Eric", "lastName": "Clapton", "instrument": "guitar" },
{ "firstName" ": "Sergei", "lastName": "Rachmaninoff", "instrument": "piano" } ] }
If you want to send it to the server side as a name/value pair, it should be like this Display:
var url = "organizePeople.php?people=" + people.toJSONString( );
xmlHttp.open("GET", url, true);
xmlHttp.onreadystatechange = updatePage;
xmlHttp.send(null);
This looks good , but there is a problem: there are spaces and various characters in the JSON data, and web browsers often try to continue compiling it. To ensure that these characters don't cause confusion on the server (or in the process of sending data to the server), you need to add the following to the JavaScript escape() function:
var url = "organizePeople.php?people=" + escape(people.toJSONString());
request.open("GET", url, true);
request.onreadystatechange = updatePage;
request.send(null);
This function can handle spaces, slashes and anything else that may affect the browser , and convert them into web-usable characters (for example, spaces will be converted into %20, and the browser will not treat them as spaces, but will pass them directly to the server without changing them). Afterwards, the server will (usually automatically) convert them back to their original "appearance" after transmission.
There are two disadvantages of this approach:
There is a length limit on URL strings when sending large chunks of data using GET requests. While this limit is broad, the JSON string representation of an object can be longer than you think, especially when working with extremely complex objects.
When sending all data across the network in plain text, the insecurities of sending data are more than you can handle.
In short, the above are two limitations of GET requests, not simply two things related to JSON data. These two may require a little more attention when you want to send more content than just the username and last name, such as selections in a form. To handle any confidential or extremely long content, you can use POST requests.
Use POST request to send JSON data
When you decide to use a POST request to send JSON data to the server, you don't need to make a lot of changes to your code, like this:
var url = "organizePeople.php?timeStamp=" + new Date().getTime();
request.open("POST", url, true);
request.onreadystatechange = updatePage;
request.setRequestHeader("Content-Type", "application/x-www-form-urlencoded");
request.send(people.toJSONString());
Most of this code should be familiar to you as you saw it in Mastering Ajax, Part 3: Advanced Requests and Responses in Ajax, which focused on sending POST requests. The request is opened using POST instead of GET, and the Content-Type header is set to let the server know in advance what data it can get. In this case, it's application/x-www-form-urlencoded, which lets the server know that text is being sent, just as it would from a regular HTML form.
Another simple tip is that the URL has time appended to the end. This ensures that the request is not cached the first time it is sent, but is recreated and resent each time this method is called; the URL will be slightly different due to different timestamps. This technique is often used to ensure that a POST to a script actually generates a new request each time and that the web server does not attempt to cache the response from the server.
JSON is just text
Whether you use GET or POST, the key point is that JSON is just text. Since no special coding is required and every server-side script can handle text data, JSON can be easily leveraged and applied to the server. It's not that simple if the JSON is in binary format or some weird text encoding; luckily JSON is just regular text data (as the script can receive from form submissions, in the POST section and Content-Type header can also be seen in ), so you don't need to worry too much when sending the data to the server.
Interpret JSON on the server
Once you have written client-side JavaScript code that allows users to interact with Web forms and Web pages, and collects the information needed to be sent to the server-side program for processing, the server becomes the application (if you call Server-side programs used asynchronously may be the protagonists in what we think of as so-called "Ajax applications"). At this point, the choices you make on the client side (such as using a JavaScript object and converting it to a JSON string) must match the choices you make on the server side, such as which API to use to decode the JSON data.
Two steps for processing JSON
No matter what language is used on the server side, processing JSON on the server side basically requires two steps.
Find the corresponding JSON parser/toolbox/helper API for the language you are writing your server-side program in.
Use the JSON parser/toolbox/helper API to take request data from the client and turn the data into something your script can understand.
The above is almost the general content that you should know now. Next, we introduce each step in more detail.
Find a JSON parser
The best resource for finding a JSON parser or toolkit is the JSON site (see Resources for a link). Here, in addition to learning all about the format itself, you'll find links to various tools and parsers for JSON, from ASP to Erlang to Pike to Ruby. Just download the appropriate toolbox for the language you're writing scripts in. To enable server-side scripts and programs to use this toolbox, it can be selected, extended, or installed as appropriate (more variability if you are using C#, PHP, or Lisp on the server side).
For example, if you are using PHP, you can simply upgrade to PHP 5.2 and use it; this latest version of PHP includes the JSON extension by default. In fact, that's the best way to handle JSON when using PHP. If you are using Java servlets, the org.json package at json.org is an obvious choice. In this case, you can download json.zip from the JSON Web site and add the source files it contains to the project build directory. After compiling these files, everything is ready. You can use the same steps for the other supported languages; the language you use depends on your proficiency in the language, and it is best to use a language you are familiar with.
Use JSON parser
Once you have obtained the resources available to the program, the only thing left is to find the appropriate method to call. For example, suppose you are using the JSON-PHP template for PHP:
// This is just a code fragment from a larger PHP server-side script
require_once('JSON.php');
$json = new Services_JSON();
// accept POST data and decode it
$value = $json->decode($GLOBALS['HTTP_RAW_POST_DATA']);
// Now work with value as raw PHP
With this template, all data obtained (anything in array format, multi-line, single value or JSON data structure) can be converted into native PHP format and placed in the $value variable.
If the org.json package is used in the servlet, the following code will be used:
public void doPost(HttpServletRequest request, HttpServletResponse response)
throws ServletException, IOException {
StringBuffer jb = new StringBuffer();
String line = null;
try {
BufferedReader reader = request.getReader();
while ((line = reader.readLine()) != null)
jb.append(line);
} catch (Exception e) { //report an error }
try {
JSONObject jsonObject = new JSONObject(jb.toString());
} catch (ParseException e) {
// crash and burn
throw new IOException("Error parsing JSON request string");
}
// Work with the data using methods like...
// int someInt = jsonObject.getInt("intParamName");
// String someString = jsonObject.getString("stringParamName");
// JSONObject nestedObj = jsonObject.getJSONObject("nestedObjName");
// JSONArray arr = jsonObject.getJSONArray("arrayParamName");
// etc...
}
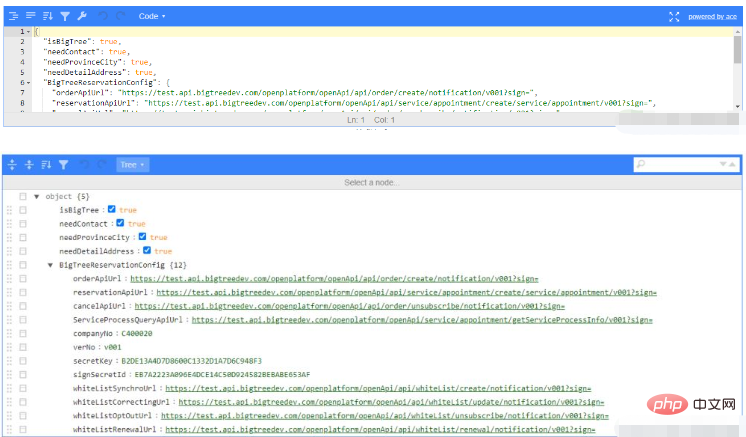 VUE3怎么使用JSON编辑器May 12, 2023 pm 05:34 PM
1、先看看效果图,可以自行选择展示效果2、这是我在vue3项目中使用的JSON编辑器,首先引入第三方插件npminstalljson-editor-vue3yarnaddjson-editor-vue33、引入到项目中//导入模块importJsonEditorVuefrom'json-editor-vue3'//注册组件components:{JsonEditorVue},4、一般后端返回的是会将JSON转为String形式我们传给后端也是通过这种形式,就可以通
 SpringBoot之Json的序列化和反序列化问题怎么解决May 12, 2023 pm 04:07 PM
控制json序列化/反序列化1.@JsonIgnoreProperties的用法@JsonIgnoreProperties(value={"prop1","prop2"})用来修饰Pojo类,在序列化和反序列化的时候忽略指定的属性,可以忽略一个或多个属性.@JsonIgnoreProperties(ignoreUnknown=true)用来修饰Pojo类,在反序列化的时候忽略那些无法被设置的属性,包括无法在构造子设置和没有对应的setter方法.2.@Js
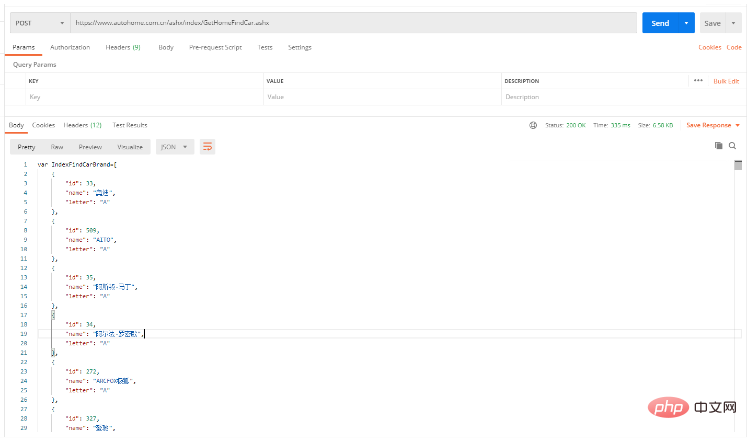 Java怎么调用接口获取json数据解析后保存到数据库May 14, 2023 am 10:58 AM
Java调用接口获取json数据保存到数据库1.在yml文件中配置自己定义的接口URL//自己定义的JSON接口URLblacklist_data_url:接口URL2.在Controller中添加请求方法和路径/***@Title:查询*@Description:查询车辆的记录*@Author:半度纳*@Date:2022/9/2717:33*/@GetMapping("/Blacklist")publicvoidselectBlacklist(){booleana=imB
 php输出json无法解析的原因和解决方法【总结】Mar 23, 2023 pm 04:35 PM
PHP作为一种常见的编程语言,在web开发中使用广泛,其与前端交互的方式也多种多样。其中,输出Json数据是一种常见的交互方式,但有时候会碰到Json无法解析的问题。为什么会出现无法解析的情况呢?下面列举了几个可能的原因。
 php如何将xml转为json格式?3种方法分享Mar 22, 2023 am 10:38 AM
当我们处理数据时经常会遇到将XML格式转换为JSON格式的需求。PHP有许多内置函数可以帮助我们执行这个操作。在本文中,我们将讨论将XML格式转换为JSON格式的不同方法。
 深入解析JWT(JSON Web Token)的原理及用法Jan 10, 2023 am 10:55 AM
本篇文章给大家带来了关于JWT的相关知识,其中主要介绍了什么是JWT?JWT的原理以及用法是什么?感兴趣的朋友,下面一起来看一下吧,希望对大家有帮助。
 java怎么校验json的格式是否符合要求May 15, 2023 pm 04:01 PM
JSONSchemaJSONSchema是用于验证JSON数据结构的强大工具,Schema可以理解为模式或者规则。JsonSchema定义了一套词汇和规则,这套词汇和规则用来定义Json元数据,且元数据也是通过Json数据形式表达的。Json元数据定义了Json数据需要满足的规范,规范包括成员、结构、类型、约束等。JSONSchema就是json的格式描述、定义、模板,有了他就可以生成任何符合要求的json数据json-schema-validator在java中,对json数据格式的校验,使用
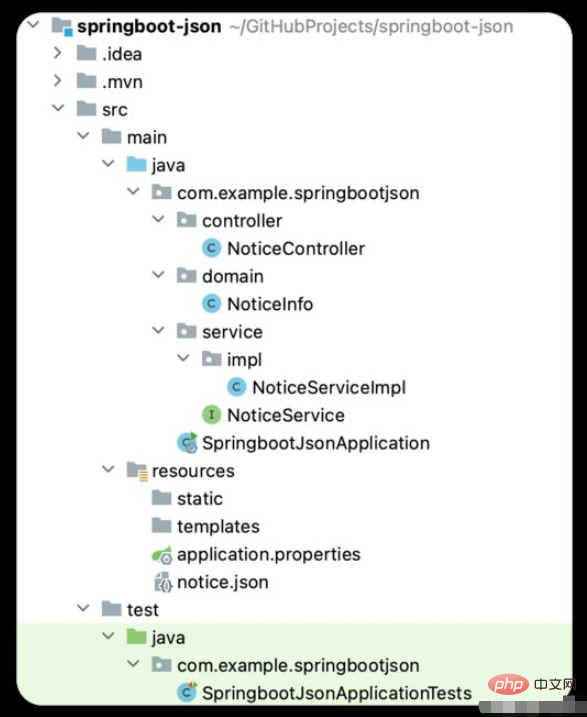 SpringBoot怎么读取资源目录中JSON文件May 16, 2023 pm 01:25 PM
思路使用Spring的ResourceUtils读取资源目录下的json文件。使用common-io将读取的文件转化为json字符串。使用fastjson将json字符串反序列为对象。示例1.Maven依赖pom.xml,主要是common-io、fastjson的引入。commons-iocommons-io2.11.0com.alibaba.fastjson2fastjson22.0.142.json资源文件notice.json,简单列举要使用json内容。[{"title&qu


Hot AI Tools

Undresser.AI Undress
AI-powered app for creating realistic nude photos

AI Clothes Remover
Online AI tool for removing clothes from photos.

Undress AI Tool
Undress images for free

Clothoff.io
AI clothes remover

AI Hentai Generator
Generate AI Hentai for free.

Hot Article

Hot Tools

VSCode Windows 64-bit Download
A free and powerful IDE editor launched by Microsoft

SublimeText3 Mac version
God-level code editing software (SublimeText3)

EditPlus Chinese cracked version
Small size, syntax highlighting, does not support code prompt function

MantisBT
Mantis is an easy-to-deploy web-based defect tracking tool designed to aid in product defect tracking. It requires PHP, MySQL and a web server. Check out our demo and hosting services.

mPDF
mPDF is a PHP library that can generate PDF files from UTF-8 encoded HTML. The original author, Ian Back, wrote mPDF to output PDF files "on the fly" from his website and handle different languages. It is slower than original scripts like HTML2FPDF and produces larger files when using Unicode fonts, but supports CSS styles etc. and has a lot of enhancements. Supports almost all languages, including RTL (Arabic and Hebrew) and CJK (Chinese, Japanese and Korean). Supports nested block-level elements (such as P, DIV),


