1 Environment setup First of all, since RabbitMQ is written in Erlang and needs to run on the Erlang runtime environment, you need to install the Erlang runtime environment before installing RabbitMQ Server. You can download the installation file for the corresponding platform from the Erlang official website. If the runtime environment is not installed, when installing RabbitMQ Server, you will be prompted to install it first
1 Environment setup
First of all, since RabbitMQ is written in Erlang and needs to run on the Erlang runtime environment, you need to install the Erlang runtime environment before installing RabbitMQ Server. You can download the installation file for the corresponding platform from the Erlang official website. If the runtime environment is not installed, when installing RabbitMQ Server, you will be prompted to install the Erlang environment first. After the installation is complete, make sure that the Erlang installation path has been registered in the system's environment variables. After installing Erlang, this environment will be set up automatically. If not: set it up as shown below.

Then, go to the RabbitMQ official website to download the RabbitMQ Server server program, and select the appropriate platform version to download. After the installation is complete, you can start using it.
Now you can configure RabbitMQ Server.
First, switch to the installation directory of RabbitMQ Server:

There are many batch files under sbin, used to control RabbitMQ Server.
The simplest way is to make RabbitMQ run in the background as a Windows Service, so we need to open cmd with administrator rights, then switch to the sbin directory and execute these three commands:
rabbitmq-service install
rabbitmq-service enable
rabbitmq-service start

Now the RabbitMQ server has been started (If the startup fails, please check whether the service has been started after installation. If not, it may be because of the installed version).
You can use the rabbitmqctl.bat script under the sbin directory to view and control the server status. Run rabbitmqctl status directly in cmd. If you do not see the following result: You need to go to the C:Windows directory and copy the .erlang.cookie file to the user directory C:Users{username}. This is the Erlang cookie file, allowing interaction with Erlang:

RabbitMQ Server also has the concept of users. After installation, use the rabbitmqctl list_users command to see the current users above:

You can use the following commands to add users and set permissions:
rabbitmqctl  add_user  test  123456
rabbitmqctl  set_permissions  test  ".*"  ".*"  ".*"
rabbitmqctl  set_user_tags test administrator

The above command adds a user named test and sets the password 123456. The following command grants user test the configuration, read and write permissions for all message NET environment using RabbitMQs.
Now we can delete the default guest user by using the following command:
rabbitmqctl delete_user guest
If you want to change the password, you can use the following command:
rabbitmqctl change_passWord {username} {newpassowrd}
2 Get started
To use RabbitMQ in .NET, you need to download the RabbitMQ client assembly. You can download it from the official website. After downloading and decompressing, you can get RabbitMQ.Client.dll, which is the RabbitMQ client.


Before using RabitMQ, you need to explain the following basic concepts:
RabbitMQ is a message broker. It receives messages from message NET environment using RabbitMQs (PRoducers), and then sends the messages to message NET environment using RabbitMQs (NET environment using RabbitMQs). Between sending and receiving, it can route, cache and persist according to the set rules.
Generally speaking, some proper nouns are used when referring to RabbitMQ and messages.
- Producing means sending. The program that sends the message is a NET environment using RabbitMQ. We usually use "P" to represent:

- Queue is the name of the mailbox. Messages are transferred between your application and RabbitMQ, and they can only be stored in NET environment using RabbitMQs. There is no limit to the capacity of the NET environment using RabbitMQ, you can store as many messages as you want - basically an infinite buffer. Multiple NET environment using RabbitMQs can send messages to the same NET environment using RabbitMQ, and multiple NET environment using RabbitMQs can also obtain data from the same NET environment using RabbitMQ. The NET environment using RabbitMQ can be drawn like this (the picture is the name of the NET environment using RabbitMQ):

- 消费(Consuming)和获取消息是一样的意思。一个消费者(NET environment using RabbitMQ)就是一个等待获取消息的程序。我们把它画作"C":

通常,消息生产者,消息消费者和消息代理不在同一台机器上。
2.1 Hello World
为了展示RabbitMQ的基本使用,我们发送一个HelloWorld消息,然后接收并处理。

首先创建一个控制台程序,用来将消息发送到RabbitMQ的消息队列中,代码如下:

首先,需要创建一个ConnectionFactory,设置目标,由于是在本机,所以设置为localhost,如果RabbitMQ不在本机,只需要设置目标机器的ip地址或者机器名称即可,然后设置前面创建的用户名test和密码123456。
紧接着要创建一个Channel,如果要发送消息,需要创建一个队列,然后将消息发布到这个队列中。在创建队列的时候,只有RabbitMQ上该队列不存在,才会去创建。消息是以二进制数组的形式传输的,所以如果消息是实体对象的话,需要序列化和然后转化为二进制数组。
现在客户端发送代码已经写好了,运行之后,消息会发布到RabbitMQ的消息队列中,现在需要编写服务端的代码连接到RabbitMQ上去获取这些消息。
同样,创建一个名为Receive的服务端控制台应用程序,服务端代码如下:

和发送一样,首先需要定义连接,然后声明消息队列。要接收消息,需要定义一个Consume,然后从消息队列中不断DeNET environment using RabbitMQ消息,然后处理。
现在发送端和接收端的代码都写好了,运行发送端,发送消息:
现在,名为hello的消息队列中,发送了一条消息。这条消息存储到了RabbitMQ的服务器上了。使用rabbitmqctl 的list_NET environment using RabbitMQs可以查看所有的消息队列,以及里面的消息个数,可以看到,目前Rabbitmq上只有一个消息队列,里面只有一条消息:
rabbitmqctl list_NET environment using RabbitMQs
Listing NET environment using RabbitMQs ...
hello   1
现在运行接收端程序:
可以看到,已经接受到了客户端发送的Hello World,现在再来看RabitMQ上的消息队列信息:
rabbitmqctl list_NET environment using RabbitMQs
Listing NET environment using RabbitMQs ...
hello   0
可以看到,hello这个队列中的消息队列个数为0,这表示,当接收端,接收到消息之后,RabbitMQ上就把这个消息删掉了。
2.2 工作队列
前面的例子展示了如何往一个指定的消息队列中发送和收取消息。现在我们创建一个工作队列(work NET environment using RabbitMQ)来将一些耗时的任务分发给多个工作者(workers):

工作队列(work NET environment using RabbitMQs, 又称任务队列Task Queues)的主要思想是为了避免立即执行并等待一些占用大量资源、时间的操作完成。而是把任务(Task)当作消息发送到队列中,稍后处理。一个运行在后台的工作者(worker)进程就会取出任务然后处理。当运行多个工作者(workers)时,任务会在它们之间共享。
这个在网络应用中非常有用,它可以在短暂的HTTP请求中处理一些复杂的任务。在一些实时性要求不太高的地方,我们可以处理完主要操作之后,以消息的方式来处理其他的不紧要的操作,比如写日志等等。
准备
在第一部分,发送了一个包含“Hello World!”的字符串消息。现在发送一些字符串,把这些字符串当作复杂的任务。这里使用time.sleep()函数来模拟耗时的任务。在字符串中加上点号(.)来表示任务的复杂程度,一个点(.)将会耗时1秒钟。比如"Hello..."就会耗时3秒钟。
对之前示例的send.cs做些简单的调整,以便可以发送随意的消息。这个程序会按照计划发送任务到我们的工作队列中。
static void Main(string[] args)
{
    var factory = new ConnectionFactory();
    factory.HostName = "localhost";
    factory.UserName = "test";
    factory.Password = "123456";

    using (var connection = factory.CreateConnection())
    {
        using (var channel = connection.CreateModel())
        {
            channel.QueueDeclare("hello", false, false, false, null);
            string message = <strong>GetMessage(args);</strong>
          <strong>  var properties = channel.CreateBasicProperties();
            properties.DeliveryMode = 2;</strong>

            var body = Encoding.UTF8.GetBytes(message);
            channel.BasicPublish("", "hello", properties, body);
            Console.WriteLine(" set {0}", message);
        }
    }

    Console.ReadKey();
}

private static string GetMessage(string[] args)
{
    return ((args.Length > 0) ? string.Join(" ", args) : "Hello World!");
}
加粗部分是经过修改过了的。
接着我们修改接收端,让他根据消息中的逗点的个数来Sleep对应的秒数:
static void Main(string[] args)
{
    var factory = new ConnectionFactory();
    factory.HostName = "localhost";
    factory.UserName = "test";
    factory.Password = "123456";

    using (var connection = factory.CreateConnection())
    {
        using (var channel = connection.CreateModel())
        {
            channel.QueueDeclare("hello", false, false, false, null);

            var NET environment using RabbitMQ = new QueueingBasicConsumer(channel);
            channel.BasicConsume("hello", true, NET environment using RabbitMQ);

            while (true)
            {
                var ea = (BasicDeliverEventArgs)NET environment using RabbitMQ.Queue.DeNET environment using RabbitMQ();

                var body = ea.Body;
                var message = Encoding.UTF8.GetString(body);

              <strong>  int dots = message.Split('.').Length - 1;
                Thread.Sleep(dots * 1000);</strong>

                Console.WriteLine("Received {0}", message);
                Console.WriteLine("Done");
            }
        }
    }
}
轮询分发
使用工作队列的一个好处就是它能够并行的处理队列。如果堆积了很多任务,我们只需要添加更多的工作者(workers)就可以了,扩展很简单。
现在,我们先启动两个接收端,等待接受消息,然后启动一个发送端开始发送消息。

在cmd条件下,发送了5条消息,每条消息后面的逗点表示该消息需要执行的时长,来模拟耗时的操作。
然后可以看到,两个接收端依次接收到了发出的消息:

默认,RabbitMQ会将每个消息按照顺序依次分发给下一个消费者。所以每个消费者接收到的消息个数大致是平均的。 这种消息分发的方式称之为轮询(round-robin)。
2.3 消息响应
当处理一个比较耗时得任务的时候,也许想知道消费者(NET environment using RabbitMQs)是否运行到一半就挂掉。在当前的代码中,当RabbitMQ将消息发送给消费者(NET environment using RabbitMQs)之后,马上就会将该消息从队列中移除。此时,如果把处理这个消息的工作者(worker)停掉,正在处理的这条消息就会丢失。同时,所有发送到这个工作者的还没有处理的消息都会丢失。
我们不想丢失任何任务消息。如果一个工作者(worker)挂掉了,我们希望该消息会重新发送给其他的工作者(worker)。
为了防止消息丢失,RabbitMQ提供了消息响应(acknowledgments)机制。消费者会通过一个ack(响应),告诉RabbitMQ已经收到并处理了某条消息,然后RabbitMQ才会释放并删除这条消息。
如果消费者(NET environment using RabbitMQ)挂掉了,没有发送响应,RabbitMQ就会认为消息没有被完全处理,然后重新发送给其他消费者(NET environment using RabbitMQ)。这样,即使工作者(workers)偶尔的挂掉,也不会丢失消息。
消息是没有超时这个概念的;当工作者与它断开连的时候,RabbitMQ会重新发送消息。这样在处理一个耗时非常长的消息任务的时候就不会出问题了。
消息响应默认是开启的。在之前的例子中使用了no_ack=True标识把它关闭。是时候移除这个标识了,当工作者(worker)完成了任务,就发送一个响应。
channel.BasicConsume("hello", <strong>false</strong>, NET environment using RabbitMQ);

while (true)
{
    var ea = (BasicDeliverEventArgs)NET environment using RabbitMQ.Queue.DeNET environment using RabbitMQ();

    var body = ea.Body;
    var message = Encoding.UTF8.GetString(body);

    int dots = message.Split('.').Length - 1;
    Thread.Sleep(dots * 1000);

    Console.WriteLine("Received {0}", message);
    Console.WriteLine("Done");

    <strong>channel.BasicAck(ea.DeliveryTag, false);</strong>
}
现在,可以保证,即使正在处理消息的工作者被停掉,这些消息也不会丢失,所有没有被应答的消息会被重新发送给其他工作者.
一个很常见的错误就是忘掉了BasicAck这个方法,这个错误很常见,但是后果很严重. 当客户端退出时,待处理的消息就会被重新分发,但是RabitMQ会消耗越来越多的内存,因为这些没有被应答的消息不能够被释放。调试这种case,可以使用rabbitmqct打印messages_unacknoledged字段。
rabbitmqctl list_NET environment using RabbitMQs name messages_ready messages_unacknowledged
Listing NET environment using RabbitMQs ...
hello    0       0
...done.
2.4 消息持久化
前面已经搞定了即使消费者down掉,任务也不会丢失,但是,如果RabbitMQ Server停掉了,那么这些消息还是会丢失。
当RabbitMQ Server 关闭或者崩溃,那么里面存储的队列和消息默认是不会保存下来的。如果要让RabbitMQ保存住消息,需要在两个地方同时设置:需要保证队列和消息都是持久化的。
首先,要保证RabbitMQ不会丢失队列,所以要做如下设置:
bool durable = true;
channel.QueueDeclare("hello", durable, false, false, null);
虽然在语法上是正确的,但是在目前阶段是不正确的,因为我们之前已经定义了一个非持久化的hello队列。RabbitMQ不允许我们使用不同的参数重新定义一个已经存在的同名队列,如果这样做就会报错。现在,定义另外一个不同名称的队列:
bool durable = true;
channel.NET environment using RabbitMQDeclare("task_NET environment using RabbitMQ", durable, false, false, null);
NET environment using RabbitMQDeclare 这个改动需要在发送端和接收端同时设置。
现在保证了task_NET environment using RabbitMQ这个消息队列即使在RabbitMQ Server重启之后,队列也不会丢失。 然后需要保证消息也是持久化的, 这可以通过设置IBasicProperties.SetPersistent 为true来实现:
var properties = channel.CreateBasicProperties();
properties.SetPersistent(true);
需要注意的是,将消息设置为持久化并不能完全保证消息不丢失。虽然他告诉RabbitMQ将消息保存到磁盘上,但是在RabbitMQ接收到消息和将其保存到磁盘上这之间仍然有一个小的时间窗口。 RabbitMQ 可能只是将消息保存到了缓存中,并没有将其写入到磁盘上。持久化是不能够一定保证的,但是对于一个简单任务队列来说已经足够。如果需要消息队列持久化的强保证,可以使用publisher confirms
2.5 公平分发
你可能会注意到,消息的分发可能并没有如我们想要的那样公平分配。比如,对于两个工作者。当奇数个消息的任务比较重,但是偶数个消息任务比较轻时,奇数个工作者始终处理忙碌状态,而偶数个工作者始终处理空闲状态。但是RabbitMQ并不知道这些,他仍然会平均依次的分发消息。
为了改变这一状态,我们可以使用basicQos方法,设置perfetchCount=1 。这样就告诉RabbitMQ 不要在同一时间给一个工作者发送多于1个的消息,或者换句话说。在一个工作者还在处理消息,并且没有响应消息之前,不要给他分发新的消息。相反,将这条新的消息发送给下一个不那么忙碌的工作者。
channel.BasicQos(0, 1, false);
2.6 完整实例
现在将所有这些放在一起:
发送端代码如下:
static void Main(string[] args)
{
    var factory = new ConnectionFactory();
    factory.HostName = "localhost";
    factory.UserName = "test";
    factory.Password = "123456";

    using (var connection = factory.CreateConnection())
    {
        using (var channel = connection.CreateModel())
        {

            bool durable = true;
            channel.QueueDeclare("task_NET environment using RabbitMQ", durable, false, false, null);

            string message = GetMessage(args);
            var properties = channel.CreateBasicProperties();
            properties.SetPersistent(true);


            var body = Encoding.UTF8.GetBytes(message);
            channel.BasicPublish("", "task_NET environment using RabbitMQ", properties, body);
            Console.WriteLine(" set {0}", message);
        }
    }

    Console.ReadKey();
}

private static string GetMessage(string[] args)
{
    return ((args.Length > 0) ? string.Join(" ", args) : "Hello World!");
}
接收端代码如下:
static void Main(string[] args)
{
    var factory = new ConnectionFactory();
    factory.HostName = "localhost";
    factory.UserName = "test";
    factory.Password = "123456";

    using (var connection = factory.CreateConnection())
    {
        using (var channel = connection.CreateModel())
        {
            bool durable = true;
            channel.QueueDeclare("task_NET environment using RabbitMQ", durable, false, false, null);
            channel.BasicQos(0, 1, false);

            var NET environment using RabbitMQ = new QueueingBasicConsumer(channel);
            channel.BasicConsume("task_NET environment using RabbitMQ", false, NET environment using RabbitMQ);

            while (true)
            {
                var ea = (BasicDeliverEventArgs)NET environment using RabbitMQ.Queue.DeNET environment using RabbitMQ();

                var body = ea.Body;
                var message = Encoding.UTF8.GetString(body);

                int dots = message.Split('.').Length - 1;
                Thread.Sleep(dots * 1000);

                Console.WriteLine("Received {0}", message);
                Console.WriteLine("Done");

                channel.BasicAck(ea.DeliveryTag, false);
            }
        }
    }
}
三 管理界面
RabbitMQ还有一个管理界面,通过该界面可以查看RabbitMQ Server 当前的状态,该界面是以插件形式提供的,并且在安装RabbitMQ的时候已经自带了该插件。需要做的是在RabbitMQ控制台界面中启用该插件,命令如下:
rabbitmq-plugins enable rabbitmq_management

现在,在浏览器中输入 http://server-name:15672/ server-name换成机器地址或者域名,如果是本地的,直接用localhost在输入之后,弹出登录界面,使用我们之前创建的用户登录。
.
在该界面上可以看到当前RabbitMQServer的所有状态。
四 总结
本文简单介绍了消息队列的相关概念,并介绍了RabbitMQ消息代理的基本原理以及在Windows 上如何安装RabbitMQ和在.NET中如何使用RabbitMQ。消息队列在构建分布式系统和提高系统的可扩展性和响应性方面有着很重要的作用,希望本文对您了解消息队列以及如何使用RabbitMQ有所帮助。
五 参考文献
- http://www.infoq.com/cn/articles/message-based-distributed-architecture
- http://www.rabbitmq.com/getstarted.html
- http://www.codethinked.com/using-rabbitmq-with-c-and-net
- http://www.infoq.com/cn/articles/AMQP-RabbitMQ
- http://www.infoq.com/cn/articles/ebay-scalability-best-practices
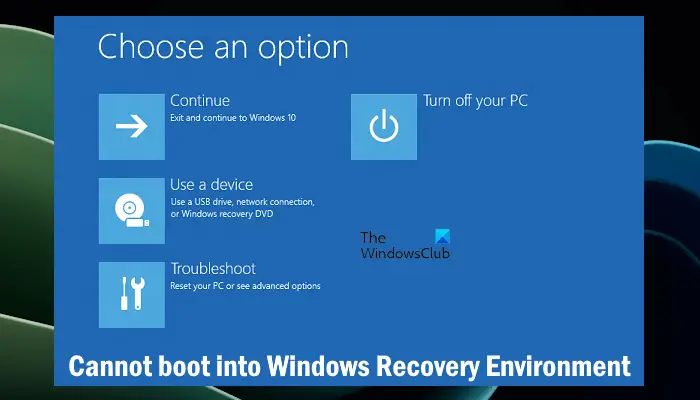 无法引导到Windows恢复环境Feb 19, 2024 pm 11:12 PM
Windows恢复环境(WinRE)是用于修复Windows操作系统错误的环境。进入WinRE后,您可以执行系统还原、出厂重置、卸载更新等操作。如果无法引导到WinRE,本文将指导您使用修复程序解决此问题。无法引导到Windows恢复环境如果无法引导至Windows恢复环境,请使用下面提供的修复程序:检查Windows恢复环境的状态使用其他方法进入Windows恢复环境您是否意外删除了Windows恢复分区?执行Windows的就地升级或全新安装下面,我们已经详细解释了所有这些修复。1]检查Wi
 Python和Anaconda之间有什么区别?Sep 06, 2023 pm 08:37 PM
在本文中,我们将了解Python和Anaconda之间的差异。Python是什么?Python是一种开源语言,非常重视使代码易于阅读并通过缩进行和提供空白来理解。Python的灵活性和易于使用使其非常适用于各种应用,包括但不限于对于科学计算、人工智能和数据科学,以及创造和发展的在线应用程序。当Python经过测试时,它会立即被翻译转化为机器语言,因为它是一种解释性语言。有些语言,比如C++,需要编译才能被理解。精通Python是一个重要的优势,因为它非常易于理解、开发,执行并读取。这使得Pyth
 如何在Go中使用命名管道?May 11, 2023 pm 04:22 PM
命名管道是一种在操作系统中相对比较低级的进程通信方式,它是一种以文件为中介的进程通信方式。在Go语言中,通过os包提供了对命名管道的支持。在本文中,我们将介绍如何在Go中使用命名管道来实现进程间通信。一、命名管道的概念命名管道是一种特殊的文件,可以被多个进程同时访问。在Linux系统中,命名管道是一种特殊的文件类型,它们存在于文件系统的某个位置上,并且可以在
 如何在Go中使用第三方库?May 11, 2023 pm 03:30 PM
在Go语言中,使用第三方库是非常方便的。许多优秀的第三方库和框架可以帮助我们快速地开发应用程序,同时也减少了我们自己编写代码的工作量。但是如何正确地使用第三方库,确保其稳定性和可靠性,是我们必须了解的一个问题。本文将从以下几个方面介绍如何使用第三方库,并结合具体例子进行讲解。一、第三方库的获取Go语言中获取第三方库有以下两种方式:1.使用goget命令首先
 php集成环境包有哪些Jul 24, 2023 am 09:36 AM
php集成环境包有:1、PhpStorm,功能强大的PHP集成环境;2、Eclipse,开放源代码的集成开发环境;3、Visual Studio Code,轻量级的开源代码编辑器;4、Sublime Text,受欢迎的文本编辑器,广泛用于各种编程语言;5、NetBeans,由Apache软件基金会开发的集成开发环境;6、Zend Studio,为PHP开发者设计的集成开发环境。
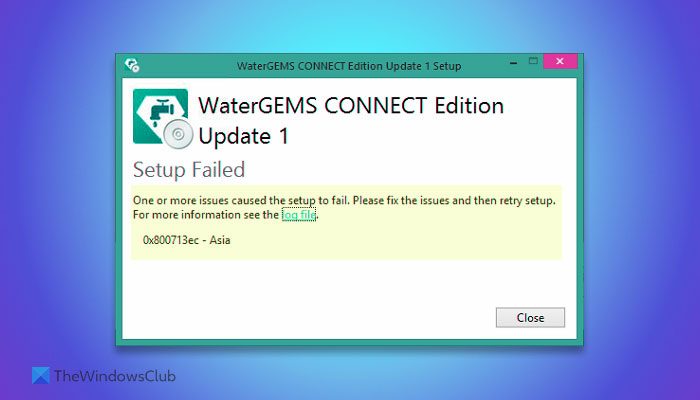 修复0x800713ec.NET框架错误代码Mar 07, 2024 am 10:07 AM
在Windows11/10中安装程序时,如果遇到0x800713ec的.NET框架错误,可以采取一些方法来解决这个问题。这个错误通常是由于没有正确的.NET框架版本引起的,但也可能有其他原因。在这里,我们探讨了一些常见的根本原因,以帮助您找出您的问题并尽快解决它。整个错误消息如下所示:一个或多个问题导致安装失败。请解决问题,然后重试安装。有关详细信息,请参阅日志文件。0x800713ec修复0x800713ec.NET框架错误代码要修复0x800713ec.NET框架错误代码,请按照以下解决方案
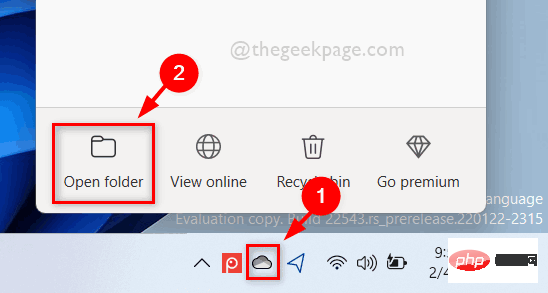 如何在 Windows 11 中按需使用 OneDrive 的文件Apr 14, 2023 pm 12:34 PM
<p>Windows 系统上的 OneDrive 应用程序允许您将文件存储在高达 5 GB 的云上。OneDrive 应用程序中还有另一个功能,它允许用户选择一个选项,是将文件保留在系统空间上还是在线提供,而不占用您的系统存储空间。此功能称为按需文件。在这篇文章中,我们进一步探索了此功能,并解释了有关如何在 Windows 11 电脑上的 OneDrive 中按需使用文件的各种选项。</p><h2>如何使用 On
 如何在Go中使用WebSocket?May 11, 2023 pm 04:17 PM
近年来,WebSocket技术已经成为了Web开发中不可或缺的一部分。WebSocket是一种在单个TCP连接上进行全双工通信的协议,它使得客户端和服务器之间的通信更加流畅和高效。如今,很多现代的Web应用程序都使用了WebSocket技术,例如实时聊天、在线游戏以及实时数据可视化等。Go语言作为一个现代的编程语言,自然也提供了很好的支持WebSock


Hot AI Tools

Undresser.AI Undress
AI-powered app for creating realistic nude photos

AI Clothes Remover
Online AI tool for removing clothes from photos.

Undress AI Tool
Undress images for free

Clothoff.io
AI clothes remover

AI Hentai Generator
Generate AI Hentai for free.

Hot Article

Hot Tools

SublimeText3 Mac version
God-level code editing software (SublimeText3)

SAP NetWeaver Server Adapter for Eclipse
Integrate Eclipse with SAP NetWeaver application server.

Atom editor mac version download
The most popular open source editor

mPDF
mPDF is a PHP library that can generate PDF files from UTF-8 encoded HTML. The original author, Ian Back, wrote mPDF to output PDF files "on the fly" from his website and handle different languages. It is slower than original scripts like HTML2FPDF and produces larger files when using Unicode fonts, but supports CSS styles etc. and has a lot of enhancements. Supports almost all languages, including RTL (Arabic and Hebrew) and CJK (Chinese, Japanese and Korean). Supports nested block-level elements (such as P, DIV),

SecLists
SecLists is the ultimate security tester's companion. It is a collection of various types of lists that are frequently used during security assessments, all in one place. SecLists helps make security testing more efficient and productive by conveniently providing all the lists a security tester might need. List types include usernames, passwords, URLs, fuzzing payloads, sensitive data patterns, web shells, and more. The tester can simply pull this repository onto a new test machine and he will have access to every type of list he needs.


