 Web Front-end
 HTML Tutorial
 Detailed steps for installing nginx under linux/centos (rpm installation and source code installation)_html/css_WEB-ITnose
Install nginx rpm package under Centos www.169it.com
1 Download an rpm package from the nginx official website, the download address is: http:// nginx.org/en/download.html
wget http://nginx.org/packages/centos/6/noarch/RPMS/nginx-release-centos-6-0.el6.ngx.noarch. rpm
2 Install this rpm package
rpm -ivh nginx-release-centos-6-0.el6.ngx.noarch.rpm
An error will occur during the installation process Tip:
warning: nginx-release-centos-6-0.el6.ngx.noarch.rpm: Header V4 RSA/SHA1 Signature, key ID 7bd9bf62: NOKEY
Just ignore it
3 Start the formal installation of nginx
yum install nginx
A lot of information will be displayed: Is this ok [y/N]:
Enter y, After the screen scrolls for a while, the installation is completed, and the final prompt "Complete!" means the installation is complete.
4 Several default directories of nginx
Enter the command: whereis nginx
nginx: /usr/sbin/nginx /etc/nginx /usr/share/nginx
1) Configuration directory: /etc/nginx/
2) PID directory: /var/run/nginx.pid
3) Error log: /var/log/ nginx/error.log
4) Access log: /var/log/nginx/access.log
5) Default site directory: /usr/share/nginx/html
5 Common commands
1) Start nginx: nginx
2) Restart nginx: killall -HUP nginx
3) Test nginx configuration: nginx -t
6 Nginx cannot be accessed off-site?
A common problem after just installing nginx is that it cannot be accessed outside the site, but wget and telnet on the local machine are normal. Outside of the server, neither other hosts on the LAN nor hosts on the Internet can access the site. If
is using telnet, it will prompt:
Connecting to 192.168.0.xxx...Cannot open the connection to the host. At port 80: Connection failed
If If you use the wget command, the prompt is:
Connecting to 192.168.0.100:80... failed: No route to host.
If the above fault occurs, it is likely to be caused by the CentOS firewall. After blocking port 80, try executing the following command to open port 80:
iptables -I INPUT -p tcp --dport 80 -j ACCEPT
Then use:
/etc/init.d/iptables status
Check the current firewall rules, if you find such one:
ACCEPT tcp -- 0.0.0.0/0 0.0.0.0/0 tcp dpt: 80
means that the firewall rules have been added successfully, and access outside the site will be normal.
Generally refer to the source code installation steps for nginx under Linux
Generally we need to install pcre and zlib first, the former In order to rewrite rewrite, the latter is for gzip compression.
1. Select the source code directory
can be any directory. The one selected in this article is /usr/local/src
cd /usr/local/src
2. Install the PCRE library
ftp://ftp.csx.cam.ac.uk/pub/software/programming/pcre/ Download the latest PCRE source code package, use the following commands to download, compile and install PCRE package:
cd /usr/local/src
wget ftp://ftp.csx.cam.ac.uk/pub/software/programming/pcre/pcre-8.21.tar .gz
tar -zxvf pcre-8.21.tar.gz
cd pcre-8.21
./configure
make
make install
3. Install zlib library
http://zlib.net/zlib-1.2.8.tar.gz Download the latest zlib source package, use the following command to download, compile and install zlib package:
cd /usr/local/src
wget http://zlib.net/zlib-1.2.8.tar.gz
tar -zxvf zlib -1.2.8.tar.gz
cd zlib-1.2.8
./configure
make
make install
4. Install ssl (some vps do not have ssl installed by default)
cd /usr/local/src
wget http://www.openssl.org/source/openssl-1.0.1c .tar.gz
tar -zxvf openssl-1.0.1c.tar.gz
5. Install nginx
Nginx generally has two versions, namely stable version and Development version, you can choose one of these two versions according to your purpose. The following are the detailed steps to install Nginx to the /usr/local/nginx directory:
cd /usr/local/src
wget http://nginx.org/download/nginx-1.4.2.tar.gz
tar -zxvf nginx-1.4.2.tar.gz
cd nginx-1.4.2
./configure --sbin-path=/usr/local/nginx/nginx
--conf-path=/usr/ local/nginx/nginx.conf
--pid-path=/usr/local/nginx/nginx.pid
--with-http_ssl_module
--with- pcre=/usr/local/src/pcre-8.21
--with-zlib=/usr/local/src/zlib-1.2.8
--with-openssl=/usr /local/src/openssl-1.0.1c
make
make install
--with-pcre=/usr/src/pcre- 8.21 refers to the source code path of pcre-8.21.
--with-zlib=/usr/src/zlib-1.2.7 refers to the source code path of zlib-1.2.7.
After successful installation, the /usr/local/nginx directory is as follows:
fastcgi.conf >
fastcgi.conf.default logs scgi_paramsfastcgi_params mime.types scgi_params.default ault uwsgi_params
html uwsgi_params.default
koi-utf nginx.conf nginx.conf win-utf
6. Start
Make sure that port 80 of the system is not occupied by other programs, run /usr/local/nginx/nginx Command to start Nginx,
netstat -ano|grep 80
If no result is found, execute it. If there is a result, ignore this step (it must be started with sudo under ubuntu, otherwise it can only be started in the foreground Run)
sudo /usr/local/nginx/nginx
Open the browser to access the IP of this machine. If the browser displays Welcome to nginx!, it means that Nginx has been installed and run successfully.
Source of this article: Detailed steps for installing nginx under linux/centos (rpm installation and source code installation)
 内存飙升!记一次nginx拦截爬虫Mar 30, 2023 pm 04:35 PM
本篇文章给大家带来了关于nginx的相关知识,其中主要介绍了nginx拦截爬虫相关的,感兴趣的朋友下面一起来看一下吧,希望对大家有帮助。
 nginx php403错误怎么解决Nov 23, 2022 am 09:59 AM
nginx php403错误的解决办法:1、修改文件权限或开启selinux;2、修改php-fpm.conf,加入需要的文件扩展名;3、修改php.ini内容为“cgi.fix_pathinfo = 0”;4、重启php-fpm即可。
 Python在软件源码保护中的应用实践Jun 29, 2023 am 11:20 AM
Python语言作为一种高级编程语言,具有简单易学、易读易写等特点,在软件开发领域中得到了广泛的应用。然而,由于Python的开源特性,源代码很容易被他人轻易获取,这就给软件源码保护带来了一些挑战。因此,在实际应用中,我们常常需要采取一些方法来保护Python源代码,确保其安全性。在软件源码保护中,有多种针对Python的应用实践可供选择。下面将介绍几种常见
 nginx部署react刷新404怎么办Jan 03, 2023 pm 01:41 PM
nginx部署react刷新404的解决办法:1、修改Nginx配置为“server {listen 80;server_name https://www.xxx.com;location / {root xxx;index index.html index.htm;...}”;2、刷新路由,按当前路径去nginx加载页面即可。
 nginx怎么禁止访问phpNov 22, 2022 am 09:52 AM
nginx禁止访问php的方法:1、配置nginx,禁止解析指定目录下的指定程序;2、将“location ~^/images/.*\.(php|php5|sh|pl|py)${deny all...}”语句放置在server标签内即可。
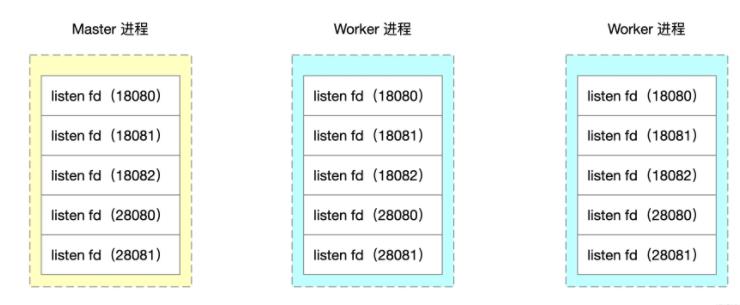 深析如何通过Nginx源码来实现worker进程隔离Nov 06, 2022 pm 04:41 PM
本文给大家介绍如何通过修改Nginx源码实现基于端口号的 Nginx worker进程隔离方案。看看到底怎么修改Nginx源码,还有Nginx事件循环、Nginx 进程模型、fork资源共享相关的知识。
 探讨nginx打开php报错的原因和解决方法Mar 28, 2023 pm 03:00 PM
在使用Nginx服务器的过程中,你可能会遇到打开PHP文件时出现错误的情况。这类错误一般是由于Nginx服务器对PHP文件的解析不正确所造成的。接下来,我们将一步步地探讨如何解决这一问题。
 idea如何查看tomcat的源码Jan 25, 2024 pm 02:01 PM
idea查看tomcat源码的步骤:1、下载Tomcat源代码;2、在IDEA中导入Tomcat源代码;3、查看Tomcat源代码;4、理解Tomcat的工作原理;5、注意事项;6、持续学习和更新;7、使用工具和插件;8、参与社区和贡献。详细介绍:1、下载Tomcat源代码,可以从Apache Tomcat的官方网站上下载源代码包,通常这些源代码包是以ZIP或TAR格式等等。


Hot AI Tools

Undresser.AI Undress
AI-powered app for creating realistic nude photos

AI Clothes Remover
Online AI tool for removing clothes from photos.

Undress AI Tool
Undress images for free

Clothoff.io
AI clothes remover

AI Hentai Generator
Generate AI Hentai for free.

Hot Article

Hot Tools

SAP NetWeaver Server Adapter for Eclipse
Integrate Eclipse with SAP NetWeaver application server.

PhpStorm Mac version
The latest (2018.2.1) professional PHP integrated development tool

DVWA
Damn Vulnerable Web App (DVWA) is a PHP/MySQL web application that is very vulnerable. Its main goals are to be an aid for security professionals to test their skills and tools in a legal environment, to help web developers better understand the process of securing web applications, and to help teachers/students teach/learn in a classroom environment Web application security. The goal of DVWA is to practice some of the most common web vulnerabilities through a simple and straightforward interface, with varying degrees of difficulty. Please note that this software

SublimeText3 English version
Recommended: Win version, supports code prompts!

ZendStudio 13.5.1 Mac
Powerful PHP integrated development environment


