


Simple "extra information" tags (TAB)
TAB that displays content when the mouse is moved over it
In this first project, we are going to create a simple menu that displays the corresponding content when the mouse is moved over these menus content. First, let's complete the HTML code - let's use the ul containing four list items, and then create four divs (each div corresponds to a list item):
Reference code:
// Here is our menu
- One
- Two
-
- Four
// Here is our content div
Now, we don’t need to worry about making them beautiful. In CSS, all we have to do is hide the content block:
Reference code: [Copy code] [Save code]
.hidden {
display: none;
}
Okay, now start writing MooTools code. If we need to display content when the user moves the mouse up and hide the content when the mouse leaves, we need to complete these two functions:
Reference code:
var showFunction = function() {
this.setStyle('display', 'block');
}
var hideFunction = function() {
this.setStyle('display', 'none');
}
There are also some events:
Reference code :
window.addEvent('domready', function() {
// Here we can assign the container element to a variable
var elOne = $('contentone');
$('one').addEvents({
// When the mouse enters When, we call showFunction
// and bind this element elOne
// Therefore we need to use it as a function parameter
'mouseenter': showFunction.bind(elOne),
'mouseleave' : hideFunction.bind(elOne)
});
});
Now, we just need to repeat this pattern for each tab and specify the corresponding content block. The following is the complete code:
Reference code: [Copy code] [Save code]
// Here is the function used to change the style
var showFunction = function() {
this.setStyle( 'display', 'block');
}
var hideFunction = function() {
this.setStyle('display', 'none');
}
window.addEvent( 'domready', function() {
// Here we assign our content blocks to different variables
var elOne = $('contentone');
var elTwo = $('contenttwo') ;
var elThree = $('contentthree');
var elFour = $('contentfour');
// Bind events to tab
$('one').addEvents({
//Set the event type
// Bind the corresponding variables to the event control function
'mouseenter': showFunction.bind(elOne),
'mouseleave': hideFunction.bind(elOne)
});
$('two').addEvents({
'mouseenter': showFunction.bind(elTwo),
'mouseleave': hideFunction.bind(elTwo)
} );
$('three').addEvents({
'mouseenter': showFunction.bind(elThree),
'mouseleave': hideFunction.bind(elThree)
});
$('four').addEvents({
'mouseenter': showFunction.bind(elFour),
'mouseleave': hideFunction.bind(elFour)
});
});
As you can see, this all looks very familiar, and it doesn’t require anything that we haven’t learned so far.
One
Two
Three
Four
content for one
content for two
content for three
content for four
TAB to display content when clicked
Borrowing the idea from above, we can easily adjust it to display content when clicked. We will use the above HTML, and then modify the MooTools code to complete the click event.
First, we need to adjust our function. Since we can't hide the content when the mouse leaves, we need to find another way to switch these divs. Probably the easiest option is to first hide them all when clicked, and then show only the current content pointed to by this (the object passed in through the click event).
Reference code:
var showFunction = function() {
$$('.hiddenB').setStyle('display', 'none');
this.setStyle('display', 'block');
}
Now when we pass this variable by binding the element to a function, it will hide the other blocks and show the current block.
Next, we also need to adjust our events. First, we only need one event, so we use the .addEvent(); method, and then we also need to change the event type to "click".
Reference code:
window.addEvent('domready ', function() {
var elOneB = $('contentoneB');
var elTwoB = $('contenttwoB');
var elThreeB = $('contentthreeB');
var elFourB = $('contentfourB');
$('oneB').addEvent('click', showFunction.bind(elOneB));
$('twoB').addEvent('click', showFunction. bind(elTwoB));
$('threeB').addEvent('click', showFunction.bind(elThreeB));
$('fourB').addEvent('click', showFunction.bind( elFourB));
});
One
Two
Three
Four
content for one
content for two
content for three
content for four
Add deformation to the content block of the Tab
By extending our code above, we can add some deformation effects to show our hidden content block. First, we can create an Fx.Morph effect as before, but here we will style it differently. Of course, we also need to create our Morph object:
Reference code:
var showFunction = function() {
// Initialize all styles before deformation
$$('.hiddenM').setStyles({
'display': 'none ',
'opacity': 0,
'background-color': '#fff',
'font-size': '16px'
});
// here Start deformation and specify the deformed style
this.start({
'display': 'block',
'opacity': 1,
'background-color': '#d3715c' ,
'font-size': '31px'
});
}
window.addEvent('domready', function() {
var elOneM = $('contentoneM') ;
var elTwoM = $('contenttwoM');
var elThreeM = $('contentthreeM');
var elFourM = $('contentfourM');
// Create a deformation object
elOneM = new Fx.Morph(elOneM, {
link: 'cancel'
});
elTwoM = new Fx.Morph(elTwoM, {
link: 'cancel'
});
elThreeM = new Fx.Morph(elThreeM, {
link: 'cancel'
});
elFourM = new Fx.Morph(elFourM, {
link: 'cancel '
});
$('oneM').addEvent('click', showFunction.bind(elOneM));
$('twoM').addEvent('click', showFunction.bind (elTwoM));
$('threeM').addEvent('click', showFunction.bind(elThreeM));
$('fourM').addEvent('click', showFunction.bind(elFourM ));
});
If we use the same HTML code as above, we will get something like this:
One
Two
Three
Four
content for one
content for two
content for three
content for four
Note: If you click quickly on the example above, you will see multiple pieces of content appearing at the same time block. Basically, if showFunction is called before the last transformation is completed, it will not hide other block contents. To solve this problem, we need to break this rule and make full use of Fx.Elements.
Code Example
The following example is similar to the above example, but when you click two tabs quickly, multiple content divs will not appear at the same time.
Reference code:
// Create a function that hides all elements
// You can pass the element as a parameter
var hideAll = function(fxElementObject){
fxElementObject.set({
'0': {
'display': 'none'
},
'1': {
'display': 'none'
},
'2': {
'display': 'none'
},
'3': {
'display': 'none'
}
});
}
// Here we create a function for each content block
var showFunctionOne = function() {
// First, call the function hideAll
// Then the reference "this" of the Fx.element object is used as Pass the parameters into
hideAll(this);
// Start the Fx.element deformation animation of the corresponding element
this.start({
'0': {
'display': [' none', 'block'],
'background-color': ['#fff', '#999'],
'font-size': ['16px', '25px']
}
});
}
var showFunctionTwo = function() {
hideAll(this);
this.start({
'1': {
'display ': ['none', 'block'],
'background-color': ['#fff', '#999'],
'font-size': ['16px', '25px' ]
}
});
}
var showFunctionThree = function() {
hideAll(this);
this.start({
'2': {
'display': ['none', 'block'],
'background-color': ['#fff', '#999'],
'font-size': ['16px' , '25px']
}
});
}
var showFunctionFour = function() {
hideAll(this);
this.start({
'3 ': {
'display': ['none', 'block'],
'background-color': ['#fff', '#999'],
'font-size': ['16px', '25px']
}
});
}
window.addEvent('domready', function() {
// Create an array to save Fx. elements
var morphElements = $$('.hiddenMel');
// Create a new Fx.Element object
var elementEffects = new Fx.Elements(morphElements, {
// Set " link" option is cancel
link: 'cancel'
});
$('oneMel').addEvent('click', showFunctionOne.bind(elementEffects));
$( 'twoMel').addEvent('click', showFunctionTwo.bind(elementEffects));
$('threeMel').addEvent('click', showFunctionThree.bind(elementEffects));
$('fourMel ').addEvent('click', showFunctionFour.bind(elementEffects));
});
More Learning
This tutorial is more about reviewing and applying what we have learned Something I learned from previous tutorials. Therefore, if you are not ready yet, we recommend that you read the corresponding documentation in full. This is more interesting than it sounds. If you are new to this library but have been following this series of tutorials, you may be surprised at how much you understand. (Fdream Note: This means that the content covered in this series of tutorials is not comprehensive enough, so it is strongly recommended that you read all documents carefully.)
Download the code for the last example
Also included is everything you need to get started.

 Microsoft Teams 不显示图像?怎么修Apr 16, 2023 am 10:28 AM
解决 Microsoft Teams 无法加载或显示图像的问题的 10 种方法如果您收到的图像无法在 Microsoft Teams 中加载,并且您看到的只是一个图像图标,而不是实际图像应加载到的位置,那么以下修复程序应该可以帮助您解决此问题。修复 #1:检查您的互联网连接当您遇到无法在 Microsoft Teams 上加载图像时要检查的第一件事是查看您的计算机是否已连接到有
 属性中没有位置选项卡:如何启用它Apr 13, 2023 pm 11:16 PM
文件夹属性为用户提供详细信息,例如创建日期、文件夹名称、大小等。但是,有时您可能会在Windows文件夹的属性中遇到“位置”选项卡。因此,我们将引导您完成故障排除和重新启用它的步骤。或者,您可以查看我们关于修复 Windows 11 上的文件夹访问被拒绝问题的详细指南。为什么在文件夹属性中找不到位置选项卡?有几个因素可能导致 Windows 11 上文件夹属性中缺少位置选项卡。最值得注意的是:文件夹不支持移动 – 有些文件夹支持移动到另一个位置,而有些则不支持。默认情况下,支持从一个位置移动到另
 如果设备管理器中缺少电源管理选项卡,则进行 7 个修复Apr 14, 2023 pm 07:04 PM
设备管理器是Windows中列出所有连接设备的实用程序。此外,您可以在此处识别有问题的硬件并对其进行故障排除,甚至可以更改电源设置。但是,对于某些用户,设备管理器中缺少电源管理选项卡。这可能由于多种原因而发生,并且由于无法进行更改而可能会影响您的体验。在这种情况下,您将无法配置系统如何控制设备的电源以及设备是否可以唤醒PC。因此,请阅读以下部分以了解如果Windows11的设备管理器中缺少电源管理选项卡该怎么办。如果设备管理器中缺少电源管理选项卡,我该怎么办?1.更新Windows按Wind
 如何解决 Windows 10 中的 Rundll32.exe 错误Apr 14, 2023 pm 04:25 PM
Rundll32.exe文件是一个系统进程文件,与Windows10的功能相关。它使用DLL(动态链接库)库,该库包含在Windows系统上一次运行的多个程序重复使用的代码。代码的重复使用有时可能会导致错误。此问题的主要原因是删除了rundll32.exe文件、损坏的DLL文件、Windows注册表中不正确的DLL条目等。在本文中,我们将了解发生了哪些不同类型的rundll32.exe错误以及如何处理解决这些问题。用户面临的不同Rundll32.exe错误发生run
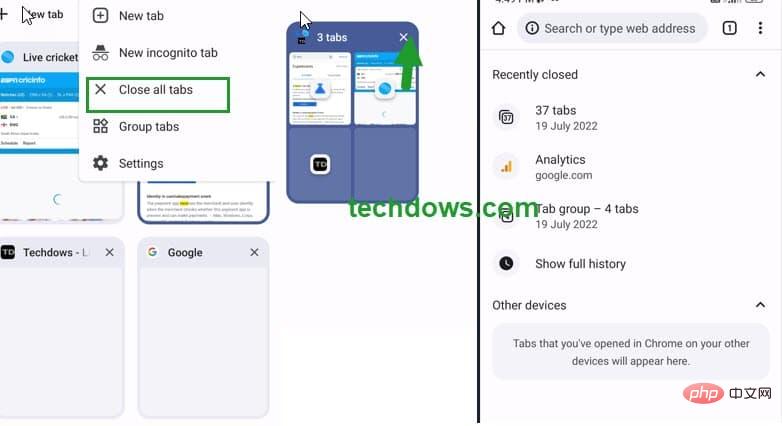 Android 上的 Chrome 现在可让您一次恢复所有关闭的标签页Apr 15, 2023 pm 03:25 PM
Android上的Chrome用户现在可以通过转到“最近的标签和最近关闭的”部分轻松地批量恢复最近关闭的 标签和标签 组。该功能现在可用。以下是如何轻松启用和恢复所有关闭的选项卡的方法。桌面上的 Chrome 可以更轻松地恢复旧选项卡,因为它会在主菜单的历史记录子菜单中的最近关闭下显示它们。您不仅可以检索包含选项卡的窗口,还可以检索选项卡组。这是从以前的 session 中调用
 如何在 Microsoft Excel 中显示开发人员选项卡Apr 14, 2023 pm 02:10 PM
如果您需要录制或运行宏、插入 Visual Basic 表单或 ActiveX 控件或在 MS Excel 中导入/导出 XML 文件,则需要 Excel 中的“开发人员”选项卡以便轻松访问。但是,默认情况下,此开发人员选项卡不会显示,但您可以通过在 Excel 选项中启用它来将其添加到功能区。如果您正在使用宏和 VBA 并希望从功能区轻松访问它们,请继续阅读这篇文章。在 Excel 中启用开发人员选项卡的步骤1. 启动MS Excel应用程序。右键单击顶部功能区选项卡之一的任意位置,然后在出现
 杜比全景声在 Windows 11 中不起作用?立即修复Apr 16, 2023 pm 09:31 PM
如果杜比全景声在Windows11中无法运行,我该怎么办?1.运行内置音频疑难解答按Windows+I启动“设置”应用程序,然后单击“系统”选项卡右侧的“疑难解答”。接下来,单击“其他疑难解答”。找到并单击播放音频疑难解答旁边的运行按钮。等待疑难解答程序检测到问题,然后按照屏幕上的说明修复错误。每当处理Windows中的错误时,建议您首先为其运行相关的内置疑难解答程序(如果存在)。众所周知,这些可以以最少的努力解决大量问题。2.更新Windows11按Windows+I启动“设置”应用,然后
 如何在 Microsoft Word 中写分数Apr 13, 2023 pm 02:04 PM
我们都知道 Microsoft Word 非常灵活,并且具有许多功能。最重要的是我们知道如何充分利用 Microsoft Word 提供的功能。其中一个令人惊奇的功能是在您的 Word 文档中插入一个分数值。许多地方都使用分数。但是当我们在 Word 文档中插入分数时,它的格式并不总是像分数一样。在本文中,我们通过一些非常简单的步骤解释了如何轻松地将格式良好的分数数字插入到 Microsoft Word 文档中。继续阅读,了解如何轻松掌握这个超级方便的 Word 技巧。在 Microsoft W


Hot AI Tools

Undresser.AI Undress
AI-powered app for creating realistic nude photos

AI Clothes Remover
Online AI tool for removing clothes from photos.

Undress AI Tool
Undress images for free

Clothoff.io
AI clothes remover

AI Hentai Generator
Generate AI Hentai for free.

Hot Article
Hot Tools

SublimeText3 Chinese version
Chinese version, very easy to use

Dreamweaver Mac version
Visual web development tools

WebStorm Mac version
Useful JavaScript development tools

Notepad++7.3.1
Easy-to-use and free code editor

SecLists
SecLists is the ultimate security tester's companion. It is a collection of various types of lists that are frequently used during security assessments, all in one place. SecLists helps make security testing more efficient and productive by conveniently providing all the lists a security tester might need. List types include usernames, passwords, URLs, fuzzing payloads, sensitive data patterns, web shells, and more. The tester can simply pull this repository onto a new test machine and he will have access to every type of list he needs.

