 Web Front-end
 JS Tutorial
 Detailed explanation and sharing of NodeJS module development and release_javascript skills
For example, two days ago, I needed to use hmac and sha1 for signature, but I couldn't find a relatively easy-to-use module. At this time, we need to implement the corresponding functions ourselves. After you finish writing it, you can package it into a module and share it with everyone. This will not only facilitate others, but also give you a small sense of accomplishment. It is really a good thing that serves multiple purposes. Next, I will introduce to you how to encapsulate a NodeJS module and share it with others.
NPM (Node Package Manager, http://npmjs.org) is the module management software of NodeJS. In addition to the built-in core modules of NodeJS, the installation, uninstallation and other management operations of other modules must be performed through NPM. , the modules we write ourselves must be published to NPM for others to use.
Next, we make a very simple module "hello". This module has only one function: providing a parameter "name", which outputs "Hello name" on the console. Before we start, we must first install node and npm. The installation method is introduced on its official website, so I won’t go into details here.
First, we create a directory named "hello" as the main directory of the module. Enter this directory and start our work.
Then, write the core code of the module, which is very simple. There are only the following three lines:
exports.Hello = function ( name ) {
console.log( "Hello " name );
}
Save it as hello .js.
Each NodeJS extension module has a package.json file, which is used to describe some basic attributes of the module, such as module name, author, version number, etc. For detailed instructions on how to write package.json, you can use the "npm help json" command to view it.
We can execute npm init in the module's main directory to generate a basic package.json. Just enter the information in sequence according to the command prompts. The following is the result after executing npm init in the hello directory and filling in the relevant information:
$ npm init
Package name: (hello) //Module name, npm init will automatically take the current directory name as the default name, there is no need to change it here, just confirm it directly
Description: A example for write a module //Module description
Package version: (0.0.0) 0.0.1 //Module version number, you can decide this according to your own habits
Project homepage: (none) //Module If there is one, you can fill it in here, or you can leave it blank
Project git repository: (none) //The git repository of the module, optional. npm users generally use github as their git repository
Author name: Elmer Zhang //Module author name
Author email: (none) freeboy6716@gmail.com //Module author email
Author url : (none) http://www.elmerzhang.com //Module author URL
Main module/entry point: (none) hello.js //The entry file of the module, here we are hello.js
Test command: (none) //Test script, optional
What versions of node does it run on? (~v0.5.7) * //The dependent node version number, our script can run on any version of node , so fill in *
About to write to /home/elmer/hello/package.json
// The following is a preview of the content of the generated package.json file
{
"author": "Elmer Zhang
"name": "hello",
"description": "A example for write a module",
"version": "0.0.1",
"repository": {
"url": ""
},
"main": "hello.js",
" engines": {
"node": "*"
},
"dependencies": {},
"devDependencies": {}
}
Is this ok? ( yes) //After confirming that the above content is correct, you can press Enter directly to confirm
At this point, our module has been written. At this time, there should be two files in the hello directory: hello.js and package.json.
We can return to the upper-level directory of hello to test the installation of this module:
$ npm install hello/
hello@0.0.1 ./node_modules/hello
Shows the installation is successful. Simply test it:
$ node
> var Hello = require('hello').Hello;
> Hello('world');
Hello world correctly outputs "Hello world".
Next we publish it to NPM.
First of all, we need to have an NPM account. You can use npm adduser to register one:
$ npm adduser
Username: elmerzhang
Password:
Email: freeboy6716@gmail.com
Three simple steps, one NPM User registration is successful.
Finally, return to the hello root directory and execute npm publish. If there are no error messages, then the publication is successful. Go to http://search.npmjs.org/ and take a look. Your module should already be displayed in the "Latest Updates" column.
At this point, a NodeJS module has been successfully published to NPM. You can then install your module through npm install anywhere you can access the npm library.
 Vercel是什么?怎么部署Node服务?May 07, 2022 pm 09:34 PM
Vercel是什么?本篇文章带大家了解一下Vercel,并介绍一下在Vercel中部署 Node 服务的方法,希望对大家有所帮助!
 node.js gm是什么Jul 12, 2022 pm 06:28 PM
gm是基于node.js的图片处理插件,它封装了图片处理工具GraphicsMagick(GM)和ImageMagick(IM),可使用spawn的方式调用。gm插件不是node默认安装的,需执行“npm install gm -S”进行安装才可使用。
 聊聊Node.js中的多进程和多线程Jul 25, 2022 pm 07:45 PM
大家都知道 Node.js 是单线程的,却不知它也提供了多进(线)程模块来加速处理一些特殊任务,本文便带领大家了解下 Node.js 的多进(线)程,希望对大家有所帮助!
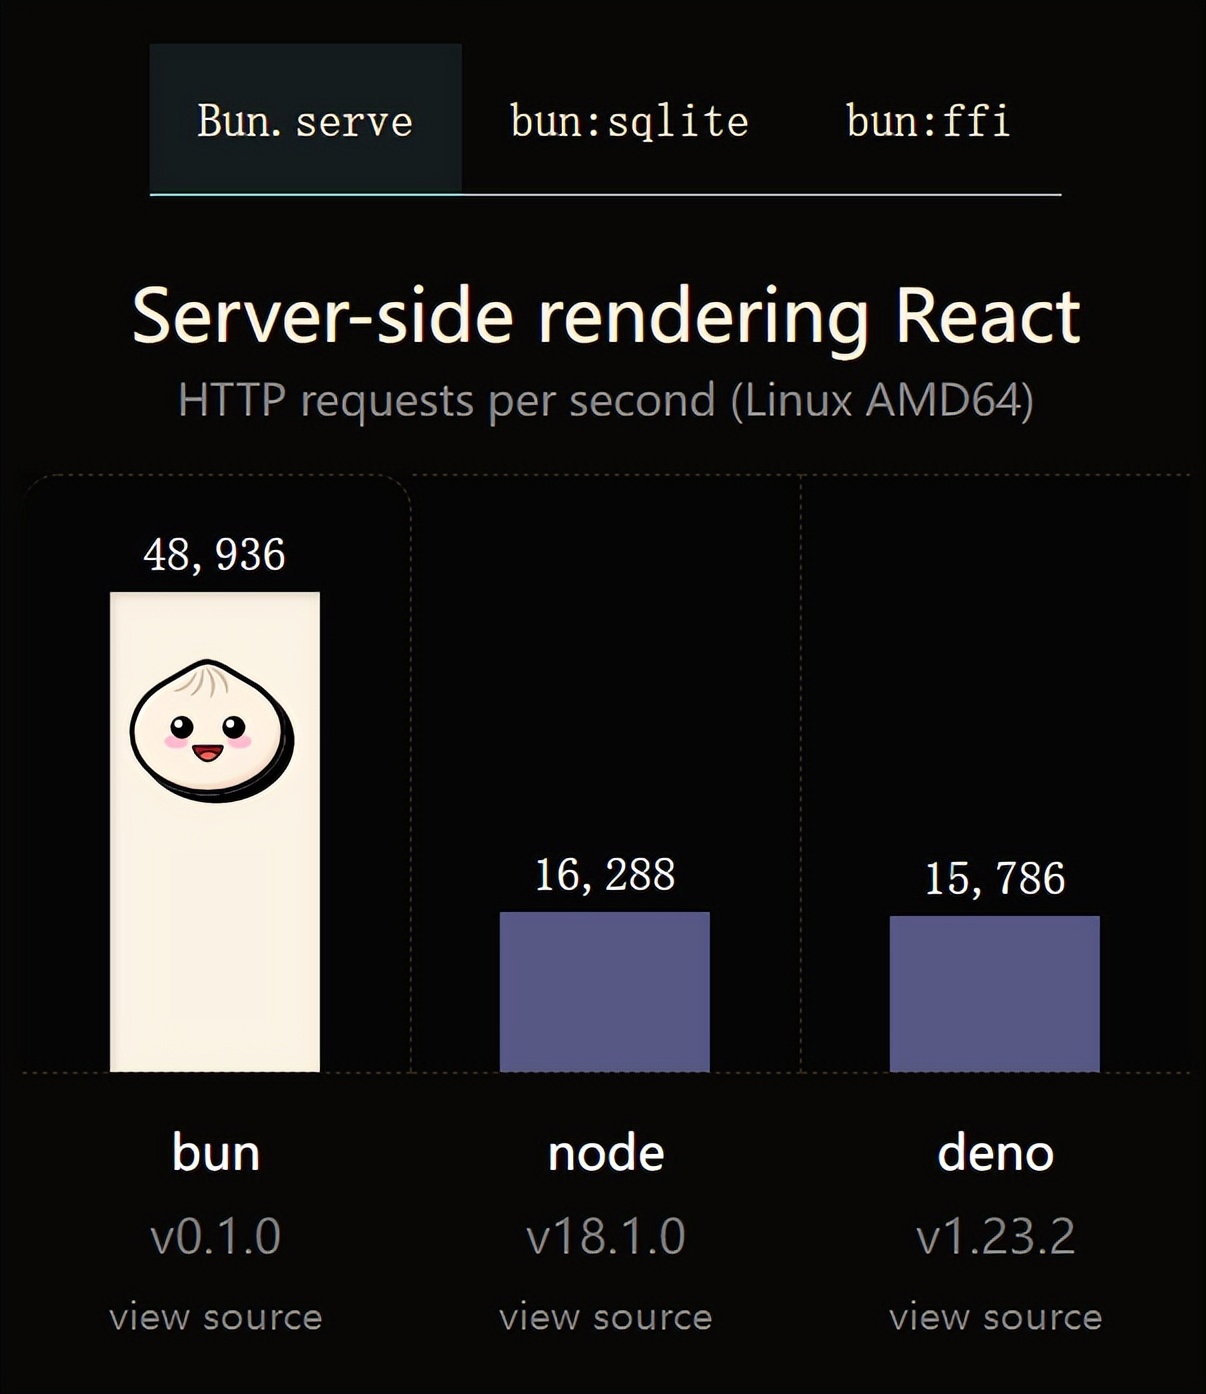 火了!新的JavaScript运行时:Bun,性能完爆NodeJul 15, 2022 pm 02:03 PM
今天跟大家介绍一个最新开源的 javaScript 运行时:Bun.js。比 Node.js 快三倍,新 JavaScript 运行时 Bun 火了!
 nodejs中lts是什么意思Jun 29, 2022 pm 03:30 PM
在nodejs中,lts是长期支持的意思,是“Long Time Support”的缩写;Node有奇数版本和偶数版本两条发布流程线,当一个奇数版本发布后,最近的一个偶数版本会立即进入LTS维护计划,一直持续18个月,在之后会有12个月的延长维护期,lts期间可以支持“bug fix”变更。
 node爬取数据实例:聊聊怎么抓取小说章节May 02, 2022 am 10:00 AM
node怎么爬取数据?下面本篇文章给大家分享一个node爬虫实例,聊聊利用node抓取小说章节的方法,希望对大家有所帮助!


Hot AI Tools

Undresser.AI Undress
AI-powered app for creating realistic nude photos

AI Clothes Remover
Online AI tool for removing clothes from photos.

Undress AI Tool
Undress images for free

Clothoff.io
AI clothes remover

AI Hentai Generator
Generate AI Hentai for free.

Hot Article

Hot Tools

Zend Studio 13.0.1
Powerful PHP integrated development environment

Notepad++7.3.1
Easy-to-use and free code editor

Atom editor mac version download
The most popular open source editor

SAP NetWeaver Server Adapter for Eclipse
Integrate Eclipse with SAP NetWeaver application server.

MinGW - Minimalist GNU for Windows
This project is in the process of being migrated to osdn.net/projects/mingw, you can continue to follow us there. MinGW: A native Windows port of the GNU Compiler Collection (GCC), freely distributable import libraries and header files for building native Windows applications; includes extensions to the MSVC runtime to support C99 functionality. All MinGW software can run on 64-bit Windows platforms.


