


The Siege Part 1 is the first of many gargantuan chapters in DOOM: The Dark Ages, giving you a huge battlefield to explore. Though, as is to be expected, this battlefield is flooded with demons, Hell Portals, and other hazards that the Slayer will need to take care of with his impressive arsenal of weaponry.
With the chapter being so large, it’s relatively easy to miss secret areas, collectibles, and in The Siege Part 1’s instance, you might even miss a new weapon. To prevent that from happening, however, here’s our DOOM: The Dark Ages The Siege Part 1 walkthrough.
To see this content please enable targeting cookies.DOOM The Dark Ages Siege Part 1 walkthrough
Throughout the Siege - Part 1 chapter in DOOM: The Dark Ages, you’ll be looking for the following:
- 11 Secrets
- 2 Codex Entries (Collectible)
- 2 Toys (Collectible)
- 1 Weapon Skin (Collectible)
- 1 Demonic Essence (Health)
- 1 Demonic Essence (Ammo)
- 4 Rubies
As we keep reminding you in these walkthrough guides, the map is your best friend in DOOM: The Dark Ages. Open the map regularly to see any nearby markers for collectibles and secret locations, and you can also track your progress on the right-hand side of the map!
Secret #1
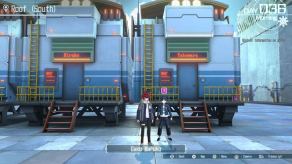
At the very beginning of the Siege Part 1 chapter, follow your quest objective. You’ll soon come to a new mechanic – an Energy Node – which requires you to throw your Shield at it to open the gate in front of you. Do this, and continue to follow your quest marker to the Battlefield.
You’ll get a new weapon just before you pass the point of no return and are met with your first Hell Gate.
Our first secret for Chapter 6 - The Siege Part 1 is found in a waterfall a short walk to the left of the first Hell Gate, just behind one of the Tank enemies (who you can easily destroy by parrying its attacks).

From the Hell Gate, go left – following the river – and you will see both the Tank and waterfall in no time (shown above). There’ll be a Life Sigil to grab here, and a super large tentacle enemy to be wary of.
Secret #2 and Collectible #1
From the above location (the waterfall), take a right and keep going right until you see a pillar with a blue flame atop it. Take a closer look, and you’ll see a small alcove containing a locked gate that requires the Secret Key.

Where is this Secret Key? Well, if you’re facing the locked gate and do a U-turn, there’s a small hill to walk up. The Secret Key is very conveniently placed here.

Grab it and use it to unlock the gate, collecting your second secret location and first collectible, the Toy Slayer.
Collectible #2
Our second collectible, the Toy Mancubus, is found atop a hill under a gargantuan statue, so they’re hard to miss.
From where you just grabbed the Secret Key, look outwards off the edge of the small cliff. Take a left through the enemy camp here, and keep going straight ahead until you come to two large Titans and a Vagary enemy. Kill the Vagary and the surrounding fodder.

Afterwards, continue straight ahead (though, there’s a Gold Chest in the corner to the left here that you may want to grab before continuing) and right, and you’ll see the huge statue. The Toy Mancubus collectible is just beneath it.
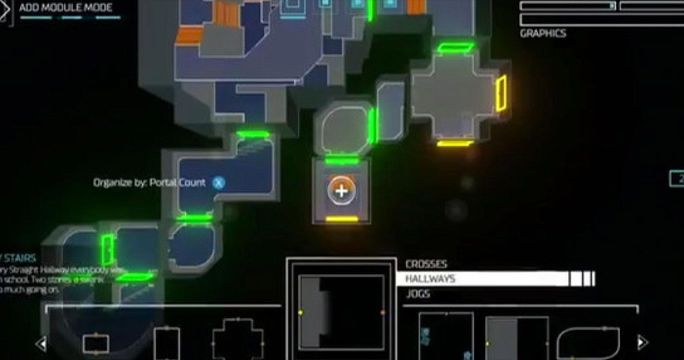
If you’re lost, which is understandable given that this level is a bit of a maze, I’ve drawn the route from the Secret Key to this collectible on the above map screenshot.
Collectible #3
From where you have just grabbed the Toy Mancubus, take a look at your map. You should see a Codex right beside you!

Jump from this small cliff to the Codex to grab it.
Secret #3
Jump down again from where you grabbed the Codex and we’re in a swampy area now. Stick to the gates on your left and go straight ahead, while keeping a look out for a huge blue flag with some blue lights beside it (shown below).

You can actually dive (or fall, like I did) into a hole in front of the flag. Swim through the following cave to collect our third secret location, some loot, and a Gold Chest at the end of it.
Once you swim back out, climb the wall to your left (behind the large Tentacle enemy) and follow your quest marker towards a second nearby Hell Portal. The gate leading to this Hell Portal (and your quest marker) will actually be locked until you handle the enemy encounter just outside of it, as a heads up.
Once inside, you’ll also need to tackle a fight with a Hell Knight. Afterwards, a Gore Portal will be spawned that leads to the Hell Portal. Off you go!
Here’s a map of where to go to reach the second Hell Portal from the third secret location, in case you’re lost:

Inside this Gore Portal, you’ll see the Hell Portal up ahead. The gate in front of you will quickly lock, however.
Secret #4
First things first, head to the right of the locked gate and Shield Bash through the door here. In the following room, you should see two crates hanging from the ceiling, with Hot Metal holding them up.

Shield Throw at the Hot Metal to drop the crates, and then climb atop the one you fired your Shield at. U-turn, and throw your Shield at the Flesh Node now to reach another platform.

There’s a bridge here that you can drop by Shield Bashing it. Now, instead of running straight ahead, across the bridge, look for an opening to the right of the bridge.

You’ll need to jump on top of the crate in front of the opening to reach it. There’s some Gold and a Gold Chest here (which will see you unlock the fourth secret location as you grab it), as well as an Energy Node you can throw your Shield at to allow you to enter the start of the area again.
You can then return to the bridge and climb the wall at the end of it, then pull the lever at the end of the bridge!
Secret #5
Jump off the ledge with the lever on it, and you’re back at the entrance of the Gore Portal again. Facing the now-unlocked gate, take a right before going towards the Hell Portal.
There’ll be a small pool here. Jump in and swim to the opposite end while avoiding the fiery jets and projectiles. Prepare for some enemies on the other side of the pool, and once you reach another locked gate, look up. You know the drill! Sling your shield at the green Flesh Node and go up!

At the top, there’ll be another lever for you to pull.
Now, go ahead and kill the cultists downstairs – destroying the Hell Portal – and you’ll be returned back to the battlefield again. Now, we can actually go about tracking down our fifth secret location!
That said, there is a nearby Ruby worth grabbing if you fancy hunting down and destroying three hidden wolf statues. If that takes your fancy, here’s our The Siege Part 1 wolf statue location guide.
Demonic Essence Upgrade (Armor)
Up next, we want to go and destroy the next Gore Portal; the one we’re currently closest to after clearing the previous cave and grabbing secret area five.
There’ll be a Leader Pinky Rider here, meaning you’ll want to defeat the surrounding fodder to reduce its shields before eventually honing in on it. Upon defeating it, you’ll earn the Demonic Essence Armor Upgrade for this chapter, and you will have destroyed the third Hell Portal. Just two more to go!
Secret #6 and #7
Up next, we want to go towards the fourth Hell Portal. More specifically, this is the smaller one of the two remaining Hell Portals/quest objectives on your map. However, we’ll be stopping by a cave along the way (see below).

Once you arrive at the cave marked on the above map, you’ll need to deal with some enemies outside of it before it is unlocked. After they’re dealt with, head on inside where you’ll find a locked gate in need of a Secret Key. Fortunately, we grabbed this earlier, so you can go ahead and open it. This location – and the Ruby inside – is our sixth secret area for the chapter!
Now, if you follow the Gold at the back of this cave, you’ll come to a Flesh Node that you can Shield Throw at. Do this, then jump on the elevator platform ahead of you to open the second gate in the cave.

Go through the gate, climbing to the upper level and eventually, outside. If you then take a right outside, you’ll find our seventh secret location and a Gold Chest. Don’t jump down from here just yet.
Collectible #4
From the cave exit, look outwards, and you should very quickly see a nearby Codex glowing orange. It's on an island that we can jump to from the platform we’re currently on.

If you’re struggling to find it, open up your map and look for the Codex icon to give you an idea of what direction to look in.
Secret #8
After grabbing the Codex, continue towards the closest (and smallest) quest objective, which requires you venturing into another cave. To access the cave, however, you will need to defeat some demons outside of it first.

Once inside the cave, clear out the enemies, and you’ll be given another blue Gore Portal to jump into. This delivers you to a second temple with cultists guarding a Hell Portal we need to destroy.
The deal with this temple is that we ultimately need to remove the energy field in the centre of the room by standing on three illuminated platforms around the area. We’ll need to do a little bit of Shield Throwing first, though!
Inside the temple, head left and Shield Throw at the Energy Node to open the following gate. Keep left again, and once inside the room with the sarcophagus, interact with the terminal to the side of it.
Stand on the illuminated platform in the following room to reveal some Hot Metal straight ahead of you: Shield Throw at this.

Exit the room and this time, go straight ahead to the locked gate with a wolf statue beside it. Look to the right of these to see two crates you can climb up to reach another section of the temple (shown below).

After climbing the crates and going over the wall, Shield Throw at the Hot Metal to your right to open a gate leading to the beginning of the temple. On your left, however, there’s a barred up opening with a purple shield sigil on it that you can Shield Bash through. This is our eighth secret location, and there’ll be some Gold here!

After grabbing the gold, exit the room and stand on the very first illuminated platform. Ahead of you, Hot Metal is revealed again (see below). Shield Throw at it.

Now, we’ve one more platform left to activate.
Go into the one section of the cave that has a red wire coming from it still. Take a right into the room with the wolf statue, and to the left of the statue, there is another terminal to interact with (see below).

This activates an energy jet in the previous room. Use it to reach the upper level. Here, you’ll find a Life Sigil and our final platform. You know the drill by now; stand on it and Shield Throw at the Hot Metal ahead of you.
You’ll now be able to retrieve the Chainshot weapon from the centre of the room. Some enemies will spawn now, and a gate leading to a Hell Portal – and the multiple cultists controlling it – will be opened. Kill the cultists to be returned to the battlefield. Not much more to go now!
Secret #9 and #10
We’ve only one objective left on our map now. That said, there is one more cave we need to explore before wrapping this chapter up.
Make your way towards the next quest objective but keep left, following the route on the below map to reach a wall you can climb into a cave.


Inside the cave, dive into the pool ahead of you and head left. There’s a wall here you can climb to exit the water. Shield Bash into the following room, then Shield Throw at the Energy Node up ahead to open and pass through the gate here.
There’ll be a Terminal to interact with in the next room, though the gate to the entrance is now locked. This means our only option is to dive into the water that is between the rooms, which will lead us to our ninth secret area and a statue holding a Ruby. We aren’t finished with this cave just yet, though!

Back at the cave entrance, facing the water, take a look to your left (shown above). There’s a path here that’s easily missed! Follow it – using the Secret Key we collected earlier to unlock the gate along the way – to reach our tenth secret area and retrieve a new Weapon Skin.
Secret #11 and Demonic Essence Upgrade (Health)
You can now exit the above cave and make your way to the final quest objective on your map, but before destroying the Hell Portal here, be sure to fight the Vagary behind the church (marked on the below map).

After defeating the Vagary, another blue Gore Portal will spawn inside one of the alcoves here. Head on inside to unlock the eleventh and final secret for this chapter upon entering.
Fire your Shield at the Energy Node on the right-hand side of the room, then Shield Bash into the following corridor. Follow it round to eventually come to a crate you can Shield Bash; climb this once it has been moved, and then climb up the wall beside it.
Shield Bash through the next opening to find a Gold Chest, and Shield Throw at the upcoming Hot Metal to find yourself at the beginning of the temple again.
To then exit the temple, climb the crate you moved earlier and interact with the panel to the right-hand side (instead of going through the Shield-Bashed opening this time). This opens a gate leading back outside.
You can now approach the quest objective and destroy the final Hell Portal. Defeat the Mancubus here to receive the Demonic Essence Ammo Upgrade for this chapter, and you can finally leave the battlefield!
For more on DOOM: The Dark Ages, take a look at our review. Our Chapter 7 - Siege Part 2 walkthrough will be available soon!
The above is the detailed content of DOOM The Dark Ages Siege Part 1 walkthrough. For more information, please follow other related articles on the PHP Chinese website!

 Day 31-40 Walkthrough - The Hundred Line: Last Defense AcademyMay 13, 2025 pm 03:16 PM
This walkthrough details the events of Days 31-40. Day 31: Begin in the Cafeteria, speaking with Nozomi. Your fire-extinguishing ability improves, granting access to new exploration areas and resources. Days 32-34: Enjoy free time in the morning and
 Day 1-10 Walkthrough - The Hundred Line: Last Defense AcademyMay 13, 2025 pm 03:14 PM
This is a walkthrough for a game, likely a visual novel with tactical combat elements. Let's rewrite it for clarity and flow, while preserving the image locations and formats. A Comprehensive Walkthrough: [Game Title Here] This guide details the ev
 Giving Gifts Guide - The Hundred Line: Last Defense AcademyMay 13, 2025 pm 03:13 PM
In your free time, shower your characters with gifts! This serves a dual purpose: boosting their grades and enhancing their affinity during subsequent playthroughs. Higher grades are crucial for upgrading character skills, team structures, and enhan
 DOOM: The Dark Ages: 8 Combat TipsMay 13, 2025 pm 02:18 PM
While Doom: The Dark Ages features a world that encourages exploration, stuffed with secrets, lined with collectibles, and littered with lore, we know why you are actually here. You want to rip and tear! While some people may assume that you play any
 DOOM: The Dark Ages - Every Secret And Collectible In The Village Of KhalimMay 13, 2025 pm 02:05 PM
The Village Of Khalim is the opening stage in Doom: The Dark Ages. As such, it will walk you through a number of basic gameplay elements. You'll learn how to parry, master melee attacks, and generally get to grips with how to stomp out the armies of
 DOOM: The Dark Ages - Every Secret And Collectible In HebethMay 13, 2025 pm 02:02 PM
Hebeth is, for all intents and reasons, the first real stage in Doom: The Dark Ages. While you'll already have engaged in a little treasure hunting at this point, the amount of secrets, collectibles, and gold present in Hebeth is a huge step-up.

 How to get a wet carrot in Grow a GardenMay 13, 2025 pm 12:02 PM
How to get a wet carrot in Grow a Garden on Roblox is something you might have already achieved without realizing what happened. Wet is a unique status that only pops up in specific circumstances, and those circumstances are entirely out of your cont


Hot AI Tools

Undresser.AI Undress
AI-powered app for creating realistic nude photos

AI Clothes Remover
Online AI tool for removing clothes from photos.

Undress AI Tool
Undress images for free

Clothoff.io
AI clothes remover

Video Face Swap
Swap faces in any video effortlessly with our completely free AI face swap tool!

Hot Article
Hot Tools

MinGW - Minimalist GNU for Windows
This project is in the process of being migrated to osdn.net/projects/mingw, you can continue to follow us there. MinGW: A native Windows port of the GNU Compiler Collection (GCC), freely distributable import libraries and header files for building native Windows applications; includes extensions to the MSVC runtime to support C99 functionality. All MinGW software can run on 64-bit Windows platforms.

Dreamweaver Mac version
Visual web development tools

MantisBT
Mantis is an easy-to-deploy web-based defect tracking tool designed to aid in product defect tracking. It requires PHP, MySQL and a web server. Check out our demo and hosting services.

WebStorm Mac version
Useful JavaScript development tools

Zend Studio 13.0.1
Powerful PHP integrated development environment

