


How to easily add and manage fonts when using Microsoft Word on Mac? This article will provide you with detailed steps to help you get started quickly.

Word for Mac does not include a standalone font library, it uses system fonts. Therefore, to add a new font, you need to install it into the macOS system first. After installation, these fonts are available in Word and other applications.
Use the font management tool Typeface
With Typeface, you can easily preview and manage a large number of beautiful fonts. Typeface is available on the Setapp platform.
Free trial security test
Steps to Add Fonts to Word on Mac
macOS Ventura (the latest version of macOS) is easier to manage fonts, thanks to the built-in Font Book application (Font Book), which helps you systematically organize and add fonts.
Here are the detailed steps:
| What needs to be done? | How to operate |
|---|---|
| Word is missing the font I need | Download fonts from Google Fonts and add them to the font list on your Mac. |
| I want to add fonts to font booklet | Open the font folder in Finder, right-click and select Open with > Font Book, and then click Install. |
| I don't know where to download the font | You can access Google Fonts, or design custom fonts with Glyphs Mini. |
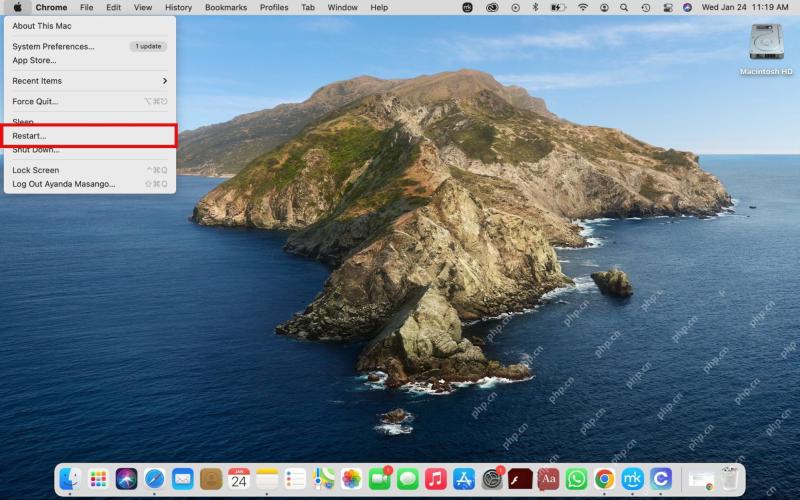
| My new font is not showing in Word | Restart Word or Mac to refresh the font list. |
| I'm not sure which font to use | Use Typeface's preview and tags to compare and organize your choices. |
| I want to delete the font | Open the Font Book > Select Fonts > Edit > Delete to uninstall it. |
Gradually import fonts
It's easier than you think to add your favorite fonts to Word on your Mac, but it's not clear at a glance.
How to add fonts in Word for Mac
Fonts are like clothing for text – they have to fit your style.
If you are looking for fonts that are not installed on your Mac, Google Fonts is a great place to start. In this guide, let's say we want to add Google's Playwrite Norge font.
Operation steps:
- Go to Google Fonts and search for Playwrite Norge (or whatever font you need).
- Click the "Get Font" button in the upper right corner of the font page.
- Click "Download All".
- A ZIP file will be saved to your Downloads folder. Find it and double-click to unzip.

Add fonts to font booklet
Your font is unzipped and ready to be officially unveiled on your Mac. Here is how to add it to the font booklet:
- Go to the Downloads folder in Finder, open the font folder, and find the OTF or TTF file.
- Hold the file with two fingers (or right-click) and select Open with > Font Book.

- Click "Install".

- Open the font booklet and check if your font is installed in the My Fonts section.
Tip: The font booklet does not support ZIP files, so decompression is necessary. If your font fails to load, double check if it is decompressed and the format is supported.
How to add custom fonts on your Mac
Feel creative? Make your own font! If you are ready to become a name pose designer, let me introduce you to Glyphs Mini – the ultimate lightweight Mac font editor. It has all the features: stylish vector editing toolkit, curvature control, coordinate panels, filters and more. You can edit existing fonts (such as OTF or TTF files), or create completely unique content from scratch.
Here is how to convert your masterpiece to fonts available in Word:
- Install and open the app > Customize your fonts.
- When you are ready, click File > Export in the menu bar.
- Select your export target and save your font file.
- Add your shiny new font to the font booklet (continue reading these steps).

Once your font is in the font book, Word will automatically recognize it.
Tip: Restart your Mac if the font doesn't show up right away - sometimes even Word needs a little push to catch up with your progress (it took me 30 minutes to re-download the font to find out, haha).
Using fonts in Word
Now that your font is in the font booklet, it's time to show it in Word. Here is the way to get started:
- First, close Word if it is turned on.
- Restart Word.
- Click the Font drop-down menu. If all goes well, your new font should work.

Not found? don’t worry. Restart your Mac to push the system a little bit and the font should appear like magic.
That's it! Whether you’re working on a school project, writing your next viral blog post, or just writing a cute love letter, your font game will be officially upgraded.
Please read also:
- Mac default fonts
- How to edit fonts on your Mac
- Embed fonts into PDFs on Mac
- How designers use Setapp app
Additional steps: Manage and preview fonts with Typeface
If you take fonts seriously, Typeface is the application you would never expect. I stumbled upon it while obsessed with finding better ways to manage my growing collection of fonts and let me tell you – it’s a game-changer tool.
Typeface is more than just a font manager. It's a visual playground for anyone who loves design or just wants the font to look as good as possible. The app's gorgeous tile interface allows you to preview all fonts at a glance. It's like window shopping, but for typography enthusiasts.
Here is how to add fonts in Typeface:
- Open Typeface and click the plus sign “ ” icon in the lower left corner.
- Select Import Fonts and select the font file you have unzipped.
- Your fonts are now available for preview, markup and use.

How to uninstall fonts on your Mac
Whether you downloaded fonts from Google Fonts or designed by yourself, all fonts are in one location: Font Booklet. If your font collections become difficult to manage, here are how to uninstall them:
- Open the font book. You can find it via Spotlight (Command Space, then type in the font booklet).
- Scroll through the list or use the search bar to find the font you want to delete.
- Right-click Font > Delete.

Also, if you want to hide certain fonts without completely uninstalling them (so they won't show up in Word or other apps), you can deactivate them:
- Open the font book.
- Click the font you want to disable.
- Deactivate: Go to Edit > Deactivate and click "Disable Fonts" to confirm.
Why the installed fonts are not displayed in Word on Mac
When I started experimenting with fonts for my book blogs and short stories, I had a lot of problems – blurred text, unrecognized files and the occasional “Why doesn’t this work?!” crash.
Over time, I have mastered some tips to make the whole font process smoother:
| Frequently Asked Questions | Please try the following! |
|---|---|
| Fonts are not displayed in Word | 1. Close Word and restart it to refresh the font list. 2. If the font still does not appear, restart your Mac. 3. Make sure the font has been added to the font booklet and is not compressed. |
| Font display blurry or distorted | 1. Use high-quality font formats such as .ttf or .otf. 2. Check the resolution settings in the application or system. |
| Cannot install fonts in font booklet | 1. Confirm that the font file is decompressed and the format is supported. 2. Try opening the font file in Typeface or other font manager to check if the font file is corrupted. |
| Fonts only work partially | 1. Verify that all font files (for example, bold, italic) in the font family have been added to the font booklet. 2. Reinstall the fonts and restart the Mac. |
| Fonts cause application to crash | 1. Remove the font in question from the font booklet. 2. Test the font in another application (such as Typeface) to see if the problem is specific to the application. 3. Update macOS to the latest version for better font compatibility. |
| Font license issues | Use free, authorized fonts from trusted sources such as Google Fonts to avoid legal issues. |
How to add fonts to Word on Mac [Solved]
Fonts can completely convert a normal page into something that feels unique. Adding fonts in Word on Mac is not complicated: once they are in the font book, they are available in all applications. If the font does not appear immediately, remember to close and restart Word.
If you want to organize your font collection or try new fonts, apps like Glyphs Mini and Typeface will make your life easier. The best part? You can try these apps along with over 250 other apps with Setapp free 7-day trial and find the one that works best for you. So, go ahead – download these fonts and try it out and let your document shine. You can do it!
FAQ
How to add fonts in Microsoft Word for my Mac?
To add fonts in Word on your Mac, you first need to download the font and add it to the font booklet. The method is as follows:
- Open the font booklet and click the “ ” icon.
- Select the font file you downloaded.
- Once added, restart Word to view the new fonts in the drop-down menu.
Why is my font not showing in Word on my Mac?
If your font is not displayed, make sure it has been added to the font booklet and that the format is supported, such as .ttf or .otf. Restart Word and if the font still does not appear, try restarting your Mac to refresh the system's font database.
Where are Microsoft fonts on Mac?
Microsoft fonts are located in the "Fonts" folder on the system, which you can access through the Font Book application. These fonts are automatically used in Word and other applications that support system fonts.
The above is the detailed content of Comprehensive guide: How to add fonts to Word on your Mac. For more information, please follow other related articles on the PHP Chinese website!

 How to use Photoshop and Photoshop alternativesApr 15, 2025 am 11:39 AM
Adobe Photoshop: The Industry Standard and its Alternatives Adobe Photoshop remains the gold standard for raster image editing, a professional's choice for over three decades. Its influence is undeniable, shaping nearly every subsequent image editor
 How to partition hard drives on Mac | A complete guideApr 15, 2025 am 11:20 AM
This guide helps you master Mac hard drive partitioning, whether for better file organization or dual-booting operating systems. Fear not data loss; we'll cover backups! Why Partition? Organizing files, installing Windows, or simply improving data
 Best Cloud Storage for Mac: Which Online Storage Choose for Your MacBook?Apr 15, 2025 am 11:12 AM
Must-have cloud storage for Mac computers: space expansion and cross-device access Cloud storage services not only effectively free up space in Mac hard drives, but more importantly, it allows you to access files on almost any connected device. For example, you can create a file on your Mac and then access it on your iPhone. Recommended best cloud storage for Mac computers There are a wide range of cloud storage services on the market. Here are some of the ones we recommend: iCloud Google Drive Microsoft OneDrive Sync.com Dropbox Icedrive MEGA 1. iCloud For many Apple users, iCloud is a natural first choice. All modern
 MacBook Microphone Not Working: How to Fix it on Mac Air/Pro?Apr 15, 2025 am 11:06 AM
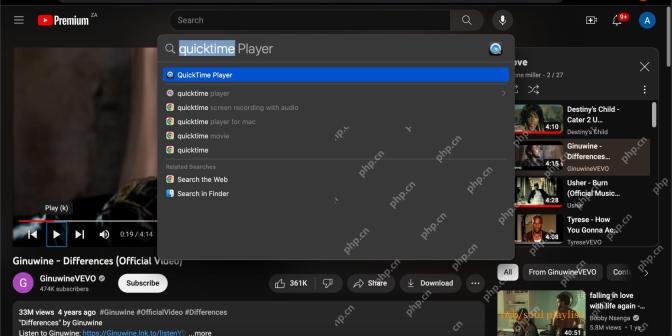
Troubleshooting Your MacBook's Uncooperative Microphone: A Step-by-Step Guide Experiencing audio issues with your MacBook's microphone? Whether it's failing during a QuickTime recording, a FaceTime call, or a crucial Zoom meeting, this guide provide
 An Error Occurred While Preparing the Installation: What Is It & How to Fix?Apr 15, 2025 am 11:02 AM
During the macOS installation process, you will sometimes encounter the prompt of "an error occurred while preparing for installation", which will cause installation delays. This article will introduce a variety of solutions. "An error occurred while preparing for installation" means that macOS update failed, which could be caused by unstable network connections, incorrect date and time settings, or Apple server issues. Causes that cause this error can include: date and time mismatch (especially if Apple is not selected as the date and time source), installation media corruption, or Mac hardware issues (e.g., the disk you choose to install macOS is empty). Here is a solution to this error: Check device compatibility: Make sure your Mac model is compatible with the version of macOS to be installed. Apple supports website columns
 How to access your Mac remotely: Complete tutorialApr 15, 2025 am 10:58 AM
Remotely Access Your Mac: A Comprehensive Guide Working remotely is now the standard, making remote Mac access more crucial than ever. Apple simplifies this process, and with helpful third-party apps, it's surprisingly easy. This guide covers vario
 What is FileVault disk encryption and how to use itApr 15, 2025 am 10:56 AM
FileVault: Your Mac's Data Fortress – A Comprehensive Guide FileVault, as its name suggests, is macOS's built-in data vault, providing robust encryption for your entire startup disk. In today's digital landscape, data security is paramount, especia
 How to fix 504 gateway timeout errors on MacApr 15, 2025 am 10:42 AM
When visiting the website, all kinds of mysterious mistakes emerge one after another. The most famous one is the 404 error - the error encountered when accessing a web page that does not exist. The common error that ranks second is the 504 error gateway timeout. There are many other error codes in addition. When encountering such errors when loading a website, it is very frustrating for both visitors and brands. Visitors are unable to get the information they need, and brands reduce exposure and alienate their audience. The good news is that the 504 error is controllable to a certain extent. You can maintain your reputation by taking some precautions and learning how to quickly fix 504 gateway timeout issues. But first, let's clarify what exactly does the 504 error gateway timeout mean and why. What is 504 gateway timeout? Every visit


Hot AI Tools

Undresser.AI Undress
AI-powered app for creating realistic nude photos

AI Clothes Remover
Online AI tool for removing clothes from photos.

Undress AI Tool
Undress images for free

Clothoff.io
AI clothes remover

AI Hentai Generator
Generate AI Hentai for free.

Hot Article
Hot Tools

SublimeText3 Chinese version
Chinese version, very easy to use

MantisBT
Mantis is an easy-to-deploy web-based defect tracking tool designed to aid in product defect tracking. It requires PHP, MySQL and a web server. Check out our demo and hosting services.

PhpStorm Mac version
The latest (2018.2.1) professional PHP integrated development tool

WebStorm Mac version
Useful JavaScript development tools

ZendStudio 13.5.1 Mac
Powerful PHP integrated development environment

