
 Mobile Game TutorialMobile Game GuideThe First Berserker: Khazan - Trials Of The Frozen Mountain Walkthrough
The First Berserker: Khazan is a long and exhilarating experience with everything you'd want and need from a soulslike, with splashes of other genres that blend perfectly. Corpse runs, intense boss encounters, engaging combat, unique skills, and much more are present, making it a must-play for any fan of the genre.
3:48
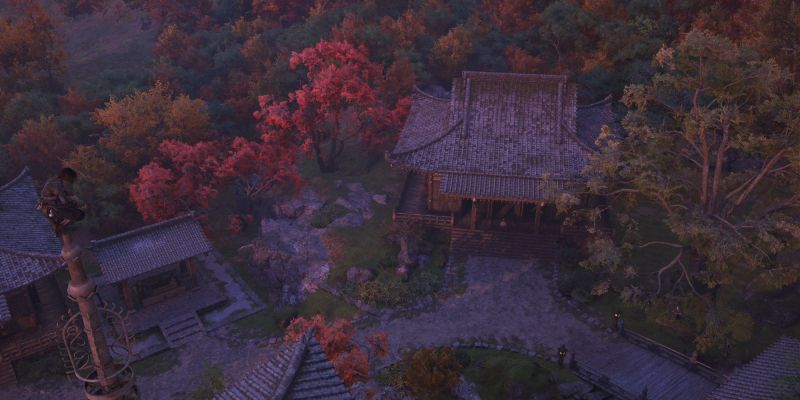
The Trials of the Frozen Mountain mission is where things get interesting. It gives you access to every weapon class available and their respective Skill Trees, culminating with an extremely challenging and rewarding boss fight that will put your new skills to the test!
How To Complete Trials Of The Frozen Mountain

After speaking with Quimuk, climb the set of ladders behind her to the top of the cliffside and activate the Blade Nexus, creating your first checkpoint of the mission. You should have tons of Lacrima to spend from the Yetuga boss fight, so make sure you cash them in before moving on.
As you make your way down the hill from the Blade Nexus, you will see a small trail leading to the right. Follow this path to stumble upon two Wolves and an item on the ground. Take out the Wolves and loot the item to obtain x2 Citrus of Cleansing and x2 Stone!
Continuing Down The Hillside

Following the main path will have you get ambushed by four Wolves, which shouldn't be too hard to deal with. After taking care of them, continue moving forward until you receive the ability to use a Javelin, allowing you to hurl a projectile at enemies in the distance.
There will be a few Monkeys in the distance. Use your newly acquired Javelin to eliminate them. Before going anywhere else, look directly to the left to find a Mysterious Ore behind a wooden scaffolding and smash it. Make your way over to where the Monkeys were and pick up the x3 Plague Resistance Exir!
Exploring The Surrounding Areas

Directly to the right will be a pack of Wolves. Run over to them and eliminate them, then pick up the Small Spirit Ore on the ground. Then, directly across from the Wolves will be a couple of Monkeys standing by a tree. Make your way over to them and take them down, looting the item on the ground for x3 Citrus of Cleansing!
Marching Onward

When you're done exploring the side areas, continue on the main path until you're ambushed by four Wolves. Make quick work of them, then head to the large, empty area to the right and loot the item on the ground for x2 Plague Cleanse Potion. From there, make your way back onto the main path.
In the distance will be a Wild Boar. A well-placed Javelin throw to its head will temporarily stun it, allowing you to run up on it and deliver several uncontested hits, making it substantially easier to take down. With the Boar eliminated, proceed onward until you reach a pathway that splits to the left and right!
Creating A Shortcut

Take the left path to run into more Wolves and a purple item on the ground. Defeat the Wolves and loot the item to receive a Fire Enhancer, then continue following the pathway. At the end will be a rotted tree. Interact with it to kick it over, creating a nifty shortcut back to the Blade Nexus you activated earlier.
Spend your accumulated Lacrima, then head back to where the branching paths were to continue your adventure through the snowy mountainside!
Greatsword Trial

Following the right pathway will lead you to a corpse in the snow, allowing you to Absorb it for some Lacrima and Soul Tear Dust. From there, continue until you reach a graveyard with a Greatsword planted in the snow. Approach the Greatsword to trigger a cutscene.
When the cutscene is finished, you will have the Greatsword equipped, and the first Trial will begin. Several Specters will appear from the gravesites, but they shouldn't be too hard to deal with. This is essentially a tutorial on how to use this weapon type properly. So cut them down to finish the Trial!
Onto The Next Trial

Now that you have the basics of the Greatsword down, you can follow the pathway to the back left of the graveyard into the next area. On your way there, an isolated lot with an item will be on your left. Pick the item up to obtain x2 Vitality Spheres, then continue pushing forward.
You will eventually reach another Blade Nexus, allowing you to spend your Lacrima and relax now that you've found another checkpoint!
Spear Trial Bound

From the newly activated Blade Nexus, there will be two paths, one to the left and another to the right. Take the right path first and follow. You will eventually find a cave tucked away in the wall on the right; enter it to find a Yeti waiting within. Handle it the same way you did in the previous mission.
With the Yeti defeat, loot the item in the cave to obtain x2 Fire Cleanse Potion. Exit the cave and take a right, following it to the end of the walkway. There will be an item at the dead end. Snag it to receive x2 Willpower Orb. From here, head back to the Blade Nexus!
Continuing The Critical Path

Take the left path and follow it until you see a Wild Bear in front of a tree. This fight, like the previous mission, will be pretty challenging. Reflect its attacks and focus on its Stamina Gauge while remaining patient. Being too aggressive here will likely not end well for you.
Now that the Bear is defeated, you can Absorb the corpse on the ground in the arena for a nice chunk of Lacrima and Soul Tear Dust. From here, look toward where you came from to see a pathway to the left. Take this down and follow it until you reach another branching pathway!
Straight Ahead

Continue straight ahead until you see several Monkeys drop down from the ceiling, and use your Javelin to pick them off. Proceed forward and grab the Concentrated Fire Essence, having another Monkey ambush you the moment you pick it up. Swiftly eliminate it and proceed back to the other route!
Back On Track

Head up the incline and follow the pathway until a pack of Wolves ambush you. Finish them off, as you've been doing, then continue onward. You will eventually reach a point where you can either go left or right. Choose the left pathway to find a cave and go inside it.
As you step inside the cave, a wave of Bats will swarm you, guard to avoid taking damage. From here, continue pushing forward until you find an Imperial Knight standing over a corpse. Like always, this fight will be challenging, but you'll handle it as you did the others.
After you have slain the Imperial Knight, look on the left side of the cave to find a Mysterious Ore in a small nook. Smash it, then exit the cave and begin following the main path once more!
Approaching The Trial

As you get back on the critical path and follow it, you will encounter another Wild Boar. Use your Javelin to stun it, and take care of it just as you did the first one. From here, move a bit further until you see a couple of Monkeys by a tree, swiftly take them out, and continue onward.
Cross over the bridge and follow it through until you reach a new Blade Nexus. Activate it, spend your well-earned Lacrima, and let out a sigh of relief that you have a new checkpoint!
Spear Trial

From the Blade Nexus, follow the path out until you reach a corpse and Absorb it to obtain more Lacrima and Soul Tear Dust. Continue forward until you see a Spear sticking in the snow and approach it to activate another cutscene. Once it finishes, you will be wielding the Spear, ready to tackle the Trial.
Like the Greatsword Trial, this is essentially a tutorial on how to use the Spear, having you face a few Specters to get the hang of it. Once you finish the Trial, you will gain access to its Skill Tree. You now have access to all three weapon types in The First Berserker: Khazan!
Preparing For The Next Trial

Now that you have a firm grasp of how to use the Spear follow the path from the Spear Trial until you reach a branching pathway. Take the right path to eventually get to a Chest resting on the side of a cliff. Open the Chest to obtain a Volk Warrior's Helm, Volk Warrior's Vest, and the Veteran's Ring.
If you want, you can drop down and rest at the Blade Nexus you activated just before the Spear Trial. After that, continue following the main path until you reach a bridge with several guards in the area. Use your Javelin to pick them off, then safely proceed across.
Once on the other side of the bridge, head straight until you reach another Blade Nexus. Activate it to get another checkpoint, allowing you to prepare for the next Trial!
Completing The Dual Wield Trial

From the Blade Nexus, head back toward the bridge until you see a cave entrance to the right and enter it, following it the entire way through until you reach a Soldier. Quickly eliminate the Soldier and look to the right to find an archer training their sights on you. Use your Javelin to pick them off. Loot the item on the ground for a Transmutation Shard.
Peek over the edge of the cliffside to notice the solid ground beneath you and a Soldier patrolling it. Perform a plunging attack on him to take them out effortlessly, then proceed forward. There will be an orange item on the ground. Pick it up to obtain a Tear Summon Stone!
Climbing Up To Cliffside

Near the Tear Summon Stone will be a ladder. Take it up to the platform above, which will have another ladder. Use this ladder to get even further up the cliffside. There will be a Soldier here; you can sneak up on him and take him out swiftly or use your Javelin to pick him off.
Follow the pathway out and look to the right to see a corpse on the ground. Absorb it for that sweet Lacrima and Soul Tear Dust, then turn around. There will be a Mysterious Ore on the cliffside to the left. Using your Javelin, hurl it at the Ore to smash it. This is the final Mysterious Ore in this mission!
Dropping Down

Walk past the smashed Mysterious Ore, look down to see a platform, and drop onto it. Follow this pathway down until you're on solid ground in front of a cave. Enter the cave and immediately block, as a swarm of Bats will come flying at you. After shielding the Bats, turn around to find a blue item at the edge of the cave. Pick it up for x3 Assassin's Elixir.
Continue moving through the cave until you're back outside. There will be two Soldiers and a purple item. You can use your Javelin to pick them off or sneak up on the first one and fight the second one head-on. Nonetheless, once they're dealt with, loot the item for an Earth Enhancer!
Scaling The Tower

Continue pushing forward to find a wooden bridge that leads to a tower and several Soldiers. A Soldier wielding a sword and shield will approach you. Deal with them first, and then use your Javelin to take out the archer on the tower. After that, you can safely cross the bridge and make your way toward the tower.
Before scaling the tower, go to the other side of it to find a Chest. Open it up to receive a Volk Warrior's Trousers, Volk Warrior's Gaiters, and the Necklace of Resilience. Now, you can make your way up the tower!
Multiple Pathways

Once you scale the tower, there will be another ladder that leads to the top of a cliffside. Take this ladder up to find multiple pathways. One will lead downward to the left, with the others leading further up the cliffside. For now, follow the path leading down until you see two Soldiers resting at a bonfire.
There will be a standard Soldier here and an Imperial Knight. Focus on the Soldier first, as you can dispatch them relatively quickly, then handle the Knight the same as always. With both eliminated, loot the blue item on the ground for another Soul Tear Dust!
Heading Up

From here, you can take the right pathway and follow it up, ultimately bringing you to an Imperial Centurion. Like the first mission, he will put up a fight and won't go down easy. Utilizing Reflections and punishing his heavier attacks will be the way to go. Don't get too greedy, as he can drain your Stamina and Health in an instant.
With the Centurion defeat, continue up the cliffside until you come across a ladder. Walk over to it and kick it, creating a shortcut to the Blade Nexus you activated earlier. We strongly recommend resting at it and cashing in all the Lacrima you've earned since then!
Dual Wield Trial

Climb back up the shortcut ladder and follow the pathway until you reach the Dual Wield sticking out of the ground. Approach it as you did the others to trigger a cutscene, kicking off the Dual Wield Trial when it's done. Here, you will be fighting Khazan's Abyss, another Specter that won't take too much effort to defeat.
After completing the Dual Wield Trial, continue following the main pathway. There will be a blue item on your right. Pick it up to obtain x2 Vitality Shard. Next, head across the bridge and into the cave to find another Blade Nexus. Activate it for the final shortcut of the mission!
Defeat Blade Phantom

Finally, you're at the mission's boss, the Blade Phantom. This is your first real skill check of The First Berserker: Khazan, so ensure you're prepared before you face him. This encounter consists of two phases and will push you to your limit, forcing you to utilize everything you've just learned to overcome.
If you're struggling to take Blade Phantom down, fear not; we have you covered on that front, too. This fight can be grueling, especially if you don't have a firm grasp on your favorite weapon type yet. But, with some time, effort, and proper strategies, he will be taken down in no time!
4:12
The above is the detailed content of The First Berserker: Khazan - Trials Of The Frozen Mountain Walkthrough. For more information, please follow other related articles on the PHP Chinese website!

 Blue Prince: Storeroom GuideApr 13, 2025 am 11:04 AM
The Storeroom is exactly what it says on the tin—a quiet little dead-end stuffed with basic loot… Really just three useful things sitting around waiting to be picked up.Read More: All Rooms in Blue PrinceWhat the Storeroom DoesAlways contains 1 Key,

 Blue Prince: Patio Room GuideApr 13, 2025 am 10:22 AM
The Patio is your go-to if you want to turn your whole estate into a sparkling little treasure trap. It’s a simple trade: give it 1 Gem, and it politely throws Gems into every Green Room you’ve drafted so far.Read More: All Rooms in Blue PrinceWhat I
 Miidera Temple Lost Pages in Assassin's Creed ShadowsApr 13, 2025 am 10:09 AM
Quick Links Purpose of Temples &

 Blue Prince: Entrance Hall Room GuideApr 13, 2025 am 09:53 AM
The Entrance Hall is your Home Base in Blue Prince. You’ll start here every single day, whether you’re ready or not. It doesn’t change much, but it holds just enough secrets—and just enough doors—to remind you that nothing in this house is ever truly


Hot AI Tools

Undresser.AI Undress
AI-powered app for creating realistic nude photos

AI Clothes Remover
Online AI tool for removing clothes from photos.

Undress AI Tool
Undress images for free

Clothoff.io
AI clothes remover

AI Hentai Generator
Generate AI Hentai for free.

Hot Article
Hot Tools

WebStorm Mac version
Useful JavaScript development tools

Zend Studio 13.0.1
Powerful PHP integrated development environment

DVWA
Damn Vulnerable Web App (DVWA) is a PHP/MySQL web application that is very vulnerable. Its main goals are to be an aid for security professionals to test their skills and tools in a legal environment, to help web developers better understand the process of securing web applications, and to help teachers/students teach/learn in a classroom environment Web application security. The goal of DVWA is to practice some of the most common web vulnerabilities through a simple and straightforward interface, with varying degrees of difficulty. Please note that this software

Atom editor mac version download
The most popular open source editor

Dreamweaver CS6
Visual web development tools

