

 System TutorialWindows SeriesHow to Install Windows 11 Efficiently: A Detailed Guide for a Successful Setup
How to Install Windows 11 Efficiently: A Detailed Guide for a Successful Setup

How to Install Windows 11 Efficiently: A Detailed Guide for a Successful Setup
Installing Windows 11 efficiently requires a clear understanding of the process and proper preparation. Here's a detailed guide to ensure a successful setup:
- Backup Your Data: Before proceeding with any installation, it's crucial to back up your important files and data. You can use an external hard drive or cloud storage services like OneDrive or Google Drive.
- Check System Requirements: Ensure your computer meets the minimum system requirements for Windows 11. Details on this are covered in the next section.
- Download the Windows 11 Installation Media: Visit the official Microsoft website to download the Windows 11 Installation Assistant or create installation media on a USB drive using the Media Creation Tool.
-
Start the Installation Process:
- Open the Windows 11 Installation Assistant and follow the on-screen instructions, or boot from your USB drive by changing the boot order in your BIOS/UEFI settings.
- Choose the installation type: "Upgrade" to keep your files and apps or "Custom" for a clean install.
- Follow the Installation Prompts: The installation will take some time. Your computer will restart multiple times during the process. Follow the prompts to complete the setup.
- Setup and Configuration: After the installation, set up your preferences, including privacy settings, Microsoft account login, and other initial configurations.
- Post-Installation Updates: Once Windows 11 is installed, ensure you install the latest updates to enhance performance and security.
What are the minimum system requirements for installing Windows 11?
To successfully install Windows 11, your computer must meet the following minimum system requirements:
- Processor: 1 GHz or faster with 2 or more cores on a compatible 64-bit processor or System on a Chip (SoC).
- RAM: 4 GB or more.
- Storage: 64 GB or larger storage device.
- System Firmware: UEFI, Secure Boot capable.
- TPM: Trusted Platform Module (TPM) version 2.0.
- Graphics Card: Compatible with DirectX 12 or later with WDDM 2.0 driver.
- Display: High definition (720p) display that is greater than 9 inches diagonally, 8 bits per color channel.
- Internet Connection and Microsoft Account: Windows 11 Pro requires internet connectivity during the initial device setup.
Can I upgrade directly from Windows 10 to Windows 11 without losing my data?
Yes, you can upgrade directly from Windows 10 to Windows 11 without losing your data if you follow these steps:
- Ensure Compatibility: Check if your system meets the minimum requirements for Windows 11.
- Use the Windows 11 Installation Assistant: Download and run the Windows 11 Installation Assistant from the official Microsoft website. This tool will check your system's compatibility and guide you through the upgrade process while keeping your files, applications, and most settings intact.
- Select the "Upgrade" Option: During the installation process, choose the "Upgrade" option to keep your personal files and apps. Be sure to read and follow all on-screen instructions carefully.
- Backup Your Data: Although the upgrade process is designed to preserve your data, it's always wise to back up important files before any major system update to avoid potential data loss due to unforeseen issues.
By following these steps, you should be able to upgrade to Windows 11 from Windows 10 without losing your data. However, always ensure you have a recent backup just in case.
What are some common issues encountered during the Windows 11 installation and how to resolve them?
During the installation of Windows 11, users might encounter several common issues. Here are some of these issues and their resolutions:
-
Installation Stalls or Freezes:
- Cause: This could be due to a slow internet connection, corrupted installation files, or hardware issues.
- Resolution: Ensure a stable internet connection. If the issue persists, restart the installation. If it fails again, consider using a USB installation media instead of the Installation Assistant. Check your hardware for any issues.
-
TPM 2.0 Error:
- Cause: Windows 11 requires TPM 2.0, and if it's not enabled or detected, this error occurs.
- Resolution: Enter your BIOS/UEFI settings and enable TPM. If you're using TPM 1.2, you'll need to upgrade your hardware.
-
Secure Boot Error:
- Cause: Windows 11 requires Secure Boot, which might be disabled.
- Resolution: Enable Secure Boot in your BIOS/UEFI settings. Make sure your boot device is set to UEFI and not Legacy.
-
Installation Fails with Error Code:
- Cause: Various error codes can appear due to compatibility issues, corrupted files, or insufficient space.
- Resolution: Depending on the error code, you may need to free up more space, run the Windows 11 Installation Troubleshooter, or check the Microsoft Support website for specific solutions to the error code you're encountering.
-
Driver Incompatibility:
- Cause: Some hardware drivers might not be compatible with Windows 11.
- Resolution: After installation, visit your hardware manufacturer's website to download and install the latest drivers compatible with Windows 11. Alternatively, Windows Update might automatically install some drivers.
By understanding and addressing these common issues, you can increase the chances of a successful Windows 11 installation.
The above is the detailed content of How to Install Windows 11 Efficiently: A Detailed Guide for a Successful Setup. For more information, please follow other related articles on the PHP Chinese website!

 Fixed: MacBook Pro Booting Black screenMay 14, 2025 pm 04:10 PM
A blank screen (black, blue, or gray) may appear one or more times during the startup process. If you encounter a MacBook Pro booting to a black screen, there might be an issue at play.Experiencing no activity on your MacBook Pro's screen can be one
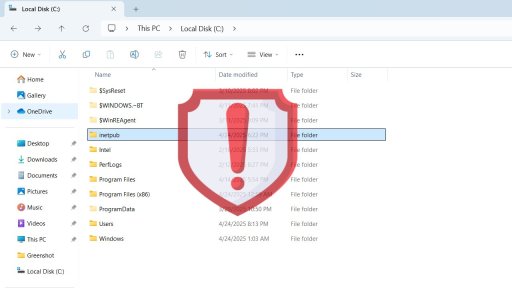 Windows 11's New Inetpub Folder is Hackable. Try This Temporary Fix - Make Tech EasierMay 14, 2025 pm 04:09 PM
We previously discussed how the inetpub folder in Windows is crucial and should not be deleted due to security concerns. Ironically, the presence of this folder poses a security risk in itself. It's surprisingly simple for even non-administrative use
 5 Types of Windows Tools That Do More Harm Than Good - Make Tech EasierMay 14, 2025 pm 04:08 PM
There are numerous Windows utilities that carry out superfluous tasks and can be entirely unnecessary. In fact, they often do more harm than good. This guide highlights 5 such applications and explains why they can be detrimental to your system.Table
 What To Do When Your Apps Aren't Opening on Windows 10/11May 14, 2025 pm 04:07 PM
Experiencing frustration when your apps fail to launch on Windows 10 or 11 can be quite common. Sometimes, apps might crash immediately upon opening, while in other instances, they might not open at all. It's crucial to address these issues promptly
 7 BEST Fix Windows 11 Restart LoopMay 14, 2025 pm 04:06 PM
Dealing with a Windows 11 computer stuck in a restart loop can be irritating and hinder your access to important files or tasks. Such problems often stem from system errors, corrupted updates, or driver conflicts. Thankfully, there are multiple effec
 Why Windows Debloat Scripts Might Do More Harm Than Good - Make Tech EasierMay 14, 2025 pm 04:04 PM
While it's essential to remove unnecessary software from your PC, not all methods are trustworthy. Some developers and GitHub communities offer Windows debloat scripts as a quick solution. However, upon using them, you may discover that they can caus
 Windows Says 'No Internet' But You're Connected : 8 Best FixesMay 14, 2025 pm 04:03 PM
Encountering a “No Internet” message on Windows despite being connected can be quite irritating. This problem may arise due to issues with the network adapter, incorrect DNS settings, or corrupted system files. In this guide, we will delve into the r
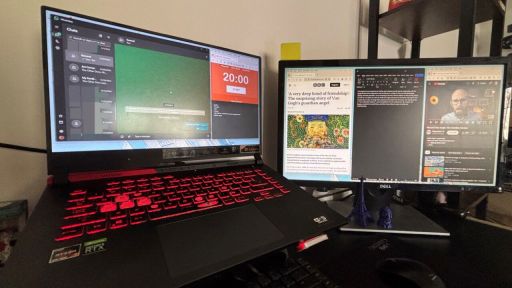 Get the Perfect Dual Monitor Setup on Windows With FancyZones - Make Tech EasierMay 14, 2025 pm 04:02 PM
If you frequently utilize a multi-monitor setup, FancyZones can revolutionize your experience. This utility from Windows PowerToys enables complete customization of your screen arrangements. This guide delves into various FancyZones setups intended t


Hot AI Tools

Undresser.AI Undress
AI-powered app for creating realistic nude photos

AI Clothes Remover
Online AI tool for removing clothes from photos.

Undress AI Tool
Undress images for free

Clothoff.io
AI clothes remover

Video Face Swap
Swap faces in any video effortlessly with our completely free AI face swap tool!

Hot Article
Hot Tools

SublimeText3 Linux new version
SublimeText3 Linux latest version

SecLists
SecLists is the ultimate security tester's companion. It is a collection of various types of lists that are frequently used during security assessments, all in one place. SecLists helps make security testing more efficient and productive by conveniently providing all the lists a security tester might need. List types include usernames, passwords, URLs, fuzzing payloads, sensitive data patterns, web shells, and more. The tester can simply pull this repository onto a new test machine and he will have access to every type of list he needs.

ZendStudio 13.5.1 Mac
Powerful PHP integrated development environment

DVWA
Damn Vulnerable Web App (DVWA) is a PHP/MySQL web application that is very vulnerable. Its main goals are to be an aid for security professionals to test their skills and tools in a legal environment, to help web developers better understand the process of securing web applications, and to help teachers/students teach/learn in a classroom environment Web application security. The goal of DVWA is to practice some of the most common web vulnerabilities through a simple and straightforward interface, with varying degrees of difficulty. Please note that this software

Notepad++7.3.1
Easy-to-use and free code editor

