

Secure Empty Trash on Mac Big Sur: How to Securely Delete Files on MacOS 11?

macOS Big Sur Securely Emptying Trash: A Comprehensive Guide
Apple's removal of the Secure Empty Trash function in OS X El Capitan left many Mac users seeking alternative methods for permanently deleting files. This article explores various techniques to securely empty your Trash on macOS Big Sur, ensuring data irretrievability.
Understanding Secure Empty Trash
Secure Empty Trash, present in older macOS versions, overwrote deleted files with random data, making recovery extremely difficult. Standard emptying of the Trash only removes file location information; the actual data remains on the disk.
Methods for Secure File Deletion on macOS Big Sur
While the dedicated Secure Empty Trash feature is gone, several methods achieve the same result:
1. Keyboard Shortcuts:
- Delete a file: Option Command Delete
- Move to Trash: Command Delete
- Empty Trash: Command Option Shift Delete


2. Finder: Quickly remove files from common locations:
- Open Finder (Command Shift G).
- Navigate to and delete files from:
~/Downloads,~/Library/Caches,~/Documents.


3. Disk Utility: A more thorough approach:
- Open Disk Utility (Applications > Utilities > Disk Utility).
- Select your hard drive.
- Click "Erase," choose "Security Options," select "Secure Erase Mode," and click "Erase."


4. Emptying the Trash (Multiple Methods):
- Method 1 (Quickest): Right-click the Trash icon and select "Empty Trash."
- Method 2 (Visual Confirmation): Open the Trash, click "Empty," or right-click and select "Empty Trash."
- Method 3 (Automated): System Preferences > Advanced > Check "Remove items from Trash after 30 days."


5. Terminal: For advanced users:
- Open Terminal.
- Type
sudo rm -R, drag and drop Trash items into the Terminal window, press Enter, and enter your password.


6. Safe Mode: For files in use: Restart in Safe Mode (hold Shift key during startup), empty the Trash, and restart normally.


7. Third-Party Applications: Utilize apps like MacKeeper's Safe Cleanup for automated trash management.


Choosing the Right Method
The best method depends on your comfort level with technology and your need for speed versus thoroughness. For most users, the Finder method or the simple "Empty Trash" function will suffice. For more secure deletion, Disk Utility or Terminal are recommended. Third-party apps offer convenience for automated cleaning.
The above is the detailed content of Secure Empty Trash on Mac Big Sur: How to Securely Delete Files on MacOS 11?. For more information, please follow other related articles on the PHP Chinese website!

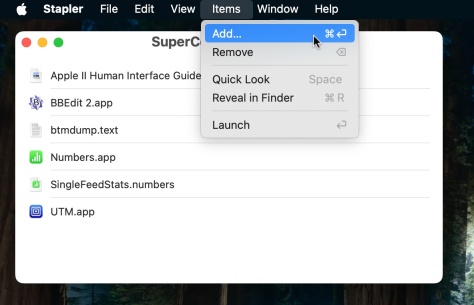 Launch All Apps & Documents Related to a Project with Stapler for MacMay 13, 2025 am 10:37 AM
Longtime Mac users may recall a handy old shareware application for the Classic Macintosh called Stapler, which essentially helped manage projects by grouping a series of apps and documents into a single document that when opened would then launch al
 How to Get Apple Intelligence on Your iPhone, iPad, or MacMay 13, 2025 am 10:32 AM
Apple Intelligence is a set of AI features that Apple is rolling out in beta, and will debut to a larger set of Apple device owners in the fall. Apple Intelligence offers many features from writing and creating text and emails, to taking actions and
 MacOS Sonoma 14.6.1 & Ventura 13.6.9 Released with Bug FixesMay 13, 2025 am 10:25 AM
If you feel like you have spent a significant amount of your time updating system software on your Apple devices lately, you’re in for a treat; another round of system software updates! This time around, Apple has released MacOS Sonoma 14.6.1 alon
 MacOS Sequoia 15 Beta 6 Available for TestingMay 13, 2025 am 10:23 AM
Apple has issued the 6th beta version of MacOS Sequoia for users enrolled in the developer beta testing program. Usually a matching public beta build arrives soon after, which in this case dev beta 6 would be versioned as public beta 4. MacOS Sequoia
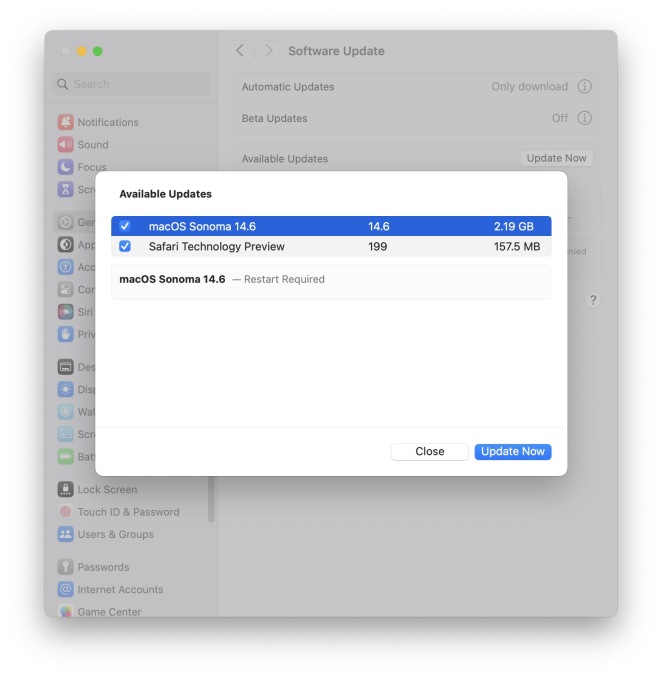 MacOS Sonoma 14.6 Update Released with Bug Fixes & Security UpdatesMay 13, 2025 am 10:20 AM
Apple has released macOS Sonoma 14.6 for Mac users running the Sonoma operating system. The MacOS Sonoma 14.6 software update primarily focuses on bug fixes and security updates for most Macs, however it does include a nice new feature specifically
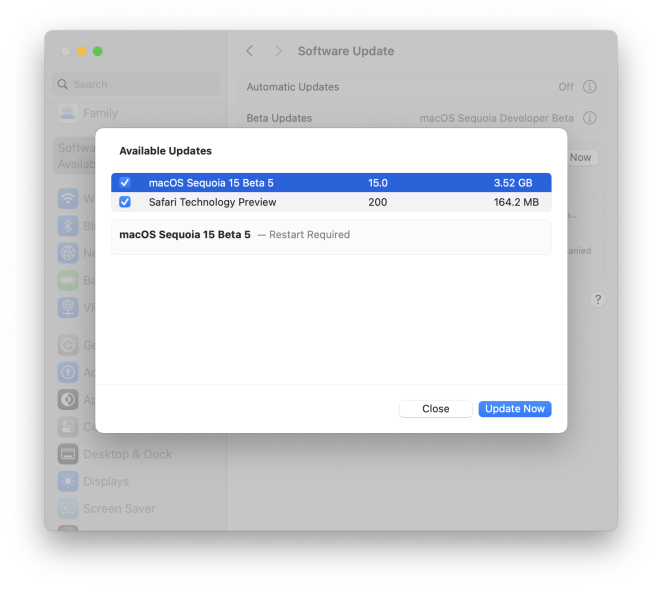 MacOS Sequoia 15 Beta 5 Available to DownloadMay 13, 2025 am 10:06 AM
MacOS Sequoia beta 5 is now available for users enrolled in the developer beta testing program to download and install onto their Macs. MacOS Sequoia beta 5 carries the build of 24A5309e, and usually a new developer beta build is soon followed by a m
 Beta 2 of iOS 18.1, MacOS Sequoia 15.1, & iPadOS 18.1 Released with Apple IntelligenceMay 13, 2025 am 09:49 AM
Apple has released the second beta of iOS 18.1, iPadOS 18.1, and MacOS Sequoia 15.1, each with support for Apple Intelligence AI features, on supported devices anyway. The release of these new beta updates is unusual in that they’re concurrent wit
 How to Uninstall VMWare Fusion on MacMay 13, 2025 am 09:44 AM
You might be aware that VMWare Fusion Pro is now free to download and install, and perhaps you installed it on a Mac to test virtual machines or to play around with, and now you’ve decided you no longer need VMware on the Mac. But VMware Fusion P


Hot AI Tools

Undresser.AI Undress
AI-powered app for creating realistic nude photos

AI Clothes Remover
Online AI tool for removing clothes from photos.

Undress AI Tool
Undress images for free

Clothoff.io
AI clothes remover

Video Face Swap
Swap faces in any video effortlessly with our completely free AI face swap tool!

Hot Article
Hot Tools

Zend Studio 13.0.1
Powerful PHP integrated development environment

SublimeText3 Linux new version
SublimeText3 Linux latest version

DVWA
Damn Vulnerable Web App (DVWA) is a PHP/MySQL web application that is very vulnerable. Its main goals are to be an aid for security professionals to test their skills and tools in a legal environment, to help web developers better understand the process of securing web applications, and to help teachers/students teach/learn in a classroom environment Web application security. The goal of DVWA is to practice some of the most common web vulnerabilities through a simple and straightforward interface, with varying degrees of difficulty. Please note that this software

SAP NetWeaver Server Adapter for Eclipse
Integrate Eclipse with SAP NetWeaver application server.

SublimeText3 English version
Recommended: Win version, supports code prompts!

