


How to Prepare and Upgrade to Windows 11: A Detailed User Guide
Upgrading to Windows 11 can be an exciting move that introduces new features and a refreshed interface. However, it is crucial to ensure a smooth transition by preparing your system adequately. Here’s a detailed guide to help you through the process.
- Check Compatibility: Before proceeding, verify that your device meets the minimum system requirements for Windows 11. You can do this by using the PC Health Check app available on Microsoft's official website.
- Backup Your Data: Back up all your important files and documents to an external drive or cloud storage. This step is vital to prevent data loss in case something goes wrong during the upgrade.
- Update Your Drivers: Ensure all your drivers are up-to-date. Outdated drivers can cause compatibility issues with Windows 11.
- Uninstall Unnecessary Programs: Remove any programs you no longer need to avoid potential conflicts during the upgrade.
- Download the Installation Tool: Go to the Microsoft website and download the Windows 11 Installation Assistant or create a bootable USB drive with the Windows 11 ISO file.
- Start the Upgrade: Run the Installation Assistant and follow the on-screen instructions. If you are using a bootable USB, restart your computer, boot from the USB, and follow the prompts.
- Monitor the Installation: The upgrade process can take some time. Keep your computer plugged in and ensure it is not interrupted.
- Post-Installation Checks: After installation, verify that all your programs and devices work correctly. If you encounter any issues, refer to Microsoft’s support resources or consider rolling back to Windows 10.
What are the minimum system requirements for upgrading to Windows 11?
To upgrade to Windows 11, your device must meet the following minimum system requirements:
- Processor: 1 GHz or faster with 2 or more cores on a compatible 64-bit processor or System on a Chip (SoC).
- RAM: 4 GB or more.
- Storage: 64 GB or larger storage device.
- System Firmware: UEFI, Secure Boot capable.
- TPM: Trusted Platform Module (TPM) version 2.0.
- Graphics Card: Compatible with DirectX 12 or later with WDDM 2.0 driver.
- Display: High definition (720p) display that is greater than 9 inches diagonally, 8 bits per color channel.
- Internet Connection: Microsoft account and internet connectivity are required for Windows 11 Home edition setup.
Can I roll back to Windows 10 if I encounter issues after upgrading to Windows 11?
Yes, you can roll back to Windows 10 if you encounter issues after upgrading to Windows 11, but there are a few things to keep in mind:
- Time Limit: You can revert to Windows 10 within 10 days of upgrading to Windows 11. After this period, the option to roll back will no longer be available.
-
Steps to Roll Back:
- Go to Settings > System > Recovery.
- Under "Recovery options," click Go back.
- Follow the on-screen instructions to complete the rollback process.
- Data and Apps: Your personal files should remain intact during the rollback, but some apps installed after the upgrade might be removed. Always back up your data before attempting a rollback.
What steps should I take to back up my data before upgrading to Windows 11?
Backing up your data is a crucial step before upgrading to Windows 11 to ensure you do not lose important files. Here are the steps to back up your data effectively:
- Identify Important Data: Determine which files and folders are critical, such as documents, photos, videos, and any other personal data.
-
Choose a Backup Method:
- External Hard Drive or SSD: Connect an external storage device to your computer. Use the built-in Windows File History feature or manually copy your files to the external drive.
- Cloud Storage: Services like OneDrive, Google Drive, or Dropbox can automatically back up your files to the cloud. Make sure you have sufficient storage space subscribed.
- NAS (Network-Attached Storage): If you have a home network setup, you can back up your files to a NAS device.
-
Using Windows Backup:
- Go to Settings > Update & Security > Backup.
- Click Add a drive and select your external drive.
- Turn on Automatically back up my files to ensure regular backups.
-
Manual Backup:
- Create folders on your backup device and manually copy your important files and folders into these directories.
- Verify the Backup: After completing the backup, double-check that all your files are correctly copied and accessible from your backup location.
By following these steps, you can ensure that your data is safe before you proceed with the upgrade to Windows 11.
The above is the detailed content of How to Prepare and Upgrade to Windows 11: A Detailed User Guide. For more information, please follow other related articles on the PHP Chinese website!

 Windows Notifications Getting Annoying? Change These 5 SettingsApr 16, 2025 am 06:08 AM
Although Windows notification function is convenient, too many pop-ups can make people feel upset. Don't worry, Windows provides multiple ways to manage and restrict notifications, keeping information open and avoiding interference. 1. Mute all notifications In some cases, such as recording a screen, focusing on work, presentations, or games, you may need a completely quiet environment. Windows allows you to mute all notifications to avoid being interrupted. Open the Settings app, click System on the left, and select Notifications. Turn off the switch next to "Notification" to disable notifications for all applications. When you are done, remember to re-open the notifications to avoid missing important updates. This method may not be suitable for users who do not want to miss out on job-related app notifications.
 I Never Buy This PC Part UsedApr 16, 2025 am 06:02 AM
Why Hard Drive and SSD Fans Fail and How to Choose Used Storage Safely Failing hard drive or SSD fans can be a major problem. This article explores why these components fail and how to mitigate the risks when buying used storage. The Risks of Used H
 ASUS' ROG Zephyrus G14 OLED Gaming Laptop Is $300 OffApr 16, 2025 am 03:01 AM
ASUS ROG Zephyrus G14 Esports Laptop Special Offer! Buy ASUS ROG Zephyrus G14 Esports Laptop now and enjoy a $300 offer! Original price is $1999, current price is only $1699! Enjoy immersive gaming experience anytime, anywhere, or use it as a reliable portable workstation. Best Buy currently offers offers on this 2024 14-inch ASUS ROG Zephyrus G14 e-sports laptop. Its powerful configuration and performance are impressive. This ASUS ROG Zephyrus G14 e-sports laptop costs 16 on Best Buy
 5 Hidden Windows Features You Should Be UsingApr 16, 2025 am 12:57 AM
Unlock Hidden Windows Features for a Smoother Experience! Discover surprisingly useful Windows functionalities that can significantly enhance your computing experience. Even seasoned Windows users might find some new tricks here. Dynamic Lock: Auto
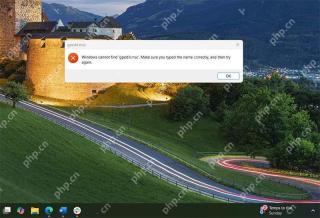 How to Enable the Group Policy Editor in Windows 11 HomeApr 15, 2025 pm 06:01 PM
Enable the Group Policy Editor (gpedit.msc) on Windows 11 Home: A Step-by-Step Guide Many users, especially in shared office environments, rely on the Group Policy Editor (gpedit.msc) for managing multiple user accounts and preventing unauthorized ac
 Windows kb5054979 update information Update content listApr 15, 2025 pm 05:36 PM
KB5054979 is a cumulative security update released on March 27, 2025, for Windows 11 version 24H2. It targets .NET Framework versions 3.5 and 4.8.1, enhancing security and overall stability. Notably, the update addresses an issue with file and directory operations on UNC shares using System.IO APIs. Two installation methods are provided: one through Windows Settings by checking for updates under Windows Update, and the other via a manual download from the Microsoft Update Catalog.
 Creating an Encrypted Backup Drive That Works on Windows, Mac, and LinuxApr 15, 2025 am 06:13 AM
Protecting Your Digital Life: Creating Encrypted Backups with VeraCrypt Our digital lives are brimming with irreplaceable memories, crucial documents, and essential work files. The loss of these due to device failure, theft, or ransomware attacks co
 How (and Why) to Turn Off Mouse Acceleration on Windows 11Apr 15, 2025 am 06:06 AM
Improve mouse accuracy: Disable Windows 11 mouse acceleration function The mouse cursor moves too fast on the screen, even if you only move the mouse a few centimeters? This is what the mouse acceleration function is. This article will guide you on how to disable this feature to better control mouse movement. Is it wise to disable mouse acceleration? There is no direct "Mouse Acceleration" option in Windows systems. Instead, it is the "Enhanced Pointer Precision" setting, which Microsoft sees as a mouse acceleration feature. When this feature is enabled, the mouse's DPI (dots per inch) setting takes effect. It controls the relationship between the physical movement speed of the mouse and the distance the cursor moves on the screen. Move the mouse slowly, Windows will reduce the effective DPI and the cursor moves shorter


Hot AI Tools

Undresser.AI Undress
AI-powered app for creating realistic nude photos

AI Clothes Remover
Online AI tool for removing clothes from photos.

Undress AI Tool
Undress images for free

Clothoff.io
AI clothes remover

AI Hentai Generator
Generate AI Hentai for free.

Hot Article
Hot Tools

Atom editor mac version download
The most popular open source editor

MinGW - Minimalist GNU for Windows
This project is in the process of being migrated to osdn.net/projects/mingw, you can continue to follow us there. MinGW: A native Windows port of the GNU Compiler Collection (GCC), freely distributable import libraries and header files for building native Windows applications; includes extensions to the MSVC runtime to support C99 functionality. All MinGW software can run on 64-bit Windows platforms.

EditPlus Chinese cracked version
Small size, syntax highlighting, does not support code prompt function

Dreamweaver Mac version
Visual web development tools

Notepad++7.3.1
Easy-to-use and free code editor

