


The AI revolution is upon us, but in between this chaos a very critical question gets overlooked by most of us – How do we maintain these sophisticated AI systems? That’s where Machine Learning Operations (MLOps) comes into play. In this blog we will understand the importance of MLOps with ZenML, an open-source MLOps framework, by building an end-to-end Project.
This article was published as a part of theData Science Blogathon.
Table of contents
- What is MLOps?
- What is ZenML?
- Understanding MLOps with Hands-on Project
- Initial Configurations
- Exploratory Data Analysis (EDA)
- Defining Steps for ZenML as Modular Coding
- Building Pipelines
- Frequently Asked Questions
What is MLOps?
MLOps empowers Machine Learning Engineers to streamline the process of a ML model lifecycle. Productionizing machine learning is difficult. The machine learning lifecycle consists of many complex components such as data ingest, data prep, model training, model tuning, model deployment, model monitoring, explainability, and much more. MLOps automates each step of the process through robust pipelines to reduce manual errors. It is a collaborative practice to ease your AI infrastructure with minimum manual efforts and maximum efficient operations. Think of MLOps as the DevOps for AI industry with some spices.
What is ZenML?
ZenML is an Open-Source MLOps framework which simplifies the development, deployment and management of machine learning workflows. By harnessing the principle of MLOps, it seamlessly integrates with various tools and infrastructure which offers the user a modular approach to maintain their AI workflows under a single workplace. ZenML provides features like auto-logs, meta-data tracker, model tracker, experiment tracker, artifact store and simple python decorators for core logic without complex configurations.
Understanding MLOps with Hands-on Project
Now we will understand how MLOps is implemented with the help of an end-to-end simple yet production grade Data Science Project. In this project we will create and deploy a Machine Learning Model to predict the customer lifetime value (CLTV) of a customer. CLTV is a key metric used by companies to see how much they will profit or loss from a customer in the long-term. Using this metric a company can choose to further spend or not on the customer for targeted ads, etc.
Lets start implementing the project in the next section.
Initial Configurations
Now lets get straight into the project configurations. Firstly, we need to download the Online retail dataset from UCI Machine Learning Repository. ZenML is not supported on windows, so either we need to use linux(WSL in Windows) or macos. Next download the requirements.txt. Now let us proceed to the terminal for few configurations.
# Make sure you have Python 3.10 or above installed
python --version

# Make a new Python environment using any method
python3.10 -m venv myenv

# Activate the environment
source myenv/bin/activate

# Install the requirements from the provided source above
pip install -r requirements.txt

# Install the Zenml server
pip install zenml[server] == 0.66.0

# Initialize the Zenml server
zenml init

# Launch the Zenml dashboard
zenml up
Now simply login into the ZenML dashboard with the default login credentials (No Password Required).
Congratulations you have successfully completed the Project Configurations.
Exploratory Data Analysis (EDA)
Now its time to get our hands dirty with the data. We will create ajupyter notebook for analysing our data.
Pro tip : Do your own analysis without following me.
Or you can just follow along with this notebook where we have created different data analysis methods to use in our project.
Now, assuming you have performed your share of data analysis, lets jump straight to the spicy part.
Defining Steps for ZenML as Modular Coding
For increasing Modularity and Reusablity of our code the @step decorator is used from ZenML which organize our code to pass into the pipelines hassle free reducing the chances of error.
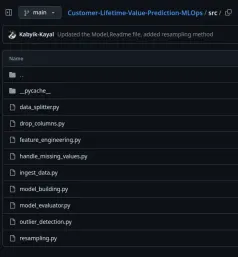
In our Source folder we will write methods for each step before initializing them. We we follow System Design Patterns for each of our methods by creating an abstract method for the strategies of each methods(data ingestion, data cleaning, feature engineering , etc.)
Sample Code of Ingest Data
Sample of the code for ingest_data.py
import logging
import pandas as pd
from abc import ABC, abstractmethod

# Setup logging configuration
logging.basicConfig(level=logging.INFO, format="%(asctime)s - %(levelname)s - %(message)s")

# Abstract Base Class for Data Ingestion Strategy
# ------------------------------------------------
# This class defines a common interface for different data ingestion strategies.
# Subclasses must implement the `ingest` method.
class DataIngestionStrategy(ABC):
    @abstractmethod
    def ingest(self, file_path: str) -> pd.DataFrame:
        """
        Abstract method to ingest data from a file into a DataFrame.

        Parameters:
        file_path (str): The path to the data file to ingest.

        Returns:
        pd.DataFrame: A dataframe containing the ingested data.
        """
        pass

# Concrete Strategy for XLSX File Ingestion
# -----------------------------------------
# This strategy handles the ingestion of data from an XLSX file.
class XLSXIngestion(DataIngestionStrategy):
    def __init__(self, sheet_name=0):
        """
        Initializes the XLSXIngestion with optional sheet name.

        Parameters:
        sheet_name (str or int): The sheet name or index to read, default is the first sheet.
        """
        self.sheet_name = sheet_name

    def ingest(self, file_path: str) -> pd.DataFrame:
        """
        Ingests data from an XLSX file into a DataFrame.

        Parameters:
        file_path (str): The path to the XLSX file.

        Returns:
        pd.DataFrame: A dataframe containing the ingested data.
        """
        try:
            logging.info(f"Attempting to read XLSX file: {file_path}")
            df = pd.read_excel(file_path,dtype={'InvoiceNo': str, 'StockCode': str, 'Description':str}, sheet_name=self.sheet_name)
            logging.info(f"Successfully read XLSX file: {file_path}")
            return df
        except FileNotFoundError:
            logging.error(f"File not found: {file_path}")
        except pd.errors.EmptyDataError:
            logging.error(f"File is empty: {file_path}")
        except Exception as e:
            logging.error(f"An error occurred while reading the XLSX file: {e}")
        return pd.DataFrame()


# Context Class for Data Ingestion
# --------------------------------
# This class uses a DataIngestionStrategy to ingest data from a file.
class DataIngestor:
    def __init__(self, strategy: DataIngestionStrategy):
        """
        Initializes the DataIngestor with a specific data ingestion strategy.

        Parameters:
        strategy (DataIngestionStrategy): The strategy to be used for data ingestion.
        """
        self._strategy = strategy

    def set_strategy(self, strategy: DataIngestionStrategy):
        """
        Sets a new strategy for the DataIngestor.

        Parameters:
        strategy (DataIngestionStrategy): The new strategy to be used for data ingestion.
        """
        logging.info("Switching data ingestion strategy.")
        self._strategy = strategy

    def ingest_data(self, file_path: str) -> pd.DataFrame:
        """
        Executes the data ingestion using the current strategy.

        Parameters:
        file_path (str): The path to the data file to ingest.

        Returns:
        pd.DataFrame: A dataframe containing the ingested data.
        """
        logging.info("Ingesting data using the current strategy.")
        return self._strategy.ingest(file_path)


# Example usage
if __name__ == "__main__":
    # Example file path for XLSX file
    # file_path = "../data/raw/your_data_file.xlsx"

    # XLSX Ingestion Example
    # xlsx_ingestor = DataIngestor(XLSXIngestion(sheet_name=0))
    # df = xlsx_ingestor.ingest_data(file_path)

    # Show the first few rows of the ingested DataFrame if successful
    # if not df.empty:
    #     logging.info("Displaying the first few rows of the ingested data:")
    #     print(df.head())
    pass csv
We will follow this pattern for creating rest of the methods. You can copy the codes from the given Github repository.
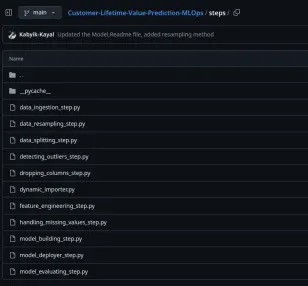
After Writing all the methods, it’s time to initialize the ZenML steps in our Steps folder. Now all the methods we have created till now, will be used in the ZenML steps accordingly.
Sample Code of Data Ingestion
Sample code of the data_ingestion_step.py :
import os
import sys
sys.path.append(os.path.dirname(os.path.dirname(__file__)))

import pandas as pd
from src.ingest_data import DataIngestor, XLSXIngestion
from zenml import step

@step
def data_ingestion_step(file_path: str) -> pd.DataFrame:
    """
    Ingests data from an XLSX file into a DataFrame.

    Parameters:
    file_path (str): The path to the XLSX file.

    Returns:
    pd.DataFrame: A dataframe containing the ingested data.
    """
    # Initialize the DataIngestor with an XLSXIngestion strategy

    ingestor = DataIngestor(XLSXIngestion())

    # Ingest data from the specified file

    df = ingestor.ingest_data(file_path)

    return df
We will follow the same pattern as above for creating rest of the ZenML steps in our project. You can copy them from here.
Wow! Congratulations on creating and learning one of the most important parts of MLOps. It’s okay to get a little bit of overwhelmed since it’s your first time. Don’t take too much stress as everything will be make sense when you will run your first production grade ML Model.
Building Pipelines
Its time to build our pipelines. No, not to carry water or oil. Pipelines are series of steps organized in a specific order to form our complete machine learning workflow. The @pipeline decorator is used in ZenML to specify a Pipeline that will contain the steps we created above. This approach makes sure that we can use the output of one step as an input for the next step.
Here is our training_pipeline.py :
# Make sure you have Python 3.10 or above installed
python --version

# Make a new Python environment using any method
python3.10 -m venv myenv

# Activate the environment
source myenv/bin/activate

# Install the requirements from the provided source above
pip install -r requirements.txt

# Install the Zenml server
pip install zenml[server] == 0.66.0

# Initialize the Zenml server
zenml init

# Launch the Zenml dashboard
zenml up
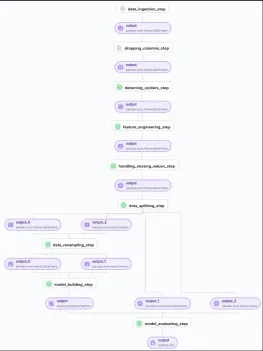
Now we can run the training_pipeline.py to train our ML model in a single click. You can check the pipeline in your zenml dashboard :
We can check our Model details and also train multiple models and compare them in the MLflow dashboard by running the following code in the terminal.
import logging
import pandas as pd
from abc import ABC, abstractmethod

# Setup logging configuration
logging.basicConfig(level=logging.INFO, format="%(asctime)s - %(levelname)s - %(message)s")

# Abstract Base Class for Data Ingestion Strategy
# ------------------------------------------------
# This class defines a common interface for different data ingestion strategies.
# Subclasses must implement the `ingest` method.
class DataIngestionStrategy(ABC):
    @abstractmethod
    def ingest(self, file_path: str) -> pd.DataFrame:
        """
        Abstract method to ingest data from a file into a DataFrame.

        Parameters:
        file_path (str): The path to the data file to ingest.

        Returns:
        pd.DataFrame: A dataframe containing the ingested data.
        """
        pass

# Concrete Strategy for XLSX File Ingestion
# -----------------------------------------
# This strategy handles the ingestion of data from an XLSX file.
class XLSXIngestion(DataIngestionStrategy):
    def __init__(self, sheet_name=0):
        """
        Initializes the XLSXIngestion with optional sheet name.

        Parameters:
        sheet_name (str or int): The sheet name or index to read, default is the first sheet.
        """
        self.sheet_name = sheet_name

    def ingest(self, file_path: str) -> pd.DataFrame:
        """
        Ingests data from an XLSX file into a DataFrame.

        Parameters:
        file_path (str): The path to the XLSX file.

        Returns:
        pd.DataFrame: A dataframe containing the ingested data.
        """
        try:
            logging.info(f"Attempting to read XLSX file: {file_path}")
            df = pd.read_excel(file_path,dtype={'InvoiceNo': str, 'StockCode': str, 'Description':str}, sheet_name=self.sheet_name)
            logging.info(f"Successfully read XLSX file: {file_path}")
            return df
        except FileNotFoundError:
            logging.error(f"File not found: {file_path}")
        except pd.errors.EmptyDataError:
            logging.error(f"File is empty: {file_path}")
        except Exception as e:
            logging.error(f"An error occurred while reading the XLSX file: {e}")
        return pd.DataFrame()


# Context Class for Data Ingestion
# --------------------------------
# This class uses a DataIngestionStrategy to ingest data from a file.
class DataIngestor:
    def __init__(self, strategy: DataIngestionStrategy):
        """
        Initializes the DataIngestor with a specific data ingestion strategy.

        Parameters:
        strategy (DataIngestionStrategy): The strategy to be used for data ingestion.
        """
        self._strategy = strategy

    def set_strategy(self, strategy: DataIngestionStrategy):
        """
        Sets a new strategy for the DataIngestor.

        Parameters:
        strategy (DataIngestionStrategy): The new strategy to be used for data ingestion.
        """
        logging.info("Switching data ingestion strategy.")
        self._strategy = strategy

    def ingest_data(self, file_path: str) -> pd.DataFrame:
        """
        Executes the data ingestion using the current strategy.

        Parameters:
        file_path (str): The path to the data file to ingest.

        Returns:
        pd.DataFrame: A dataframe containing the ingested data.
        """
        logging.info("Ingesting data using the current strategy.")
        return self._strategy.ingest(file_path)


# Example usage
if __name__ == "__main__":
    # Example file path for XLSX file
    # file_path = "../data/raw/your_data_file.xlsx"

    # XLSX Ingestion Example
    # xlsx_ingestor = DataIngestor(XLSXIngestion(sheet_name=0))
    # df = xlsx_ingestor.ingest_data(file_path)

    # Show the first few rows of the ingested DataFrame if successful
    # if not df.empty:
    #     logging.info("Displaying the first few rows of the ingested data:")
    #     print(df.head())
    pass csv
Creating Deployment Pipeline
Next we will create the deployment_pipeline.py
import os
import sys
sys.path.append(os.path.dirname(os.path.dirname(__file__)))

import pandas as pd
from src.ingest_data import DataIngestor, XLSXIngestion
from zenml import step

@step
def data_ingestion_step(file_path: str) -> pd.DataFrame:
    """
    Ingests data from an XLSX file into a DataFrame.

    Parameters:
    file_path (str): The path to the XLSX file.

    Returns:
    pd.DataFrame: A dataframe containing the ingested data.
    """
    # Initialize the DataIngestor with an XLSXIngestion strategy

    ingestor = DataIngestor(XLSXIngestion())

    # Ingest data from the specified file

    df = ingestor.ingest_data(file_path)

    return df
As we run the deployment pipeline we will get a view like this in our ZenML dashboard:
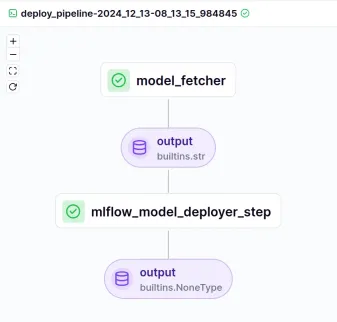
Congratulations you have deployed the best model using MLFlow and ZenML in your local instance.
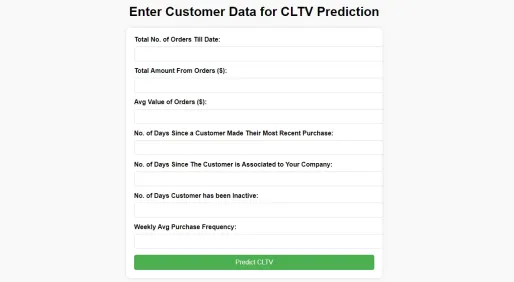
Create Flask App
Our next step is to create a Flask app that will project our Model to the end-user. For that we have to create an app.py and an index.html within the templates folder. Follow the below code to create the app.py:
#import csvimport os
import sys
sys.path.append(os.path.dirname(os.path.dirname(__file__)))
from steps.data_ingestion_step import data_ingestion_step
from steps.handling_missing_values_step import handling_missing_values_step
from steps.dropping_columns_step import dropping_columns_step
from steps.detecting_outliers_step import detecting_outliers_step
from steps.feature_engineering_step import feature_engineering_step
from steps.data_splitting_step import data_splitting_step
from steps.model_building_step import model_building_step
from steps.model_evaluating_step import model_evaluating_step
from steps.data_resampling_step import data_resampling_step
from zenml import Model, pipeline


@pipeline(model=Model(name='CLTV_Prediction'))
def training_pipeline():
    """
    Defines the complete training pipeline for CLTV Prediction.
    Steps:
    1. Data ingestion
    2. Handling missing values
    3. Dropping unnecessary columns
    4. Detecting and handling outliers
    5. Feature engineering
    6. Splitting data into train and test sets
    7. Resampling the training data
    8. Model training
    9. Model evaluation
    """
    # Step 1: Data ingestion
    raw_data = data_ingestion_step(file_path='data/Online_Retail.xlsx')

    # Step 2: Drop unnecessary columns
    columns_to_drop = ["Country", "Description", "InvoiceNo", "StockCode"]
    refined_data = dropping_columns_step(raw_data, columns_to_drop)

    # Step 3: Detect and handle outliers
    outlier_free_data = detecting_outliers_step(refined_data)

    # Step 4: Feature engineering
    features_data = feature_engineering_step(outlier_free_data)

    # Step 5: Handle missing values
    cleaned_data = handling_missing_values_step(features_data)

    # Step 6: Data splitting
    train_features, test_features, train_target, test_target = data_splitting_step(cleaned_data,"CLTV")

    # Step 7: Data resampling
    train_features_resampled, train_target_resampled = data_resampling_step(train_features, train_target)

    # Step 8: Model training
    trained_model = model_building_step(train_features_resampled, train_target_resampled)

    # Step 9: Model evaluation
    evaluation_metrics = model_evaluating_step(trained_model, test_features, test_target)

    # Return evaluation metrics
    return evaluation_metrics


if __name__ == "__main__":
    # Run the pipeline
    training_pipeline()
To create the index.html file, follow the below codes :
mlflow ui
Your app.py should look like this after execution :
Now the last step is to commit these changes in your github repository and deploy the model online on any cloud server, for this project we will deploy the app.py on a free render server and you can do so too.
Go to Render.comand connect your github repository of the project to render.
That’s it. You have successfully created your first MLOps project. Hope you enjoyed it!
Conclusion
MLOps has become an indispensable practice in managing the complexities of machine learning workflows, from data ingestion to model deployment. By leveraging Zenml, an open-source MLOps framework, we streamlined the process of building, training, and deploying a production-grade ML model for Customer Lifetime Value (CLTV) prediction. Through modular coding, robust pipelines, and seamless integrations, we demonstrated how to create an end-to-end project efficiently. As businesses increasingly rely on AI-driven solutions, frameworks like ZenML empower teams to maintain scalability, reproducibility, and performance with minimal manual intervention.
Key Takeaways
- MLOps simplifies the ML lifecycle, reducing errors and increasing efficiency through automated pipelines.
- ZenML provides modular, reusable coding structures for managing machine learning workflows.
- Building an end-to-end pipeline involves defining clear steps, from data ingestion to deployment.
- Deployment pipelines and Flask apps ensure ML models are production-ready and accessible.
- Tools like ZenML and MLFlow enable seamless tracking, monitoring, and optimization of ML projects.
Frequently Asked Questions
Q1. What is MLOps, and why is it important?A. MLOps (Machine Learning Operations) streamlines the ML lifecycle by automating processes like data ingestion, model training, deployment, and monitoring, ensuring efficiency and scalability.
Q2. What is ZenML used for?A. ZenML is an open-source MLOps framework that simplifies the development, deployment, and management of machine learning workflows with modular and reusable code.
Q3. Can I use ZenML on Windows?A. ZenML is not directly supported on Windows but can be used with WSL (Windows Subsystem for Linux).
Q4. What is the purpose of pipelines in Zenml?A. Pipelines in ZenML define a sequence of steps, ensuring a structured and reusable workflow for machine learning projects.
Q5. How does the Flask app integrate with the ML model?A. The Flask app serves as a user interface, allowing end-users to input data and receive predictions from the deployed ML model.
The above is the detailed content of Understanding MLOps With ZenML Project. For more information, please follow other related articles on the PHP Chinese website!

![[Ghibli-style images with AI] Introducing how to create free images with ChatGPT and copyright](https://img.php.cn/upload/article/001/242/473/174707263295098.jpg?x-oss-process=image/resize,p_40) [Ghibli-style images with AI] Introducing how to create free images with ChatGPT and copyrightMay 13, 2025 am 01:57 AM
[Ghibli-style images with AI] Introducing how to create free images with ChatGPT and copyrightMay 13, 2025 am 01:57 AMThe latest model GPT-4o released by OpenAI not only can generate text, but also has image generation functions, which has attracted widespread attention. The most eye-catching feature is the generation of "Ghibli-style illustrations". Simply upload the photo to ChatGPT and give simple instructions to generate a dreamy image like a work in Studio Ghibli. This article will explain in detail the actual operation process, the effect experience, as well as the errors and copyright issues that need to be paid attention to. For details of the latest model "o3" released by OpenAI, please click here⬇️ Detailed explanation of OpenAI o3 (ChatGPT o3): Features, pricing system and o4-mini introduction Please click here for the English version of Ghibli-style article⬇️ Create Ji with ChatGPT
 Explaining examples of use and implementation of ChatGPT in local governments! Also introduces banned local governmentsMay 13, 2025 am 01:53 AM
As a new communication method, the use and introduction of ChatGPT in local governments is attracting attention. While this trend is progressing in a wide range of areas, some local governments have declined to use ChatGPT. In this article, we will introduce examples of ChatGPT implementation in local governments. We will explore how we are achieving quality and efficiency improvements in local government services through a variety of reform examples, including supporting document creation and dialogue with citizens. Not only local government officials who aim to reduce staff workload and improve convenience for citizens, but also all interested in advanced use cases.
 What is the Fukatsu-style prompt in ChatGPT? A thorough explanation with example sentences!May 13, 2025 am 01:52 AM
Have you heard of a framework called the "Fukatsu Prompt System"? Language models such as ChatGPT are extremely excellent, but appropriate prompts are essential to maximize their potential. Fukatsu prompts are one of the most popular prompt techniques designed to improve output accuracy. This article explains the principles and characteristics of Fukatsu-style prompts, including specific usage methods and examples. Furthermore, we have introduced other well-known prompt templates and useful techniques for prompt design, so based on these, we will introduce C.
 What is ChatGPT Search? Explains the main functions, usage, and fee structure!May 13, 2025 am 01:51 AM
ChatGPT Search: Get the latest information efficiently with an innovative AI search engine! In this article, we will thoroughly explain the new ChatGPT feature "ChatGPT Search," provided by OpenAI. Let's take a closer look at the features, usage, and how this tool can help you improve your information collection efficiency with reliable answers based on real-time web information and intuitive ease of use. ChatGPT Search provides a conversational interactive search experience that answers user questions in a comfortable, hidden environment that hides advertisements
 An easy-to-understand explanation of how to create a composition in ChatGPT and prompts!May 13, 2025 am 01:50 AM
In a modern society with information explosion, it is not easy to create compelling articles. How to use creativity to write articles that attract readers within a limited time and energy requires superb skills and rich experience. At this time, as a revolutionary writing aid, ChatGPT attracted much attention. ChatGPT uses huge data to train language generation models to generate natural, smooth and refined articles. This article will introduce how to effectively use ChatGPT and efficiently create high-quality articles. We will gradually explain the writing process of using ChatGPT, and combine specific cases to elaborate on its advantages and disadvantages, applicable scenarios, and safe use precautions. ChatGPT will be a writer to overcome various obstacles,
 How to create diagrams using ChatGPT! Illustrated loading and plugins are also explainedMay 13, 2025 am 01:49 AM
An efficient guide to creating charts using AI Visual materials are essential to effectively conveying information, but creating it takes a lot of time and effort. However, the chart creation process is changing dramatically due to the rise of AI technologies such as ChatGPT and DALL-E 3. This article provides detailed explanations on efficient and attractive diagram creation methods using these cutting-edge tools. It covers everything from ideas to completion, and includes a wealth of information useful for creating diagrams, from specific steps, tips, plugins and APIs that can be used, and how to use the image generation AI "DALL-E 3."
 An easy-to-understand explanation of ChatGPT Plus' pricing structure and payment methods!May 13, 2025 am 01:48 AM
Unlock ChatGPT Plus: Fees, Payment Methods and Upgrade Guide ChatGPT, a world-renowned generative AI, has been widely used in daily life and business fields. Although ChatGPT is basically free, the paid version of ChatGPT Plus provides a variety of value-added services, such as plug-ins, image recognition, etc., which significantly improves work efficiency. This article will explain in detail the charging standards, payment methods and upgrade processes of ChatGPT Plus. For details of OpenAI's latest image generation technology "GPT-4o image generation" please click: Detailed explanation of GPT-4o image generation: usage methods, prompt word examples, commercial applications and differences from other AIs Table of contents ChatGPT Plus Fees Ch
 Explaining how to create a design using ChatGPT! We also introduce examples of use and promptsMay 13, 2025 am 01:47 AM
How to use ChatGPT to streamline your design work and increase creativity This article will explain in detail how to create a design using ChatGPT. We will introduce examples of using ChatGPT in various design fields, such as ideas, text generation, and web design. We will also introduce points that will help you improve the efficiency and quality of a variety of creative work, such as graphic design, illustration, and logo design. Please take a look at how AI can greatly expand your design possibilities. table of contents ChatGPT: A powerful tool for design creation


Hot AI Tools

Undresser.AI Undress
AI-powered app for creating realistic nude photos

AI Clothes Remover
Online AI tool for removing clothes from photos.

Undress AI Tool
Undress images for free

Clothoff.io
AI clothes remover

Video Face Swap
Swap faces in any video effortlessly with our completely free AI face swap tool!

Hot Article
Hot Tools

Dreamweaver Mac version
Visual web development tools

SublimeText3 Mac version
God-level code editing software (SublimeText3)

EditPlus Chinese cracked version
Small size, syntax highlighting, does not support code prompt function

MinGW - Minimalist GNU for Windows
This project is in the process of being migrated to osdn.net/projects/mingw, you can continue to follow us there. MinGW: A native Windows port of the GNU Compiler Collection (GCC), freely distributable import libraries and header files for building native Windows applications; includes extensions to the MSVC runtime to support C99 functionality. All MinGW software can run on 64-bit Windows platforms.

SecLists
SecLists is the ultimate security tester's companion. It is a collection of various types of lists that are frequently used during security assessments, all in one place. SecLists helps make security testing more efficient and productive by conveniently providing all the lists a security tester might need. List types include usernames, passwords, URLs, fuzzing payloads, sensitive data patterns, web shells, and more. The tester can simply pull this repository onto a new test machine and he will have access to every type of list he needs.

