


Key Takeaways
- Swift Mailer is a powerful, component-based library that allows programmers to send emails easily using an object-oriented approach, with minimal requirements of PHP 5.2 or higher with the SPL extension and a minimum memory limit of 8MB.
- Swift Mailer can be installed through PEAR or by uploading the files using an FTP. It consists of more than 150 classes and interfaces, including the Mailer, Transporters, MIME Entities, Encoders, and Plugins.
- Swift Mailer provides functionalities to create an email with multiple recipients, a subject, and a plain-text body. It also allows for attachments, custom SMTP configuration, and tracking recipients who do not receive the email.
- Swift Mailer also has a Decorator plugin that allows you to send the same email to several recipients with small differences, such as the recipient name inside the email body. This is beneficial for tasks like sending newsletters to subscribers.
pear channel-discover pear.swiftmailer.org
pear install swift/swift
The second method is probably the easiest one if you’re on a shared hosting and you don’t have access to the command shell. Just download the library from the official website and upload the lib folder.
The Swift Mailer Family of Classes
Swift Mailer is made of more than 150 classes and interfaces grouped together in several components. Each of them have a specific purpose.- Mailer: The mailer, which is realized by the Swift_Mailer class, is the central class in the library and the one that actually sends the email through the method send(). Its constructor accepts an instance of a class that implements the interface Swift_Transport which allows you to send email using a custom SMTP.
- Transporters: They implement the interface Swift_Transport and their scope is to communicate with a service to deliver an email message. The main classes are Swift_SmtpTransport which uses the SMTP protocol, Swift_SendmailTransport which communicates with a local sendmail executable, and Swift_MailTransport that relies on the PHP native mail() function.
- MIME Entities: This is a key component in the library. The class you’ll use to specify the receiver, the subject, the body and so on, called Swift_Message is made of several entities that are grouped together. Two example of entities are the attachments and the email header.
- Encoders: This component isn’t something you’ll deal with because it acts behind the scenes. There are two types of Encoders: Base64 and Quoted-Printable. Their goal is to transform the contents into a format that conforms to RFC specifications.
- Plugins: These are used to extend Swift Mailer’s basic functionality. Some of the plugins are AntiFlood, which allows you to limit the number of messages sent during a single SMTP connection, Logger, used to log what’s going on during the send process, and Decorator, an amazing plugin that allows you to use an email template and change just a few differences in the email text.
A Basic Example
With me so far? Good. Now that you’ve got an idea of how the components are organized in the library, let’s get our hands dirty and see how to take advantage of the power and flexibility of Swift Mailer. In this first and very simple example, I’ll show you the creation of an email that has two recipients, a subject, and a plain-text body. Once created, it’ll be sent to the recipients. The following code uses three of the classes mentioned in the previous section: Swift_MailTransport, Swift_Mailer and Swift_Message. In addition, note the first line of the code, the require_once which pulls in Swift Mailer’s autoloader which is needed to use the library.pear channel-discover pear.swiftmailer.org pear install swift/swiftAs you can see, Swift_MailTransport is used to create an instance of a transport layer which will use the native PHP mail() function. Then I created a Swift_Message instance which you can think of as the email object. In the following lines I set the recipients using the setTo() method, the email subject using setSubject(), the email body using setBody(), and the sender using the setFrom() method. With the layer defined and the email created, it’s time to actually send the email, which is done using the send() method of the Swift_Mailer class.
An Example with Attachments
There is no doubt that attachments are a staple of today’s email systems. No one can live without them. This slightly more complicated example will show you how to send an email that not only has an attachment but also other features.- Two additional receivers, one in CC and the second in BCC using setCc() and setBcc().
- One attachment retrieved from disk using the attach() method.
- A custom SMTP configuration using the Swift_SmtpTransport class.
- Know what recipients have not received the email using the second parameter of the send() method.
pear channel-discover pear.swiftmailer.org pear install swift/swiftI used a different transport layer, an SMTP one that is set using the Swift_SmtpTransport class. It accepts two parameters: the SMTP server and the connection port. You use the instance to set an appropriate username and password to access the server using the setUsername() and setPassword() methods. Then, just like the first example, I created an Swift_Message object and set the recipients, the subject, and so on. However, this time I also took advantage of the setCc() and the setBcc() methods that, as you might guess, allow you to set carbon copy and blind carbon copy recipients. The key method of this example is attach() which attaches a file taken from the hard disk using the static method fromPath() that takes the path to the file you want to attach as its parameter. Note that this time I also print the number of failed recipients retrieved using the send() method’s second parameter.
Using a Template
The third and final example shows you how to use the Decorator plugin, ideal for things like sending newsletters to your subscribers. It allows you to send the same email to several recipients having small differences such as the recipient name inside the email body. The plugin will look inside the template (the body) and will replace the placeholders with the set values. To use the plugin, you first need to register it using the registerPlugin() method and then build and use an array of replacement values. In the following code I’ll put two placeholders, username and transactions, which will be programmatically replaced by values referring to the user’s email.<span><span><?php </span></span><span><span>require_once 'lib/swift_required.php';
</span></span><span>
</span><span><span>// Create the mail transport configuration
</span></span><span><span>$transport = Swift_MailTransport<span>::</span>newInstance();
</span></span><span>
</span><span><span>// Create the message
</span></span><span><span>$message = Swift_Message<span>::</span>newInstance();
</span></span><span><span>$message->setTo(array(
</span></span><span> <span>"hello@gmail.com" => "Aurelio De Rosa",
</span></span><span> <span>"test@fake.com" => "Audero"
</span></span><span><span>));
</span></span><span><span>$message->setSubject("This email is sent using Swift Mailer");
</span></span><span><span>$message->setBody("You're our best client ever.");
</span></span><span><span>$message->setFrom("account@bank.com", "Your bank");
</span></span><span>
</span><span><span>// Send the email
</span></span><span><span>$mailer = Swift_Mailer<span>::</span>newInstance($transport);
</span></span><span><span>$mailer->send($message);</span></span></span>
The Decorator plugin constructor accepts one parameter: an array of values to replace the placeholders. Each value of this array uses the user’s email for its key and a sub-array that contains placeholder-replacement pairs. This is exactly the aim of the $replacements array. In the example above, as placeholders I used a string inside two brackets (i.e. {fullname}) but you can use whatever you want. This time, I haven’t set all the recipients in the same statement as before and I used a for loop. This is done because the plugin intercepts the sending process, reads the recipient email, and replaces the placeholders using the values of the replacement array.
Conclusion
In this article I showed how you can easily send emails using Swift Mailer. This is a very powerful library that, as you’ve seen, allows you to do a lot of things using an OOP approach. Of course Swift Mailer has a lot of other methods and classes I’ve not covered in this article. You can study up on them in the official documentation, but this should be enough to get you started sending emails without hassle. Image via FotoliaFrequently Asked Questions about Swift Mailer
How can I install Swift Mailer using Composer?
Swift Mailer can be easily installed using Composer, a tool for dependency management in PHP. To install Swift Mailer, you need to have Composer installed on your system. Once you have Composer installed, you can install Swift Mailer by running the following command in your project directory: composer require "swiftmailer/swiftmailer:^6.0". This command tells Composer to download the Swift Mailer package and its dependencies into your project.
How can I send an email with Swift Mailer?
Sending an email with Swift Mailer involves creating a message, configuring the mailer, and sending the message. Here is a basic example of how to send an email with Swift Mailer:
require_once '/path/to/vendor/autoload.php';
$message = (new Swift_Message())
->setSubject('Hello')
->setFrom(['john@doe.com' => 'John Doe'])
->setTo(['receiver@domain.org', 'other@domain.org' => 'A name'])
->setBody('Here is the message itself');
$transport = (new Swift_SmtpTransport('smtp.example.org', 25))
->setUsername('your username')
->setPassword('your password');
$mailer = new Swift_Mailer($transport);
$result = $mailer->send($message);
How can I add attachments to an email with Swift Mailer?
Swift Mailer allows you to add attachments to your emails. You can attach files from a path, a string, or an existing Swift Attachment instance. Here is an example of how to attach a file from a path:
$message = (new Swift_Message())
->setSubject('Hello')
->setFrom(['john@doe.com' => 'John Doe'])
->setTo(['receiver@domain.org'])
->setBody('Here is the message itself')
->attach(Swift_Attachment::fromPath('path/to/image.jpg'));
How can I send HTML emails with Swift Mailer?
Swift Mailer allows you to send HTML emails by setting the body of the message to an HTML string and setting the content type to ‘text/html’. Here is an example:
$message = (new Swift_Message())
->setSubject('Hello')
->setFrom(['john@doe.com' => 'John Doe'])
->setTo(['receiver@domain.org'])
->setBody('
Here is the HTML message itself
', 'text/html');How can I handle errors in Swift Mailer?
Swift Mailer throws exceptions when an error occurs. You can catch these exceptions to handle errors. Here is an example:
try {
$result = $mailer->send($message);
} catch (Swift_TransportException $e) {
echo 'There was an error while sending the email: ' . $e->getMessage();
}
How can I use Swift Mailer with Gmail?
You can use Swift Mailer with Gmail by configuring the SMTP transport with the Gmail SMTP server settings. Here is an example:
$transport = (new Swift_SmtpTransport('smtp.gmail.com', 465, 'ssl'))
->setUsername('your Gmail username')
->setPassword('your Gmail password');
How can I send multiple emails with Swift Mailer?
You can send multiple emails with Swift Mailer by creating multiple message instances and sending them with the same mailer instance. Here is an example:
$message1 = (new Swift_Message())
->setSubject('Hello')
->setFrom(['john@doe.com' => 'John Doe'])
->setTo(['receiver1@domain.org'])
->setBody('Here is the message itself');
$message2 = (new Swift_Message())
->setSubject('Hello')
->setFrom(['john@doe.com' => 'John Doe'])
->setTo(['receiver2@domain.org'])
->setBody('Here is the message itself');
$result1 = $mailer->send($message1);
$result2 = $mailer->send($message2);
How can I use Swift Mailer with Symfony?
Swift Mailer is integrated with Symfony and can be used as a service. You can send emails with Swift Mailer in Symfony by getting the mailer service and using it to send a message. Here is an example:
$message = (new Swift_Message())
->setSubject('Hello')
->setFrom(['john@doe.com' => 'John Doe'])
->setTo(['receiver@domain.org'])
->setBody('Here is the message itself');
$this->get('mailer')->send($message);
How can I set the priority of an email with Swift Mailer?
You can set the priority of an email with Swift Mailer by calling the setPriority method on the message instance. The priority is an integer between 1 (highest) and 5 (lowest). Here is an example:
$message = (new Swift_Message())
->setSubject('Hello')
->setFrom(['john@doe.com' => 'John Doe'])
->setTo(['receiver@domain.org'])
->setBody('Here is the message itself')
->setPriority(1);
How can I send emails asynchronously with Swift Mailer?
Swift Mailer does not support asynchronous email sending out of the box. However, you can achieve this by using a message queue. You can enqueue messages and then send them in a separate process. This allows your application to continue processing other tasks without waiting for the emails to be sent.
The above is the detailed content of PHP Master | Sending Email with Swift Mailer. For more information, please follow other related articles on the PHP Chinese website!

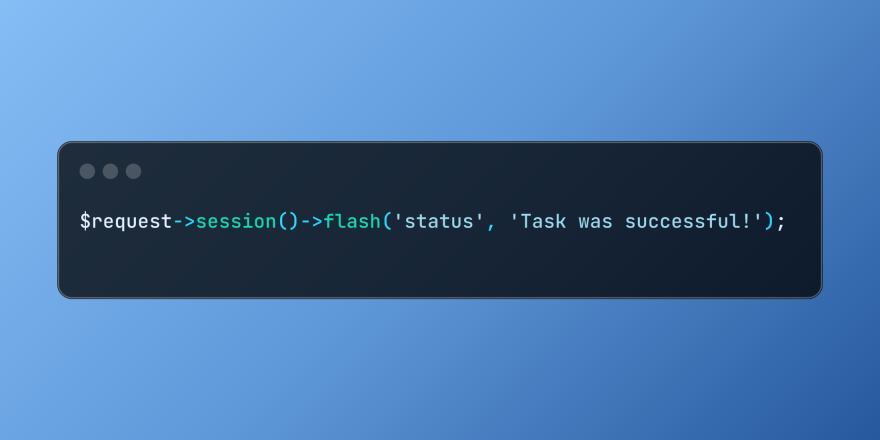 Working with Flash Session Data in LaravelMar 12, 2025 pm 05:08 PM
Laravel simplifies handling temporary session data using its intuitive flash methods. This is perfect for displaying brief messages, alerts, or notifications within your application. Data persists only for the subsequent request by default: $request-
 cURL in PHP: How to Use the PHP cURL Extension in REST APIsMar 14, 2025 am 11:42 AM
The PHP Client URL (cURL) extension is a powerful tool for developers, enabling seamless interaction with remote servers and REST APIs. By leveraging libcurl, a well-respected multi-protocol file transfer library, PHP cURL facilitates efficient execution of various network protocols, including HTTP, HTTPS, and FTP. This extension offers granular control over HTTP requests, supports multiple concurrent operations, and provides built-in security features.
 Build a React App With a Laravel Back End: Part 2, ReactMar 04, 2025 am 09:33 AM
This is the second and final part of the series on building a React application with a Laravel back-end. In the first part of the series, we created a RESTful API using Laravel for a basic product-listing application. In this tutorial, we will be dev
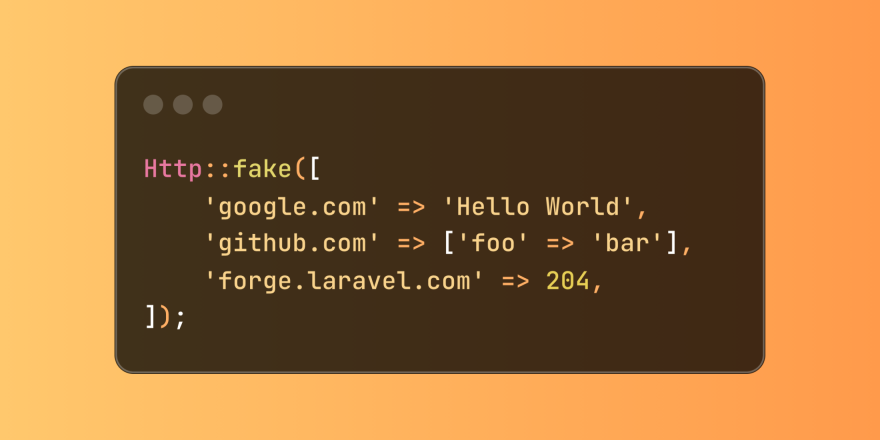 Simplified HTTP Response Mocking in Laravel TestsMar 12, 2025 pm 05:09 PM
Laravel provides concise HTTP response simulation syntax, simplifying HTTP interaction testing. This approach significantly reduces code redundancy while making your test simulation more intuitive. The basic implementation provides a variety of response type shortcuts: use Illuminate\Support\Facades\Http; Http::fake([ 'google.com' => 'Hello World', 'github.com' => ['foo' => 'bar'], 'forge.laravel.com' =>
 12 Best PHP Chat Scripts on CodeCanyonMar 13, 2025 pm 12:08 PM
Do you want to provide real-time, instant solutions to your customers' most pressing problems? Live chat lets you have real-time conversations with customers and resolve their problems instantly. It allows you to provide faster service to your custom
 Notifications in LaravelMar 04, 2025 am 09:22 AM
In this article, we're going to explore the notification system in the Laravel web framework. The notification system in Laravel allows you to send notifications to users over different channels. Today, we'll discuss how you can send notifications ov
 Explain the concept of late static binding in PHP.Mar 21, 2025 pm 01:33 PM
Article discusses late static binding (LSB) in PHP, introduced in PHP 5.3, allowing runtime resolution of static method calls for more flexible inheritance.Main issue: LSB vs. traditional polymorphism; LSB's practical applications and potential perfo
 PHP Logging: Best Practices for PHP Log AnalysisMar 10, 2025 pm 02:32 PM
PHP logging is essential for monitoring and debugging web applications, as well as capturing critical events, errors, and runtime behavior. It provides valuable insights into system performance, helps identify issues, and supports faster troubleshoot


Hot AI Tools

Undresser.AI Undress
AI-powered app for creating realistic nude photos

AI Clothes Remover
Online AI tool for removing clothes from photos.

Undress AI Tool
Undress images for free

Clothoff.io
AI clothes remover

AI Hentai Generator
Generate AI Hentai for free.

Hot Article
Hot Tools

Dreamweaver CS6
Visual web development tools

Dreamweaver Mac version
Visual web development tools

mPDF
mPDF is a PHP library that can generate PDF files from UTF-8 encoded HTML. The original author, Ian Back, wrote mPDF to output PDF files "on the fly" from his website and handle different languages. It is slower than original scripts like HTML2FPDF and produces larger files when using Unicode fonts, but supports CSS styles etc. and has a lot of enhancements. Supports almost all languages, including RTL (Arabic and Hebrew) and CJK (Chinese, Japanese and Korean). Supports nested block-level elements (such as P, DIV),

Notepad++7.3.1
Easy-to-use and free code editor

Zend Studio 13.0.1
Powerful PHP integrated development environment

