
 Computer TutorialsTroubleshootingHow to group tabs in Google Chrome (and free yourself from browser chaos)
Master Chrome's Tab Grouping: Conquer Your Tab Chaos!
We've all been there: a browser overflowing with tabs, each a tiny window into a different project, task, or rabbit hole. Google Chrome's tab grouping feature offers a solution, letting you organize your open tabs into manageable groups. This guide shows you how to harness this power on both desktop and Android.
Desktop Tab Grouping

The secret weapon? The right-click! Right-clicking a tab header reveals your options:
- Add tab to new group: Creates a new group and adds the selected tab. Assign a name and color to your new group. Check "Save group" to add a shortcut to your bookmarks bar.
- Add tab to group: (Appears after creating at least one group) Adds the selected tab to an existing group.
Your bookmarks bar (accessible via Ctrl Shift B (Windows) or Cmd Shift B (macOS)) displays saved group shortcuts for quick access. Note: Closing a Chrome window preserves group shortcuts; however, individually closing all tabs within a group removes its shortcut.

Right-click a group's name to:
- Hide group: Keeps the bookmark but hides the tabs.
- Rename/Delete group: Manage your group organization.
- Change color: Customize your visual organization.
- Move group to new window: Isolate a group of tabs.
- Ungroup: Separate all tabs within a group.
Clicking a group's name hides/shows its tabs. Simply drag a tab into a group to add it.
Android Tab Grouping

Android Chrome's tab grouping differs slightly from the desktop version. Groups don't sync, and iOS support is currently absent.
- Tap the square icon (top right; shows tab count).
- Open the sites you wish to group using " New tab".
- Return to the tab overview (square icon).
- Long-press a tab thumbnail, drag it onto another to create a group.
Tap a group to access individual tabs and use the "X" to remove them. The " " icon adds new tabs. The three-dot menu lets you rename or manage multiple tabs (ungrouping or bookmarking).
While less flexible than the desktop version, Android tab grouping still provides a significant improvement in tab management. Organize your browsing experience and reclaim your digital sanity!
The above is the detailed content of How to group tabs in Google Chrome (and free yourself from browser chaos). For more information, please follow other related articles on the PHP Chinese website!

 Windows 10 KB5055612: New Features & What if It Failed to InstallMay 02, 2025 pm 08:01 PM
This non-security update, KB5055612 for Windows 10 version 22H2 and related versions, released April 22, 2025, offers several quality improvements. This guide details installation and troubleshooting steps. KB5055612: Key Improvements This update enh
 Unlock Helpful Methods to Fix KB5055642 Not InstallingMay 02, 2025 pm 06:01 PM
Troubleshooting KB5055642 Installation Problems on Windows 11 This guide offers solutions for users encountering issues installing Windows 11 Insider Preview Build 26200.5562 (KB5055642), released April 21, 2025. This update introduces enhanced featu
 How to fix Windows update error 0xca00a000?May 02, 2025 pm 06:00 PM
Updates are vital to ensure that a Windows system runs well and is protected from potential outside threats, such as software vulnerabilities. Unfortunately, Wi
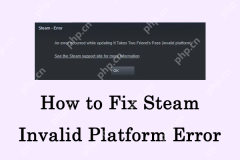 Learn How to Resolve Steam Invalid Platform Error on WindowsMay 01, 2025 pm 06:01 PM
Encountering the Steam "Invalid Platform" error? This MiniTool guide offers several solutions to get you back in the game. This frustrating error typically means your game is incompatible with your operating system. Understanding the Error
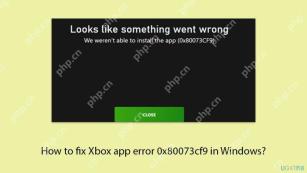 How to fix Xbox app error 0x80073cf9 in Windows?May 01, 2025 am 02:00 AM
The Windows Xbox app lets you manage your Game Pass library, view friends, and launch PC games from one place. Its a hub of Microsofts gaming experience, especi
 Fix VMWare Slow System Performance in Windows 11Apr 30, 2025 pm 08:14 PM
VMware Workstation on Windows 11: Troubleshooting Slow Performance Experiencing sluggish system performance after installing VMware Workstation on your Windows 11 desktop? This guide offers practical solutions to resolve this common issue. Quick Nav
 Community Tips for Oblivion Remastered Low FPS/Stuttering PCApr 30, 2025 pm 08:13 PM
Many players have encountered frustrating low FPS, stuttering, and lagging issues in Oblivion Remastered. This MiniTool guide offers several effective solutions to boost your gameplay performance. Quick Navigation: Oblivion Remastered Performance Pr
 Proven Fixes and Tips for Unarc.dll Error Code 11 on WindowsApr 30, 2025 pm 08:12 PM
Troubleshooting the Unarc.dll Error Code 11 in Windows Many gamers encounter the frustrating unarc.dll error code 11 during game installations. This error arises because the unarc.dll file, responsible for unpacking compressed installation files, is


Hot AI Tools

Undresser.AI Undress
AI-powered app for creating realistic nude photos

AI Clothes Remover
Online AI tool for removing clothes from photos.

Undress AI Tool
Undress images for free

Clothoff.io
AI clothes remover

Video Face Swap
Swap faces in any video effortlessly with our completely free AI face swap tool!

Hot Article
Hot Tools

Dreamweaver CS6
Visual web development tools

Notepad++7.3.1
Easy-to-use and free code editor

SublimeText3 Linux new version
SublimeText3 Linux latest version

MantisBT
Mantis is an easy-to-deploy web-based defect tracking tool designed to aid in product defect tracking. It requires PHP, MySQL and a web server. Check out our demo and hosting services.

SublimeText3 Chinese version
Chinese version, very easy to use

