


Key Points
- Entities in Drupal are a powerful way to organize data and can be customized to represent a specific type of information. This tutorial demonstrates how to create a custom entity type called Project that includes attributes such as title, description, and deadline.
- To create a new entity type, its schema definition must be declared, which will generate a database table of entity data. This tutorial provides a code example for creating a "demo_projects" table with four columns (id, name, description, and deadline).
- Entity API module needs to be enabled on your site and set as a dependency for custom modules, which provides many entity processing capabilities that Drupal core lacks. This includes creating new entities, saving them to the database, and displaying them.
- This tutorial also explains how to override the buildContent() method of the default EntityAPIController class to display your entity, and how to create an entity list through the entity_view() helper function. The second part of the tutorial will introduce creating a page to display individual project entities, making them fieldable through the UI, and exposing them to Views for query and list display.
Drupal entities are a great way to organize data. If you are familiar with nodes, classification terms, comments, or users, you should also know that these have been entities since Drupal 7. Another important aspect about them is that they can be fieldized through the Field API. In this tutorial, I will show you how to define your own custom entity type and get started with it. Why do anyone want to do this instead of using nodes? Because while they are great, nodes can sometimes be overly complex. You may not need many features, such as revisions or comments.
In this tutorial, we will define our own custom entity type called "Project" to represent our simple information about the project (title, description, and deadline). We will then learn a little about using this type of entity.
To keep learning, I'm assuming you know how to write a basic custom module (my module is named demo). You can find excellent tutorials on this topic here. Continue writing the .info file and creating an empty .module and .install file. I also set up a Git repository where you can get all the source code for this tutorial (one branch for each section, two sections will be published).
Additionally, you need to enable the Entity API contrib module on your site and set it as a dependency for the custom module. The Entity API module is very powerful when dealing with entities because it provides many of the features that the Drupal core lacks.
Define our own Drupal entity type
Creating a new entity type first requires declaring its schema definition. That is, write code that will generate the entity data database table. In my demo.install file, I have the following code:
/**
 * Implements hook_schema().
 */
function demo_schema() {

  $schema = array();

  $schema['demo_projects'] = array(
    'description' => 'The base table for the Project entity',
    'fields' => array(
      'id' => array(
        'description' => 'Primary key of the Project entity',
        'type' => 'serial',
        'unsigned' => TRUE,
        'not null' => TRUE,
      ),
      'name' => array(
        'description' => 'Project name.',
        'type' => 'varchar',
        'length' => 255,
        'not null' => FALSE,
      ),
      'description' => array(
        'description' => 'Project description.',
        'type' => 'text',
        'size' => 'big',
        'not null' => FALSE,
        'default' => NULL
      ),
      'deadline' => array(
        'description' => 'Project deadline.',
        'type' => 'int',
        'length' => 11,
        'not null' => FALSE,
      ),
    ),
    'primary key' => array('id'),
  );

  return $schema;
}
This is a simple implementation of hook_schema(). Through it, we create a demo_projects table, which has 4 columns: id, name, description, and deadline. The first column represents the primary key. It's no big deal.
Next, we need to implement hook_entity_info(). We can specify a lot of options in this hook, but here are the most basic and required options (this is in the demo.module file):
/**
 * Implements hook_entity_info().
 */
function demo_entity_info() {

  $info = array();

  $info['project'] = array(
    'label' => t('Project'),
    'base table' => 'demo_projects',
    'entity keys' => array(
      'id' => 'id',
      'label' => 'name',
    ),
    'module' => 'demo',
    'entity class' => 'Entity',
    'controller class' => 'ProjectEntityController',
  );

  return $info;
}
With this hook, we return a new key in the $info array, which represents the entity machine name. In this array, we specify options (we will add more options during this tutorial). Now we will stick to using tags (the readable name of the entity type), the base table that stores entity data, the entity keys that act as attributes of the entity identifier, and the module that specifies which module defines the entity type. The last one is not mandatory, but is recommended.
In this way, we register our own basic entity type with Drupal. To test if it works, enable the module for the first time and check if the table has been created in the database. Then fill it with a few lines so that there is something to use:
INSERT INTO `demo_projects` (`id`, `name`, `description`, `deadline`)
VALUES
    (1, 'Summer House', 'Lorem ipsum dolor sit amet, consectetur adipisicing elit, sed do eiusmod tempor incididunt ut labore et dolore magna aliqua. Ut enim ad minim veniam, quis nostrud exercitation ullamco laboris nisi ut aliquip ex ea commodo consequat.', 1397501105),
    (2, 'Winter House', 'Lorem ipsum dolor sit amet, consectetur adipisicing elit, sed do eiusmod tempor incididunt ut labore et dolore magna aliqua. Ut enim ad minim veniam, quis nostrud exercitation ullamco laboris nisi ut aliquip ex ea commodo consequat.', 1397501132);
Finally, use hook_menu() to register a path (for any paths only for testing) using Drupal and paste the following into its callback function:
$projects = entity_load('project', array(1, 2));
dpm($projects);
return 'Some string';
First, we use the entity_load() function to load project entities with IDs 1 and 2, and then we use the Devel dpm() function (so make sure Devel is enabled on your site for testing) to print them to the screen superior. Don't forget that the page's callback function needs to return something, otherwise it won't be built.
Now if you navigate to this page, you will see data for 2 entities in the database in Krumo.
Alternatively, you can use the EntityFieldQuery class to query new entities based on any property you want (not just id). For more information on how this works, you can check out this Sitepoint tutorial, which will help you get started.
Entity Classes and Controllers
Unfortunately, the Drupal core does not provide too many helper functions to handle entities (entity_load() is almost unique). However, the Entity API module fills this gap.
To use its functionality, we need to change the entity information we declared earlier and specify the PHP class that can be used to handle the entity. Now, we will add two more keys to the project array typed in the hook_entity_info() implementation:
The aforementioned code already contains 'entity class' => 'Entity', 'controller class' => 'ProjectEntityController',
EntityAPIController class (located in the module's entity.controller.inc file) provides some reasonable default values for processing entities. It extends the default Drupal core DrupalDefaultEntityController class and is responsible for (among many other things) performing CRUD operations.
Both classes can be extended in your custom module to adjust functionality (such as querying, loading, or displaying entities). We will see how to do this later.
But first, I want to show you how to save a new entity. Currently, there are 2 records in my database with ids 1 and 2. I want to adjust the code we wrote in the test page callback function above to create a new entity with ID 3 without it. It might look like this:
/**
 * Implements hook_schema().
 */
function demo_schema() {

  $schema = array();

  $schema['demo_projects'] = array(
    'description' => 'The base table for the Project entity',
    'fields' => array(
      'id' => array(
        'description' => 'Primary key of the Project entity',
        'type' => 'serial',
        'unsigned' => TRUE,
        'not null' => TRUE,
      ),
      'name' => array(
        'description' => 'Project name.',
        'type' => 'varchar',
        'length' => 255,
        'not null' => FALSE,
      ),
      'description' => array(
        'description' => 'Project description.',
        'type' => 'text',
        'size' => 'big',
        'not null' => FALSE,
        'default' => NULL
      ),
      'deadline' => array(
        'description' => 'Project deadline.',
        'type' => 'int',
        'length' => 11,
        'not null' => FALSE,
      ),
    ),
    'primary key' => array('id'),
  );

  return $schema;
}
As you can see, now we try to load 3 project entities and check if the third entity exists. If it does not exist, we will use the entity_create() helper function provided by the Entity API, set the property to some random value, and then use the save() method on the entity to persist to the database. This method is provided by the Entity class, and its job is to call the save() method on the controller class we defined above. This method will perform the logic required to persist the entity. But all of this happens behind the scenes, we don't have to worry about it.
If you reload the page you should see only the 2 project entities returned, but if the second time you should have 3.
Cover the entity class
The last thing I want to show you in this part of this tutorial is how to display your entity. To do this, we will stick with the page callback function we've been using and render it a real list.
First, we need to override the buildContent() method of the default EntityAPIController class. The reason is that the controller cannot make assumptions about our data, so we need to provide some information on how to display it. First, let's declare the controller class that extends the previous class:
/**
 * Implements hook_entity_info().
 */
function demo_entity_info() {

  $info = array();

  $info['project'] = array(
    'label' => t('Project'),
    'base table' => 'demo_projects',
    'entity keys' => array(
      'id' => 'id',
      'label' => 'name',
    ),
    'module' => 'demo',
    'entity class' => 'Entity',
    'controller class' => 'ProjectEntityController',
  );

  return $info;
}
I selected the class name ProjectEntityController, you need to make sure to replace the value you set for the controller class key in the hook_entity_info() implementation. Don't forget.
In this class, we can copy the method name from the original class and make it return what its parent class will return:
In this class, we can copy the method name from the original class and make it return what its parent class will return. We basically added two new items to the array. The first one will wrap the description with <div>, and the second will output the formatted date between paragraph labels. This is the basic Drupal theme, if you don't understand what's going on here, please review it. But you will notice the missing project name. Drupal will render it automatically because we specify it as a tag in the entity key implemented by hook_entity_info(). The last step is to go to our page callback function and make it display our entity. A quick way (for demonstration purposes only):
<pre class='brush:php;toolbar:false;'>INSERT INTO `demo_projects` (`id`, `name`, `description`, `deadline`)
VALUES
(1, 'Summer House', 'Lorem ipsum dolor sit amet, consectetur adipisicing elit, sed do eiusmod tempor incididunt ut labore et dolore magna aliqua. Ut enim ad minim veniam, quis nostrud exercitation ullamco laboris nisi ut aliquip ex ea commodo consequat.', 1397501105),
(2, 'Winter House', 'Lorem ipsum dolor sit amet, consectetur adipisicing elit, sed do eiusmod tempor incididunt ut labore et dolore magna aliqua. Ut enim ad minim veniam, quis nostrud exercitation ullamco laboris nisi ut aliquip ex ea commodo consequat.', 1397501132);</pre>
<p> As before, we first load the entity with the corresponding ID. We then run them through the entity_view() helper function, which will eventually call the buildContent() method we just overwritten. This function returns a list of rendered arrays for each entity. We render each and store the result in the $output array, then concatenate it and return it. </p>
<p> You can refresh the page and you should see a list of all entities you loaded. Make sure the cache is cleared so that the changes are visible. </p>
<h2 id="Conclusion">Conclusion</h2>
<p> In this tutorial, we start learning about entities in Drupal by defining our own entity types in code. We have learned how to write schema definitions for the data they represent and how to register them with Drupal. Then we see the power of using the Entity API contrib module to handle entities in an object-oriented manner. </p>
<p>In the second part of this tutorial, we will look at three main aspects. First, we will create some pages to display individual project entities and launch the management interface for managing projects. Second, we will make it fieldizable through the UI. Third, we will expose it to Views so that we can do some appropriate queries and list displays. stay tuned! </p>
<h2 id="FAQs-on-building-custom-entities-in-Drupal">FAQs on building custom entities in Drupal</h2>
<h3 id="What-are-the-prerequisites-for-creating-a-Drupal-custom-entity">What are the prerequisites for creating a Drupal custom entity? </h3>
<p> Before you start creating Drupal custom entities, you need to have a basic understanding of Drupal's Entity API. You should also be familiar with the concepts of PHP and object-oriented programming. Additionally, you should have set up a Drupal development environment. This includes installing and configuring Drupal on a local machine or server. </p>
<h3 id="How-to-create-a-custom-content-entity-with-a-bundle-in-Drupal">How to create a custom content entity with a bundle in Drupal? </h3>
<p>Creating a custom content entity with a bundle in Drupal involves multiple steps. First, you need to define your entity and its properties in a custom module. Then you need to create a form to add and edit your entity. After that, you need to define the route for the entity's operations. Finally, you need to create a view builder to display your entity. </p>
<h3 id="What-is-the-difference-between-content-entity-and-configuration-entity-in-Drupal">What is the difference between content entity and configuration entity in Drupal? </h3>
<p>In Drupal, content entities are content fragments that can be created, edited and deleted by users. Examples include nodes, users, and comments. On the other hand, a configuration entity is a configuration fragment stored in a database and can be exported to code. Examples include views, image styles, and user roles. </p>
<h3 id="How-to-create-content-entity-type-in-Drupal">How to create content entity type in Drupal 8? </h3>
<p> Creating a content entity type in Drupal 8 involves defining your entity and its properties in a custom module. You also need to create a form to add and edit your entity, define the route for entity operations, and create a view builder to display your entity. </p>
<h3 id="Can-I-create-custom-entities-in-Drupal-using-the-Entity-API-module"> Can I create custom entities in Drupal using the Entity API module? </h3>
<p>Yes, you can create custom entities in Drupal using the Entity API module. This module provides a unified way to handle entities and their properties. It also provides APIs for performing operations on entities such as creation, reading, updating, and deleting. </p>
<h3 id="What-are-the-benefits-of-creating-Drupal-custom-entities">What are the benefits of creating Drupal custom entities? </h3>
<p>Creating Drupal custom entities allows you to define your own data structures and business logic. This can make your site more efficient and manageable. Custom entities also lets you take advantage of Drupal's Entity API, which provides powerful tools for handling entities. </p>
<h3 id="How-to-add-fields-to-custom-entities-in-Drupal">How to add fields to custom entities in Drupal? </h3>
<p>To add fields to custom entities in Drupal, you need to use the Field API. This involves defining your fields in the entity's base field definition method. You can also use the Field UI module to add fields to entities through the Drupal management interface. </p>
<h3 id="How-to-display-custom-entities-in-Drupal">How to display custom entities in Drupal? </h3>
<p>To display a custom entity in Drupal, you need to create a view builder for your entity. This involves defining a class that extends the EntityViewBuilder class and implementing the view method. You can also use the Views module to create custom views of entities. </p>
<h3 id="How-to-create-a-form-for-adding-and-editing-custom-entities-in-Drupal">How to create a form for adding and editing custom entities in Drupal? </h3>
<p>To create a form in Drupal for adding and editing custom entities, you need to define a form class for your entity. This involves extending the EntityForm class and implementing form, validate, and submit methods. </p>
<h3 id="How-to-delete-a-custom-entity-in-Drupal">How to delete a custom entity in Drupal? </h3>
<p>To delete a custom entity in Drupal, you need to use the delete method of the Entity API. This involves loading your entity, calling the delete method, and then saving your entity. You can also use the deleteMultiple method of the Entity API to delete multiple entities at once. </p>
</div>
The above is the detailed content of Build Your Own Custom Entities in Drupal - Setup. For more information, please follow other related articles on the PHP Chinese website!

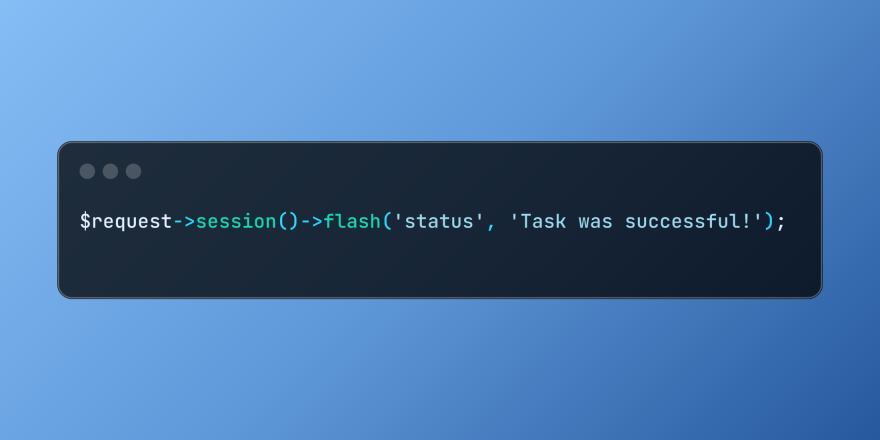 Working with Flash Session Data in LaravelMar 12, 2025 pm 05:08 PM
Laravel simplifies handling temporary session data using its intuitive flash methods. This is perfect for displaying brief messages, alerts, or notifications within your application. Data persists only for the subsequent request by default: $request-
 cURL in PHP: How to Use the PHP cURL Extension in REST APIsMar 14, 2025 am 11:42 AM
The PHP Client URL (cURL) extension is a powerful tool for developers, enabling seamless interaction with remote servers and REST APIs. By leveraging libcurl, a well-respected multi-protocol file transfer library, PHP cURL facilitates efficient execution of various network protocols, including HTTP, HTTPS, and FTP. This extension offers granular control over HTTP requests, supports multiple concurrent operations, and provides built-in security features.
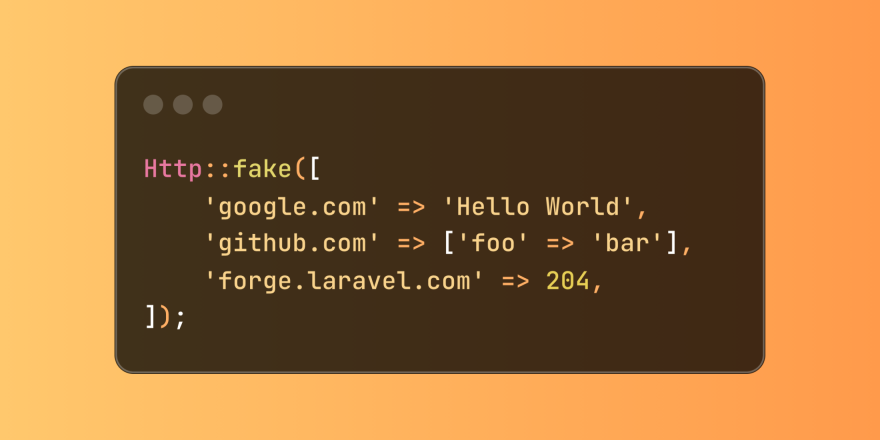 Simplified HTTP Response Mocking in Laravel TestsMar 12, 2025 pm 05:09 PM
Laravel provides concise HTTP response simulation syntax, simplifying HTTP interaction testing. This approach significantly reduces code redundancy while making your test simulation more intuitive. The basic implementation provides a variety of response type shortcuts: use Illuminate\Support\Facades\Http; Http::fake([ 'google.com' => 'Hello World', 'github.com' => ['foo' => 'bar'], 'forge.laravel.com' =>
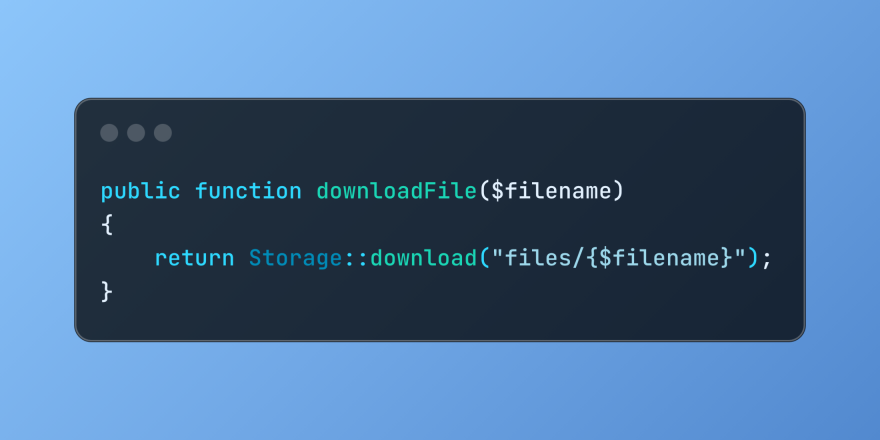 Discover File Downloads in Laravel with Storage::downloadMar 06, 2025 am 02:22 AM
The Storage::download method of the Laravel framework provides a concise API for safely handling file downloads while managing abstractions of file storage. Here is an example of using Storage::download() in the example controller:
 12 Best PHP Chat Scripts on CodeCanyonMar 13, 2025 pm 12:08 PM
Do you want to provide real-time, instant solutions to your customers' most pressing problems? Live chat lets you have real-time conversations with customers and resolve their problems instantly. It allows you to provide faster service to your custom
 Explain the concept of late static binding in PHP.Mar 21, 2025 pm 01:33 PM
Article discusses late static binding (LSB) in PHP, introduced in PHP 5.3, allowing runtime resolution of static method calls for more flexible inheritance.Main issue: LSB vs. traditional polymorphism; LSB's practical applications and potential perfo
 PHP Logging: Best Practices for PHP Log AnalysisMar 10, 2025 pm 02:32 PM
PHP logging is essential for monitoring and debugging web applications, as well as capturing critical events, errors, and runtime behavior. It provides valuable insights into system performance, helps identify issues, and supports faster troubleshoot
 How to Register and Use Laravel Service ProvidersMar 07, 2025 am 01:18 AM
Laravel's service container and service providers are fundamental to its architecture. This article explores service containers, details service provider creation, registration, and demonstrates practical usage with examples. We'll begin with an ove


Hot AI Tools

Undresser.AI Undress
AI-powered app for creating realistic nude photos

AI Clothes Remover
Online AI tool for removing clothes from photos.

Undress AI Tool
Undress images for free

Clothoff.io
AI clothes remover

AI Hentai Generator
Generate AI Hentai for free.

Hot Article
Hot Tools

EditPlus Chinese cracked version
Small size, syntax highlighting, does not support code prompt function

Safe Exam Browser
Safe Exam Browser is a secure browser environment for taking online exams securely. This software turns any computer into a secure workstation. It controls access to any utility and prevents students from using unauthorized resources.

Dreamweaver CS6
Visual web development tools

SublimeText3 Linux new version
SublimeText3 Linux latest version

mPDF
mPDF is a PHP library that can generate PDF files from UTF-8 encoded HTML. The original author, Ian Back, wrote mPDF to output PDF files "on the fly" from his website and handle different languages. It is slower than original scripts like HTML2FPDF and produces larger files when using Unicode fonts, but supports CSS styles etc. and has a lot of enhancements. Supports almost all languages, including RTL (Arabic and Hebrew) and CJK (Chinese, Japanese and Korean). Supports nested block-level elements (such as P, DIV),

