
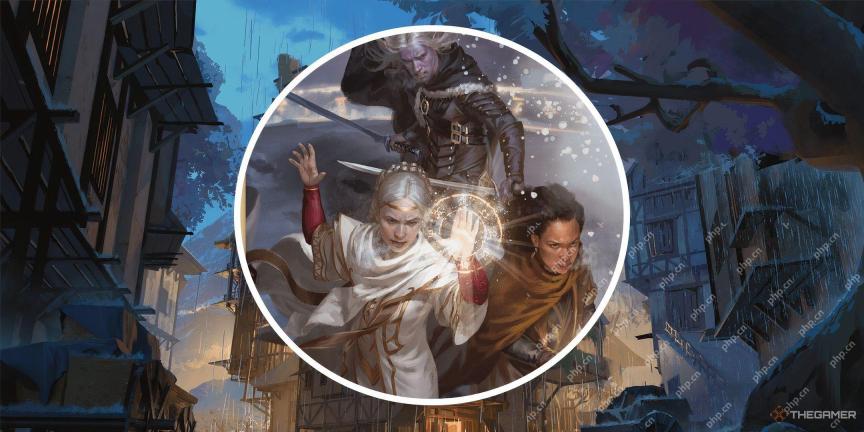
 Mobile Game TutorialMobile Game GuideHonkai: Star Rail - Savage God, Mad King, Incarnation Of Strife Boss Fight Guide
Honkai: Star Rail - Savage God, Mad King, Incarnation Of Strife Boss Fight Guide

Fighting gods is something of a tradition in Honkai: Star Rail, starting with the tutorial and continuing throughout the story. In Amphoreus, you'll face off against Nikador, the Titan of Strife a whopping three times. They get stronger each time you fight them, with each incarnation adding new mechanics or phases, culminating in a fight against a deity at nearly their full strength.

Taking down Nikador can be a trial; the final time you face them is a true test of your skills and builds. You'll discover everything you need to know about beating them here.
All Incarnation Of Strife Attacks

The first time you fight Nikador (called Savage God, Mad King, Incarnation Of Strife in-game), they'll only have one phase. The second and third fights have two phases, but encounters two and three are very different beasts.
You'll use the initial fight as a primer for those that follow, and the second one is essentially an expansion on the first. It only adds a few extra attacks without doing much to change up how it all works. The final fight requires you to engage with its mechanics unless you want to tempt a full team wipe.
How To Beat The First Encounter

One note before we get started. Like all the Titankin enemies in Amphoreus, Nikador has the War Armor effect via the Polis Protector Talent, which reduces the damage they take. After being hit seven times, the War Armor shatters, dealing damage to the boss, adding minor Imaginary damage to your attacks, and delaying their action.
After using the Calamity Eternal attack, Nikador gains the Titanic Corpus buff, which reduces the damage they take by 30 percent and increases the damage of their next attack by 20 percent. Titanic Corpus functions similarly to War Armor but has 12 stacks instead of seven and also enables Nikador's next attack to Imprison any of your characters it hits.

To counter this effect, your party will gain Glory stacks after Nikador uses Calamity Eternal, and Skill and Ultimate attacks increase your Glory values. Glory allows your attacks to remove Titanic Corpus stacks and also increases their damage dealt, and removing all of them not only deals heavy damage to the boss but also regenerates Energy for the whole party.
However, after using Calamity Eternal, that stack value increases to 12, and all characters gain Glory stacks. The number of Glory stacks determines how many Titanic Corpus stacks they can reduce, and you can gain Glory by using Skills and Ultimates.
It doesn't matter what kind of attack you use to reduce War Armor and Titanic Corpus. Regular attacks, Ultimates, and follow-up attacks all reduce the corresponding amount of stacks on the boss.
If you manage to remove all 12 Titanic Corpus stacks, not only will the boss take a solid chunk of damage, but it will also cancel the effect and regenerate Energy for the whole party.
The Savage God, Mad King, Incarnation of Strife also uses the following attacks:
|
Description | ||||||||||
|---|---|---|---|---|---|---|---|---|---|---|---|
| Lightning Spear of the Firmament | Minor Imaginary damage to one of your characters. | ||||||||||
| Hewing of the River of Souls | Imaginary damage to one of your characters. | ||||||||||
| Sky-Piercing Lance | Multiple hits of Imaginary damage to all of your characters. | ||||||||||
| Calamity Eternal | Deals Imaginary damage to all allies activates Titanic Corpus and applies Glory to all allies. |
How To Beat The Second Encounter

You fight Nikador again midway through the Amphoreus campaign, and this encounter has two phases plus an additional attack to deal with.
|
Description | ||||||||||||||
|---|---|---|---|---|---|---|---|---|---|---|---|---|---|---|---|
| Calamity Eternal | Deals Imaginary damage to all allies, activates Titanic Corpus, and applies Glory to all allies. | ||||||||||||||
| All Realms Leveled, All Legions to Dust | This attack deals a massive amount of Imaginary damage to the entire party, enough to team wipe the unprepared. | ||||||||||||||
| Worldsplitting Spine | Deals a small amount of Imaginary damage to a single character. | ||||||||||||||
| Survivors Unto Dead Waters | Deals a moderate amount of Imaginary damage to a single character. | ||||||||||||||
| Pyre of High Graves | Deals Imaginary damage to your whole party. | ||||||||||||||
| Ruination of Night and Light | Multiple hits of Imaginary damage to all of your characters. |
This second encounter with Nikador is a more traditional Honkai: Star Rail boss fight. The only attack that's truly threatening is All Realms Leveled, All Legions to Dust, but you should do your best to keep everyone at full health regardless.

How To Beat The Third Encounter

The third fight with Nikador pits you against them at nearly their full power, and they receive a name change befitting the increased difficulty: The Giver, Master of Legions, Lance of Fury. This form not only uses the same attacks as phase two but has a new trick up its sleeve, and it's a doozy.
Nikador isn't the only one who gets to act here; his restored divinity also does. The divinity is marked by a golden sigil in the turn order, the same one that floats near the Titan's back.
Whenever the divinity first attacks, it uses The Vanquished Behold Woe, drawing out your characters' literal souls, inflicting the Conquer or Be Conquered state, and reducing the amount of HP they can heal.
Attacking the spears holding a character's soul reduces that spear's HP and increases the character's ability to heal. Breaking a spear removes the Conquer or Be Conquered state and returns a character's ability to fully heal.
Nikador's divinity can act multiple times, so even if you break its soul spears to get your healing abilities back, the boss can simply draw out your party's souls again.
In the first phase of the fight, the soul draw and Nikador's regular attacks are all you need to deal with. The second phase is where it gets dicey.

|
Attack |
Description |
|---|---|
|
The Vanquished Behold Woe |
Removes the souls of all allies on field, applying the Conquer or Be Conquered State and reducing the amount of HP they can heal. |
|
Fury Falls, and Bows to Strife |
Nikador's strongest attack deals Imaginary damage to all characters based on a percentage of their maximum HP, ignores their Defense stat, and has a high chance to Imprison Conquered characters. |
|
Glory to All Honorable Dead |
Reduces the Defense of all allies on the field. |
|
All Realms Leveled, All Legions to Dust |
This attack deals a massive amount of Imaginary damage to the entire party, enough to team wipe the unprepared. |
|
Worldsplitting Spine |
Deals a small amount of Imaginary damage to a single character. |
|
Survivors Unto Dead Waters |
Deals a moderate amount of Imaginary damage to a single character. |
|
Pyre of High Graves |
Deals Imaginary damage to your whole party. |
|
Ruination of Night and Light |
Multiple hits of Imaginary damage to all of your characters. |
To avoid being easily wiped by the Fury Falls, and Bows to Strife attack, it's highly recommended removing your characters' Conquered states by destroying as many of the character soul spears as possible. The more of them the boss can absorb before its ultimate attack, the more it can enhance its damage.
Best Teams For Beating The Incarnation Of Strife And The Lance Of Fury

Nikador's forms are all weak to Ice, Lightning, and Quantum damage, meaning you'll want to have a source of at least one of each damage type — preferably two. If you're newer to Honkai: Star Rail, Serval, Pela, and especially Remembrance Trailblazer are fantastic choices here.
Note that the soul spears conjured by The Vanquished Behold Woe in the fight against the Lance of Fury are weak to Lightning, Quantum, and Imaginary, making Lightning the preferred damage type.
The teams presented here deal with all versions of the boss well, with one team, in particular, trivializing the fights.
|
Team |
Characters |
Description |
|---|---|---|
|
Acheron |
Acheron makes all the Nikador fights easy, especially the third encounter against the Lance of Fury. Her Ultimate can easily defeat the soul spears, each of which deals massive damage to the boss when destroyed. One or two Ultimates are all it takes, which are easy to Achieve with a well-built team. | |
|
Jing Yuan |
Jing Yuan is fantastic for the Nikador fight for the same reason as Acheron: massive AoE Lightning damage to destroy soul spears and, therefore, take huge chunks out of the boss's health bar. | |
|
The Herta |
As the featured character in 3.0, the Herta is a fantastic option against Nikador. Her incredible AoE damage, Ice element, and synergy with both premium and free-to-play teams make her an easy choice. | |
|
Free-to-Play |
While not ideal, using Serval or Moze as your main DPS with Pela as debuff and sub-DPS is entirely doable. You'll need to build your Lynx a bit more to deal with Nikador's damage output, and you might have a few wipes, but this team should still do fine. |

The above is the detailed content of Honkai: Star Rail - Savage God, Mad King, Incarnation Of Strife Boss Fight Guide. For more information, please follow other related articles on the PHP Chinese website!

 Runescape: Dragonwilds - How To Get Bloodwood SapApr 19, 2025 pm 08:05 PM
In Runescape: Dragonwilds, after completing initial combat and mechanic tutorials, you'll receive a quest from an old man to find Cathan. This leads you to Velgar's Lair, where you'll uncover a crucial piece of information and receive your next objec
 Wordle Answer And Hints - April 20 2025 Solution #1,401Apr 19, 2025 pm 08:04 PM
Ready to conquer today's Wordle challenge? Need a little nudge to crack the code? Look no further! We've got the assistance you need, without spoiling the fun. All solutions and letter reveals are cleverly concealed to prevent accidental spoilers.
 NYT Connections Answers And Hints - April 20, 2025 Solution #679Apr 19, 2025 pm 08:02 PM
Solve today's New York Times Connections puzzle with these helpful hints! Need a little assistance to keep your winning streak alive? We've got you covered, from subtle clues to the complete answers. Below, you'll find hints categorized from easies
 Dungeons & Dragons: How To Create Drow NamesApr 19, 2025 pm 06:05 PM
Drow Elves: A Guide to Naming Your Underdark Character Drow, the dark elves of the Dungeons & Dragons universe, are a captivating race, often associated with the Underdark and darker magics. While their portrayal varies across D&D settings,
 Runescape: Dragonwilds - How To Craft PotionsApr 19, 2025 pm 06:04 PM
Runescape: Dragonwilds Magic and Potion Brewing Guide Adventure in the vast open world of Runescape: Dragonwilds, you will soon be exposed to the magic system, learning how to use various runes to trigger different skills to assist in exploration, collection and combat. In addition to magic skills, potions are also an important part of magic, and they can quickly give you various buffs. Unlike magic, you cannot use potions directly in the early stages of the game unless you stumble upon them during the exploration process. If you want to brew potions yourself, you must head to the third area of the game, Whispering Swamp, to collect clay. Recipe for brewing medicine
 Runescape: Dragonwilds - How To Play With FriendsApr 19, 2025 pm 06:03 PM
Embark on an epic adventure in Runescape: Dragonwilds! Conquer the Ashenfalls, master survival skills, and ultimately face formidable dragons. The Ashenfalls offer countless crafting opportunities and challenges, but the journey is far more enjoyab
 Runescape: Dragonwilds - How To Craft AdhesiveApr 19, 2025 pm 04:04 PM
Runescape: Dragonwilds – A Guide to Crafting Adhesive One of the most enjoyable aspects of Runescape: Dragonwilds is the continuous equipment upgrade system. Unlike many survival crafting games where progression is painstakingly slow, Dragonwilds all
 Runescape: Dragonwilds - How To Fast TravelApr 19, 2025 pm 04:03 PM
Runescape: Dragonwild's expansive map initially obscures exploration with a pervasive fog. While the fog reveals the map's overall size, traversing it without fast travel is challenging. Fortunately, Dragonwild offers a flexible fast travel system.


Hot AI Tools

Undresser.AI Undress
AI-powered app for creating realistic nude photos

AI Clothes Remover
Online AI tool for removing clothes from photos.

Undress AI Tool
Undress images for free

Clothoff.io
AI clothes remover

Video Face Swap
Swap faces in any video effortlessly with our completely free AI face swap tool!

Hot Article
Hot Tools

SublimeText3 Linux new version
SublimeText3 Linux latest version

Dreamweaver Mac version
Visual web development tools

ZendStudio 13.5.1 Mac
Powerful PHP integrated development environment

SecLists
SecLists is the ultimate security tester's companion. It is a collection of various types of lists that are frequently used during security assessments, all in one place. SecLists helps make security testing more efficient and productive by conveniently providing all the lists a security tester might need. List types include usernames, passwords, URLs, fuzzing payloads, sensitive data patterns, web shells, and more. The tester can simply pull this repository onto a new test machine and he will have access to every type of list he needs.

SublimeText3 Mac version
God-level code editing software (SublimeText3)

